Wardrobe, Part 5

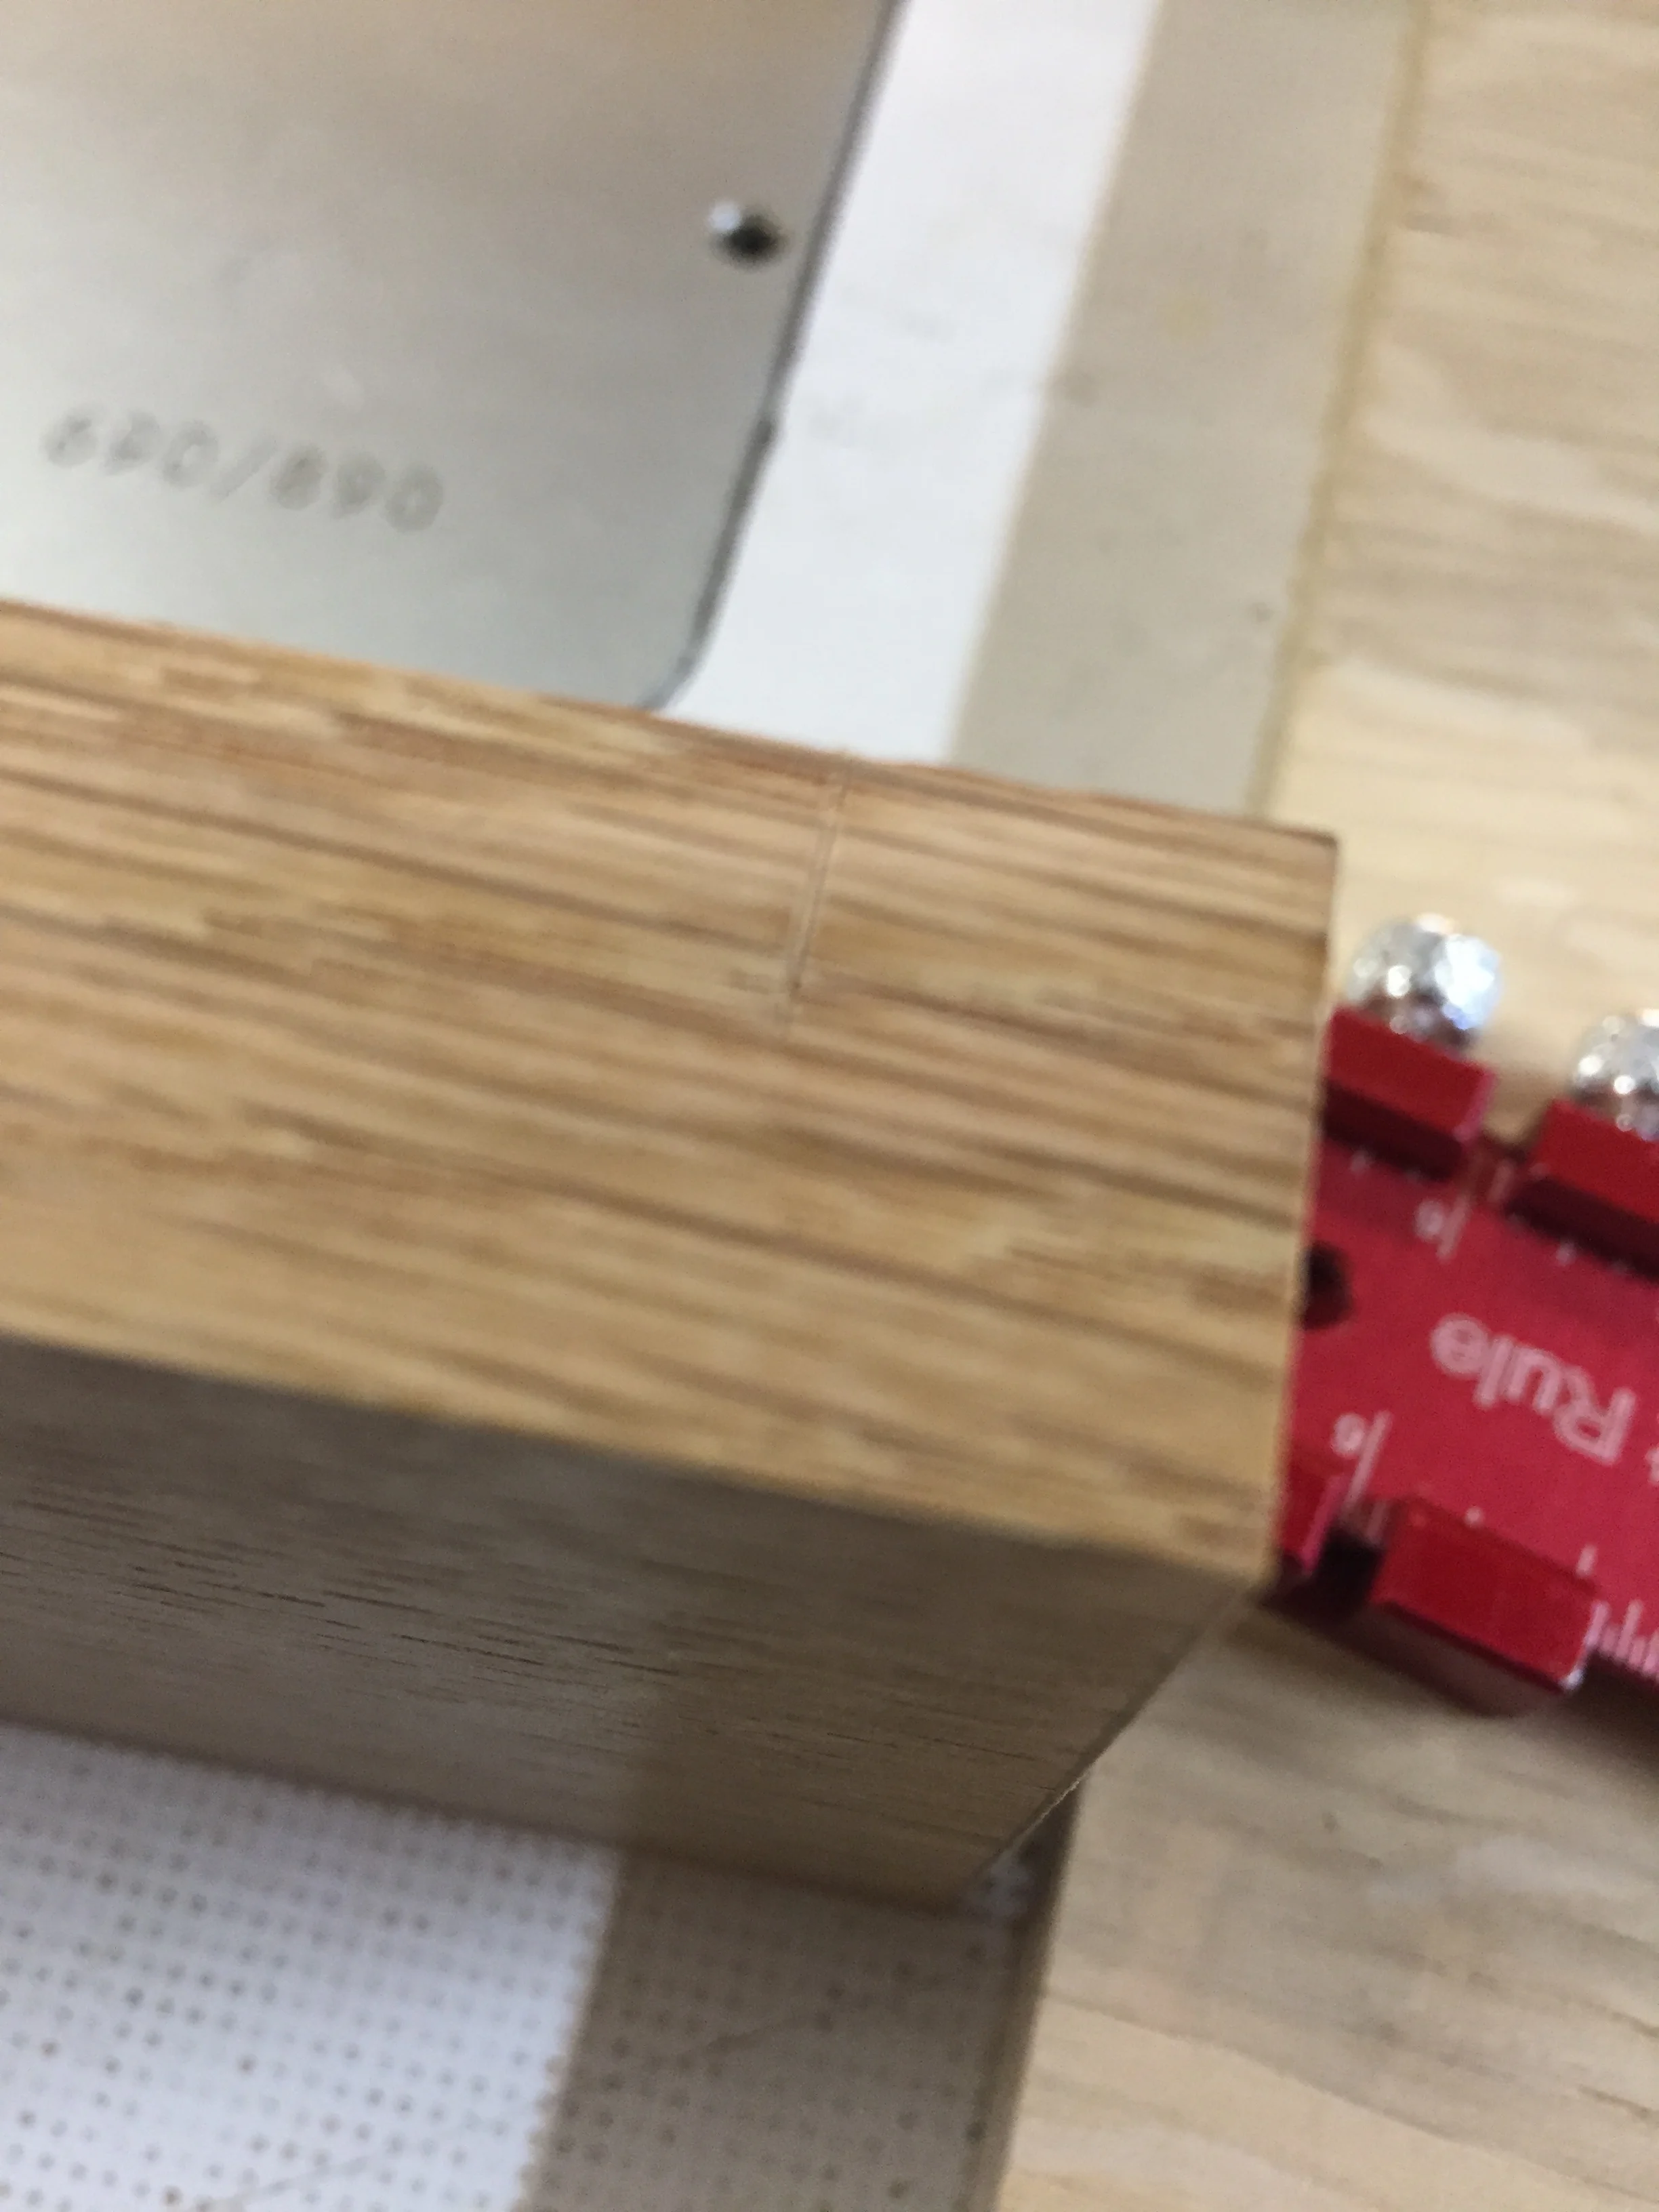
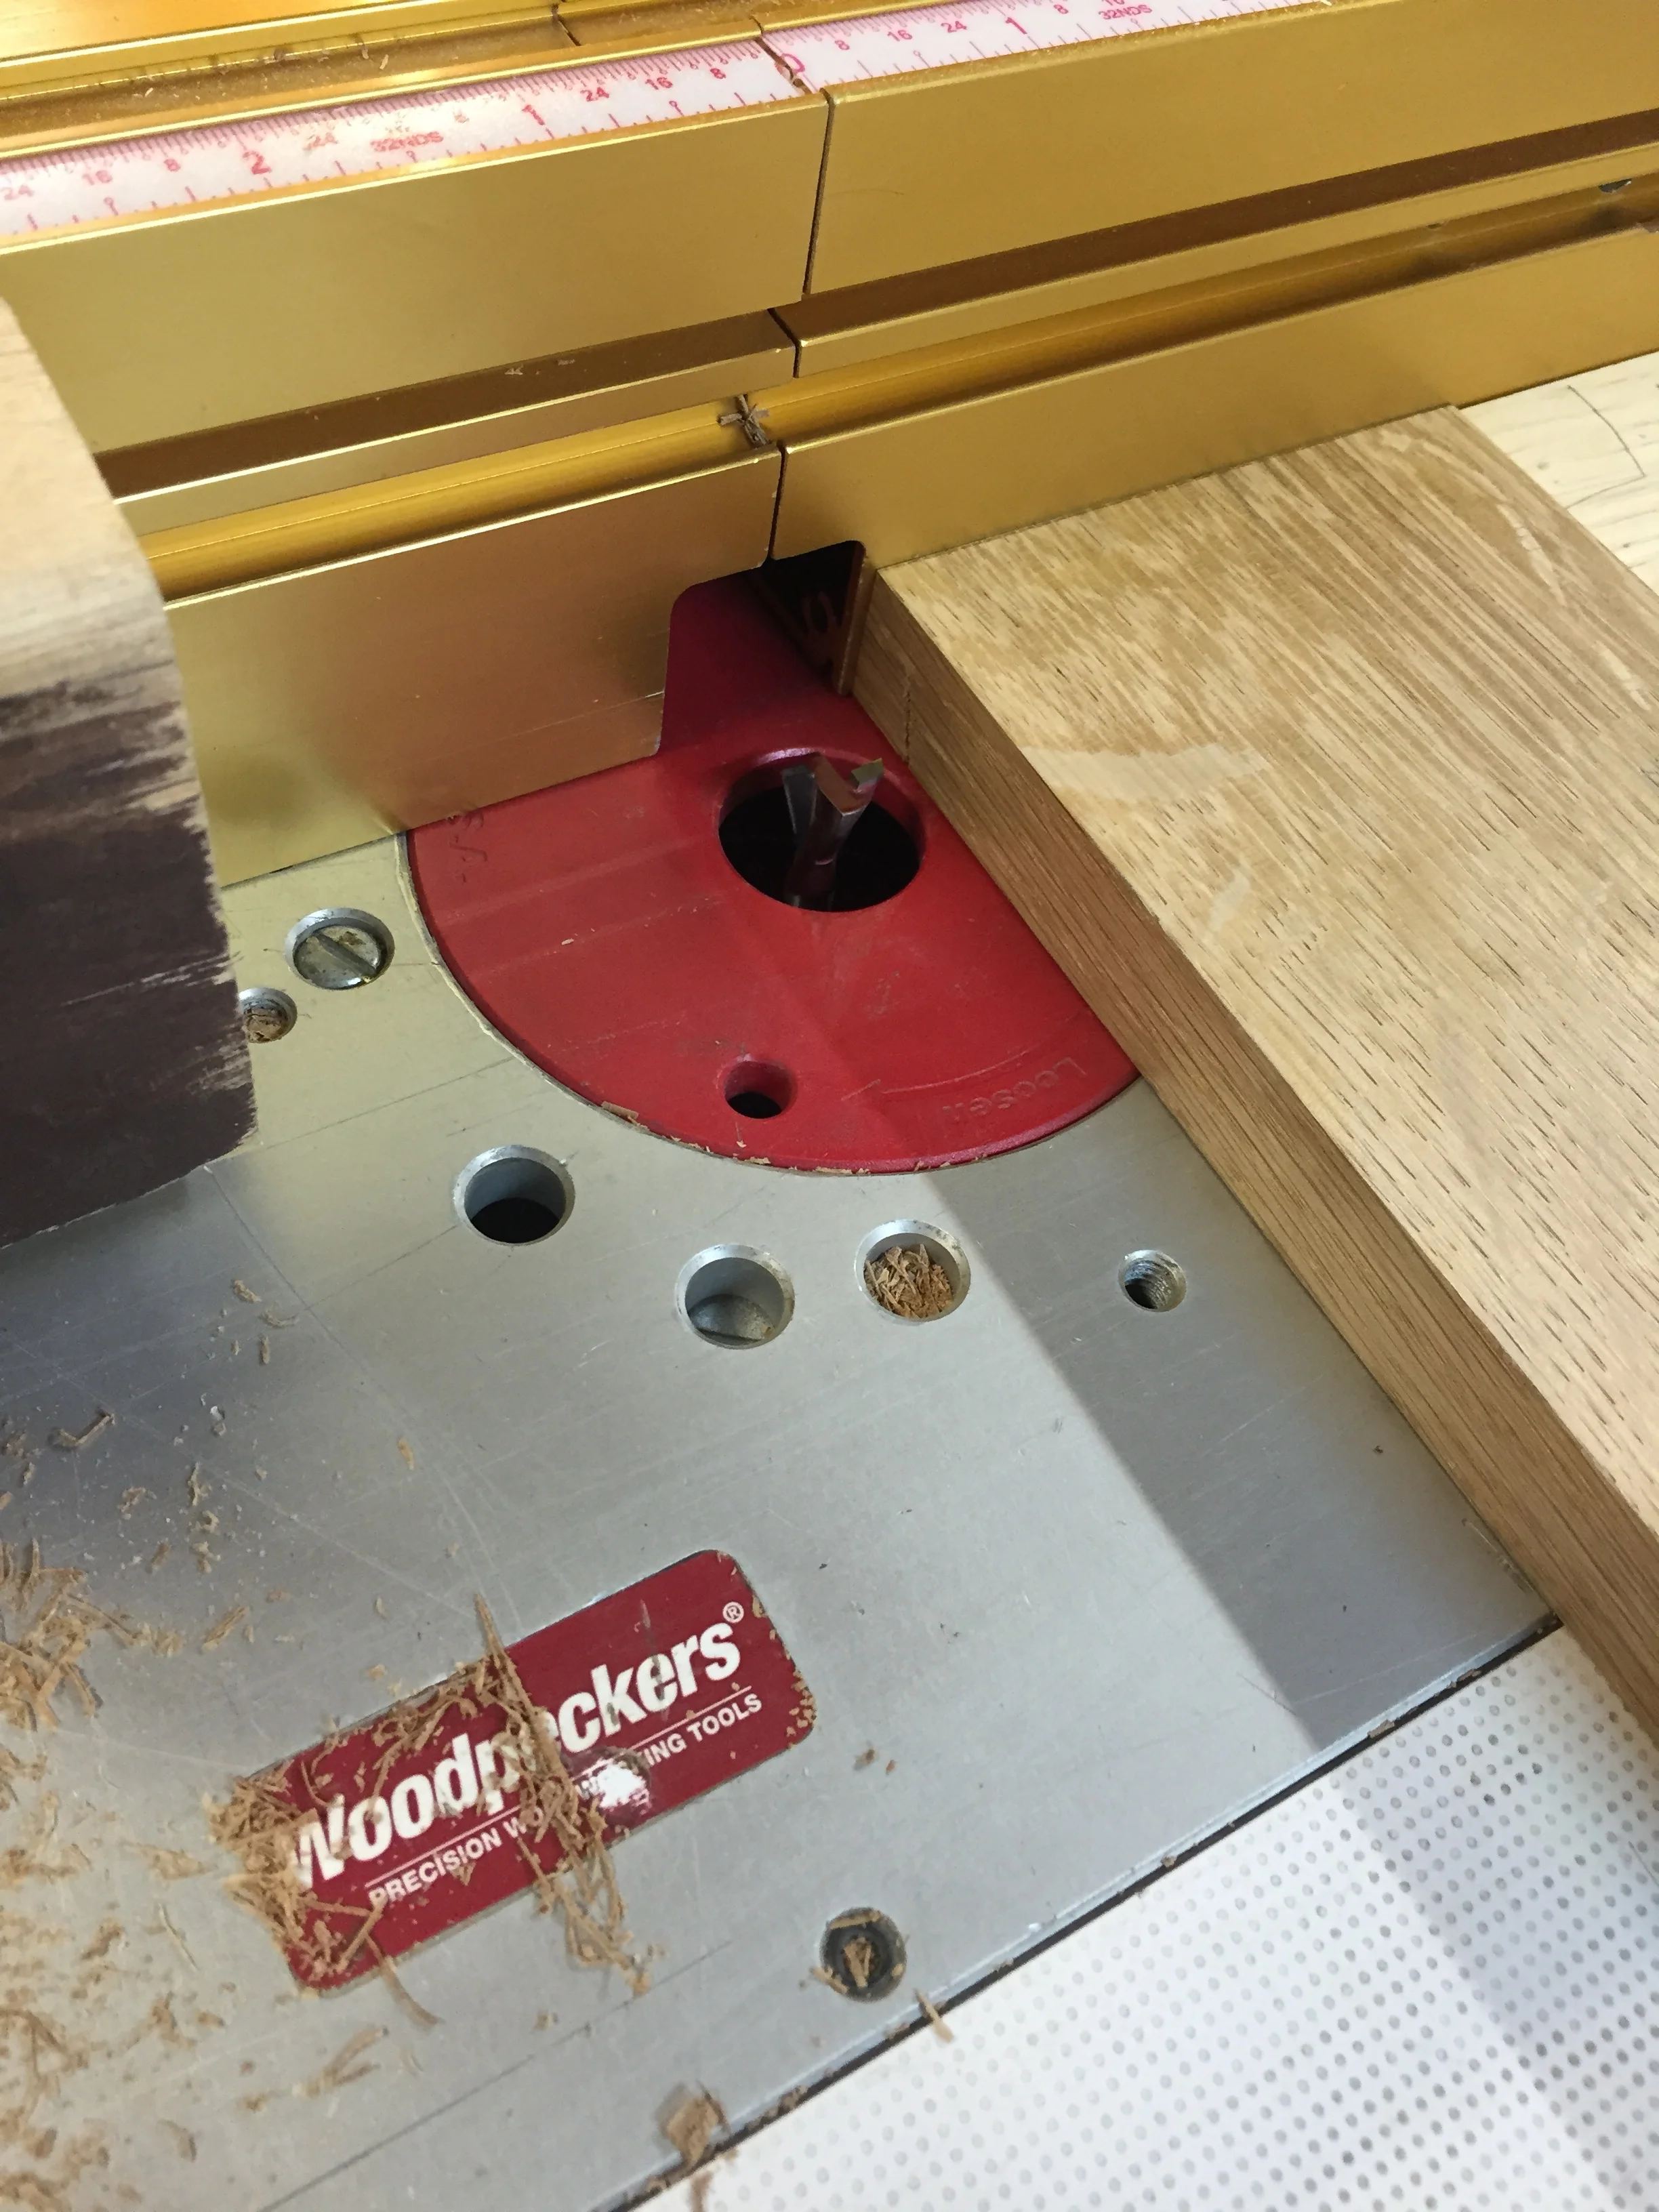
Following the progress from Wardrobe, Part 4, I now turned my attention to the drawers. After sizing them and fitting the fronts, I proceeded to make the boxes, using birch plywood and poplar for the bottoms and sides, respectively. As these drawers hang from runners attached to the sides, the original piece uses sliding dovetails to join the fronts to the drawer boxes. In addition, those dovetails need to be stopped at that the top, so they won't show from above. This makes for a very machine-centric joint. I generally dislike using the router: its noisy and annoying to use. But, it is sometimes the best tool for the job, and for this piece, is is. This is a reproduction, after all, and that's how it was done then too.

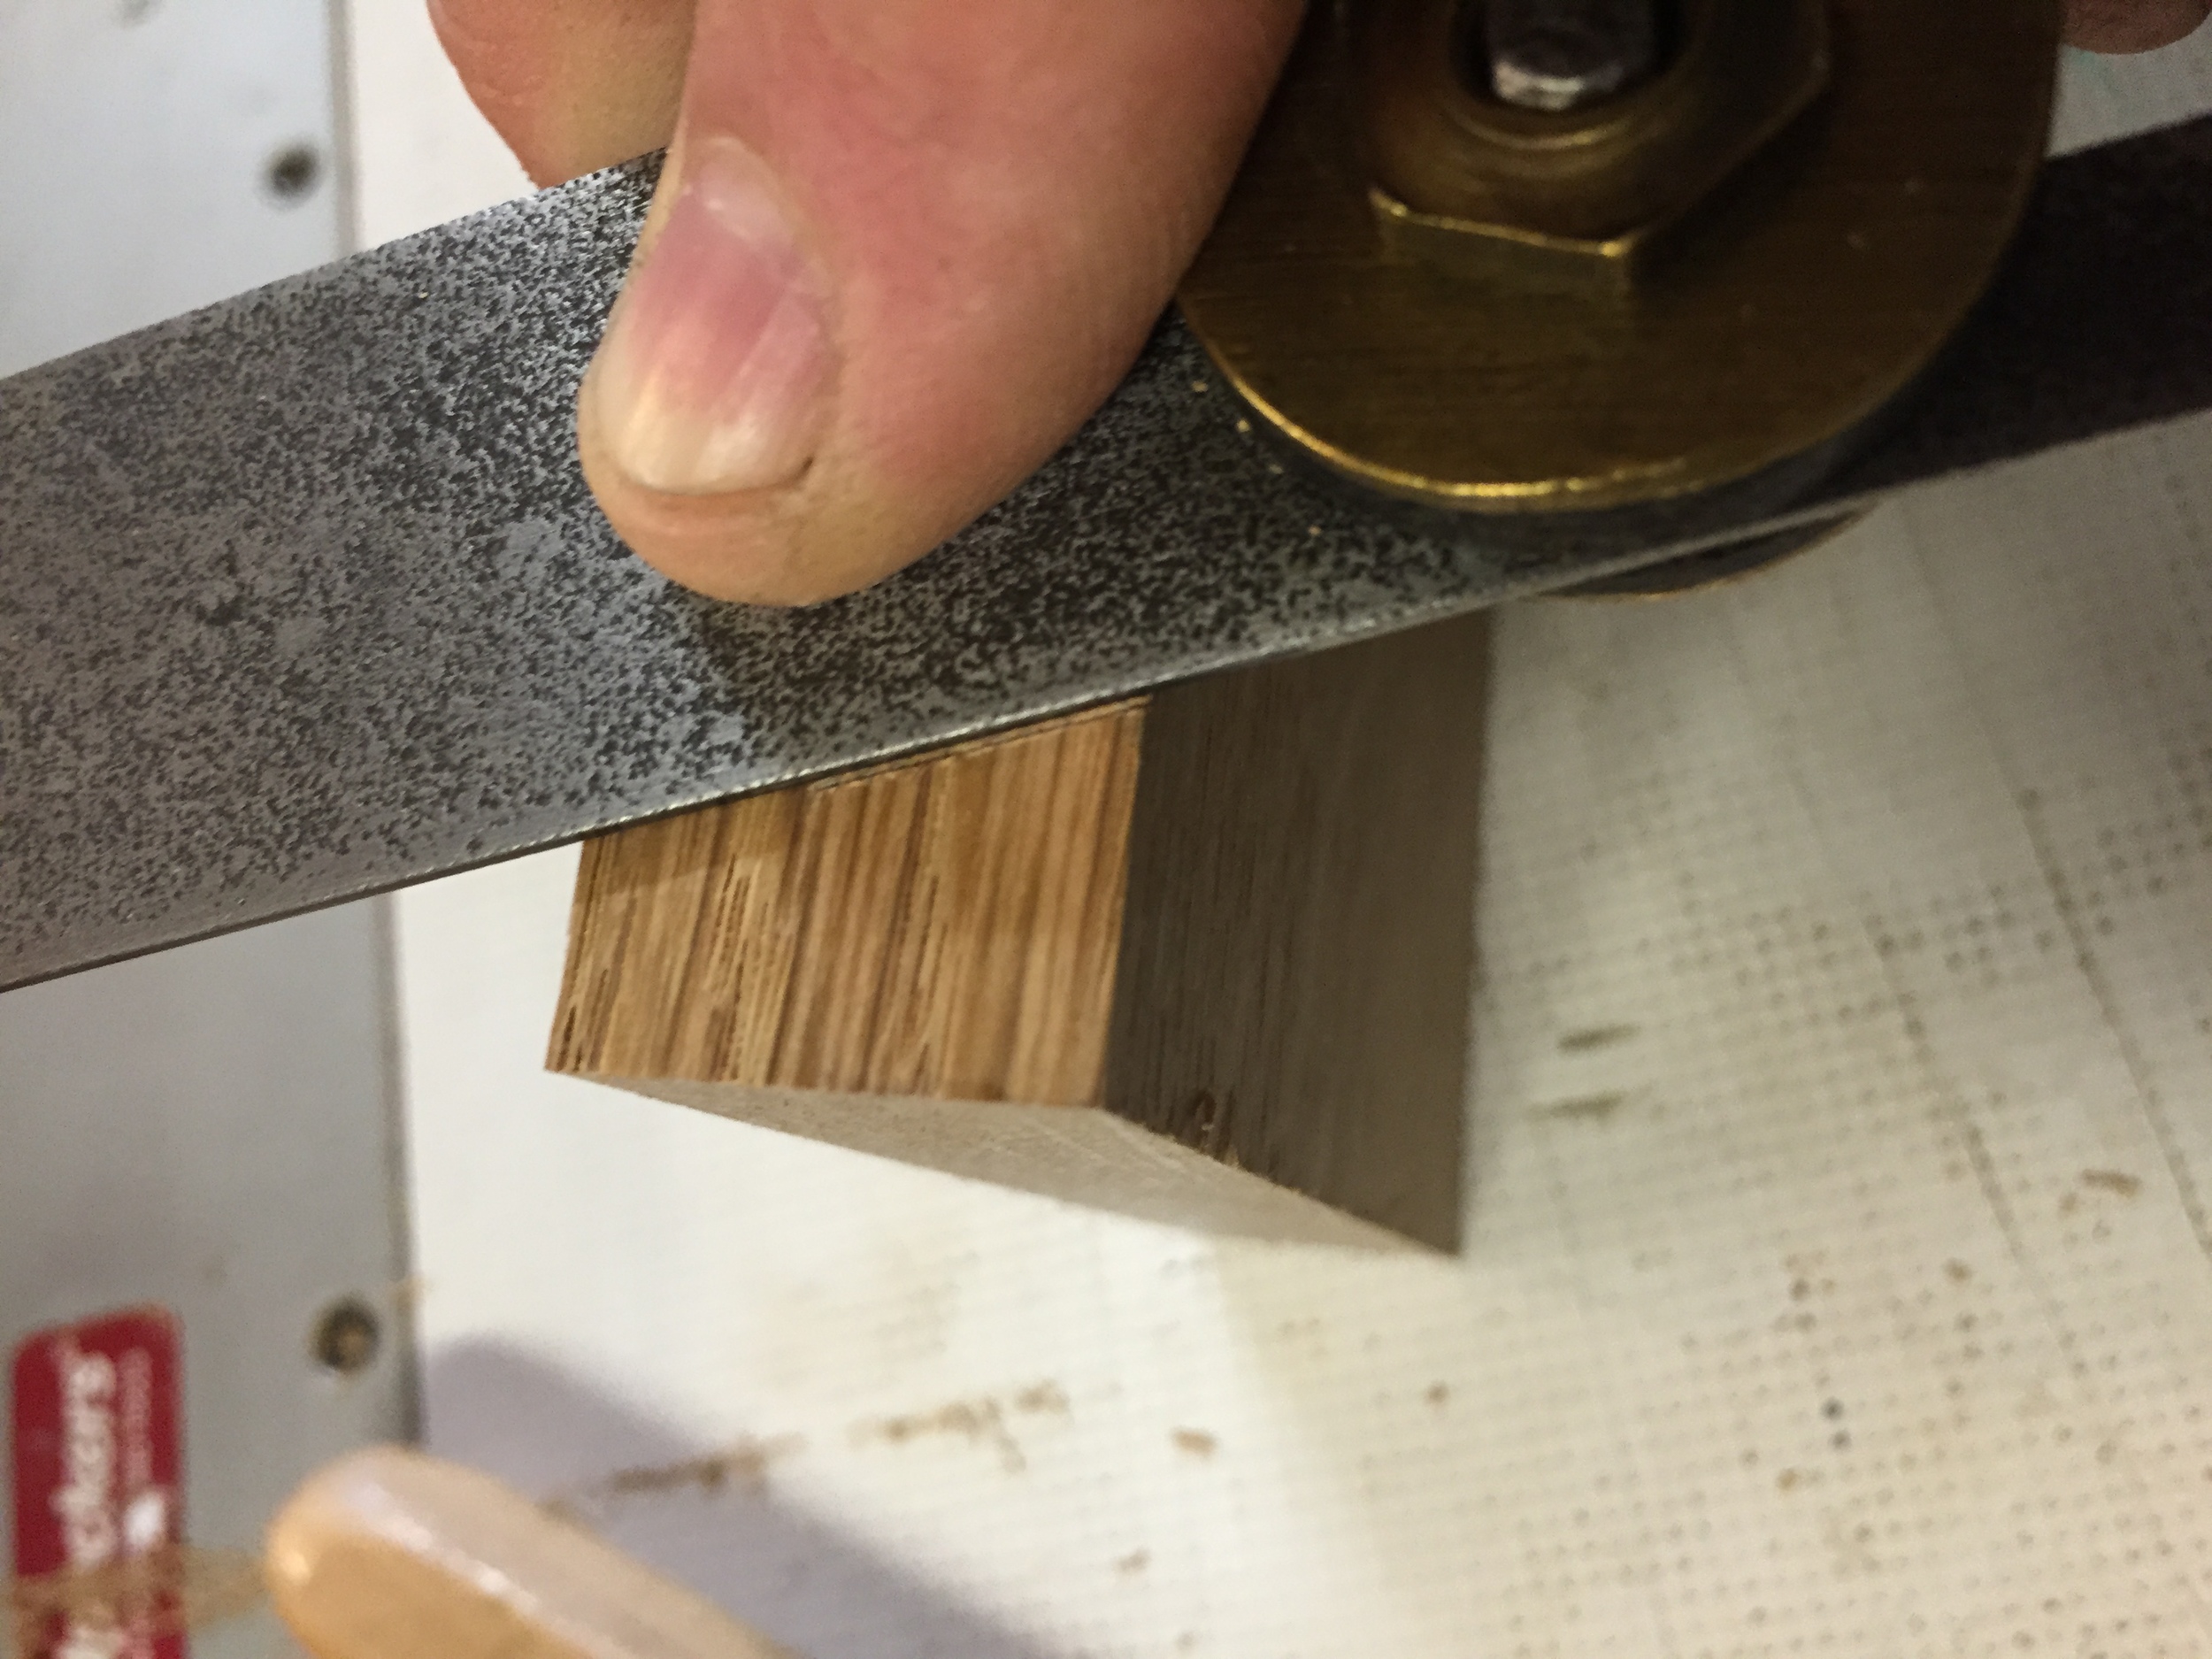
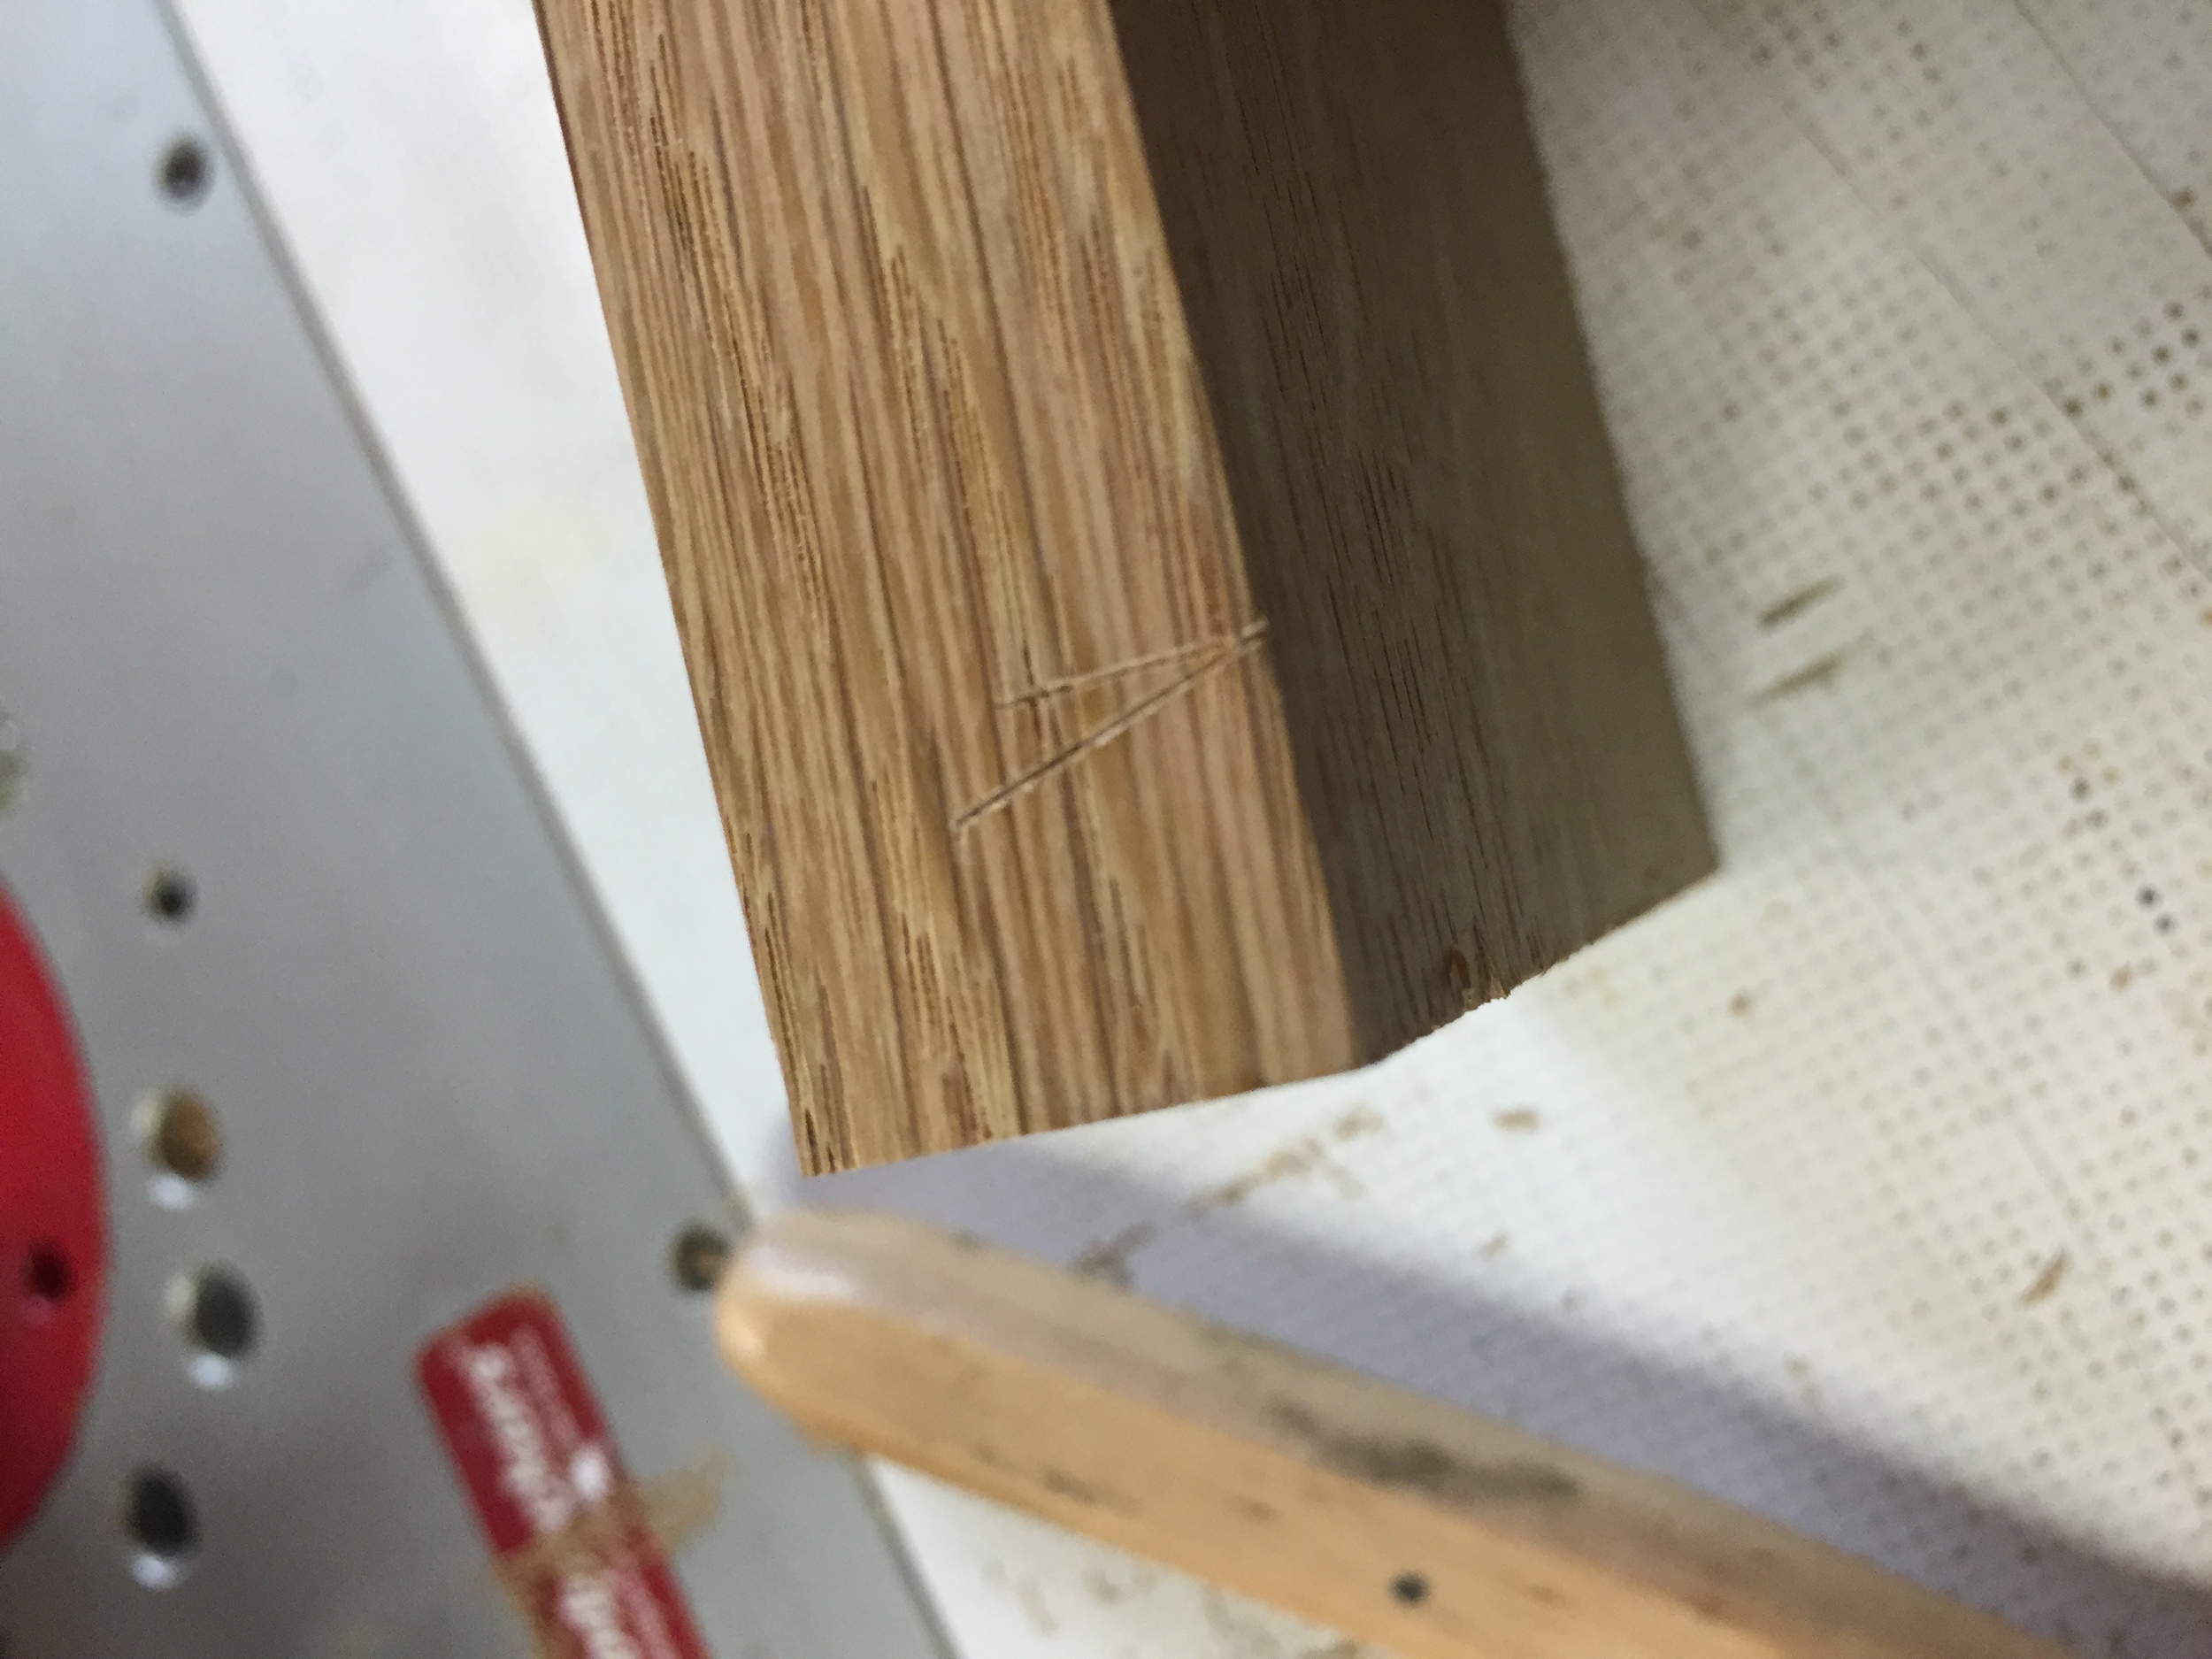
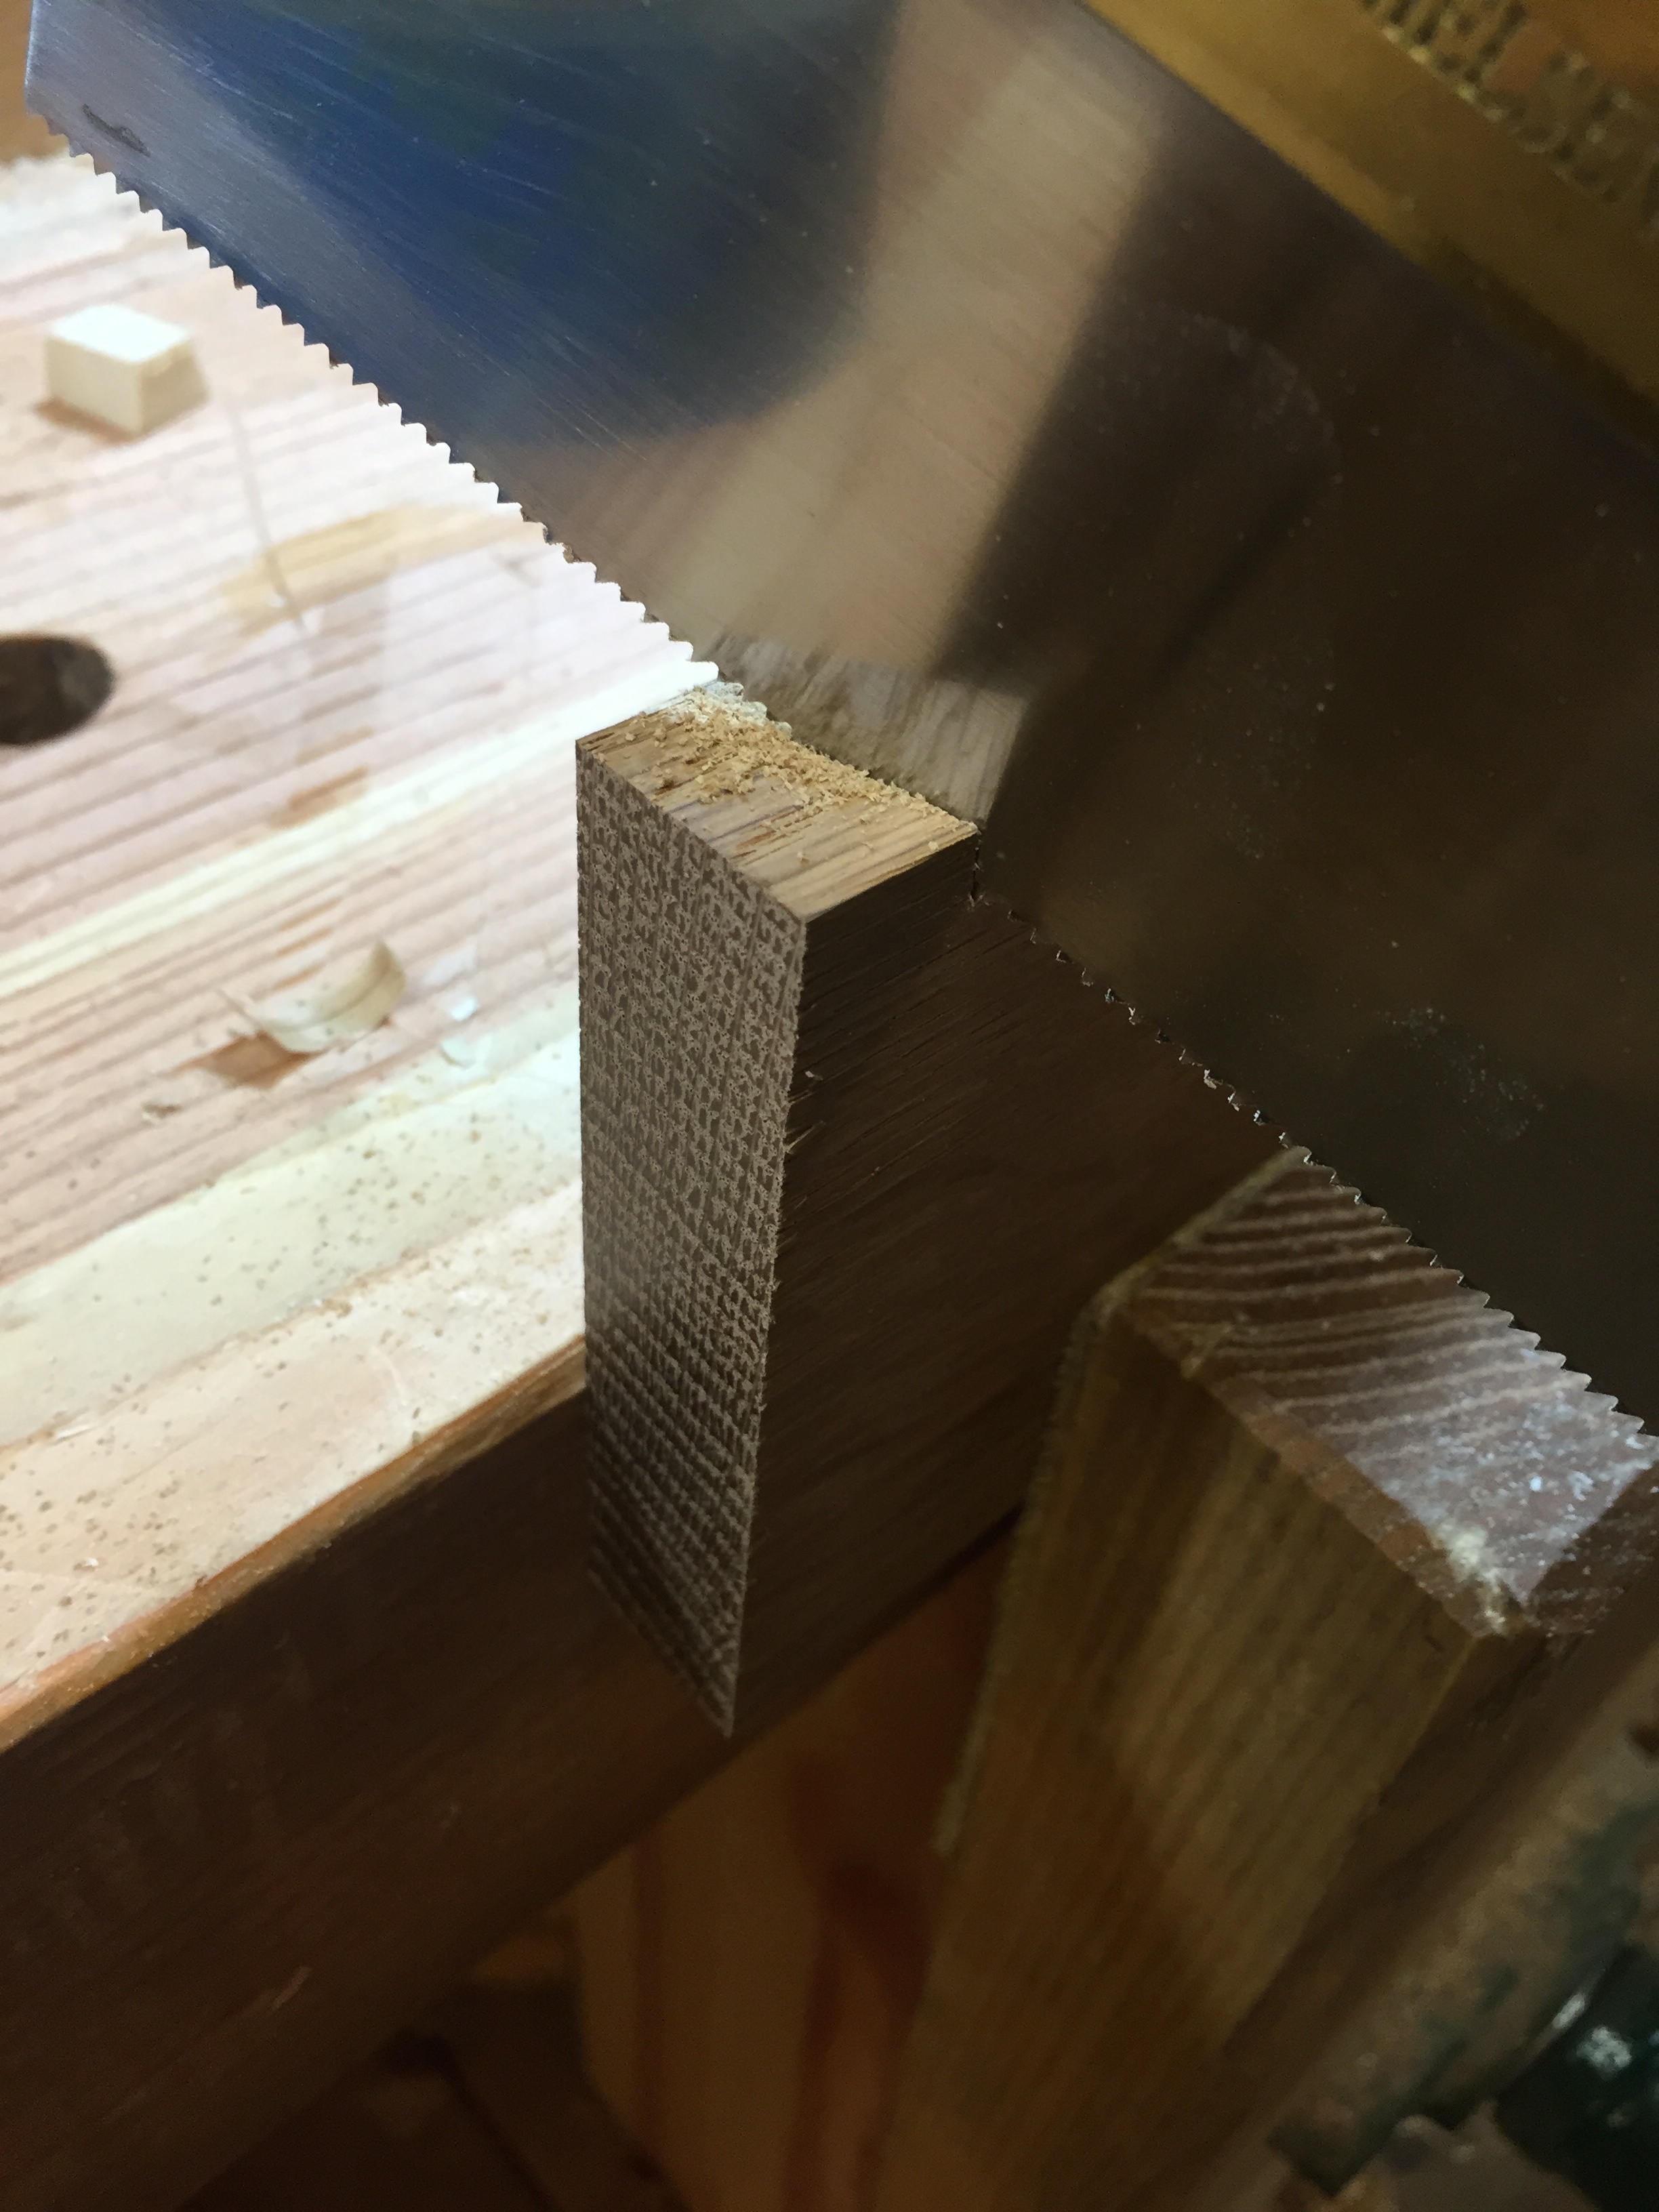
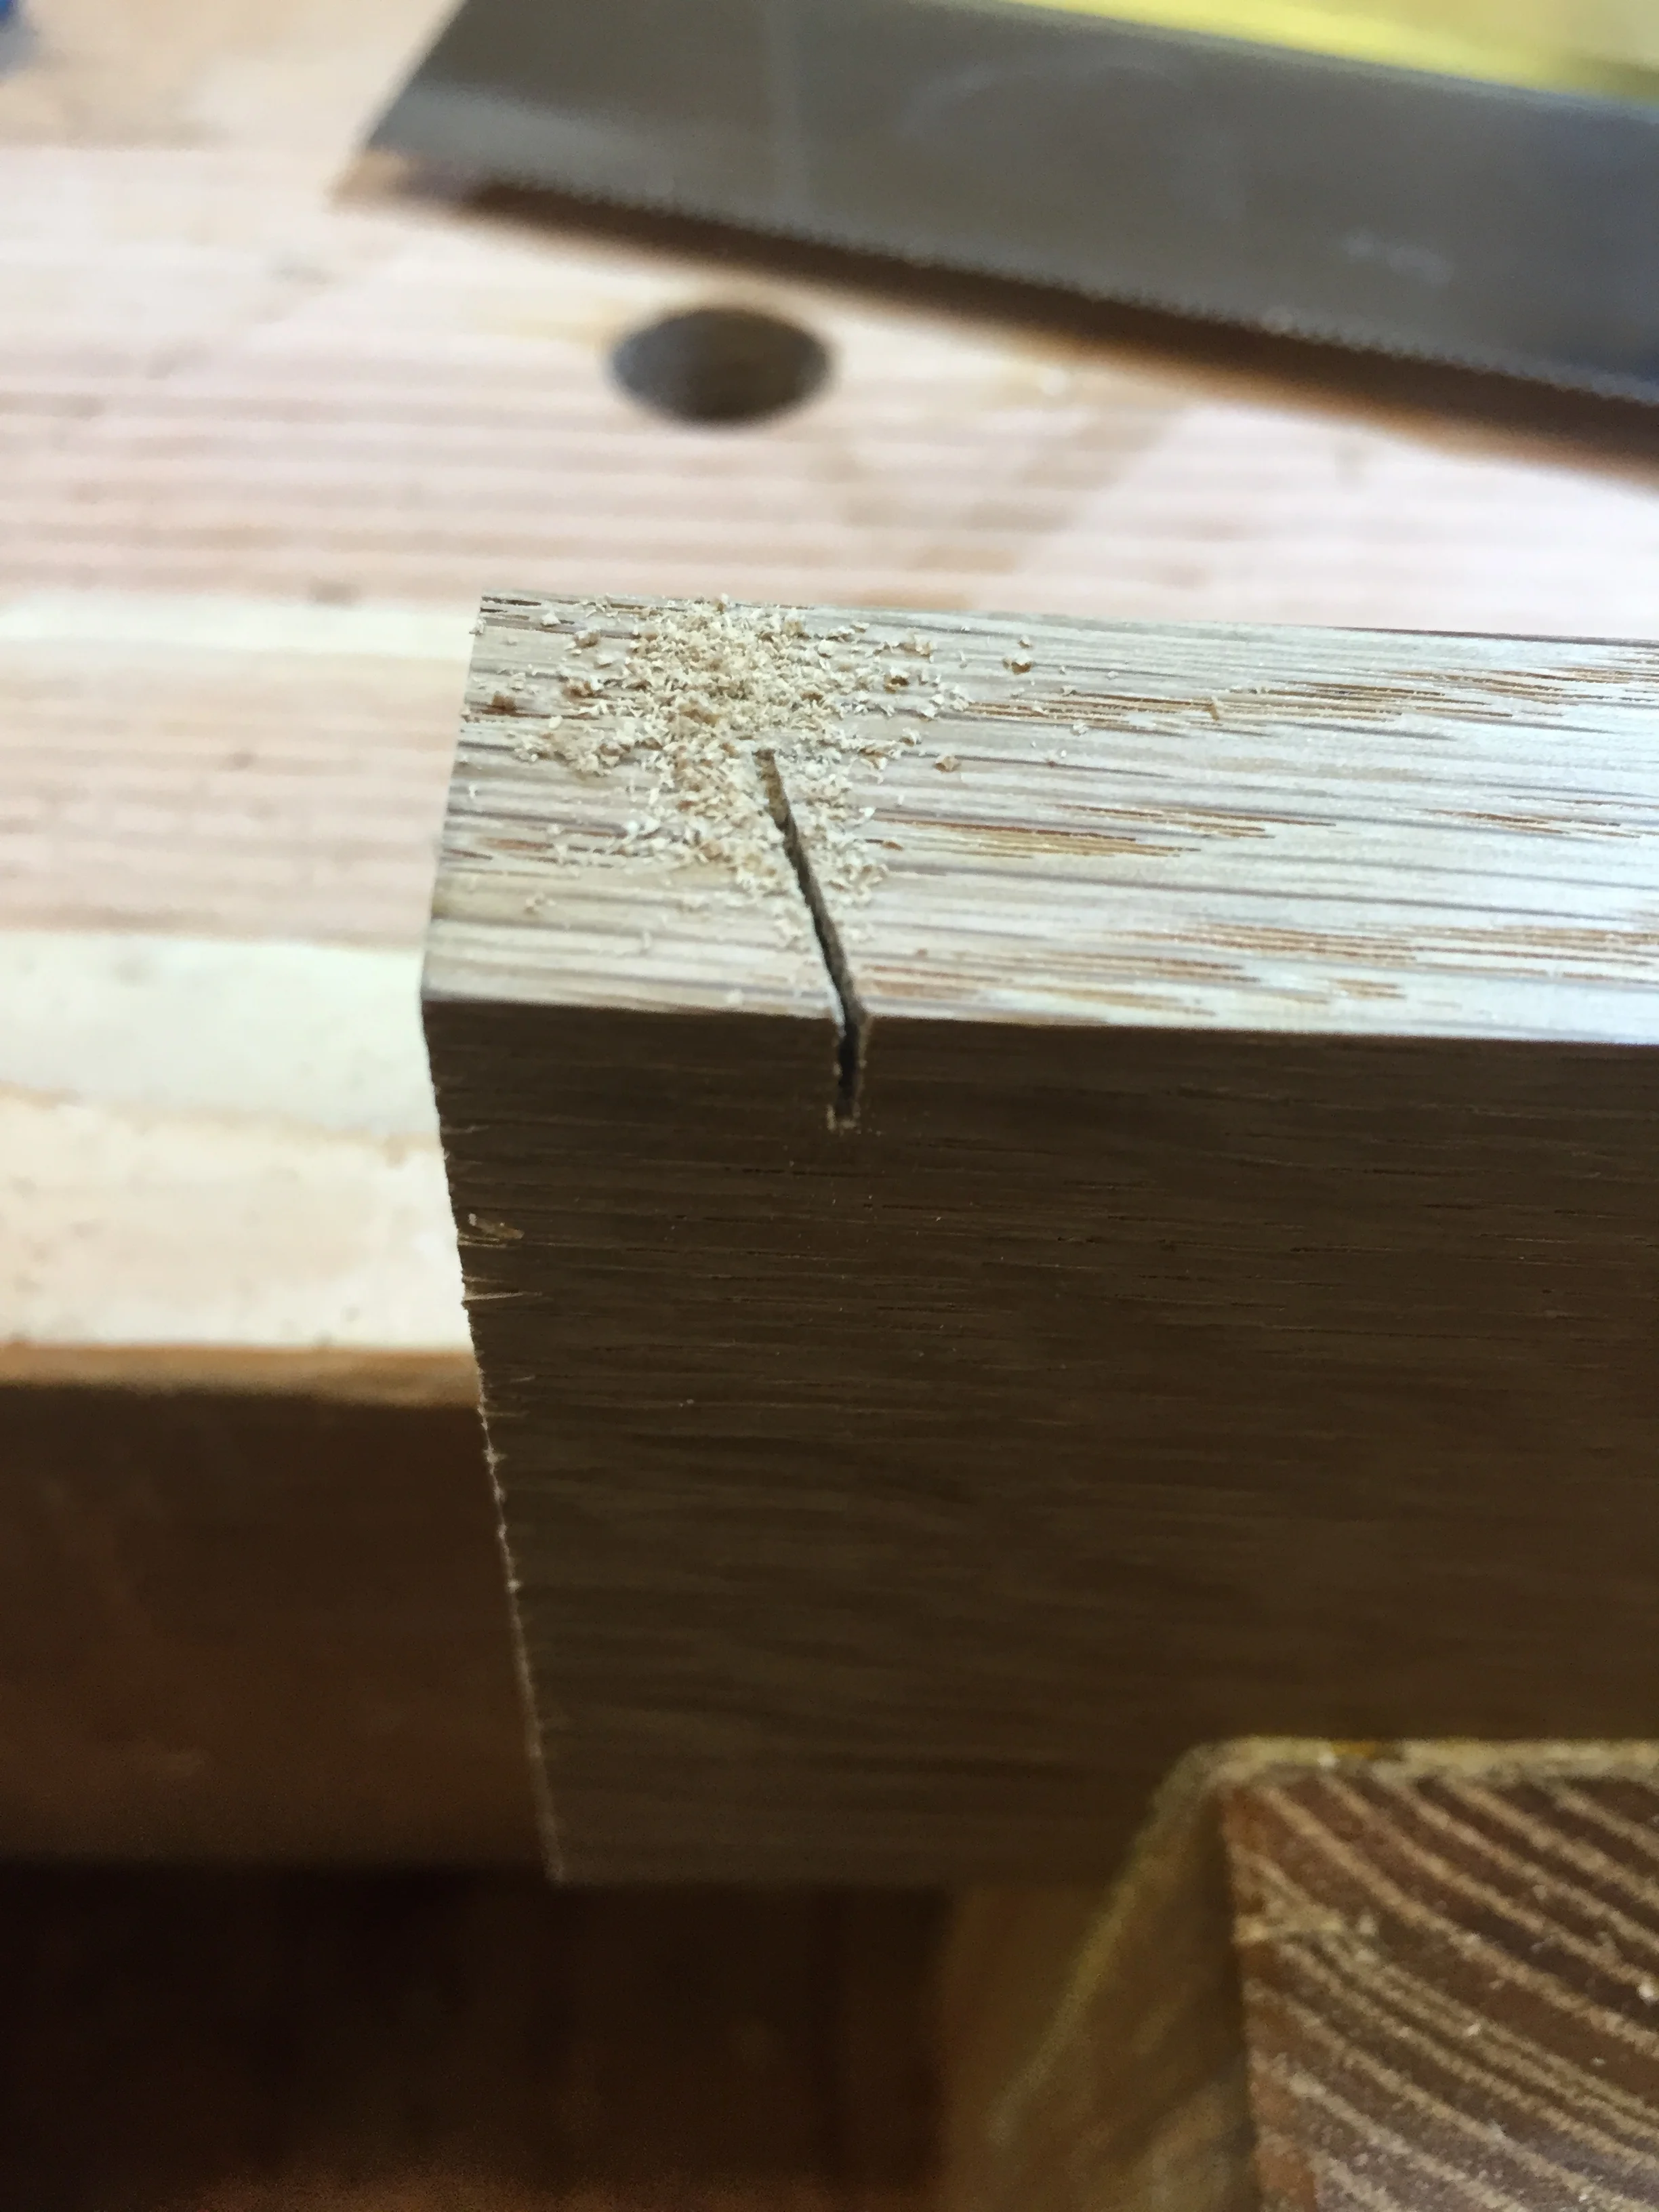
I did find when routing the grooves that the dovetail bit would tend to blow out one of the sides of the cut, even after backing (or in this case, fronting) the workpiece with a scrap. As its a dovetail bit, there's no sneaking up on it, or doing a shallow cut first, like a straight cut would allow. It's the whole thing or nothing. That meant I had to lay out the cuts with a bevel gauge, and do a relief saw cut to sever the fibers on the blowout prone side first. That worked well, and I had only a couple of blow-outs to glue back with CA glue. Those looked fine after sanding and finishing.

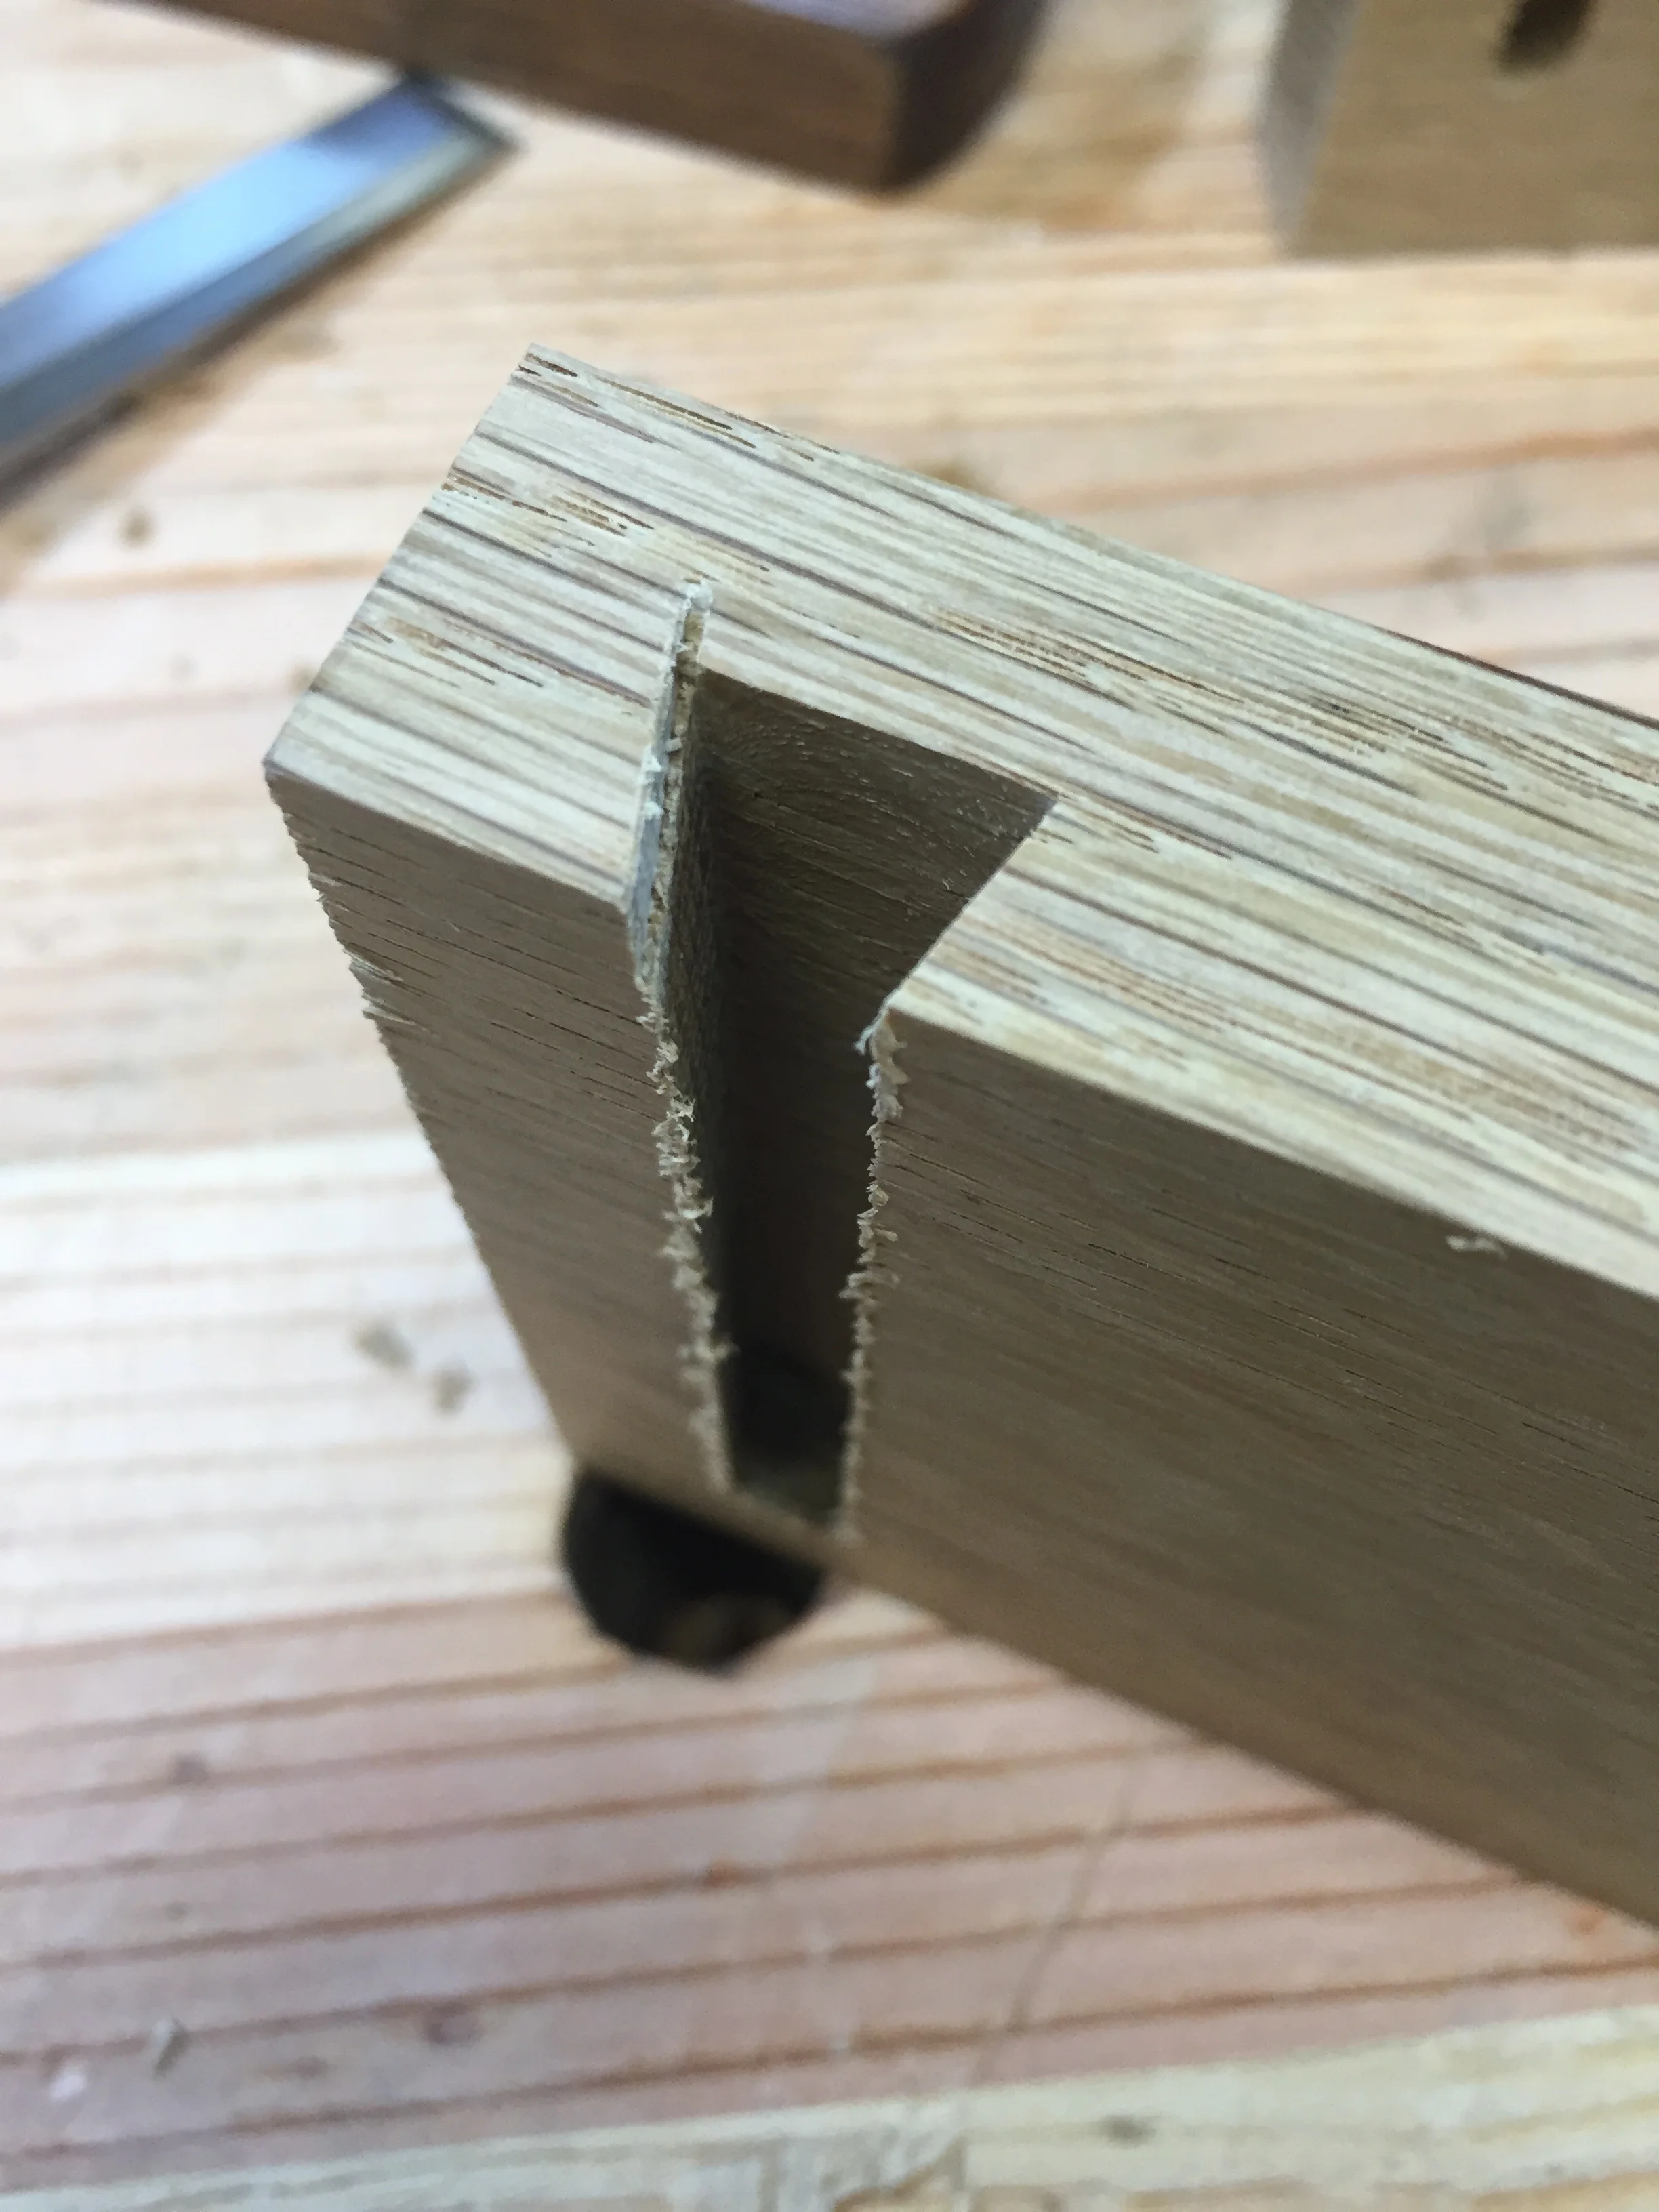
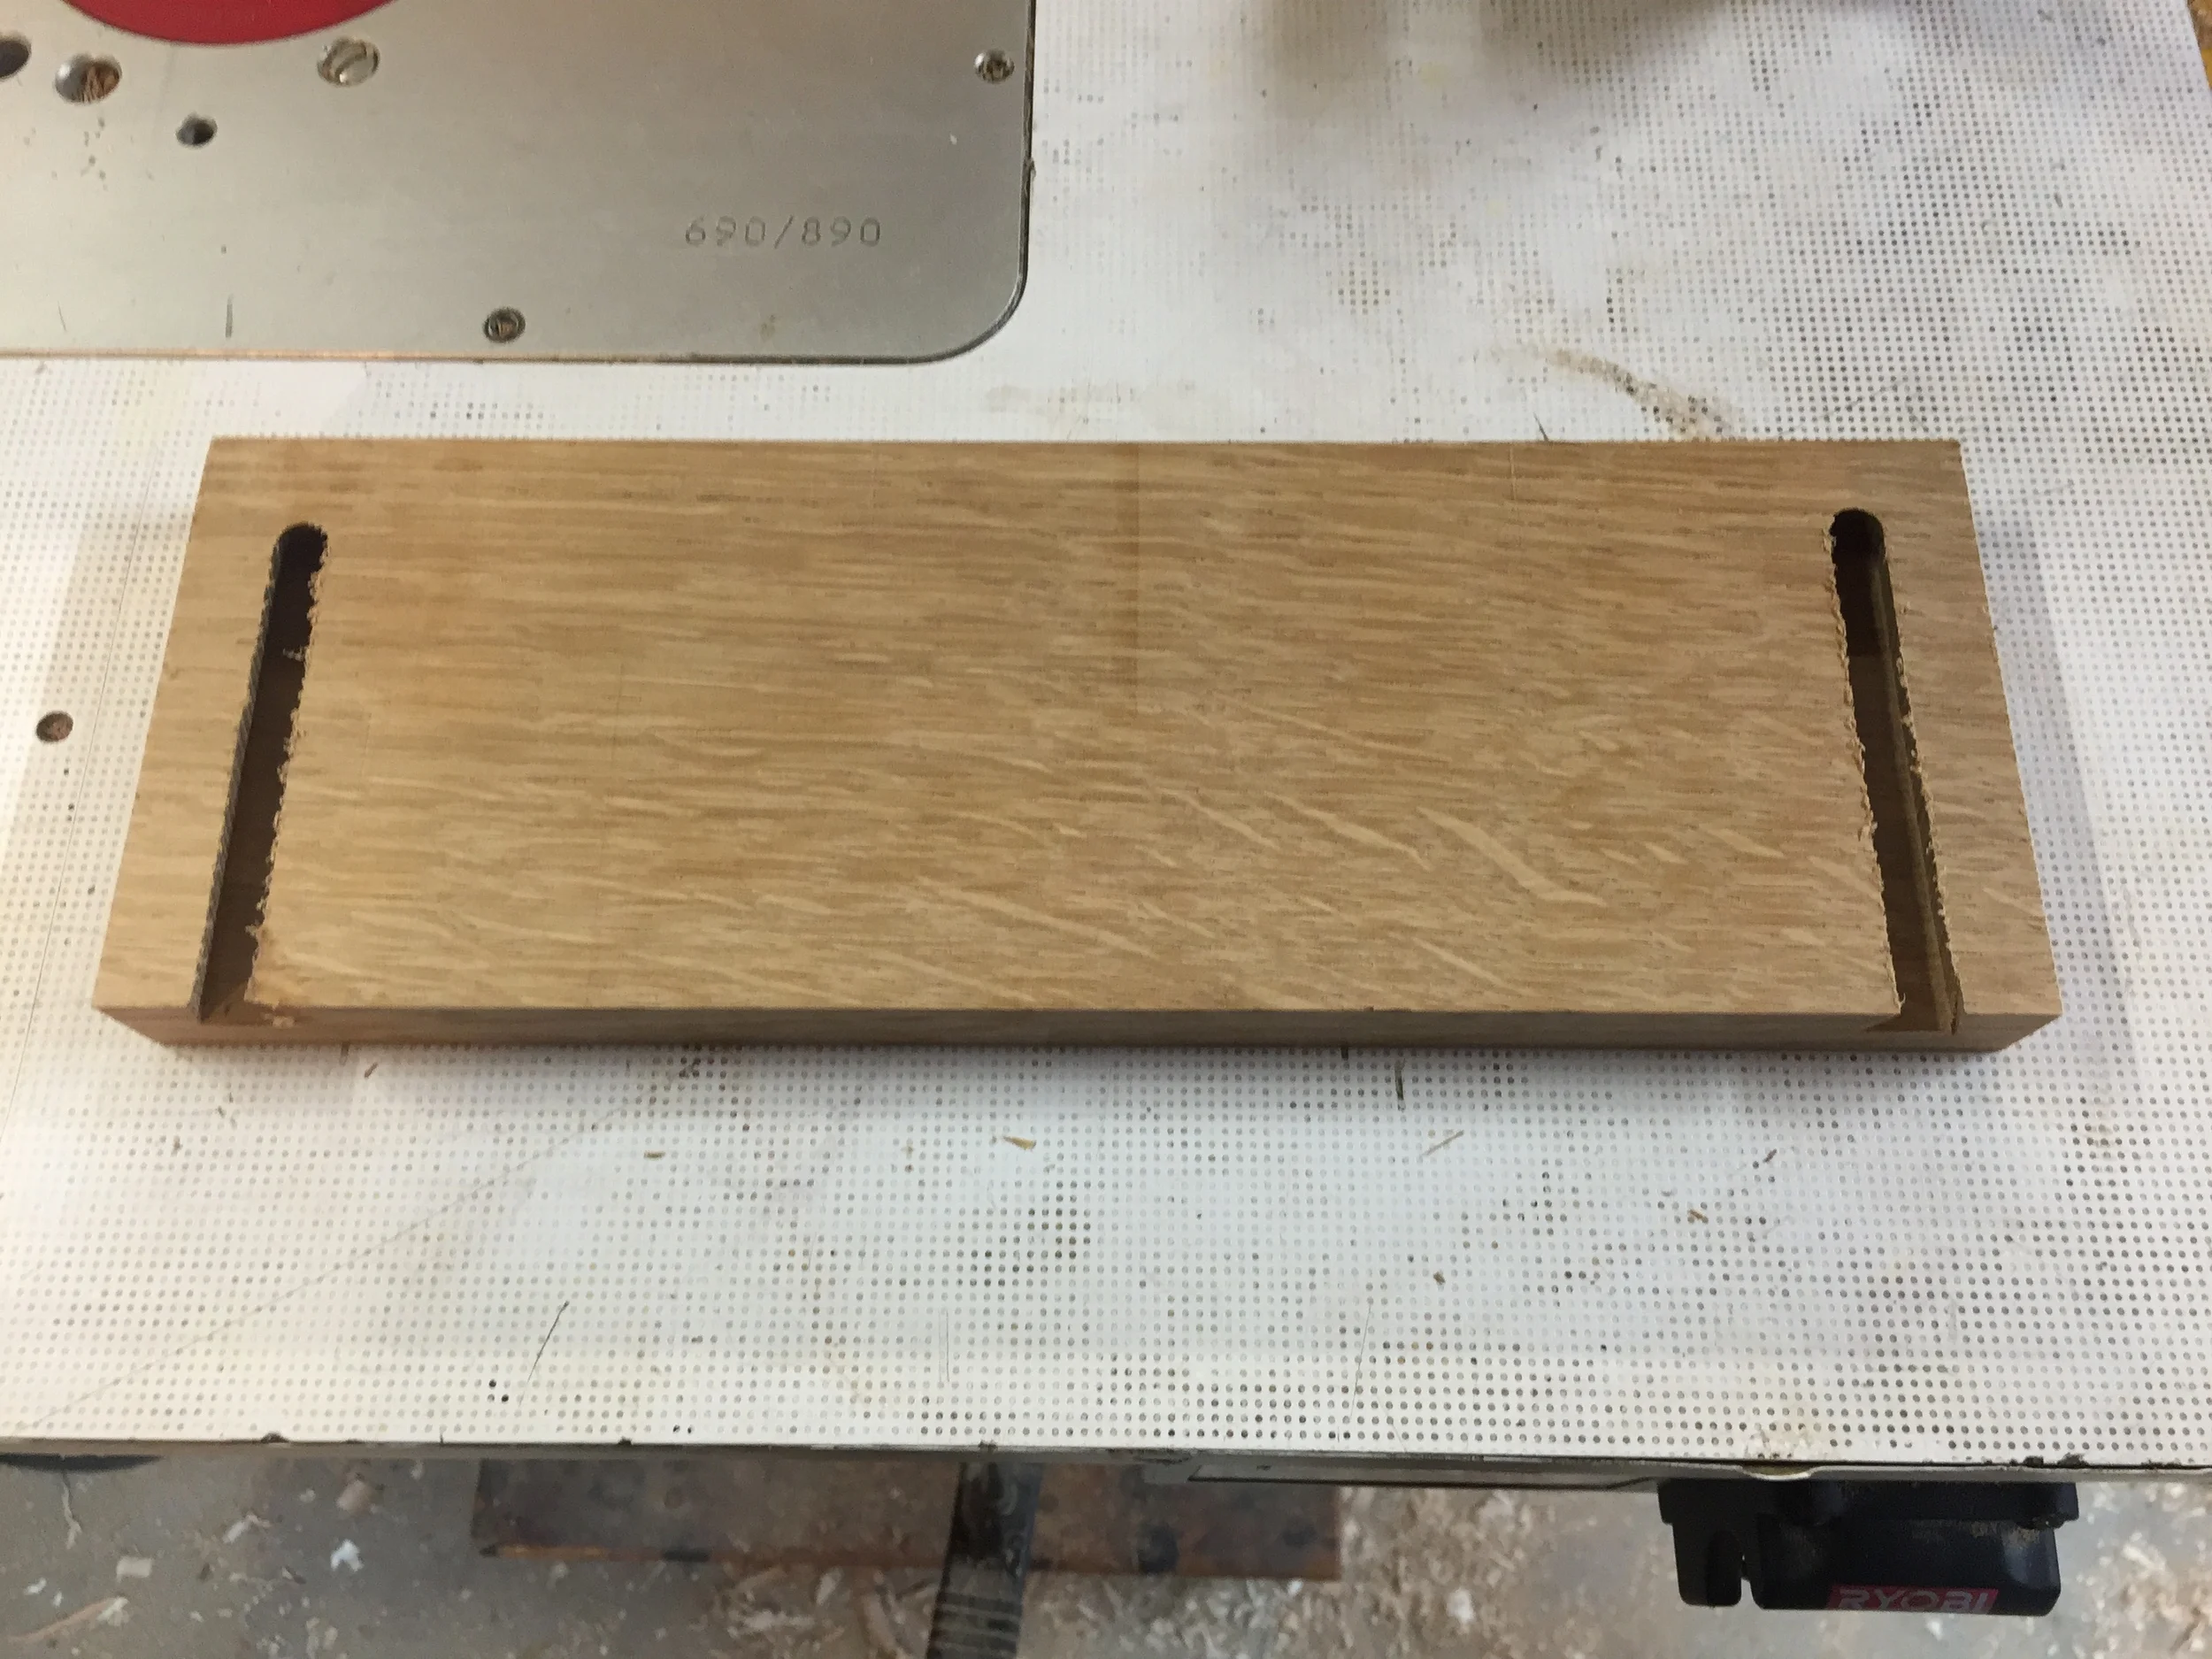
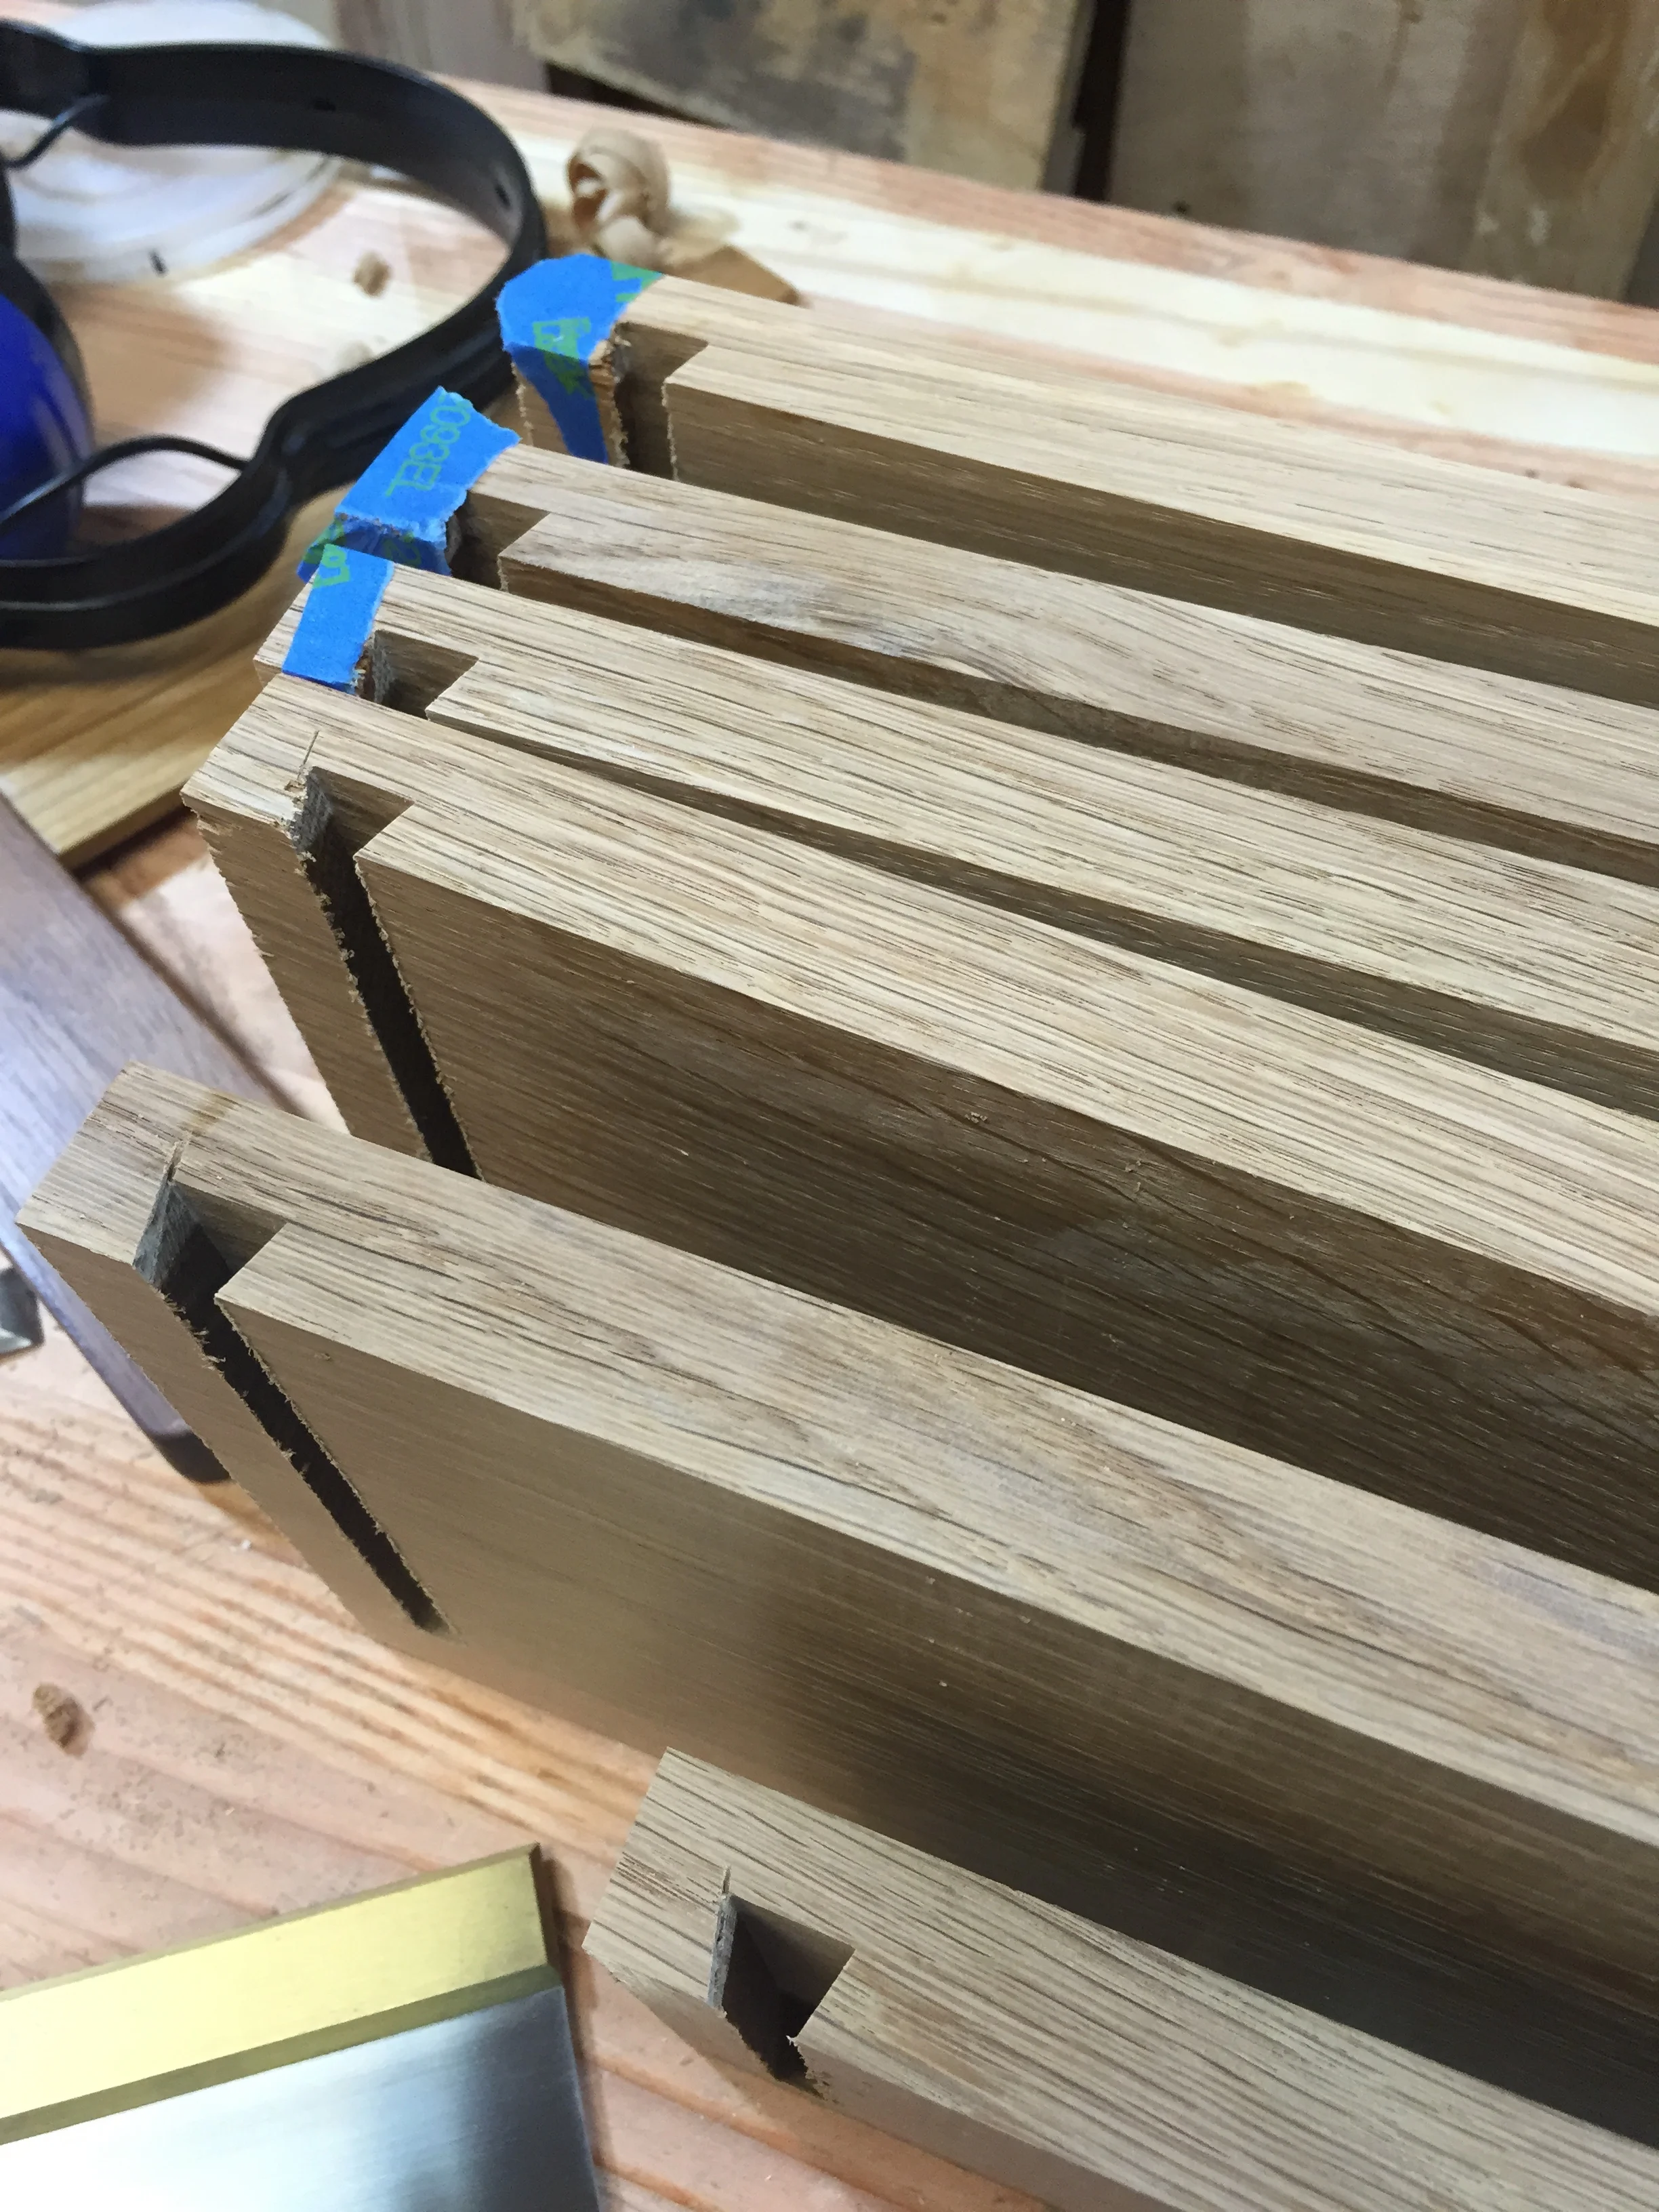
I then had to do another stopped groove between the stopped dovetails, to make the groove that holds the drawer bottom in place.

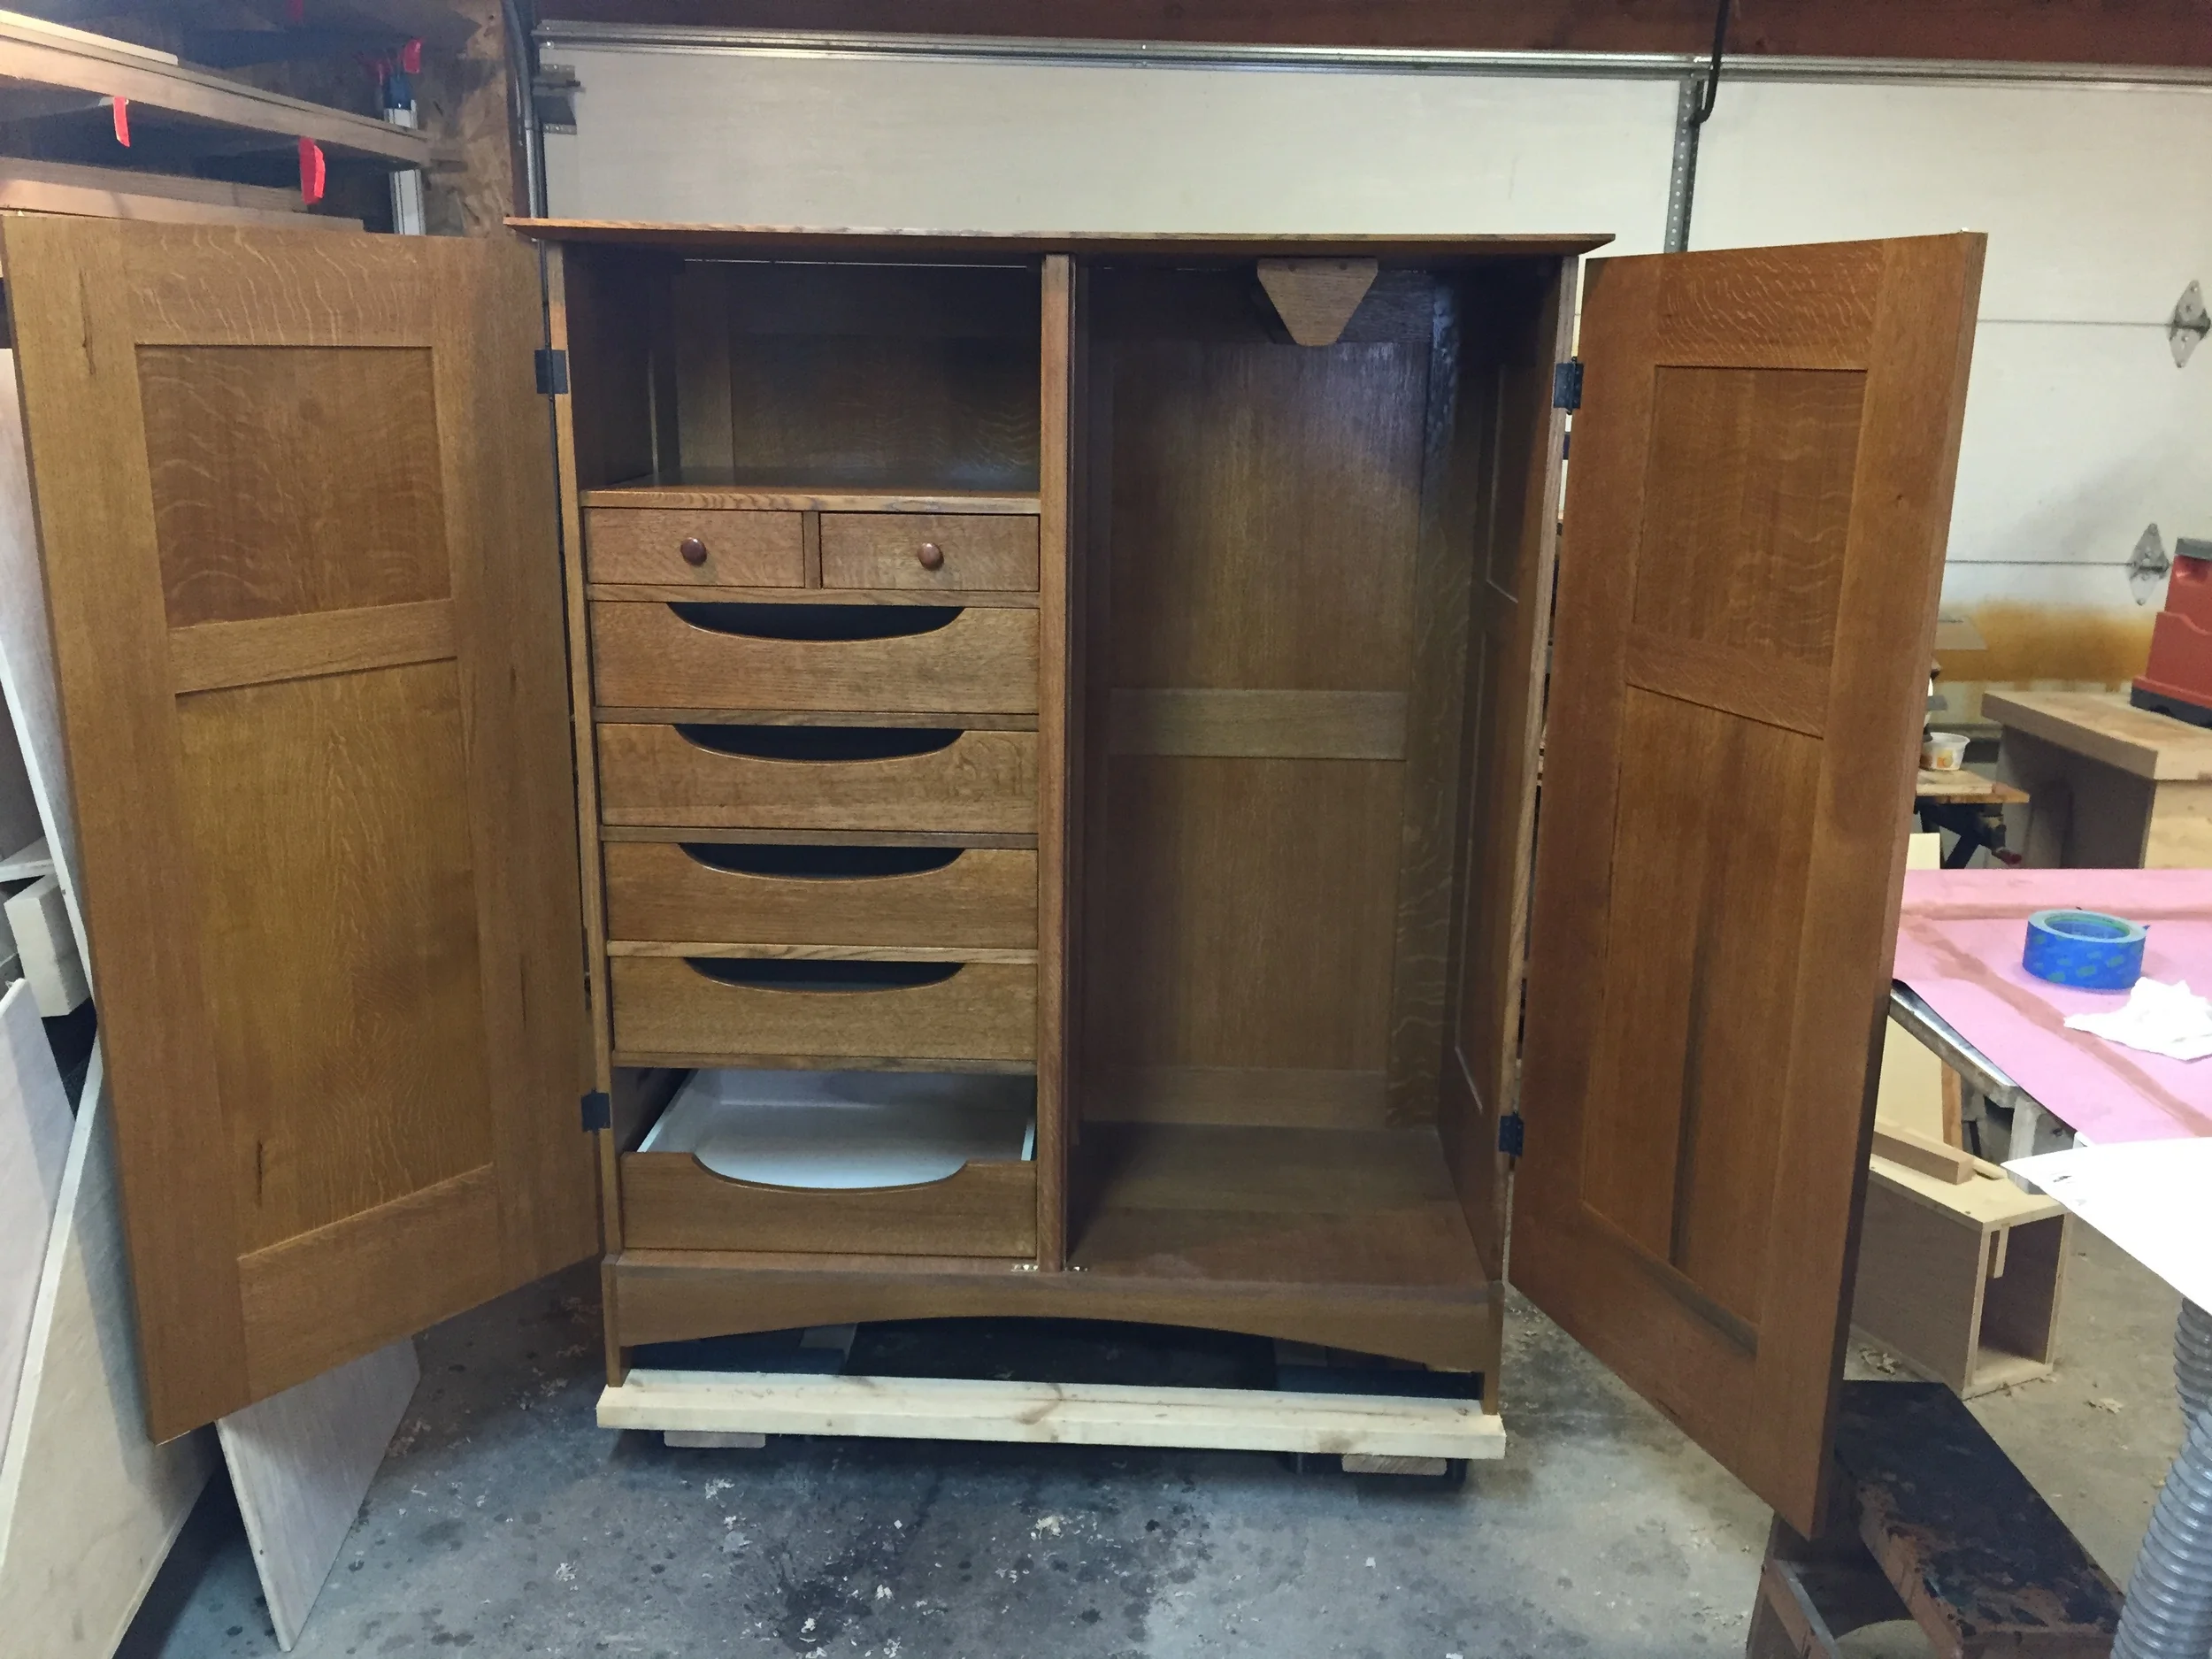
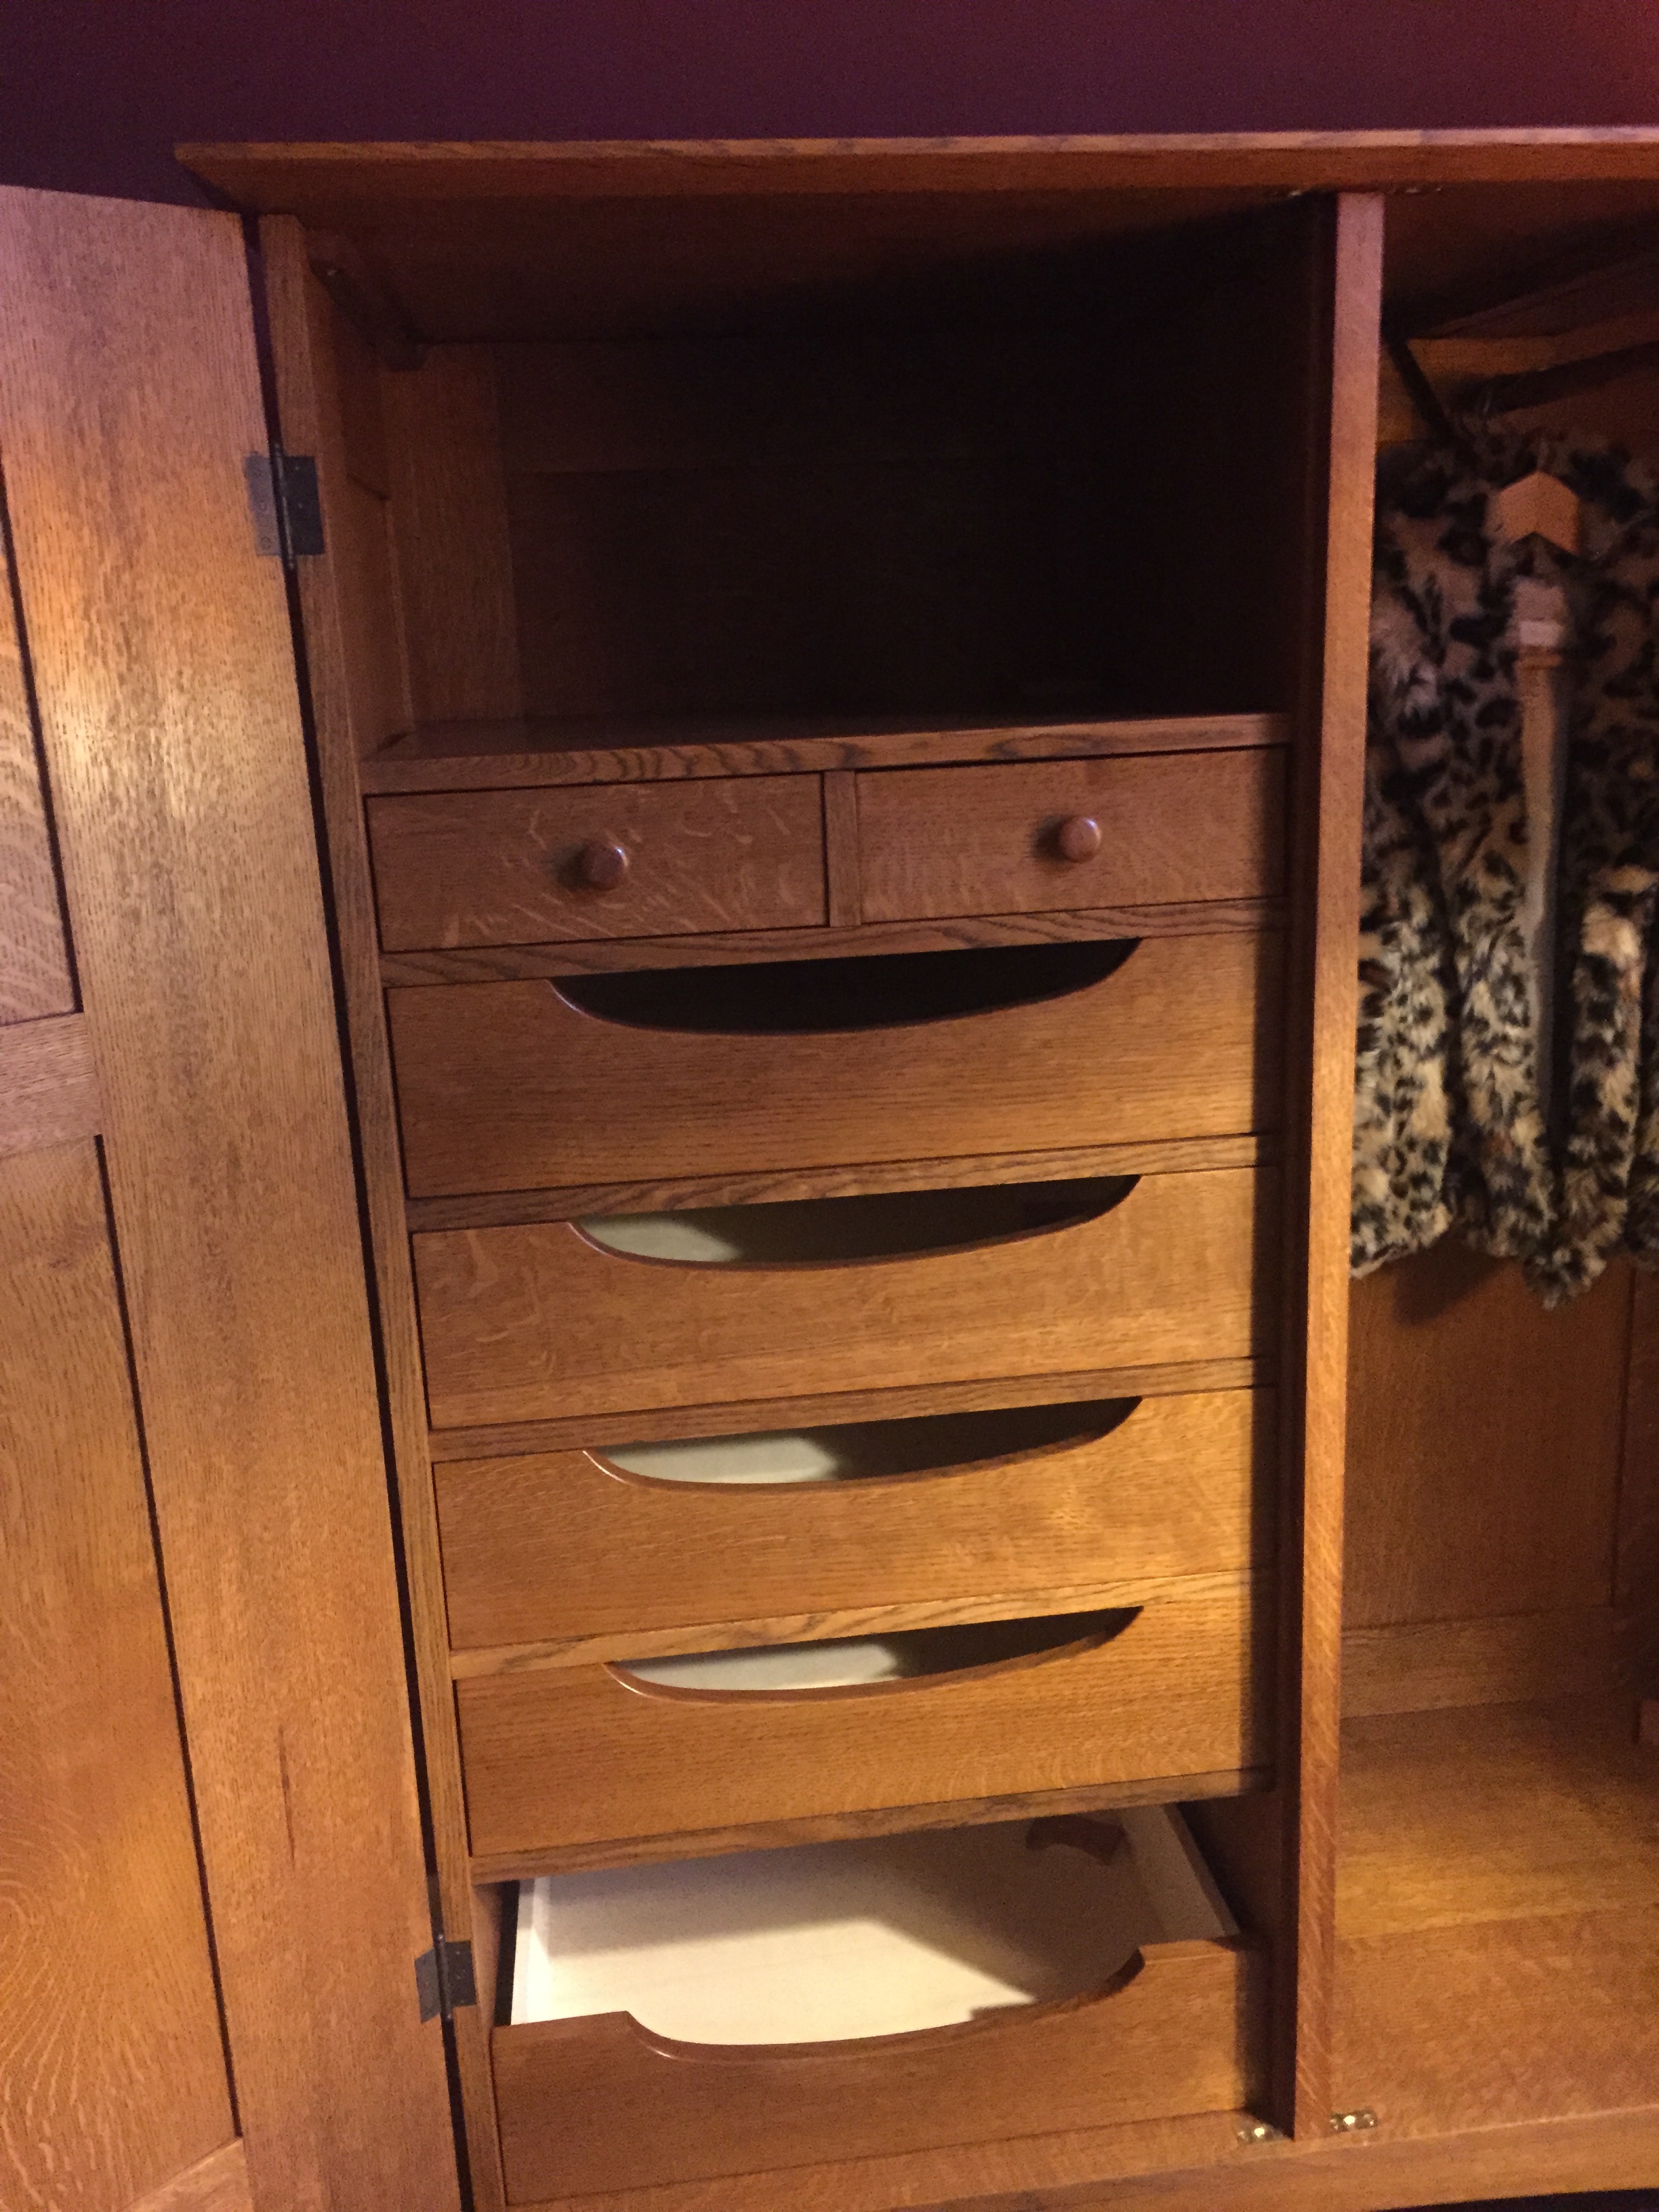
With all those pieces ready, and the sides & backs cut, I was able to do the dry assembly. I decided to leave the sides & bottom of the drawers unfinished. I felt that if I really wanted to, it would be easy enough to go back and apply some clear shellac later. After the dry assembly, I cut the gentle arches that serve as the openings for the hand pulls. Then it was finishing time again (grain raising, water based dye, amber shellac) on the fronts. If you're keeping score, this is the third time in the project I've had to switch gears from joinery & case work to finishing.

The grooves for the runners were cut into the drawer aides with a router, with the drawers clamped to the bench (sorry, no photos of that). Then I made and attached the runners, using unfinished white oak. I tired to be very precise on getting the fit right so the drawers would slide well, the fronts would have the right reveals, and they wouldn't bind. I was generally pleased with the results, but felt I should have done better. They do get a little left-to-right shifty as they're near the end of their extension, but I guess that's to be expected.

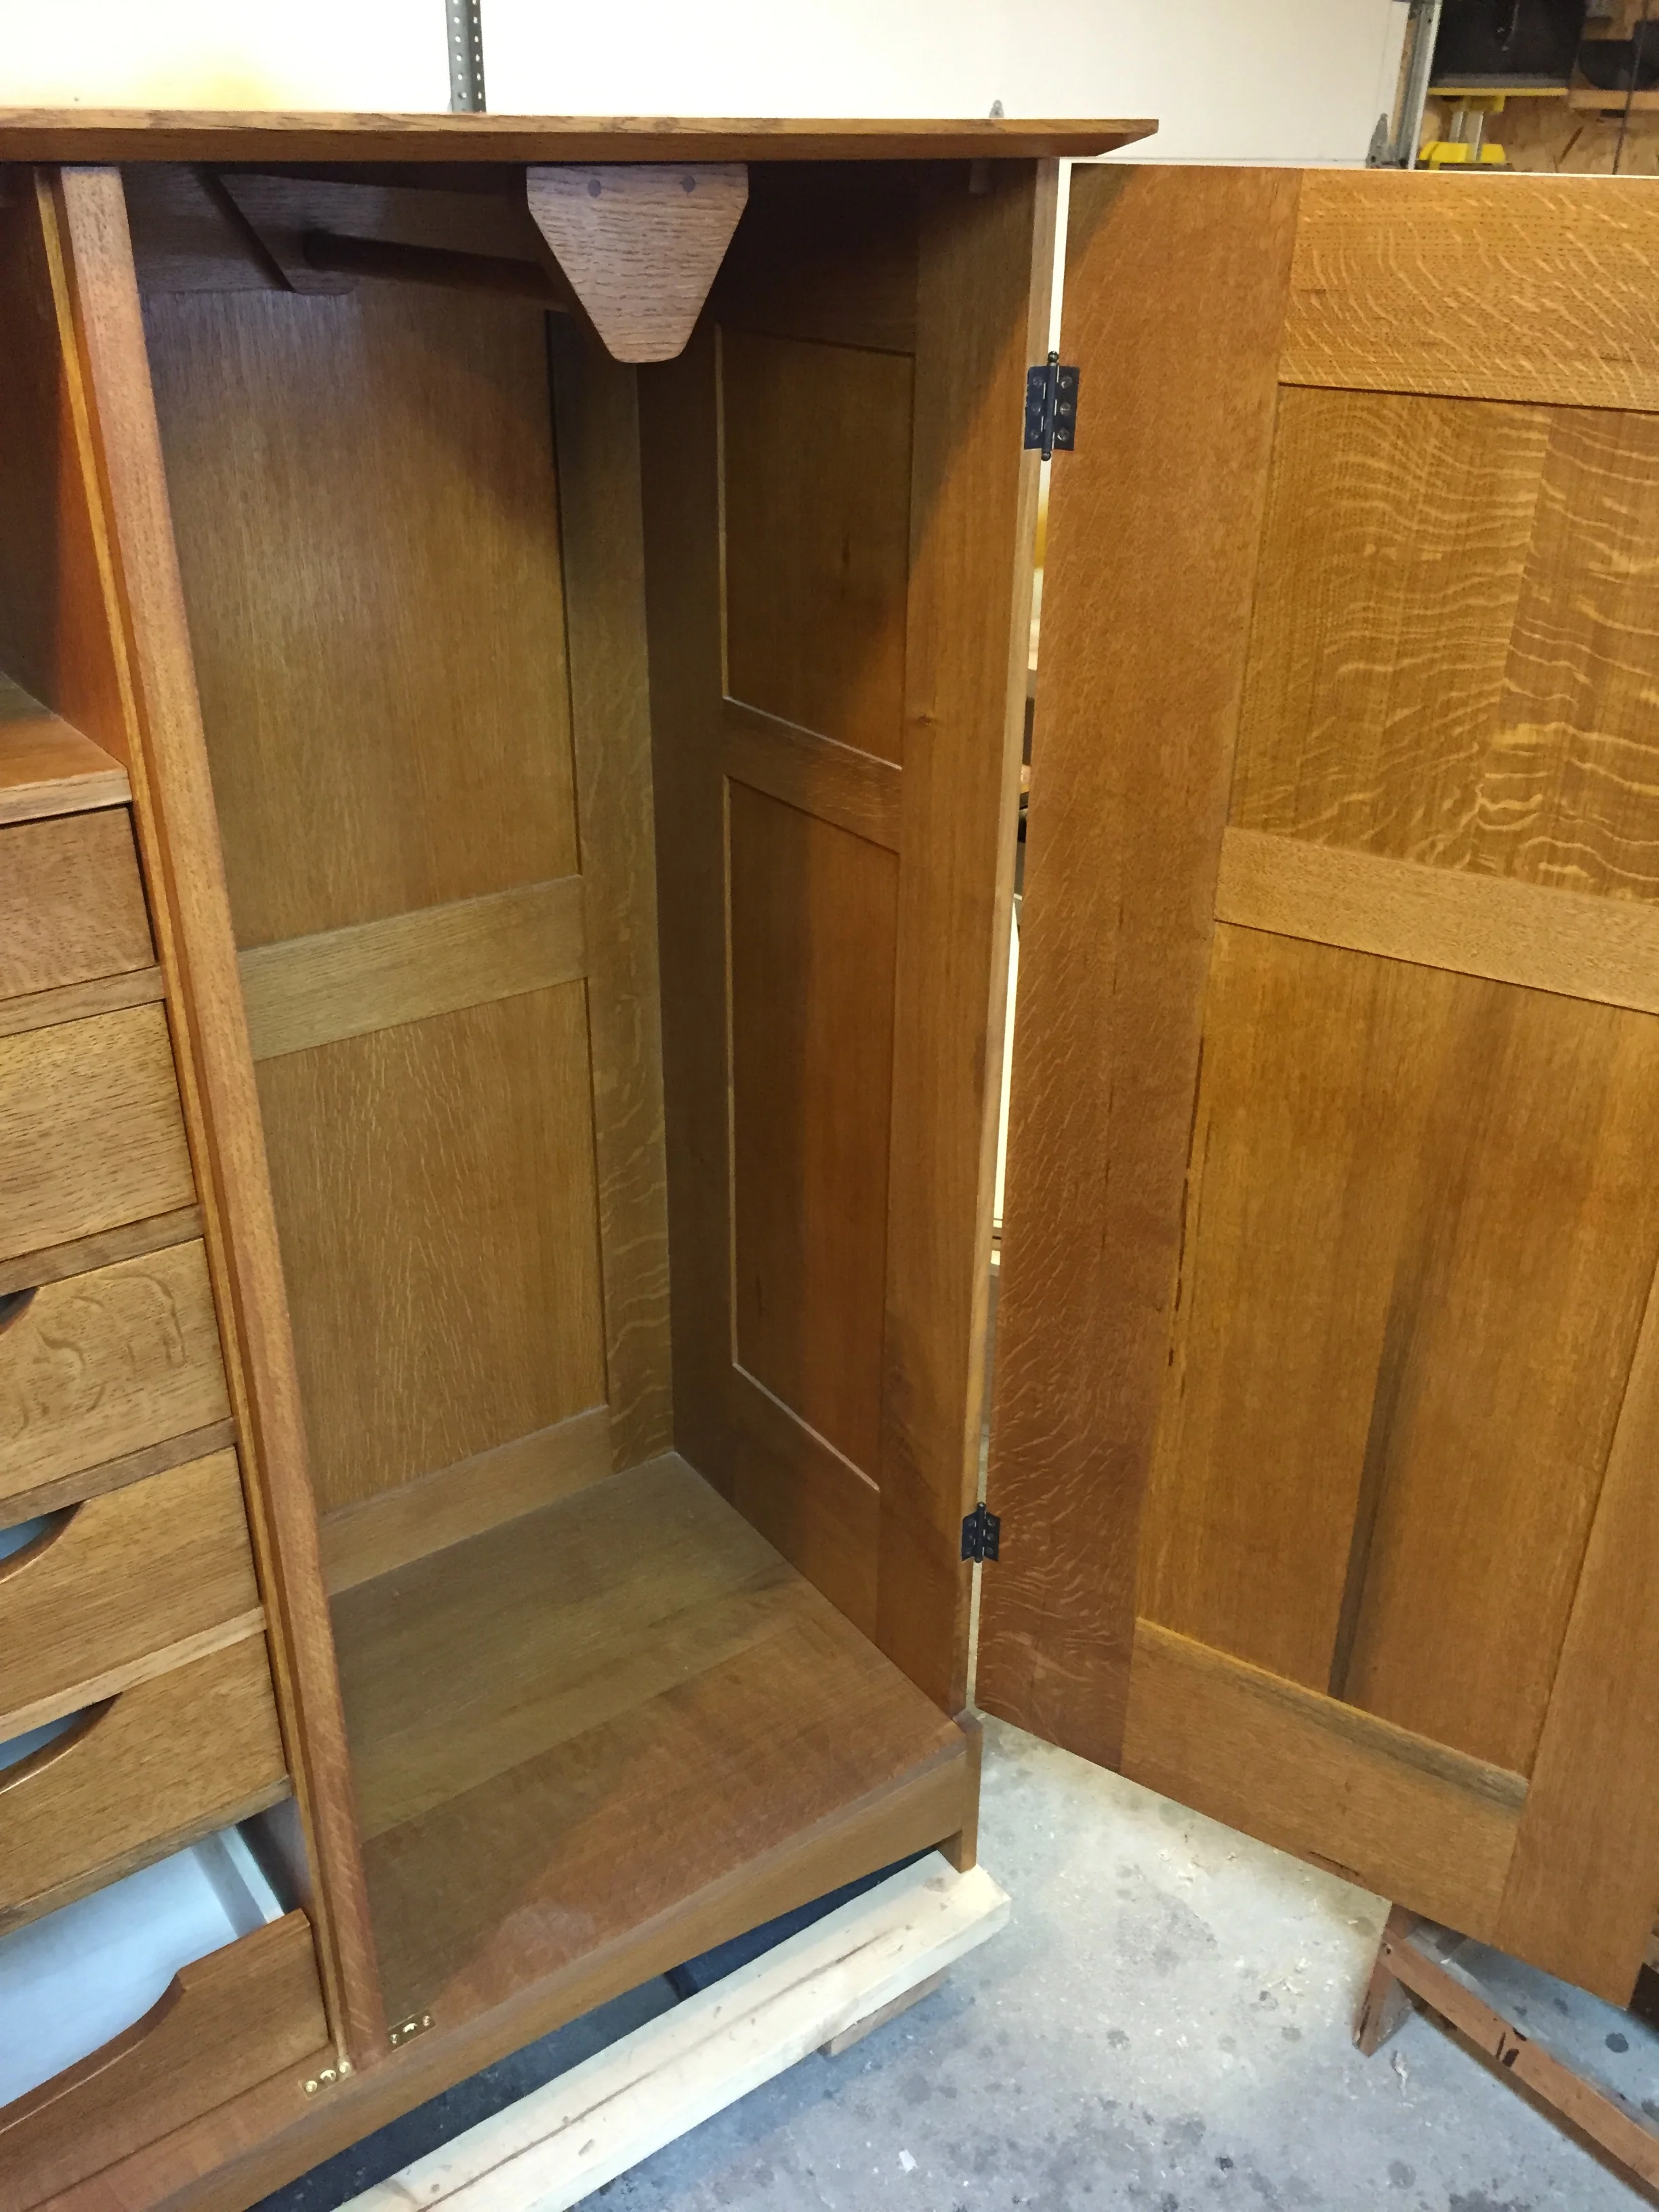
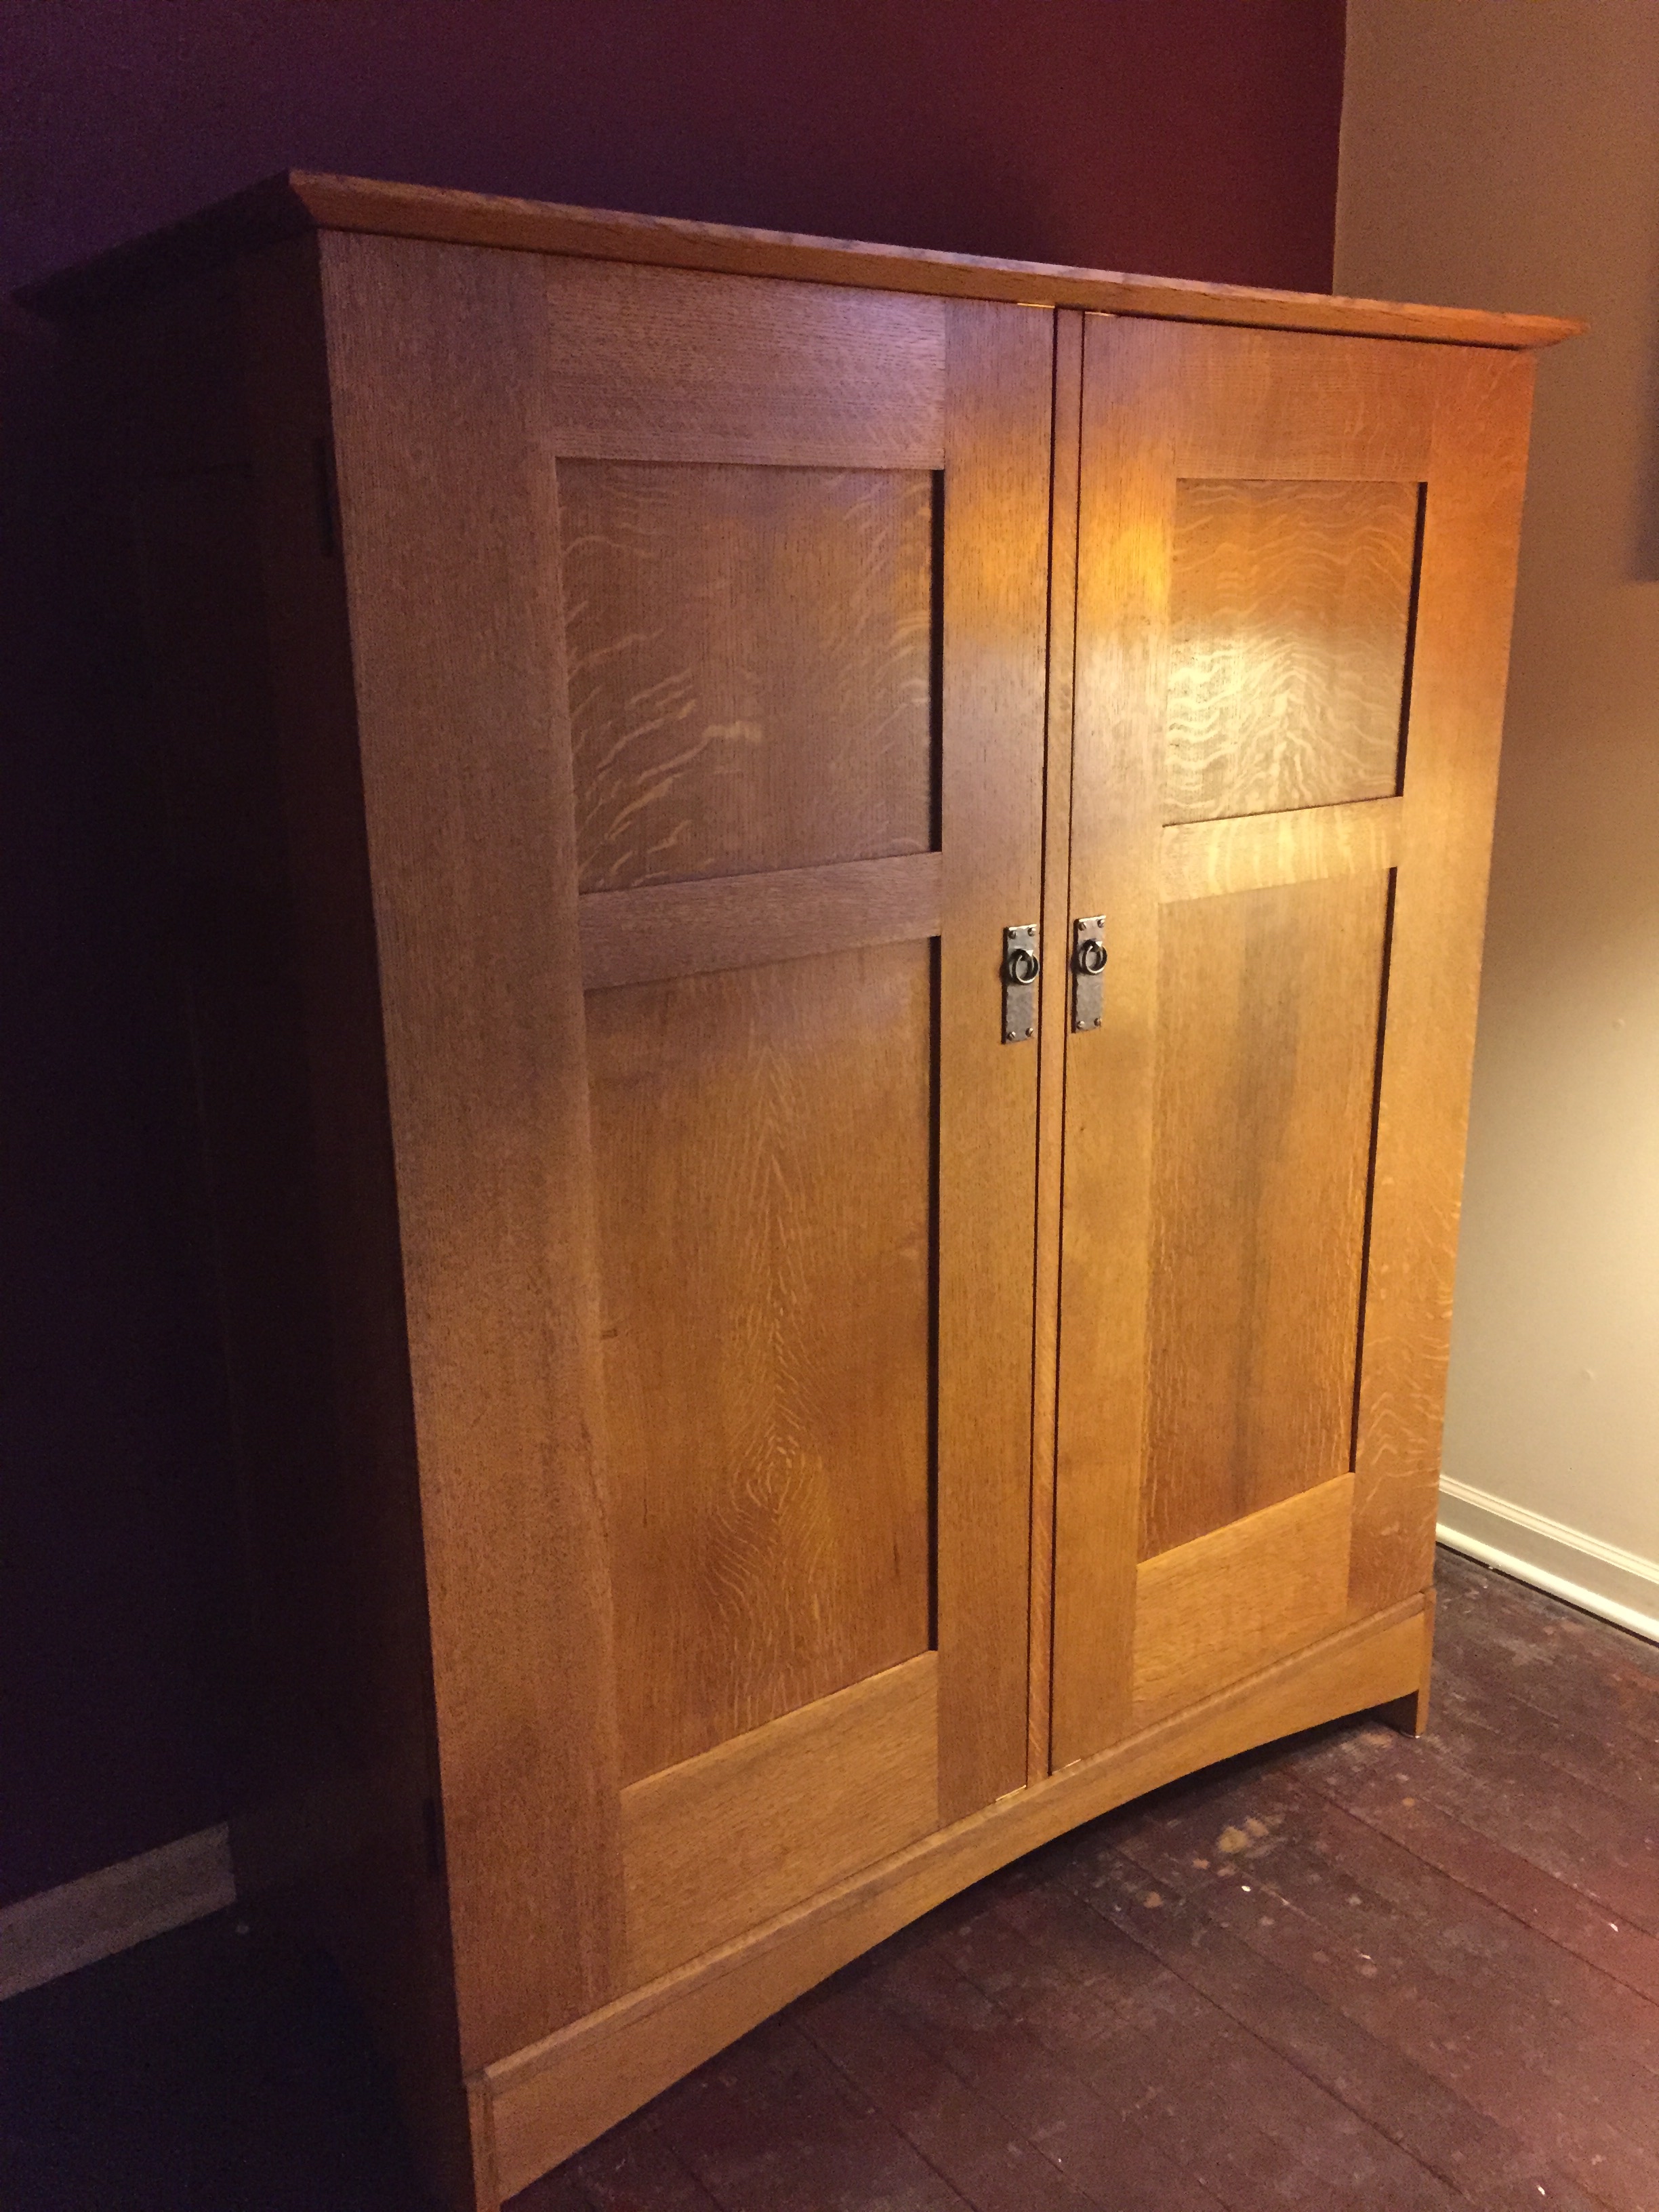
Finally, it was time to fit the doors. They'd been assembled, oversized, with finished center panels, and sitting around the shop for months now, and at last they could be fit to the openings, and finished. I found it hard to work on mortising the lower of the two pairs of hinges, as I had to work near the floor with the huge case on the dolly, but I got it done. It's just awkward to do that chiseling and router plane work crouched down near the floor, and at 90°. There was a bit of attaching-and-removing to be done when trying to get the reveal on the doors correct. One mistake that game back to bite me was that there was a slight bit of twist introduced to this large, heavy case as it sat on the maybe-not-perfectly-level dolly and my not-perfectly-even shop floor. After I brought the thing into the house, placed it on a differently out-of-level floor, the case had a bit of twist it, and in a different direction than when it was in the shop. That twist was telegraphed directly to all the careful fitting I'd done on these large, tall doors. It might have made more sense to have found a very, very flat floor to place it on, then fit things, then shimmed under the feet as needed when it was in its final location. Luckily, nowhere were the doors more than 1/16" out, and after I placed some shims under the feet, it worked fine. But its a good lesson for next time.

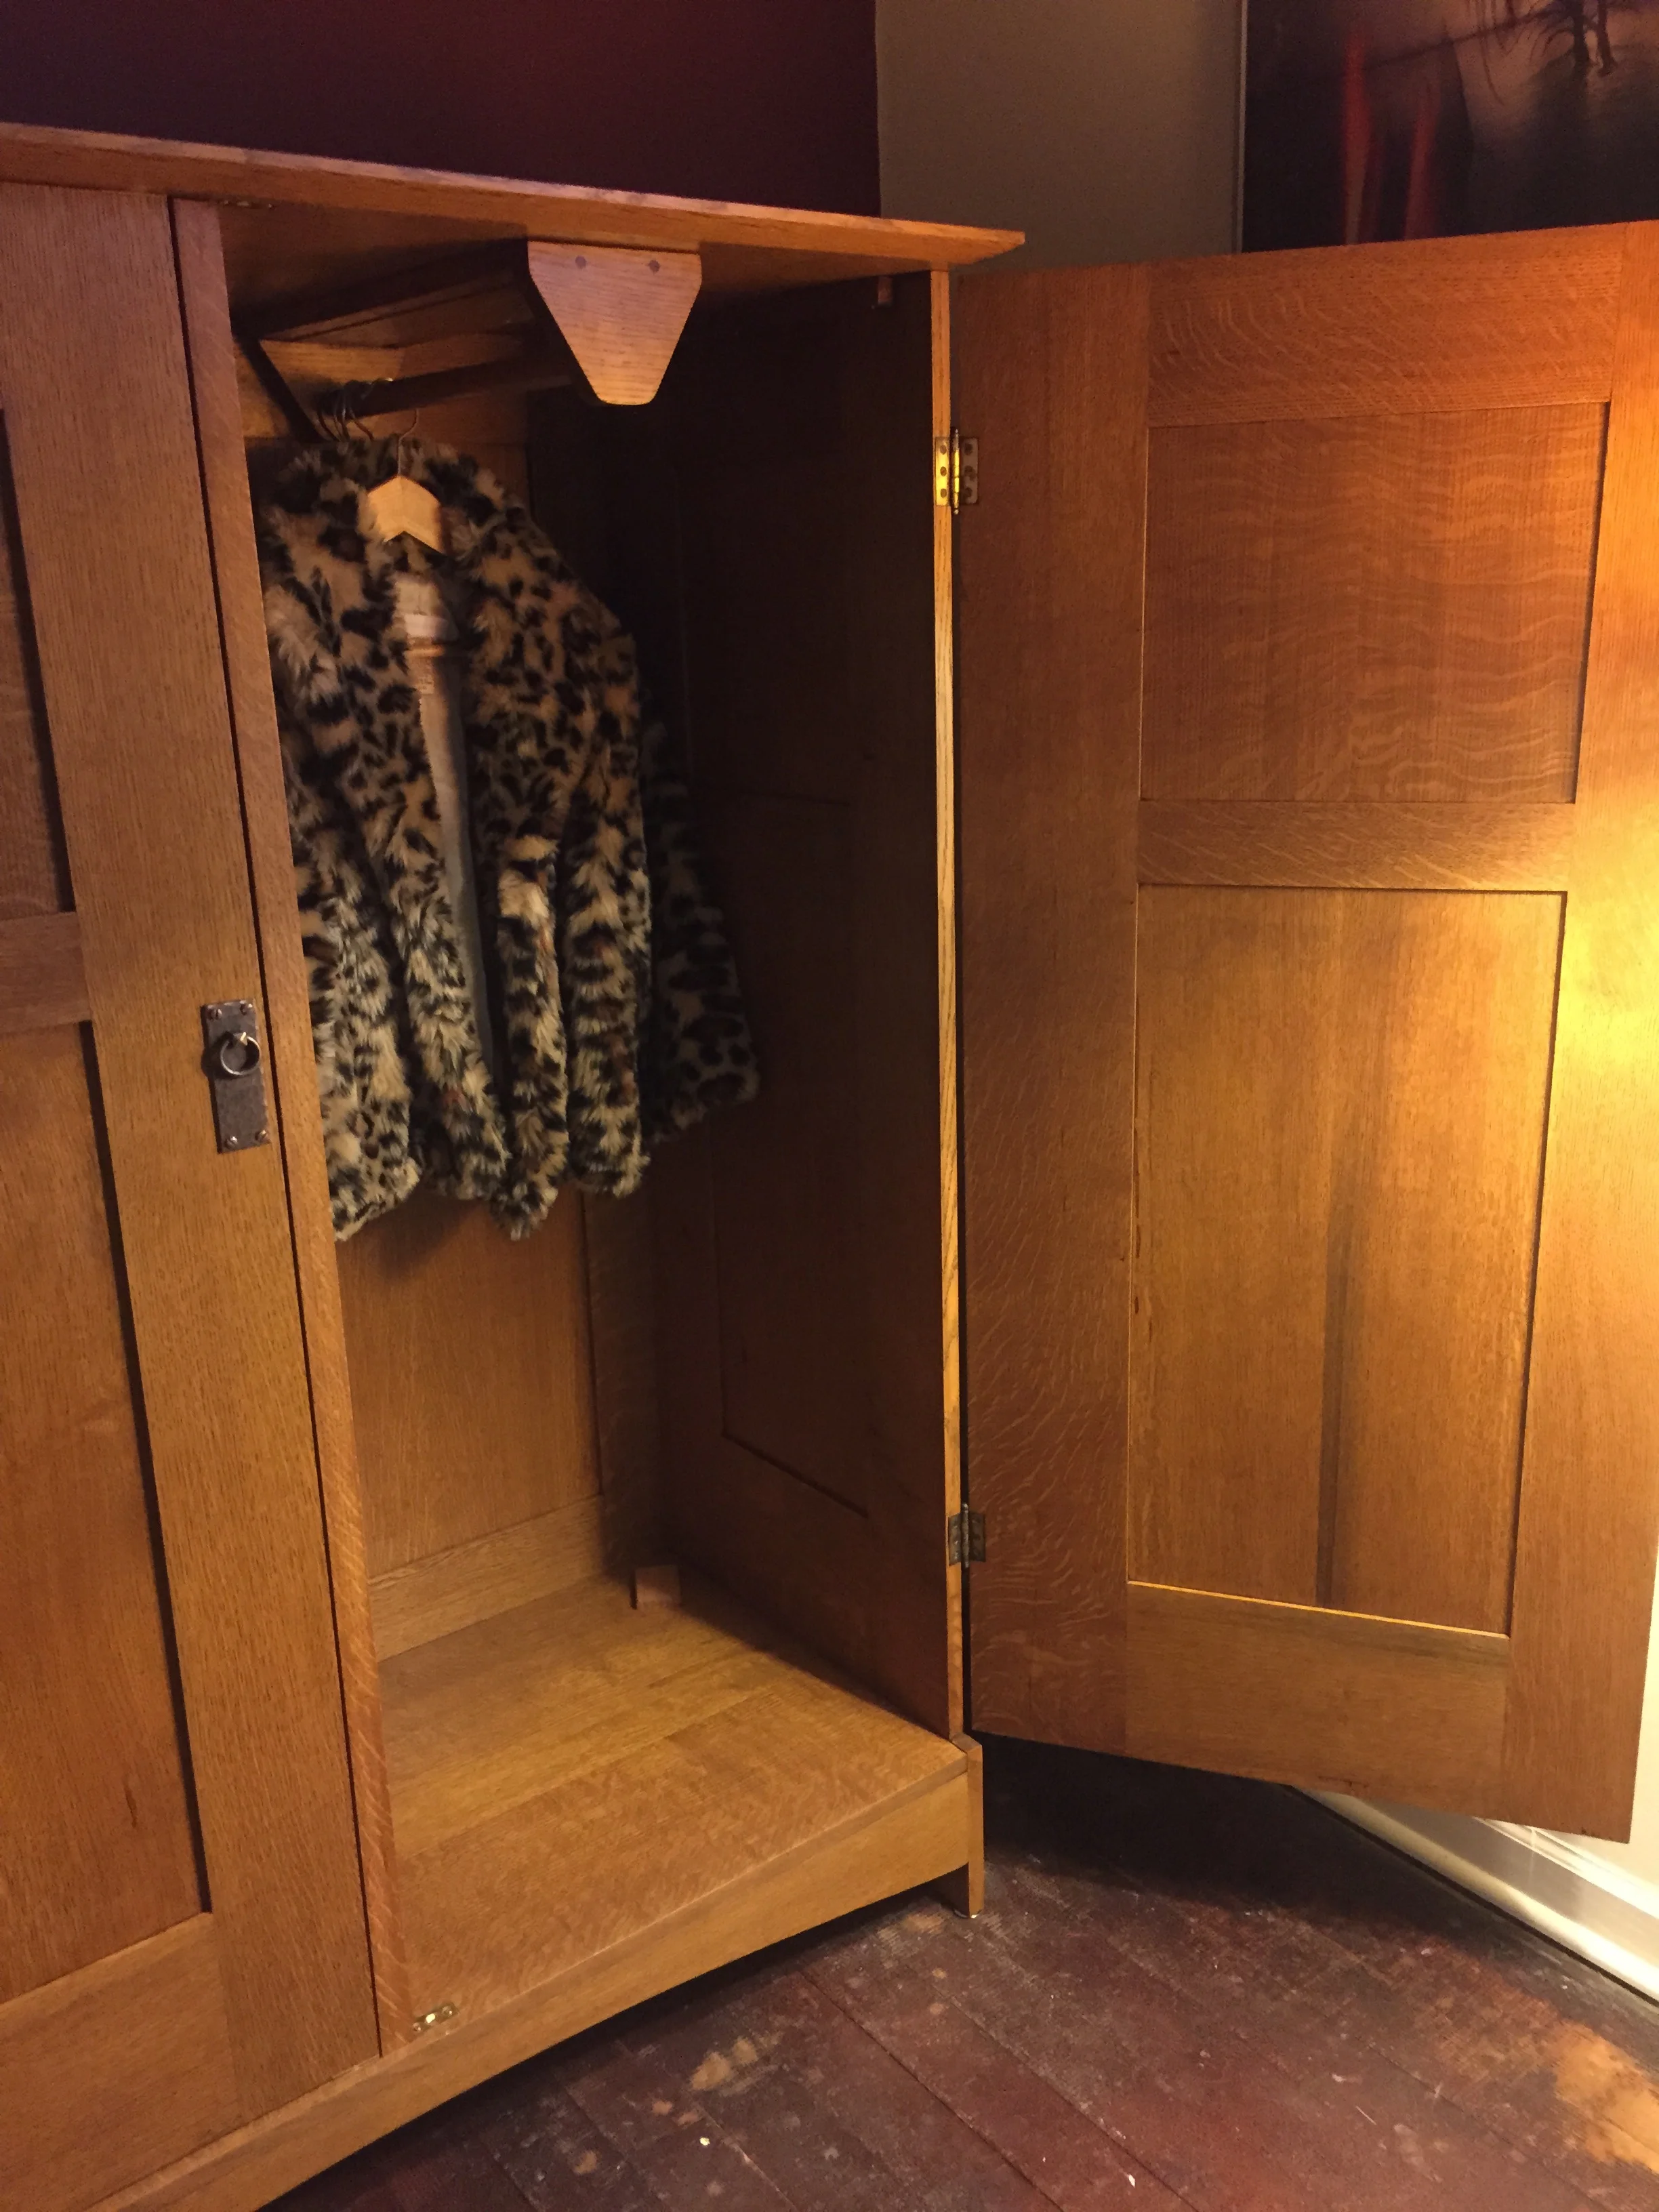
I also fit the pulls, and the ball catches for the top and bottom of each door to help hold them closed. The ball catch part was not in the original plans, and there was no mention or guidance on how to hold the doors closed. I thought of several solutions, but top and bottom ball catches seemed like the most subtle and elegant solution.

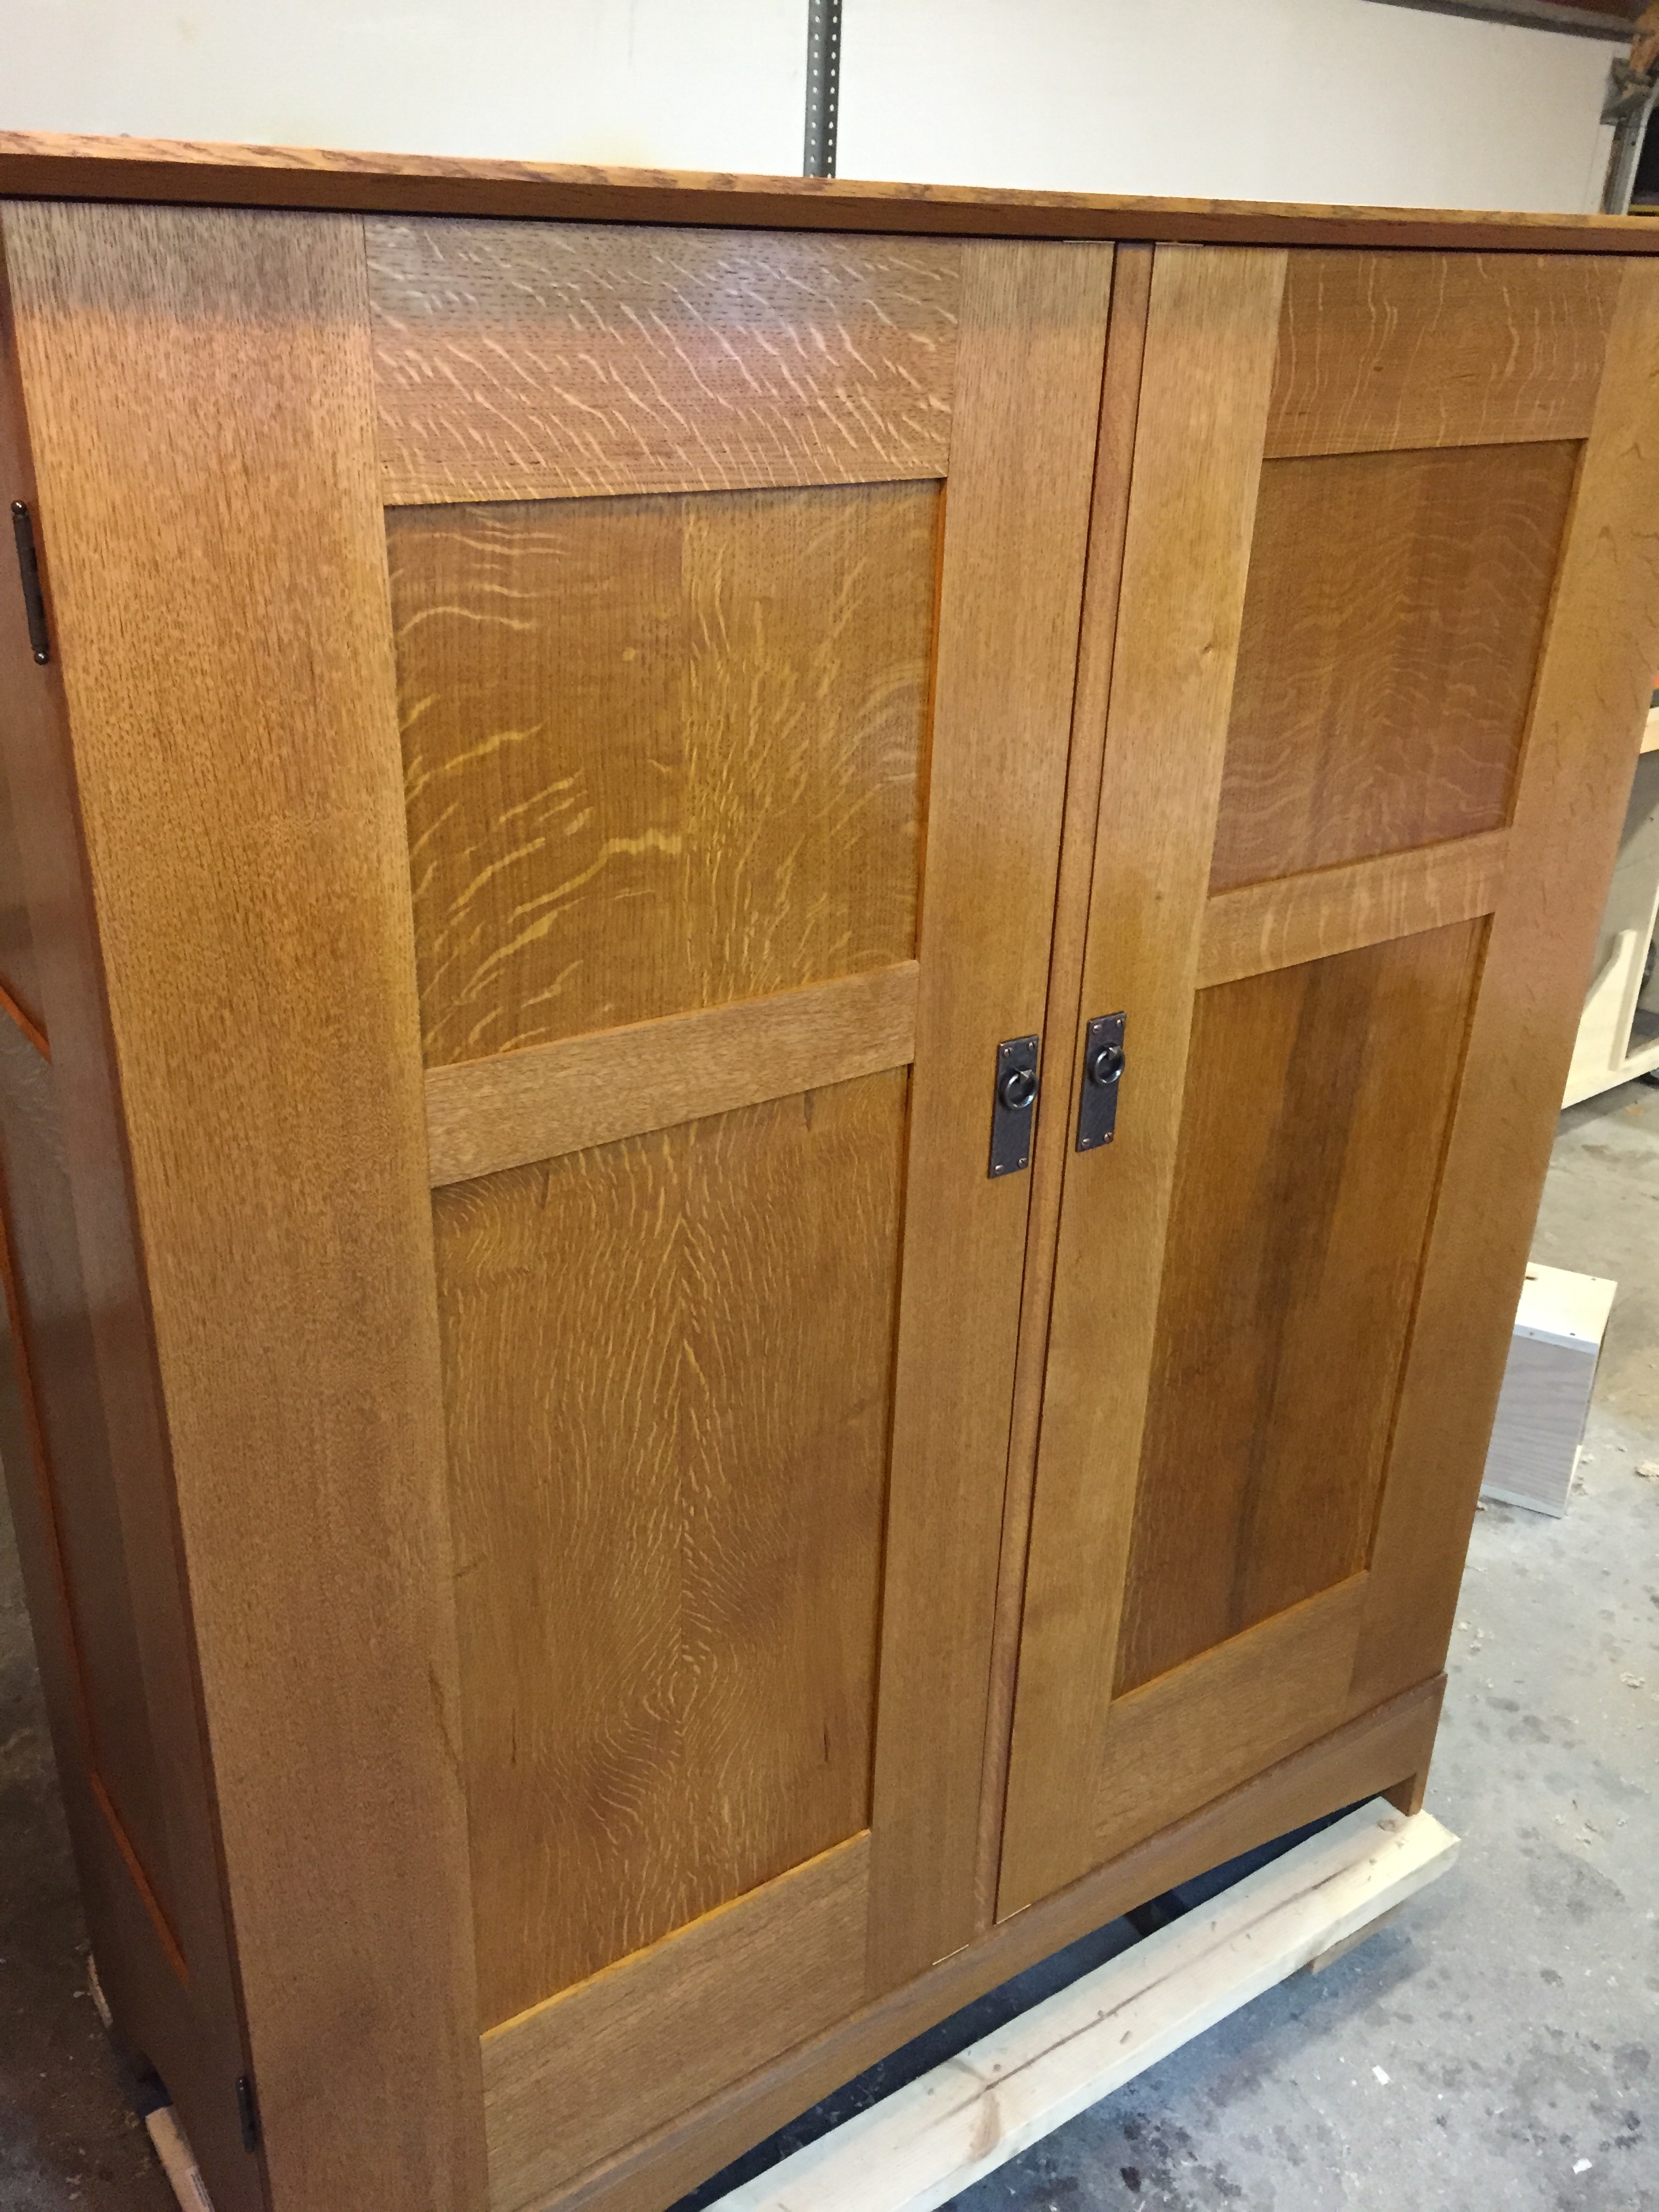
And, then back to finishing, again (that's four times!), getting the rails and stiles of the doors done. And then... wow, it was all built! I went over all the finish with any shellac touch ups that were needed, just using a shellac rag-ball. When dry, I went over the whole piece, inside and out, with dark paste wax, applied with 0000 steel wool, then buffed out with cotton rags.

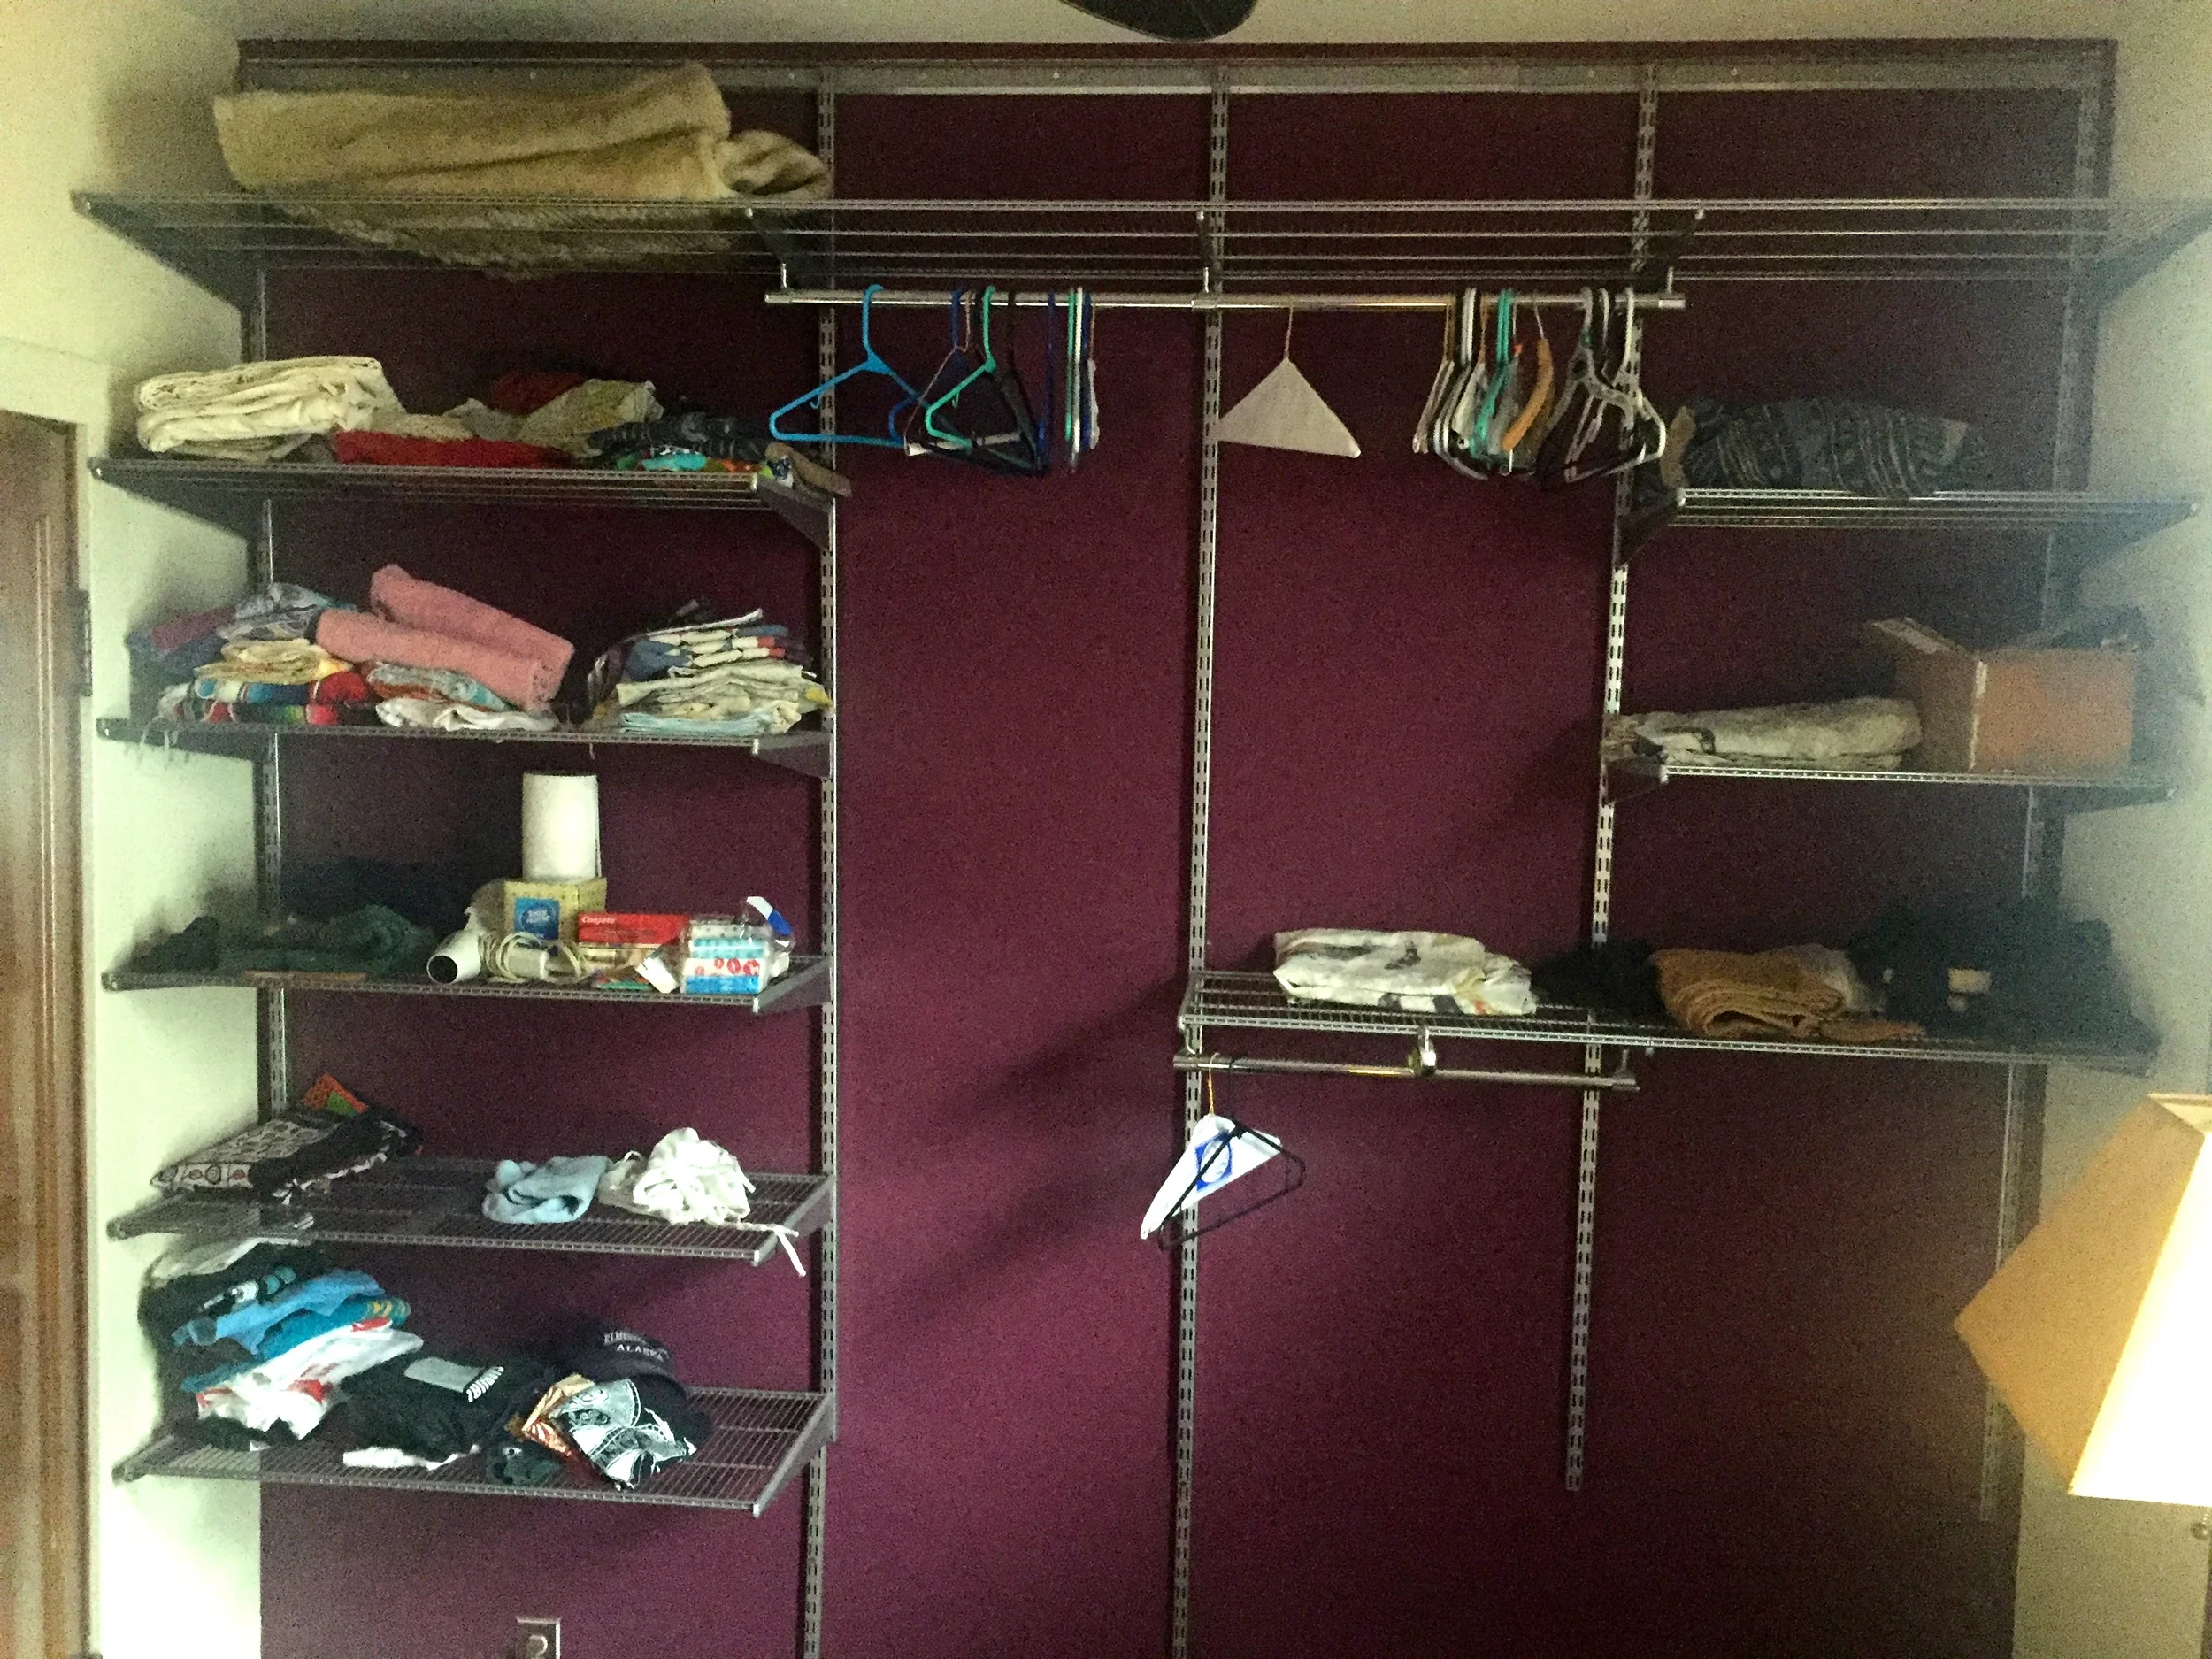
Carrying the piece into our first floor bedroom was a lot work, as even with the doors and drawers removed, it was heavy. I can only imagine how much more heavy it would have been if I'd used full depth drawer dividers. When it was finally in place, I could at last step back, and take it in. It really works for the room, and is a huge improvement over the open, metal shelf system it replaced. As mentioned before, the legs needed a little shimming both to get it level to the eye, and to make sure the doors fit as intended.

Now that is is done, a full confession: this took about one year from start to finish. There were many interruptions along the way, many of those were other projects (that I'll be posting about soon!), some were just the normal flow of other things in my life. The back-and-forth between doing joinery, then switching to doing finishing, was tedious, and I think slowed things down a lot. While I'm very pleased with the look of the solid panels, that added quite a lot of time to this build, and was probably the main reason it took so long to complete. The size was a factor too: there's a lot of lumber in this piece! Also, having to work on other projects while juggling around the various parts and piece of this for a year was annoying. I really do like to work on one thing at a time, and get it done, out of the way, and start something new with a clean and open shop. So, hopefully, I'll avoid this type of situation again. 

But I'm proud of this piece: its one of the biggest I've ever attempted, and its just plain beautiful. I love having this in my house. Seeing it in place, along with the other pieces I've built, fills me with a certain serenity and generates genuine feelings of satisfaction and accomplishment. There's noting like making a beautiful and useful object that I hopefully will be able to enjoy to the end of my days. I guess that's why I do it.

Thank you for following along.

Wardrobe, Part 4

When I finally was able to return to the wardrobe build, it was time to square off the glued up panels for the sides & back, and cut the bottom and top to size as well. On the side panels, I also cut the arch that forms the feet of the cabinet. But before I could assemble it, I had to go back to finishing it again. If you recall, the panels were finished, but the rails and stiles were not. Instead of doing assembly first, then finishing them in place, it seemed easier to finish them as separate pieces now.

That meant taping off the panels, and then applying the dye and shellac to the rails and stiles, also avoiding the glue surfaces. Yup, you can it hear it in my (typing) voice - that was tedious. But again, the result was great, and FINALLY, assembly could proceed.

The assembly finally revealed the true size of this thing - big. It took quite a few clamps. The bottom and top were attached using screws to cleats, and the arched stretchers in the front and back were attached with pocket screws.

Here's the result, with the center divider set in place and braced temporarily.

The assembly was placed on a wheeled dolly so I could scoot it around my shop as needed, and this proved really handy. 

I could now contemplate the remaining build: drawer dividers, the doors, hardware, and the sliding clothes hanger. One thing left out at me when looking at the drawer dividers: this is going to heavy as well as big. The plans show the six drawer dividers as being made of solid stock, from the front to the back for the drawer side. That's about six more pieces of 22"22" 3/4" oak, in addition to the solid oak center divider. As the drawers are going to slide on side runners, solid full depth dividers seemed like overkill. So I re-designed them to be just 4" deep dividers. This made a lot more sense to me. The drawer dividers were attached to the side with pocket screws.

I took this moment to make the sliding clothes hanger for the right side. This was a lot of fun, for some reason.

Next up: drawers, doors, home stretch. 

Wardrobe, Part 3

Resuming this build series from Part 2, I'd just finished dry filling the side & back panels. As I was fitting the back panel, the reality of its size became apparent... this was going to be a pretty big build...

Thankfully, the fit went well. One of the things you might notice in the above photos is a little bit of discoloration on the stiles. That is just the tannins in the oak reacting to the environment. It is a "flaw" unless I was doing some very dark coloration to the wood. But my planed finish was a sort of medium, and the discoloration would be visible. But I decided to work with it anyway, and even with some other "less than perfect" material, because I wanted to approach this from a practical "we need a wardrobe" perspective, rather than a "this should be in a gallery or museum" standard. I want to embrace that approach more in my work - making good furniture with great craftsmanship, but not getting obsessive about getting a glass finish on the underside the feet. Any examination of fantastic pieces in museums, historic homes, etc, will show you that is the approach craftsmen of yore took - the backs of cases, the underside of drawers are usually raw and unfinished. Our modern "every single unseen surface should be gallery perfect" approach is over the top, and I hope to remain practical in that light.

To that end, I put the slightly "off" pieces and parts in places that would rarely, if ever be seen, and have no effect on the functionality of the piece. Here's an example of the pieces I used for the bottom panel; there was a nail removal chunk (done by the sawyers) missing from the middle of the glued up panel. Instead of ditching the material, I did a patch repair, and that area is on the underside of the bottom of the wardrobe. Good luck lifting up this huge, fully loaded wardrobe and seeing that.

Next, I did more panels, this time the two large doors. The same as the sides and back. I saved the prettiest pieces and panels for the doors - the most visible part of the piece.

With all the panels dry fit, it was time to get into the PITA part of doing solid panels vs plywood panels (discussed in Part 1) - finishing the panels before assembly (as well as the inner edges of the frames). I got all the parts labeled, knocked apart, and ready to go.

twelve panels

a zillion rails & stiles

The finishing process was some light shade of brown water based dye, followed by several coats of amber shellac. I had to come up with a way to store the twelve panels as they dried, as well as the zillion rails and stiles. The rails and stiles just ended up on my "assembly table" (aka, my table saw + outfeed table), and the panels ended up in this dowels + 2x4 rack I improvised. The rack worked well, as I shellacked one face at a time, left it it dry, then did the other face.

dowels and 2x4 drying rack

inner edges of the rails & stiles being finished

This took a while to do, and with some real life interruptions, longer than I liked. But after the finishing was done, glue up & assembly went fine. And that's how the wardrobe stayed, for a long time, as other projects cut in line ahead of it. More in part 4...

wardrobe pieces (doors, sides, back, top, bottom, and inner divider) taking up shop space - I ended up stumbling over them and moving them back and forth, working around them, for the next several months. 

Resuming Shortly

It's been a few months since the blog was updated. In that time, I've been woodworking a lot, with many completed projects, some new tools and new techniques to report on. Stay tunes, and I'll start getting those posted.

Not a Myth - Wood Moves

This weekend, humidity in the Chicago area was hovering around 94%, and its been between pretty high for the whole month of August. With extremes like these, it's been a great change to see the effect of wood movement on my past projects, and hopefully learn to better appreciate this unstoppable force.

One of my biggest, and earliest woodworking projects was to build a full set of kitchen cabinets when we re-did our kitchen. The design has 33 cabinet doors, 17 drawers, and face frames, all made from flat sawn red oak (and then the standard plywood boxes and drawer bodies). As this was early in my woodworking journey, I didn't have the level of appreciation for choosing proper grain direction that I do now. The frame and panel doors were made with plywood panels, a few with glass, and stub tenons & grooves (as opposed to full mortise & tenon joinery). The potential was high for them to move over time. But so far, I've been lucky: just a few of the 33 doors have moved a bit. Let's look at them...

This first photo shows the bottom inside edge of this door getting swollen, to the point where some force is needed to close it. It's also tight on the bottom edge. The door facing it is fine, however.

swollen at the bottom, making it hard to close

This pair of doors have also expanded towards each other, making for a tight fit. If I close the tow of them together, they close tightly. If one is closed, I can't close the other.

tight here

can't close one at a time

This door has twisted, so that the lower corner is "in" about 1/4" inch.

do the twist

And the rest of the doors and drawers are fine. 4 out of 33 is not bad for blindly picking wood without careful attention to grain. Of these 4, now might be a good time (at the point of maximum expansion) to trim the 3 "swollen" ones down to where they are just barely working smoothly again, knowing that they'll be fine as it shrinks, and for the next time it gets humid again. Now is the time to deal with this, as It's impossible to guess how much of a gap to leave in the dry seasons. For the one door that's twisted, I have to either live with it, or re-make it, this time being conscientious of the material.

Also in the kitchen, we have some birch laminated slabs for the counter tops, and two of them meet at a right angle. In the winter, there is as much as a 3/16" gap at this joint. But now, they are tight. They're only butted up to each other, and attached to the base cabinets with clips, allowing them to move.

that's tight!

Last year, I built a window bench / banquette, with batten supported lid/seats. These were fitting perfectly then, but looking at them today, the tops have moved about 1/4", and now stick out proud from the "side" pieces, who's grain is oriented 90° from the lids...

sticking out

The obvious fix here is to remove the lids from the piano hinges, shave some length off the back (where the lack of finish will not be seen) and re-attach them. I think I'll have to be careful not to cut them perfectly flush now, as they will shrink again, and be uneven the other direction. I'll have to opt for a happy medium, somewhere in between.

Here's an example of how good design can compensate wood movement. On the mission pedestal table I built last year, the wide tops have indeed expanded. But the movement is only visible where the the edges of the skirts are pushed apart, on the underside edge of the table. The table top still looks good, with the two halves coming together tightly. If I had built the top and skirt to fit tightly during of high humidity, the opposite might have happened during the dry season: the skirt pieces would have been flush, and the gap between the two halves would have opened, which would have been ugly.

a gap, but down where only furniture nerds will see it

The lesson from all this is not to think wood movement is theoretical, or can't happen to you. It's not, it can, and it will. It's therefore a good idea to take the time to examine the things you've built, and take note of how well, or how poorly, your earlier designs have held up under the extremes of humidity, and build your future projects accordingly. I'll revisit this in the middle of winter when things are bone dry, and we'll compare how the piece have moved, looking at both the fixes and the pieces that I left alone. Fingers crossed. However, as we're talking about wood, there's never going to a perfect fit. The wood will move, and our furniture must move with it. Hopefully, joints won't crack, doors won't stick, and boards won't twist, but when (not if) they do, take it into account, and learn from it.