Not a Myth - Wood Moves

This weekend, humidity in the Chicago area was hovering around 94%, and its been between pretty high for the whole month of August. With extremes like these, it's been a great change to see the effect of wood movement on my past projects, and hopefully learn to better appreciate this unstoppable force.

One of my biggest, and earliest woodworking projects was to build a full set of kitchen cabinets when we re-did our kitchen. The design has 33 cabinet doors, 17 drawers, and face frames, all made from flat sawn red oak (and then the standard plywood boxes and drawer bodies). As this was early in my woodworking journey, I didn't have the level of appreciation for choosing proper grain direction that I do now. The frame and panel doors were made with plywood panels, a few with glass, and stub tenons & grooves (as opposed to full mortise & tenon joinery). The potential was high for them to move over time. But so far, I've been lucky: just a few of the 33 doors have moved a bit. Let's look at them...

This first photo shows the bottom inside edge of this door getting swollen, to the point where some force is needed to close it. It's also tight on the bottom edge. The door facing it is fine, however.

swollen at the bottom, making it hard to close

This pair of doors have also expanded towards each other, making for a tight fit. If I close the tow of them together, they close tightly. If one is closed, I can't close the other.

tight here

can't close one at a time

This door has twisted, so that the lower corner is "in" about 1/4" inch.

do the twist

And the rest of the doors and drawers are fine. 4 out of 33 is not bad for blindly picking wood without careful attention to grain. Of these 4, now might be a good time (at the point of maximum expansion) to trim the 3 "swollen" ones down to where they are just barely working smoothly again, knowing that they'll be fine as it shrinks, and for the next time it gets humid again. Now is the time to deal with this, as It's impossible to guess how much of a gap to leave in the dry seasons. For the one door that's twisted, I have to either live with it, or re-make it, this time being conscientious of the material.

Also in the kitchen, we have some birch laminated slabs for the counter tops, and two of them meet at a right angle. In the winter, there is as much as a 3/16" gap at this joint. But now, they are tight. They're only butted up to each other, and attached to the base cabinets with clips, allowing them to move.

that's tight!

Last year, I built a window bench / banquette, with batten supported lid/seats. These were fitting perfectly then, but looking at them today, the tops have moved about 1/4", and now stick out proud from the "side" pieces, who's grain is oriented 90° from the lids...

sticking out

The obvious fix here is to remove the lids from the piano hinges, shave some length off the back (where the lack of finish will not be seen) and re-attach them. I think I'll have to be careful not to cut them perfectly flush now, as they will shrink again, and be uneven the other direction. I'll have to opt for a happy medium, somewhere in between.

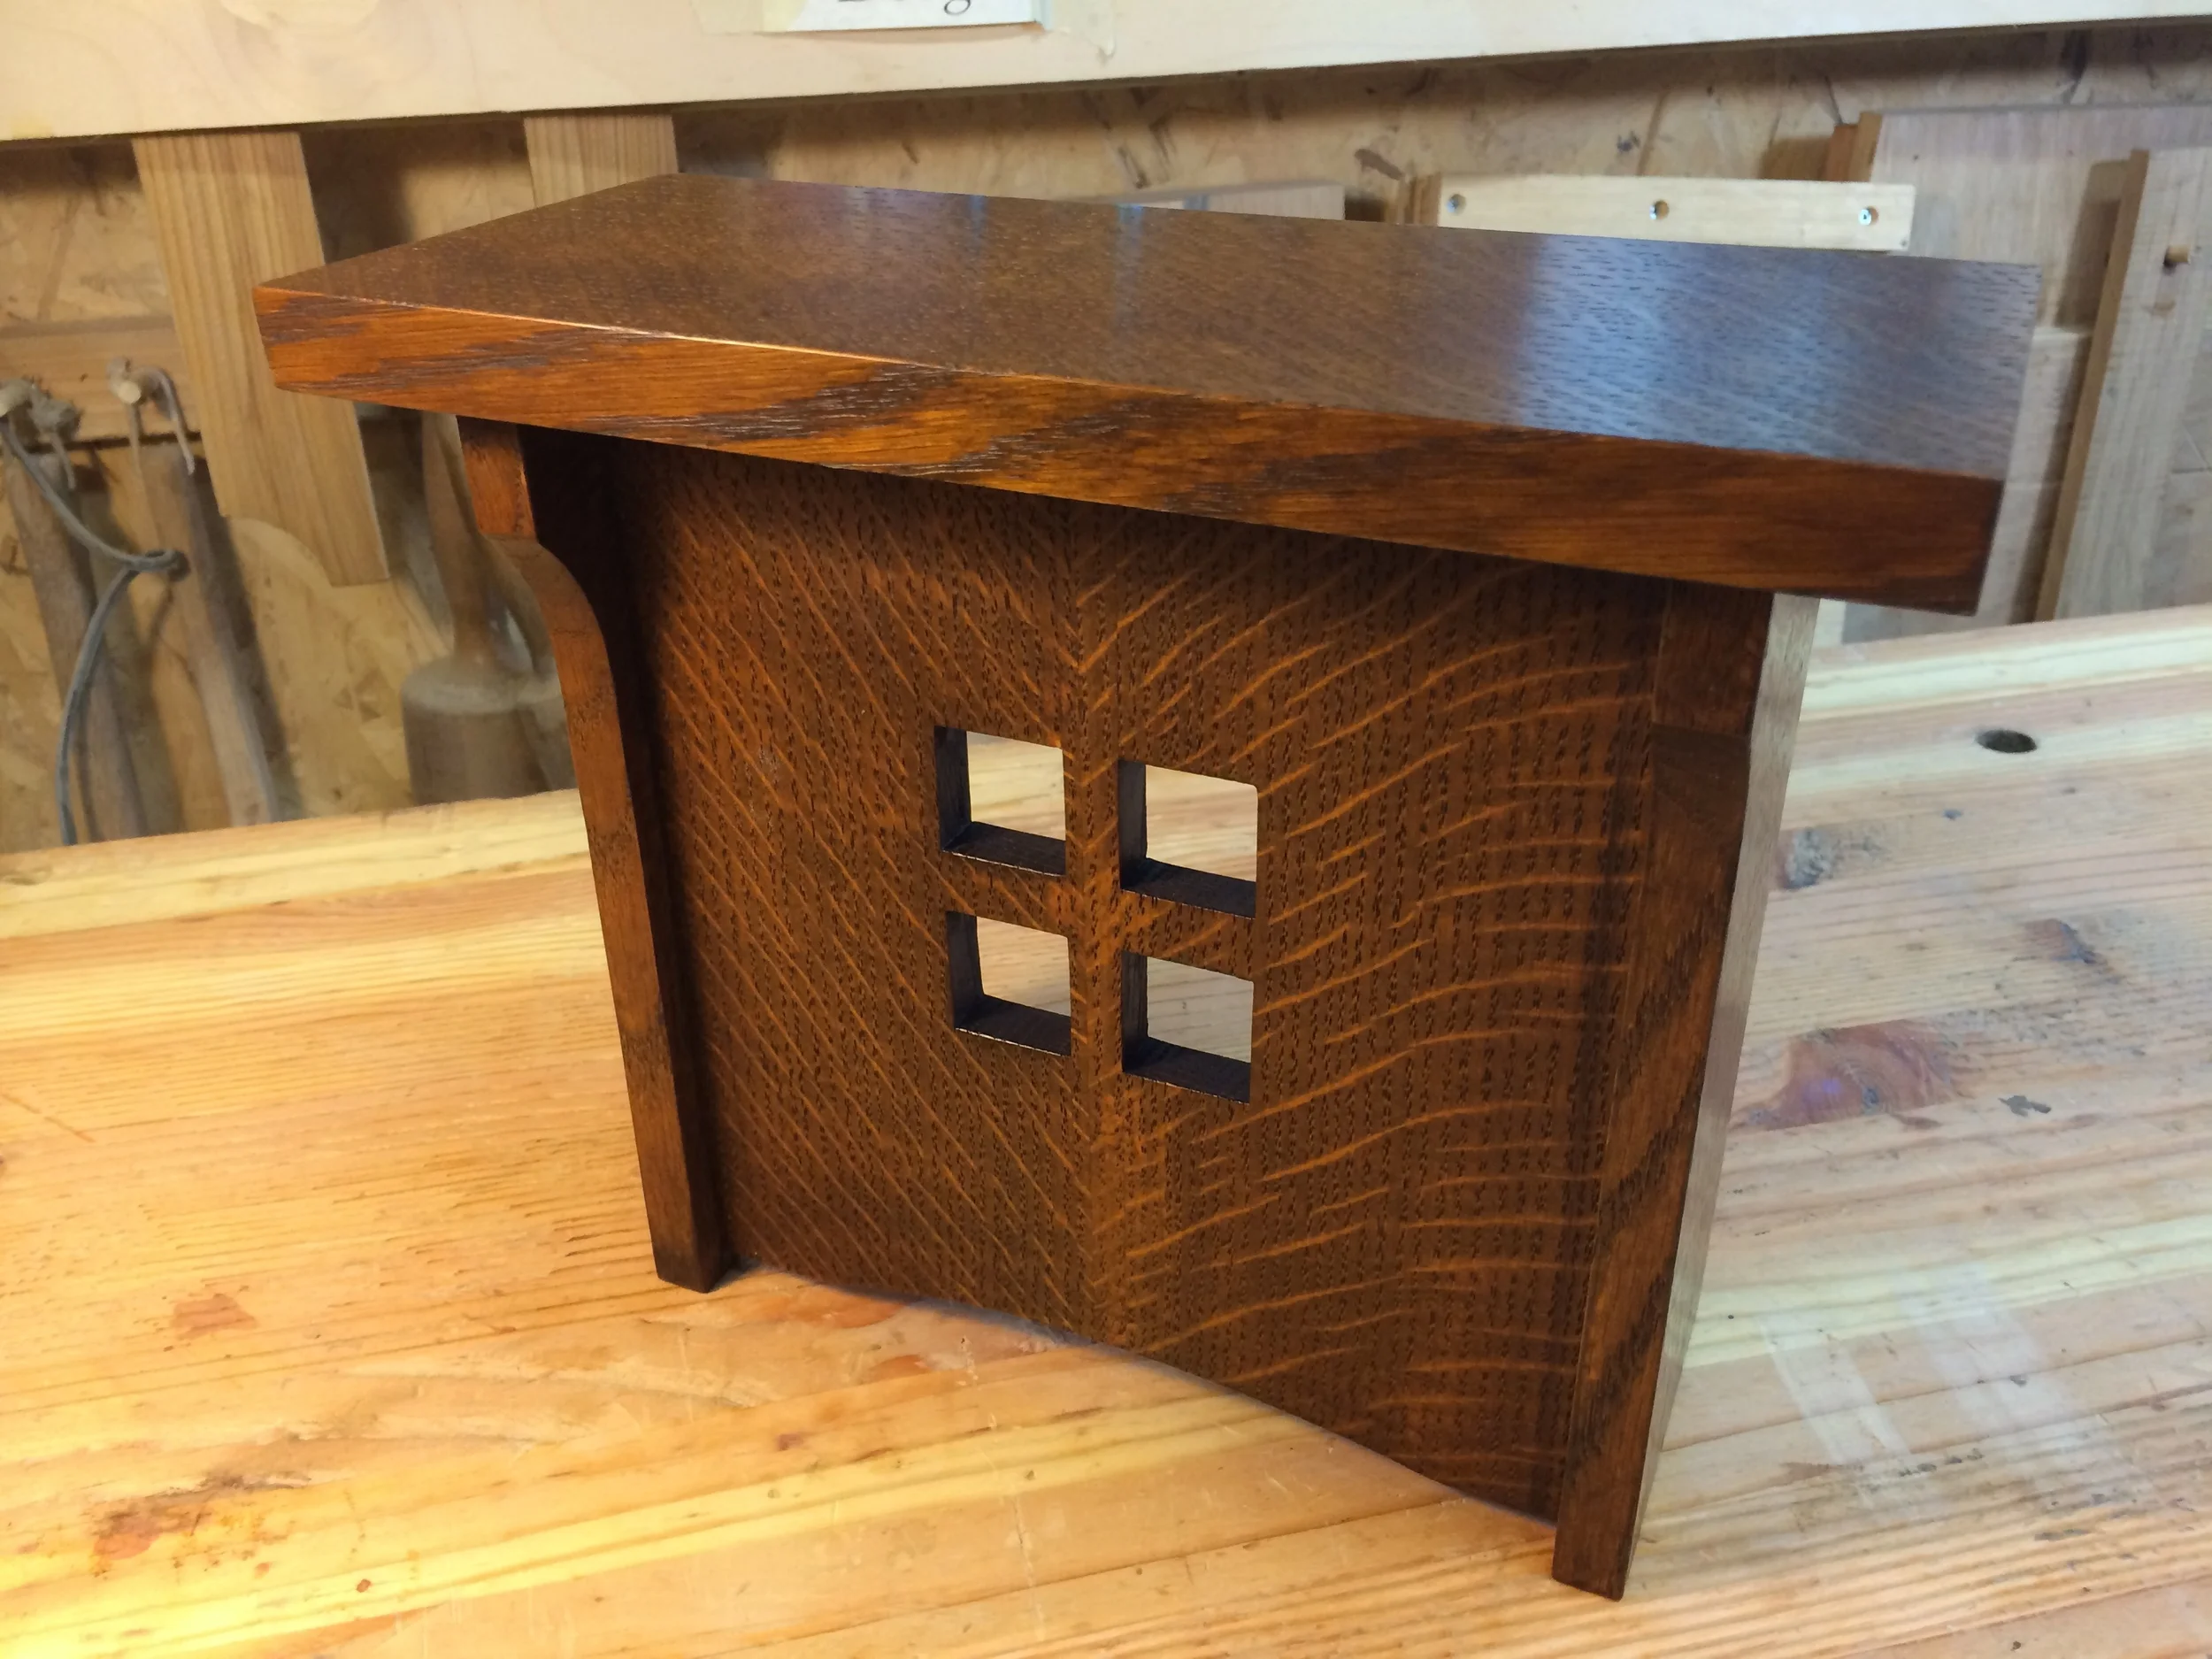
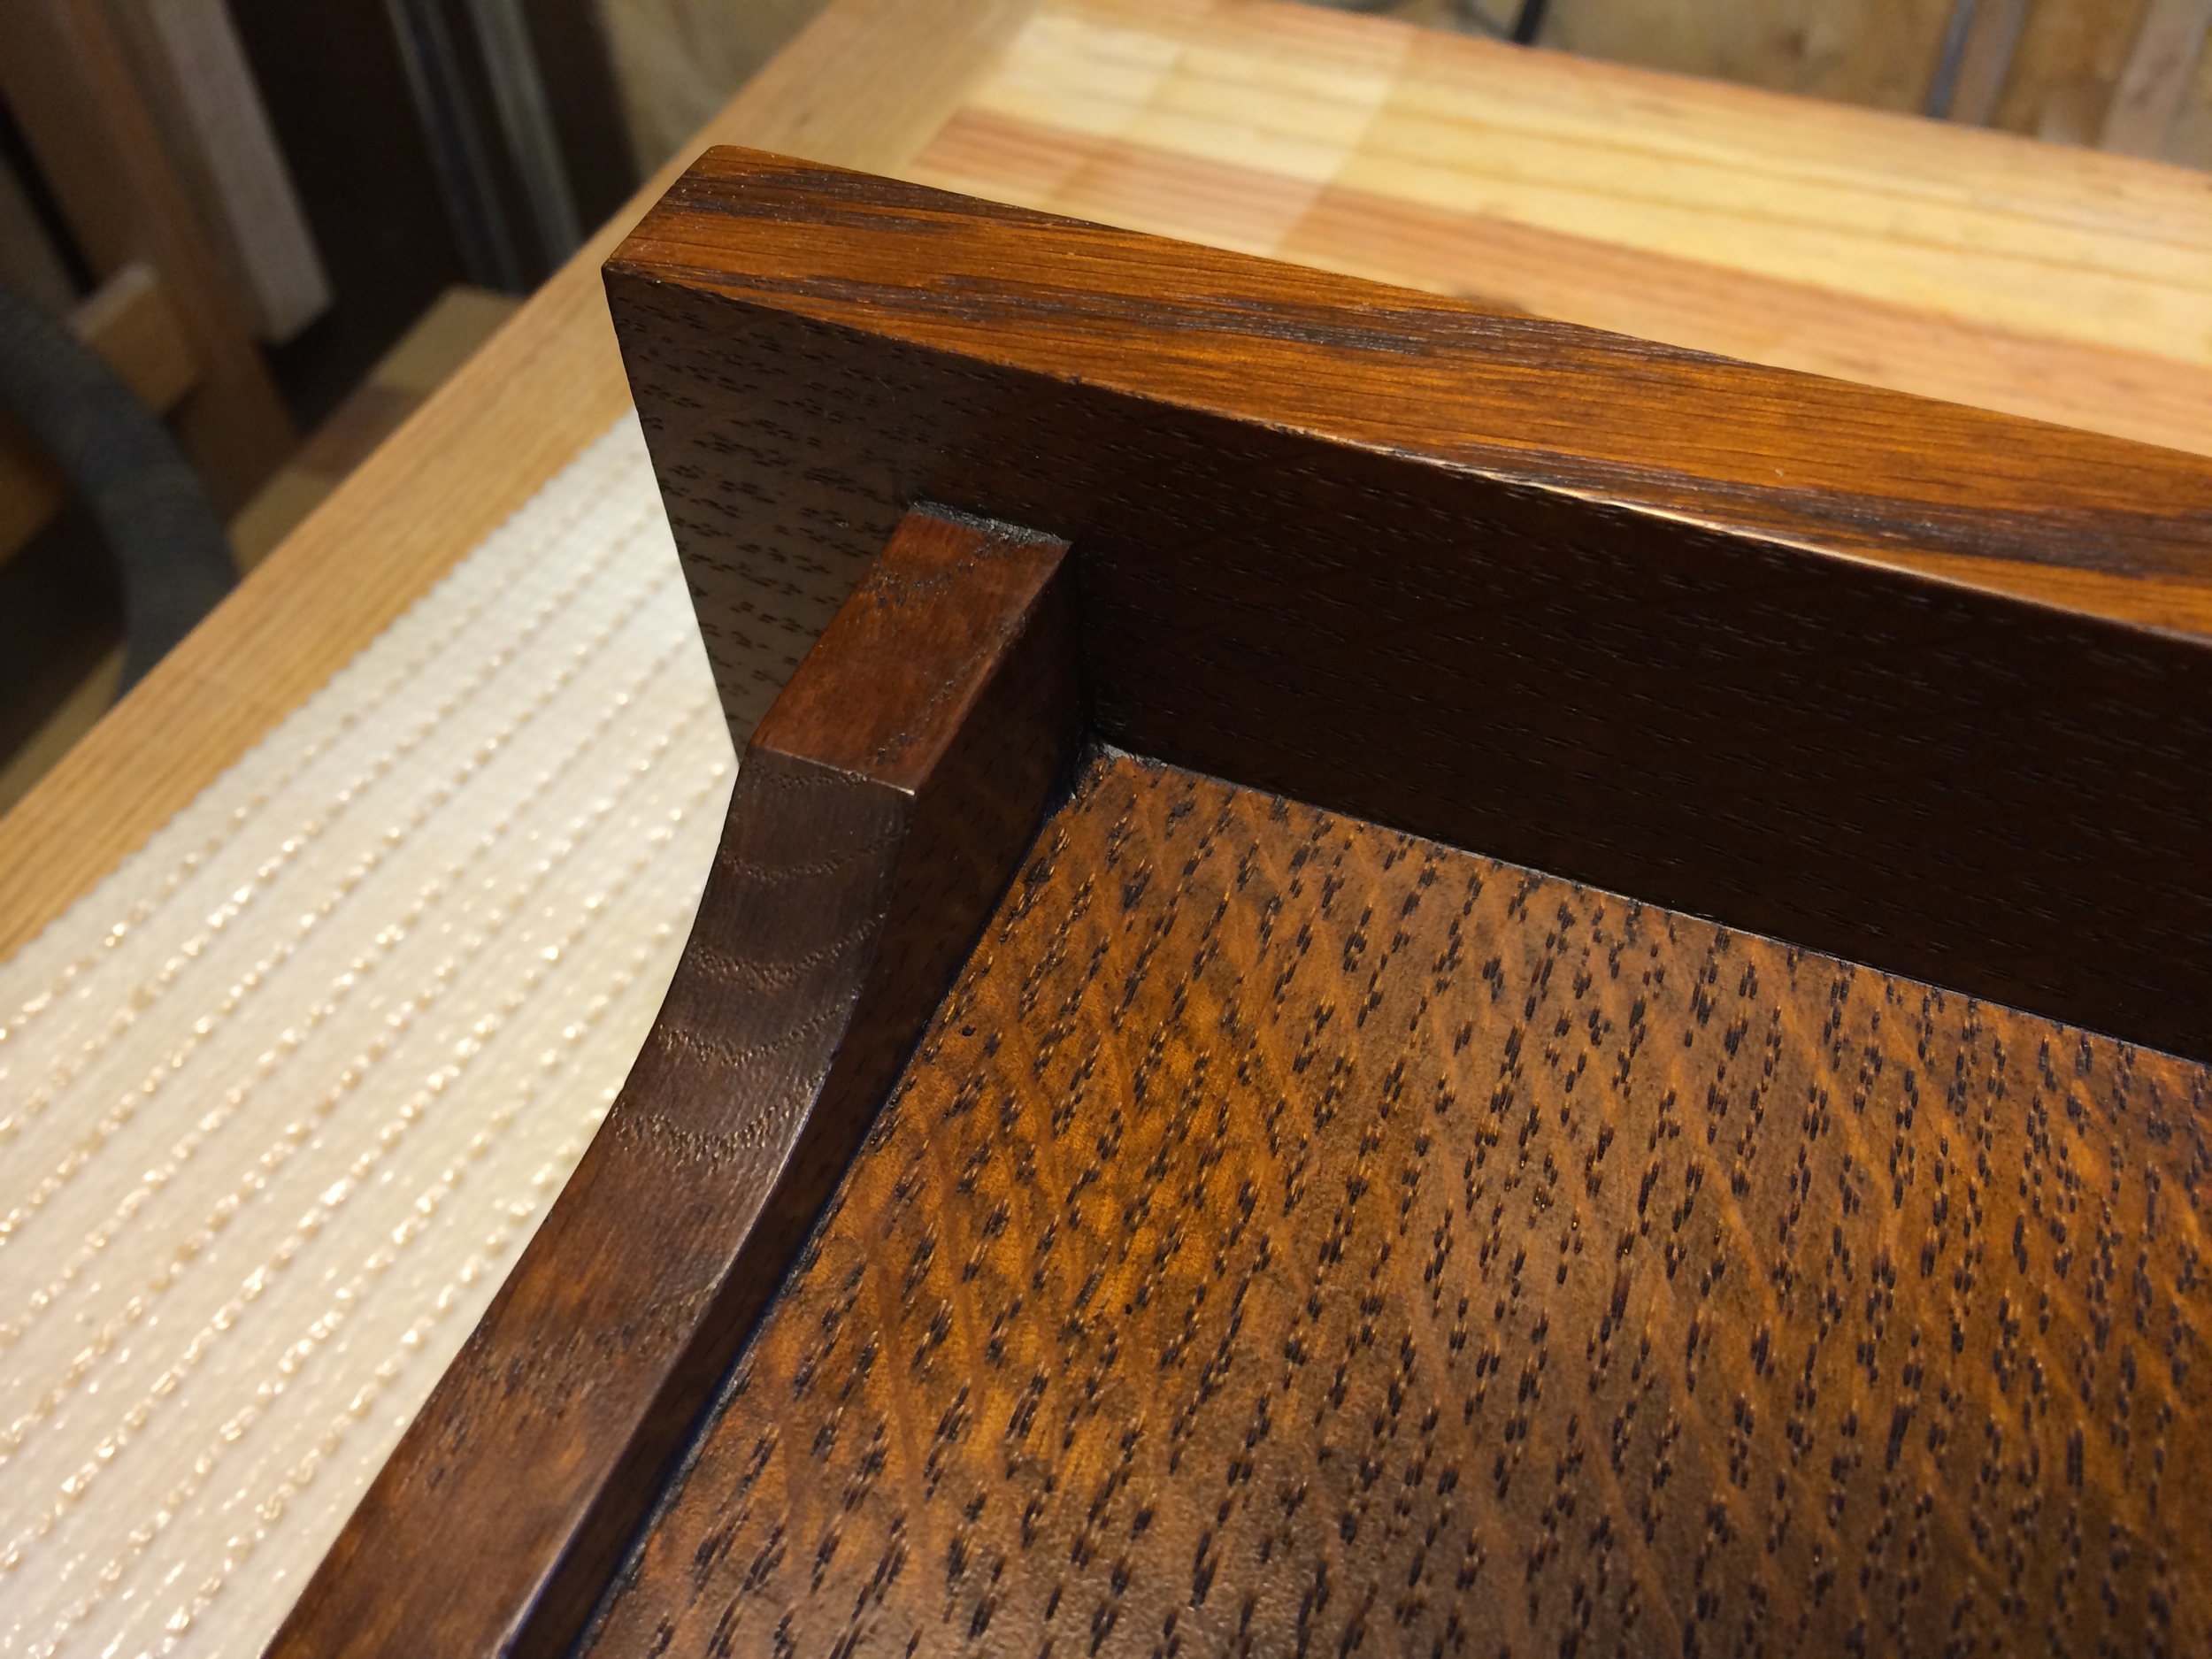
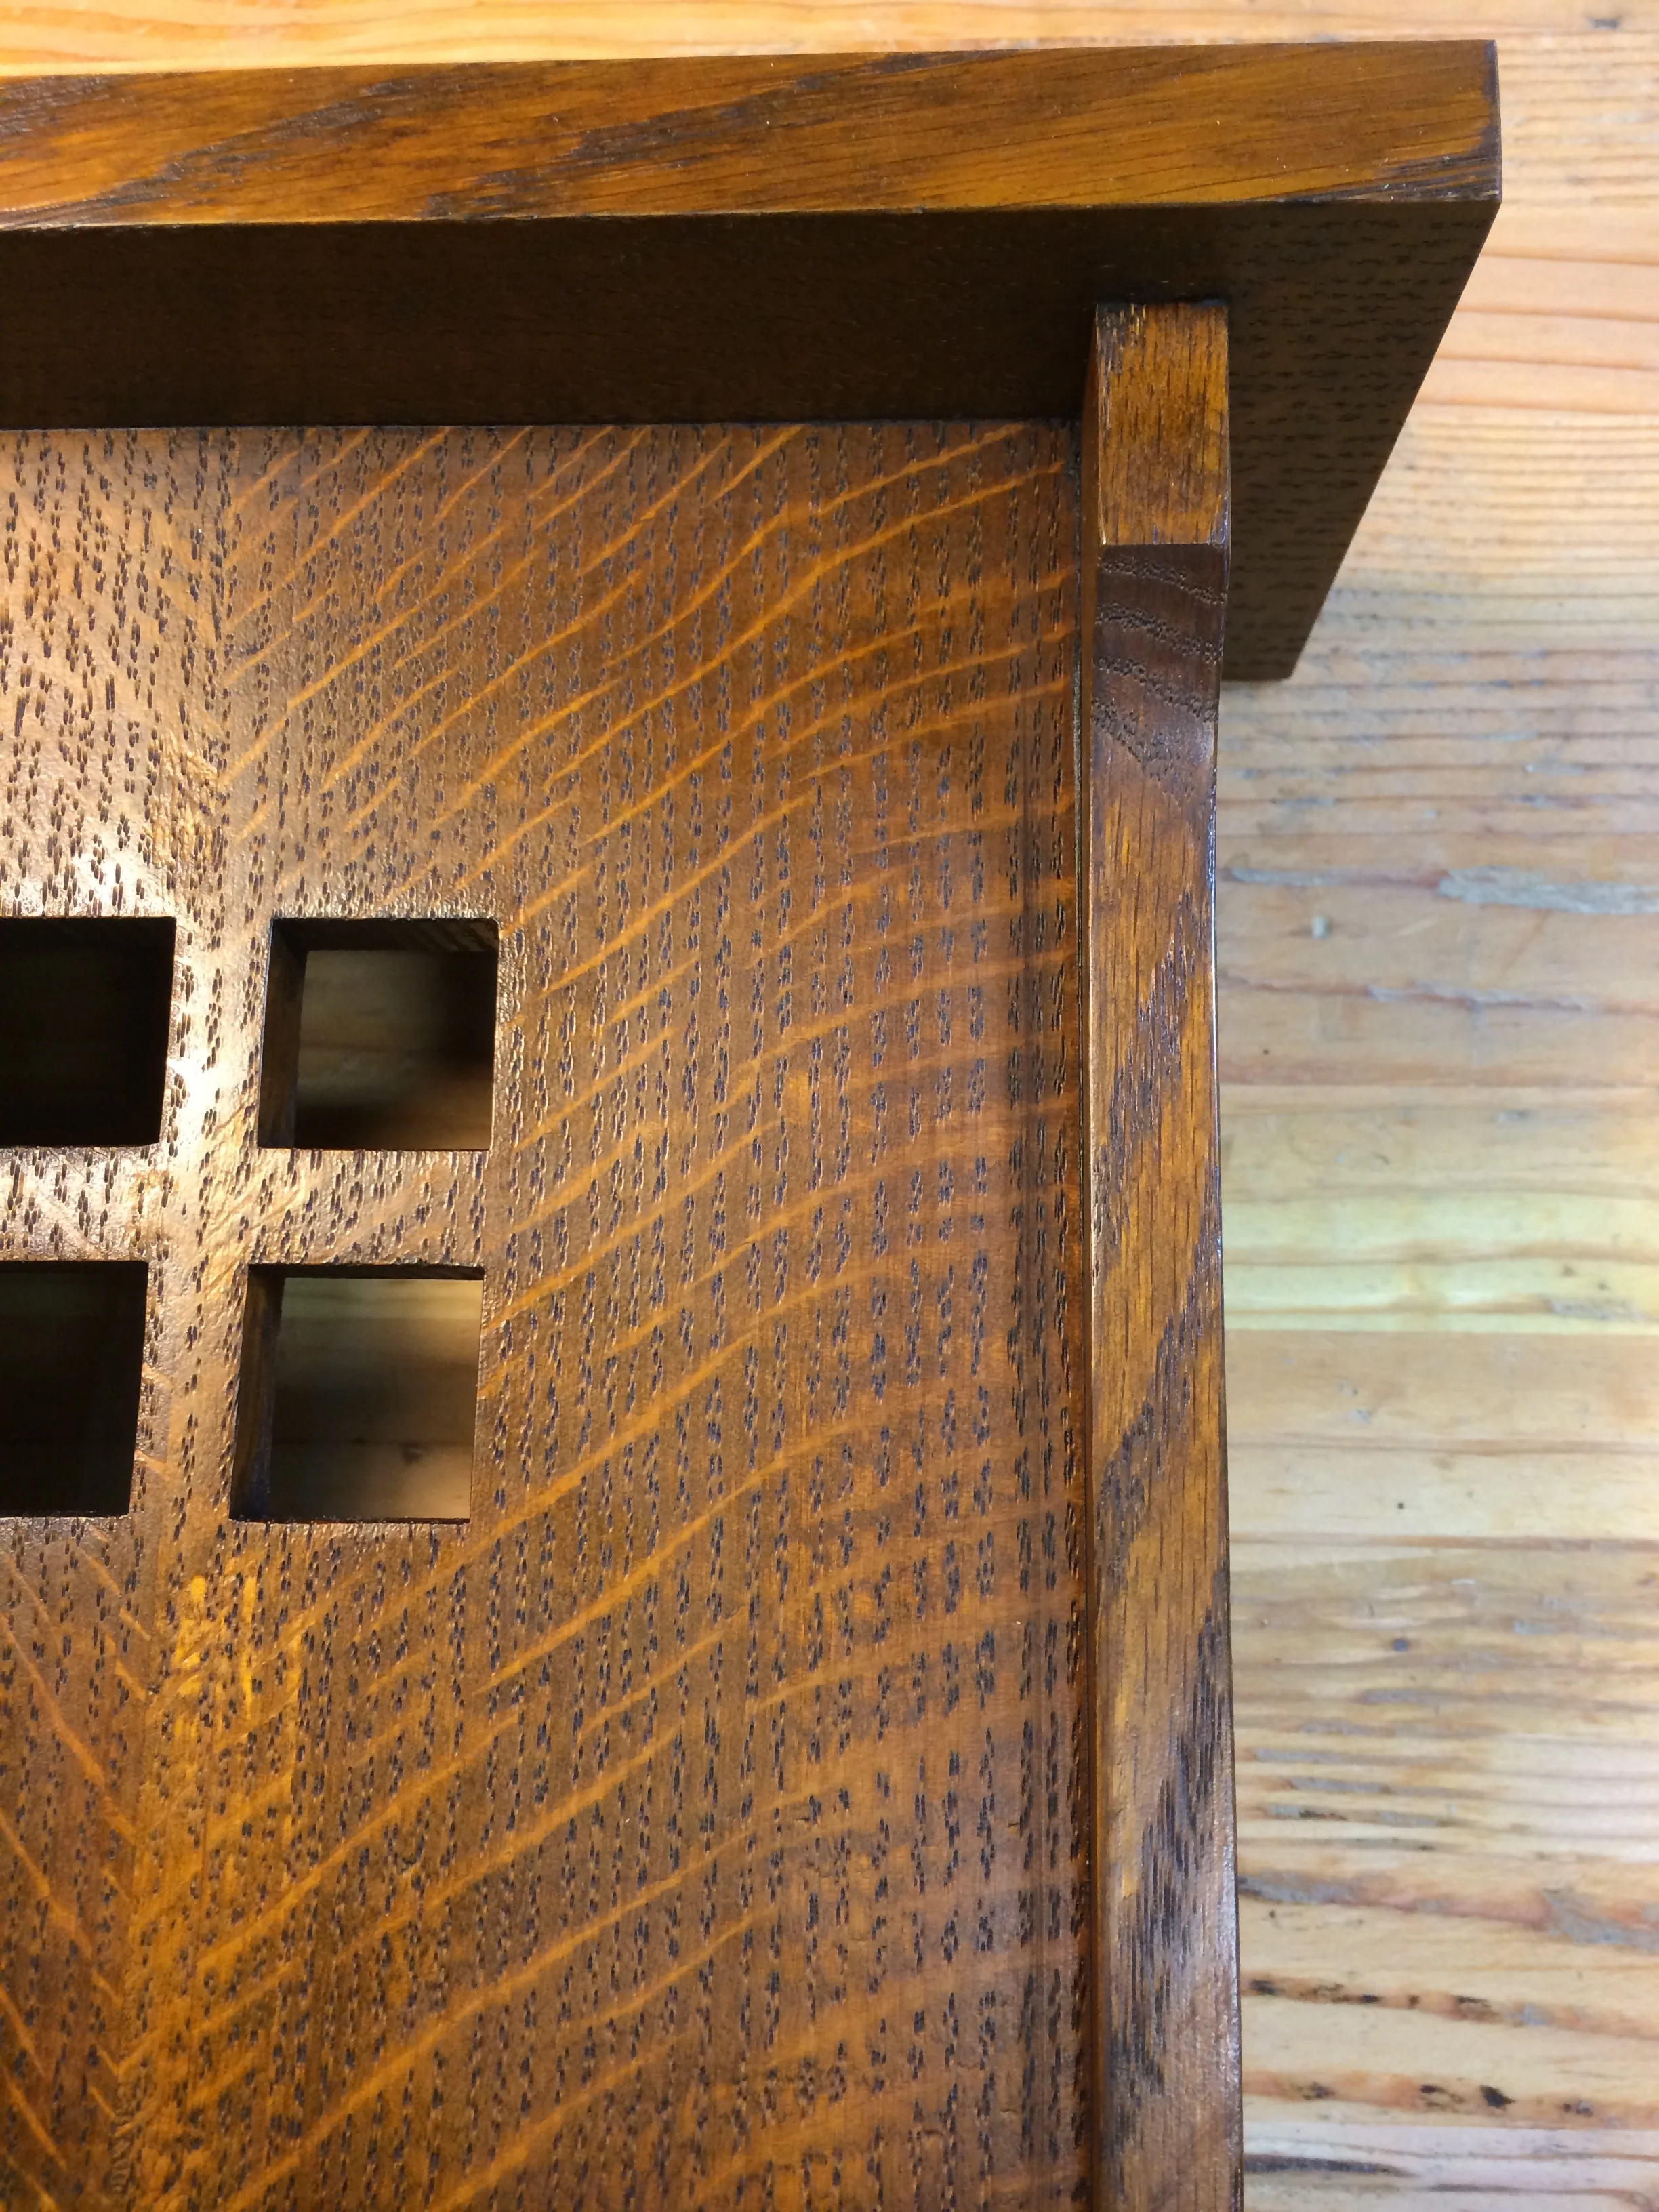
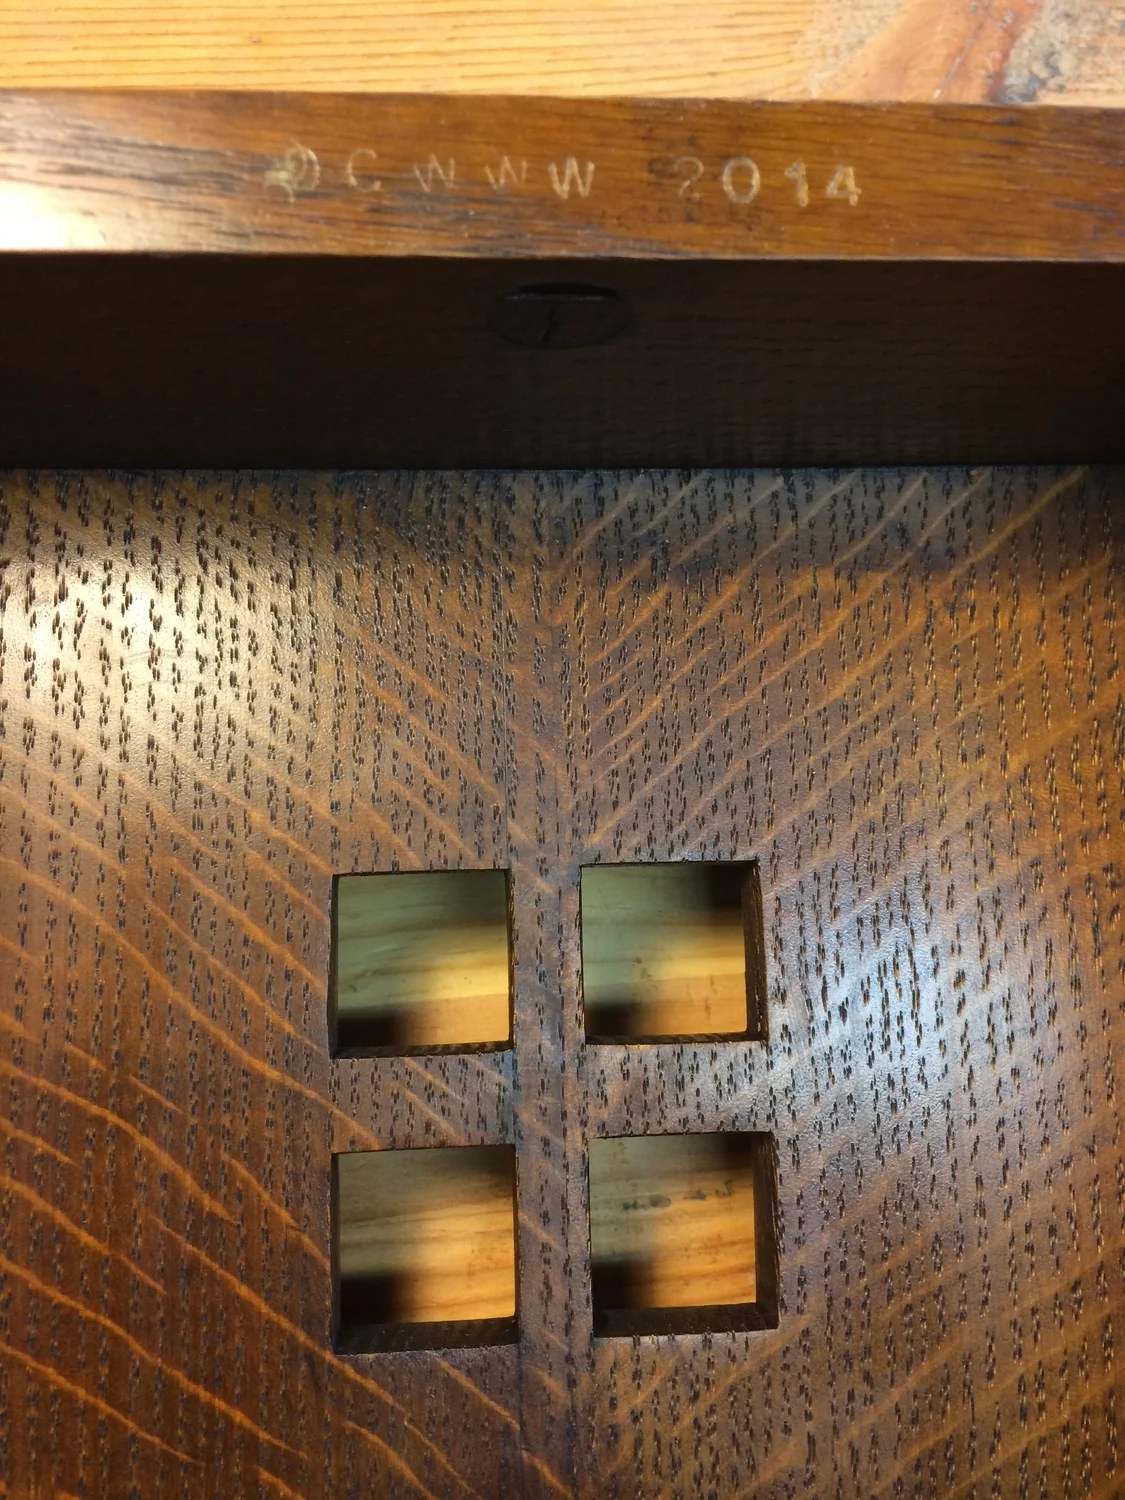
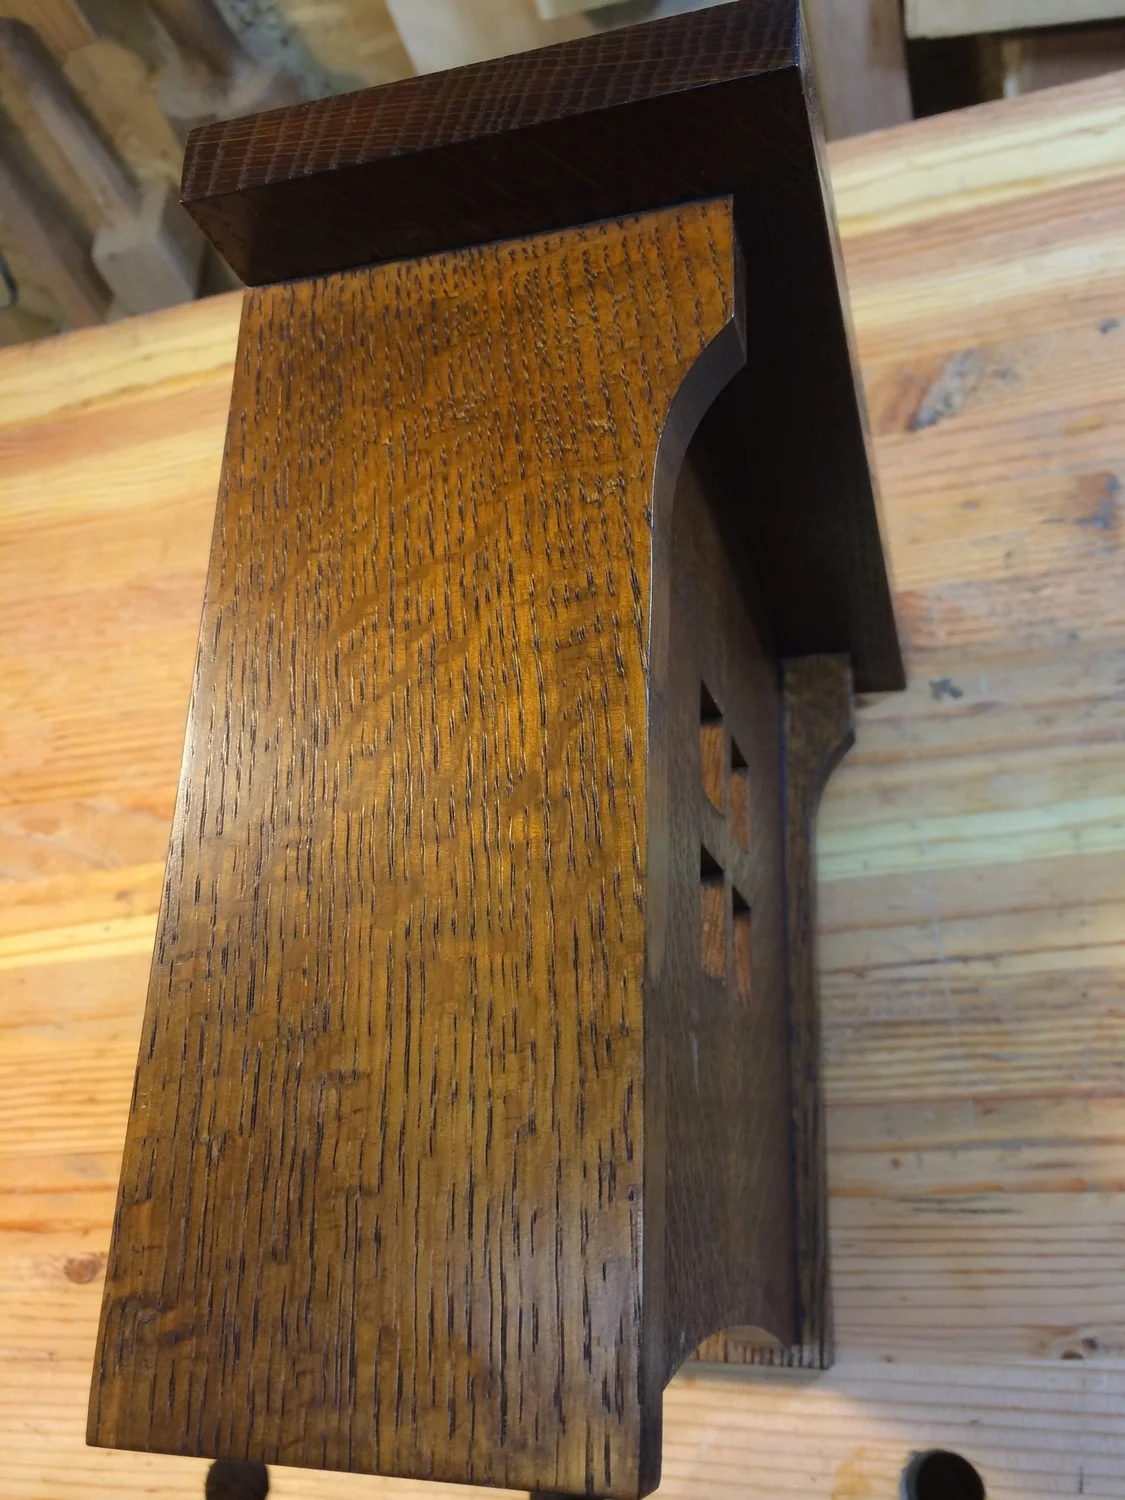
Here's an example of how good design can compensate wood movement. On the mission pedestal table I built last year, the wide tops have indeed expanded. But the movement is only visible where the the edges of the skirts are pushed apart, on the underside edge of the table. The table top still looks good, with the two halves coming together tightly. If I had built the top and skirt to fit tightly during of high humidity, the opposite might have happened during the dry season: the skirt pieces would have been flush, and the gap between the two halves would have opened, which would have been ugly.

a gap, but down where only furniture nerds will see it

The lesson from all this is not to think wood movement is theoretical, or can't happen to you. It's not, it can, and it will. It's therefore a good idea to take the time to examine the things you've built, and take note of how well, or how poorly, your earlier designs have held up under the extremes of humidity, and build your future projects accordingly. I'll revisit this in the middle of winter when things are bone dry, and we'll compare how the piece have moved, looking at both the fixes and the pieces that I left alone. Fingers crossed. However, as we're talking about wood, there's never going to a perfect fit. The wood will move, and our furniture must move with it. Hopefully, joints won't crack, doors won't stick, and boards won't twist, but when (not if) they do, take it into account, and learn from it.

A tool cabinet, not a tool display case

A couple of years ago, I got around to making a wall-hanging tool cabinet to store my hand tools. It was made from red oak, with birch plywood for the panels, and while not pretty, did a good job at holding my tools. The design came from the countless other wall hanging tool cabinets I'd seen posted here and there in the world of online woodworking, and I was pretty pleased with the result. Over the following months, I adjusted the tool holders, added more tools, moved other around, and fiddled with it until it became pretty full. More importantly, it became more useful, as I was more comfortable with where everything was stored, it was easy to reach for what I needed, sometimes without looking. It was also easy to know when I had forgotten to put a tool back into place.

But I screwed up on one of the most important things about a tool cabinet - closing the doors. I was so pleased with how the cabinet was set up, and seeing my modest but nice array of tools, that I left the doors open not only when I was working, but also when I was not. I liked walking into the shop for another session, and seeing my tools smiling back at me, all in their nice holders, all in order, ready to go. I felt fine about things. In fact, sometime last year, I'd even purchased one of those rust inhibitor stick-ups, the kind that releases a rust inhibiting vapor, and put it in the case. Of course, those only work in a closed space, and not sitting near my tools in an open cabinet.

And then, recently, I started to see it: little black spots here and there on a chisel, or the sole of a plane, or the blade of a saw. Where there was once jew a few, after  while there were quite a few more, and I realized I was starting to have a rust problem. I knew about the theory of protecting my tools from rust, sure, but in the first several years of woodworking, I really hadn't seen it appear on any of my new tools, or on my used/vintage new-to-me tools, after cleaning the rust off them when first acquired.

Bullfrog vapor corrosion inhibitor

So, feeling like a fool, I resolved to slay the beast. I spent all of one afternoon going over every single tool in the cabinet, removing any rust spots, or soon-to-be rust spots, using an abrasive pad and WD-40, then cleaning the remaining parts of each tool, wiping them all over with a WD-40 covered rag. The proceeded to vacuum out the insides of the cabinet, wiping it down with a tack cloth until it was dust free. And finally, I proceeded to place everything back, and even replaced the long since uselessly depleted Bull Frog vapor corrosion inhibitor. And then I  CLOSED THE CABINET DOORS.

That evening, with dirty hands, some messy rags, and feeling stupid, I vowed to not be such and idiot. Not only do I now keep those cabinet doors closed when I'm not using the tools, I also make a point to brush and blow any dust off each tool before I put it away, and wipe the metal surfaces it with an oiled rag - stuff I should have been doing all along. Airborne dust and salt settling on your tools attracts water, and that is where the rust comes in. Its pervasive, and one of the dustier places has to be a woodshop. So, yeah, finally, I'm serious about establishing good habits to keep the rust monster at bay. And I can get by without seeing the spread of nice tools all in a row, knowing they're well protected.

After all, its a tool cabinet, not a tool display case. 

Not pretty, and that one door hangs a little crooked, but at least they're closed.

What a Waste

As I get further along the path of making things for my home, I've found that the things that aren't made by me, and especially the ones that are made of ugly plastic or are otherwise crappy, beg to be dealt with. Specifically, they beg to be replaced by something hand made, or at least by some natural material.

planning with sketches

There's also the perpetual discussion among woodworkers about dealing with all the scrap wood and cutoffs that woodworking creates. On one side, there are the fanatical, I'm-thriftier-than-thou zealots who loudly proclaim "Scrap wood?!?! There's no such thing!", and go on to explain how they went from using the 200 year old trees on their property to build their house, then all furniture in it, then scores of picture frames and cutting boards, then turned a bunch of pens, and now pick their teeth with the remainder. On the other side, there are the "I only have what I need for my current project" types, with the rest heading right into the "burn pile" (those people usually have wood burning stoves), or even the trash. Most of us woodworkers are somewhere in between, and deal with the scrap wood problem like most people (and us too) deal with being overweight: we do our best, we could do better, and we're always just a little big heavier than we want to be.

the "leaves" design

My own scrap wood coping technique is to have both a large lumber cart, for sheet and large flat things, a small cart for long & narrow things, and several lumber shelves for the very long boards. When those are full, the rest goes into my burn pile. Yup, that's the RULE. I try to be strict, I really do. But, when a cutoff is just so damn gorgeous, or when the sting of the cost of the lumber is still fairly fresh in my mind, it is hard to follow the RULE. Sometimes I'll swap out the new, better scraps for older, less useful scraps. And then, sometimes, you just get a good pile of too-good-to-toss stuff built up.

That was me a while ago with some red & white oak. Too good to toss, and it was overflowing my system. Around that time, I happened upon an image online of a great craftsman style wastepaper basket. As I looked at it, peaking around the corner of my desk, just in the corner of my eye, was an ugly grey plastic Office Depot garbage can that sits in my office, and another one around the corner in my kitchen...

So, it all clicked. Ugly stuff + some great un-tossable scrap = project, and I made these four wastepaper baskets - they're much too nice to be called "garbage cans".

sizing and dry fitting

I tried three different main designs, variations on ones I saw online, and two variations of the "leaves" design. On the "leaves" design, I got a chance to try working with some different materials; brass clips on one, and leather loops fastened with copper rivets on the other. I think the brass clips idea was good, but I couldn't get a clean bend on them, and the way they look on the back isn't very satisfying. The leather loops idea came out much better, and were easier to do as well.

After the build, and with much pleasure, I relegated the plastic garbage cans to the basement, and placed the four news ones throughout the house. The brass clip version of the "leaves" one is in my office, where I don't mind the flaws very much. The only thing I might add to these, especially to the large "slats" one, is a copper liner, so that a) messier things could be put in it, and b) one would only have to empty the liner, rather than picking up the whole thing. I'd like to try making the liner with folded sheets of copper (copper roof flashing?) and a soldered weld. I've never done that before, but I look forward to figuring that out.

Doorbell Cover 2

I recently received a commission for another version of my doorbell cover. Of course, it had to be custom sized to the customer's doorbell chime mechanism, so we exchanged photos and measurements. It was nice to get a chance to revisit a project, as it provides an opportunity to improve on the original. Although this project is small and fairly simple, there were one efficiencies I was able to add to the construction this time around.

In the first build, to make the four square cutouts, I did the following:

(obviously, I did all this to just the face, when it was a stand alone piece, before it was glued up: I just used the final assembly sketch up for illustration here)

version 1

  • First, I made four rip cuts on the bandsaw in the material (red).
  • Then, I crosscut the waste away from the two side strips, again with the bandsaw (purple and yellow).
  • Finally, I glued it all back together, keeping the pieces and grain aligned.

This worked fine, but it made fiddling with the little "middle" pieces in-between the two squares a little fussy to get right.

So the second time around, I made less work for myself...

version 2

  • first, I made two rip cuts on the bandsaw to separate the middle strip from the sides (red).
  • then I cut away the "holes", using the bandsaw for the tops & bottoms, a chisel for the side (yellow).
  • finally, re-glued everything in position.

Obviously, the second approach is much easier. Not only are the fewer cuts, but the pieces stay aligned better, especially the two little middle pieces, which tended to slide around during a glue-up. Also, there are two fewer kerfs, leaving more original width.

Why didn't I do it that way the first time? It does seem obvious when its explained. But these are to the sorts of things you pick up and learn as you go, and especially as you revisit the same, or similar items, again and again. My first attempt at this was my... first attempt, and the way I came up with to execute it was fine. But there's nothing as powerful as learning by doing. I'm sure that by doorbell cover #50, I'll be humming along, running Ding-Dong Covers, Inc. I'll just throw a board at the wall the voila!, a perfect doorbell cover will appear.

.

Here's the final piece. The customer wanted the same finish and wood (red oak) as the original. I had used some flat-sawn red oak before, but as I was hunting for materials, came across some leftover quarter-sawn red oak that was gorgeous, so I used that instead. I book matched the main front panel to give it that nice figure.