
Here's a short video showing me chopping out a mortise for a cabinet door hinge.
Favorite Plastic Shop Gadgets
For the new woodworker setting up their shop, a trip to Rockler, Woodcraft, or their big box stores presents an onslaught of gizmos, gadgets, devices that "guarantee a perfect (insert woodworking task here) every time". I went through that phase, spent my money, and made it out (mostly) unscathed. Along the way I found a few that were worth it.
I like to be surrounded by wood, metal, leather, fabric, and other natural materials in my shop. Non-plastic tools just look and feel better in my creative space. I have some plastic in my shop that I can't really do anything about; the handle on the fence of my table, the dust collection tubes, and my dead blow mallet is covered in plastic. The handle of my combo screwdriver is plastic (although I couldn't stand that, so I recently bought a combo screwdriver turning kit from Rockler and made a wooden handled one). While my plastic tool aversion might seem a little neurotic and silly, it's what I like. I've been known to retire a perfectly nice new plastic handled hack saw for a wood handled one from the 1920's I found in flea market. It took me an hour to de-rust off the vintage one, clean and oil the handle. And after all that, it works about the same as the new one. But I like it better.
After all that, I have a few plastic woodworking tools / gadgets that I will not part with. Despite their plastic-ness, these things are great at what they do and I wouldn't replace them if there were non-plastic equivalents.
(Disclaimer: I have received no endorsements for these reviews, and I have no contact with these companies. I paid full retail for them. I am posting links so you can check them out, but they're not affiliate links or anything.)
So without further ado...
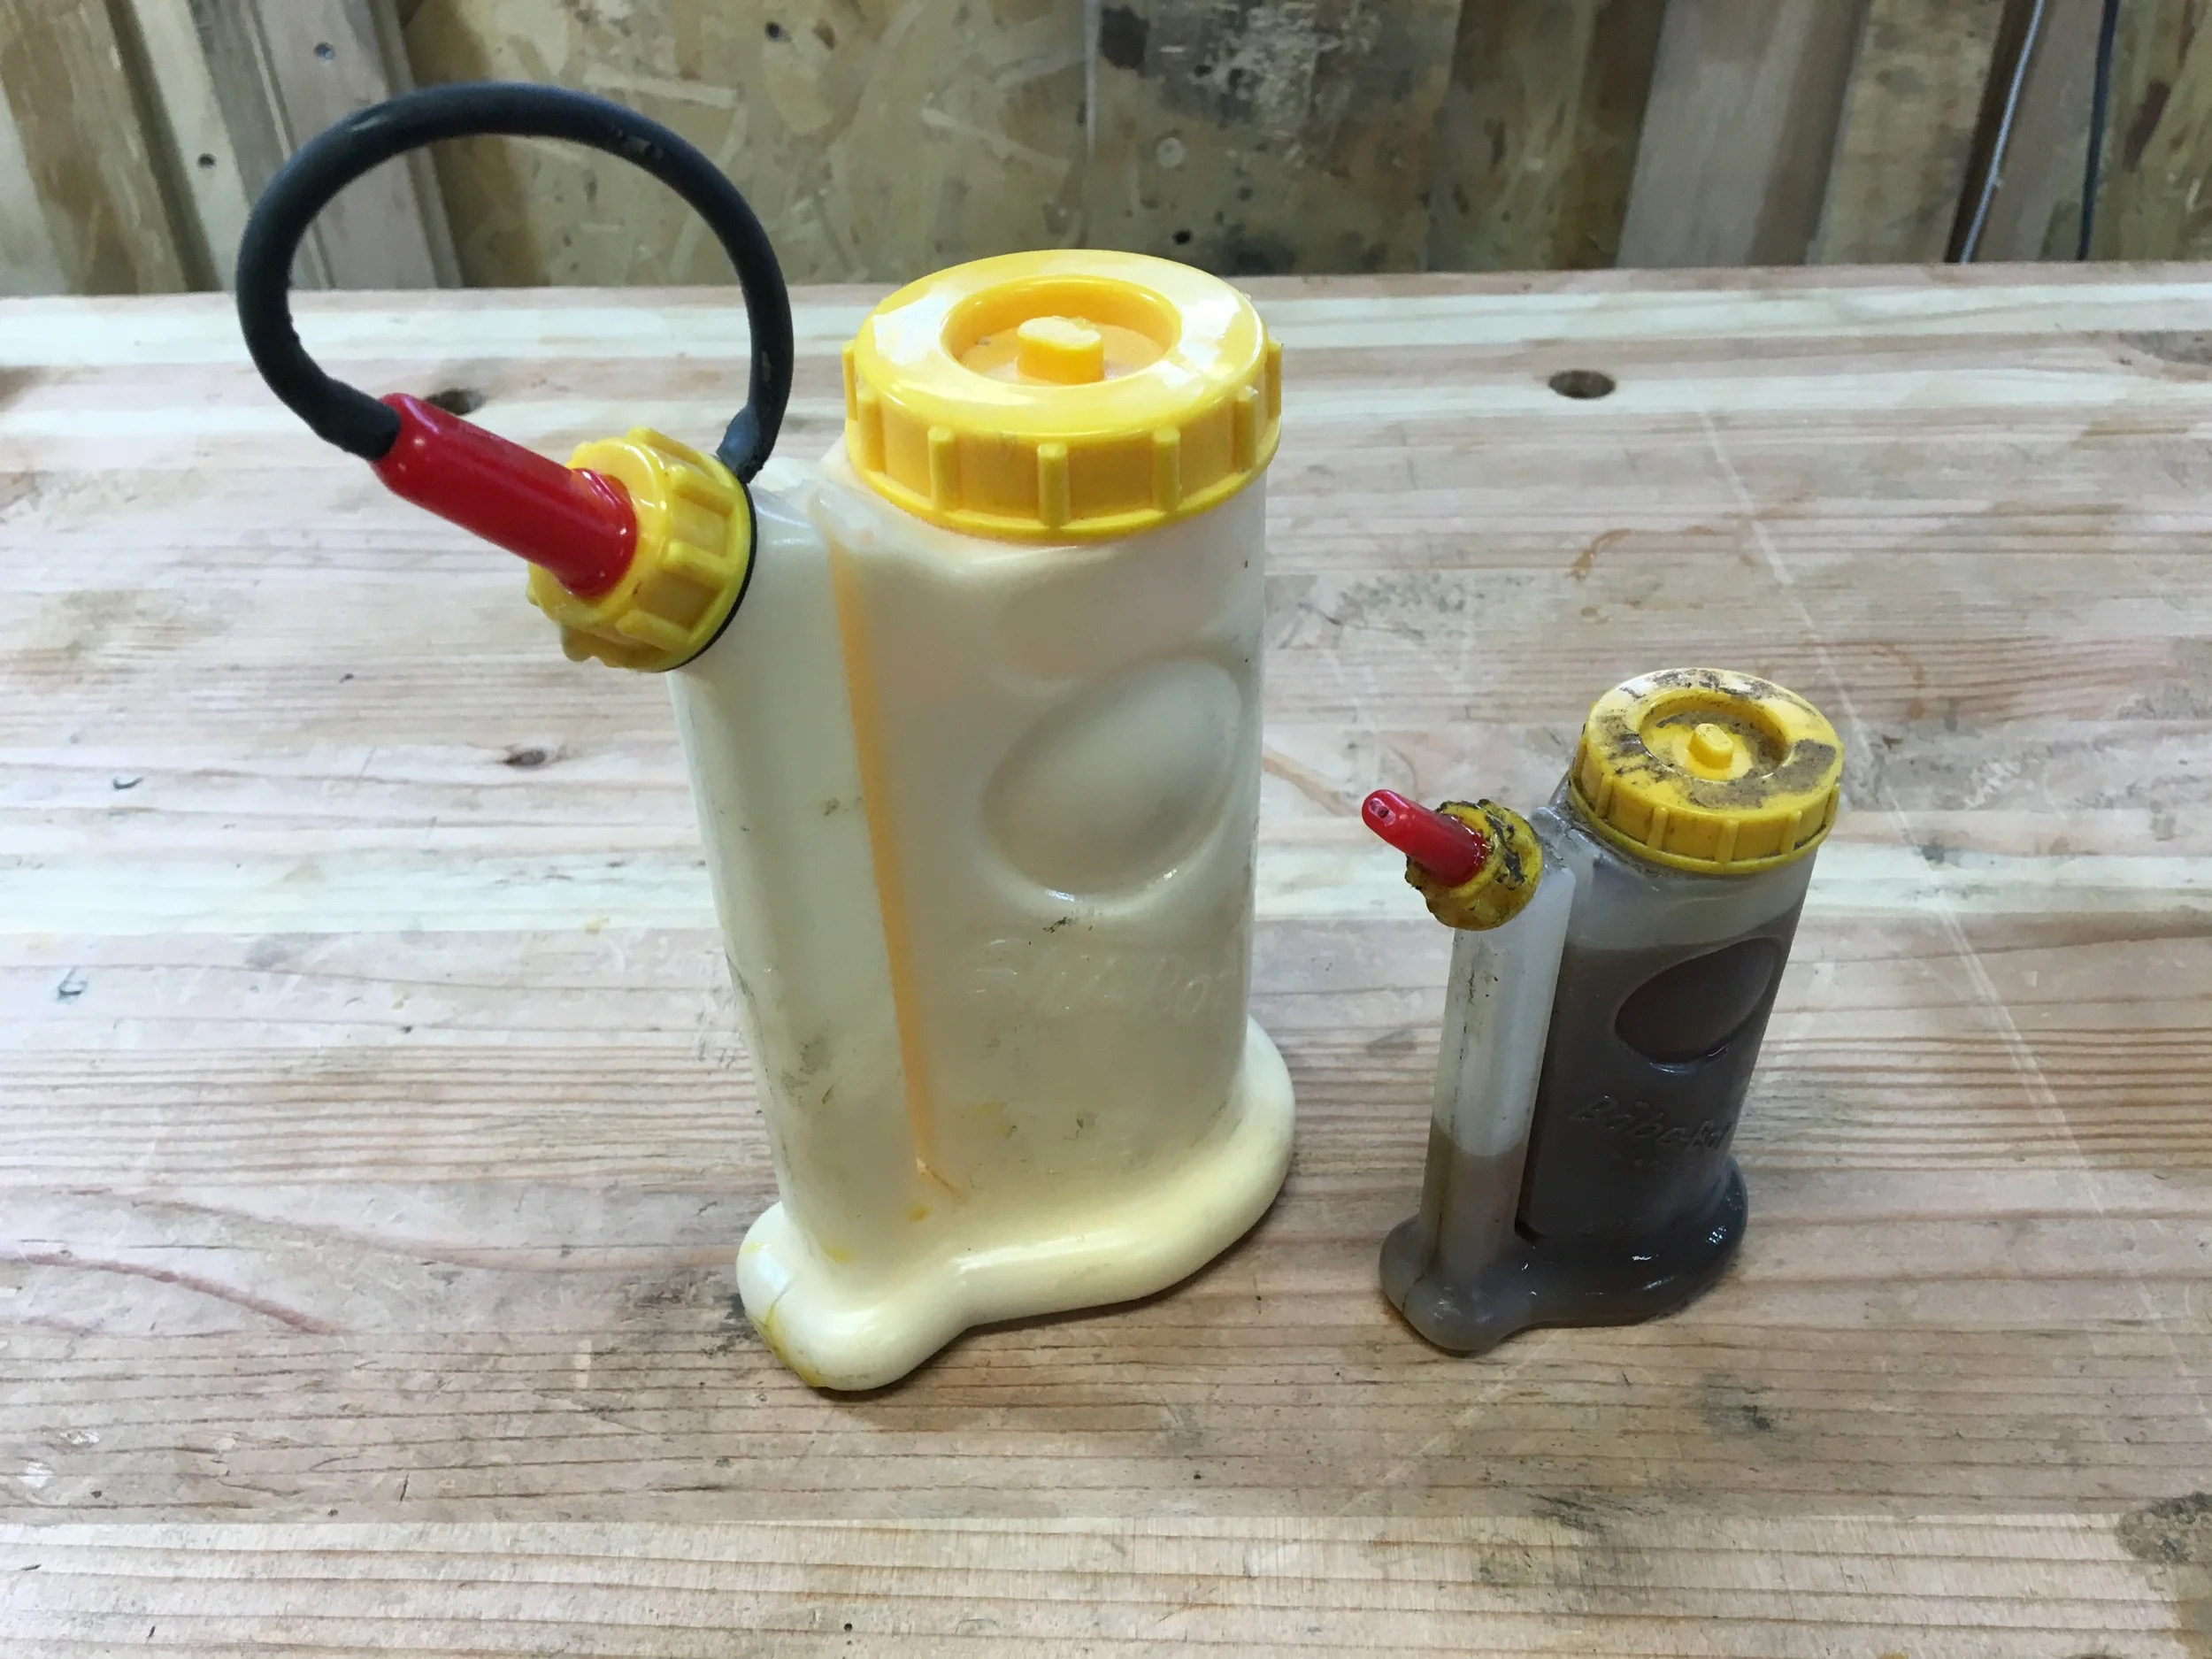
GluBot(s)
The FastCap GluBot, and it's little cousin, the BabeBot, are the best glue dispensers I've ever used. I've tried the manufacturer's bottles. I've tried the mustard-bottle-as-glue-bottle. I've tried the "store the glue bottle tip-side down in a holder" trick. Then I found these, and I was done looking. These containers are designed so that no matter how much, or little, glue is inside the reservoir, fresh glue is just a squeeze away. I use the big one for PVA glue, and the little one for liquid hide glue. The smaller BabeBot is easier to heat up in my high-tech pot-on-a-hotplate hot water bath (in order to get the Old Brown Glue up to working temperature of 100-140°F.) These things don't clog, and glue is always ready to go when I need it. During a glue up, there's already enough things to worry about without battling a clogged or doing the "I forgot to refill it so now I'll stand there holding it upside down and shake it a lot" dance.
Preppin' Weapon
Next we have the Preppin' Weapon from Time Saver Tools. Continuing in the tradition of cute names, It's a plastic sanding block. How good can it be? I'd used my own shop blocks, when they were just... blocks of wood with paper wrapped around them. I used those horrible 3M rubber blocks with the tack/nail grippers. I'd made my own fancier one with a cork bottom and wing-nut-clamp system. Then I saw these, and I gave one a try - I was hooked. These use a simple cam lever on both ends to secure a 1/4 sheet of paper (... wide, so they use 8 1/2" by 2 3/4" size pieces) over a soft rubber face. They hold the pieces very close to the ends, so it allows almost all of the paper to be used. I like that the 1/4 sheet shape makes for a nice long reference surface, and finger hold shape is very comfy. I ended up getting all 4 colors, and keep them set up with different grits. I also made a simple little jig with an old hacksaw blade to quickly tear the sheets to the right sizes. Now changing paper and doing lots of sanding is really nice and easy.
sandpaper fleet
paper sizing/cutting jig
The Grr-ripper
Finally, we have the Grr-ripper from Microjig which is well designed push block. It's purpose is to keep your hands safe while allowing you to exert a lot of control over a workpiece when using a tables or router table. I bought one of these when I first started out, and at $60, it seemed like a lot for a hunk of plastic. But after using it for a few months, I went and got a second one. The safety and control these brought me, especially as a new woodworker, were exceptional. It's now been years, and I love how I can adjust the feet to straddle the table saw's blade, while holding down both the work and the off cut. The added L shaped support foot lets the Grr-ripier remain balanced when working with a narrow piece, which is especially nice on a router table. These are so well designed, that's it's hard to find a situation where they don't work well. If I ever break or lose one, I'll get it again. But after years of use, and a few battle scars, these have held up and are well work the price tag.
dual Grr-rippers!
adjustable L foot, and center support
Despite their plastic nature, these items are welcome on my shop, and help me get work done efficiently. I know I could make alternatives. I've seen a few people do some great sanding block builds, and I've even seen a DIY wooden Grr-riper build or two. Show me a copper GluBot, and I'd be tempted. But the work required doesn't outweigh the relatively low cost and high value that these gizmos deliver. So they're here to stay.
Sharing My Shop
Most woodworkers experience their craft as a solitary endeavor. And overall, this seems just and fitting. A shop or workspace is highly personalized to the craftsperson: the layout, the choice of tools, where everything is placed, how it is kept up and arranged - all very personal. And it is the same for me and my shop. That made it all the more strange to not only have shared my shop for over a year, but to have discovered the loved it. And I was saddened by that period coming to an end.
For the last year or so, my good friend and fellow woodworker Brett has been sharing my shop. As an apartment dweller with no shop of his own, he was struggling with setting up temporary shop in the backyard of his building, or in the laundry room in the basement, hauling his tools, sawhorses and mini workbench top up and down stairs each time he had to work. Sounded like hell to me. When he moved to a new apartment last summer (located a couple of blocks from my shop), he was still shop-space restricted. Both out of sheer pity for his situation, and a great excuse to spend some time with a friend, I offered him the use of my space. I gave him a set of keys, and he had the run of the place.
My first instinct, of course, was that it would be annoying; he'd put things in weird places where I couldn't find them, he'd leave his stuff around and it would be in my way, and maybe he'd make a mess. But although I'd only known him for a little while, something told me it wasn't going to be a problem. From the get-go, he learned where everything was, and how I liked it to be. He put all of his tools and projects away neatly. And much to my embarrassment, he took better care of cleaning up the shop than I did. No matter if he was in the shop for a half hour, or all day, when it was over, he didn't just walk out and lock up. His day wasn't done until he'd swept everything, emptied the trash, and dust-collector if it was needed. Once, early on in the shop sharing experience, he broke a zero clearance insert on the table saw (he was tilting the blade, and my former saw requires your remove the ZCI before tilting - he found out the hard way). He immediately bought a new one to replace it. He also took pains to replenish shop supplies as needed. (I'm not a slob, but when it's just me, I can sometimes walk out and tackle the mess until tomorrow. But not Brett.)
It also didn't hurt that we enjoyed each other's musical choices, and had fun playing records for each other while working. And despite having two people in a one-person shop, we were able to work along-side from time to time, even having two people on the workbench at once. this culminated in doing a big simultaneous Morris chair build. THAT should have been annoying, and crowded. But it turned out to be a boon to both of us. We were able to work out how to approach the build together, dealing with the challenges, and sharing the successes as we went. Without a doubt, my chair came out better because of it. And so did his.
Tool borrowers and shop sharers take note - this is how you do it. Brett not only didn't cause me any problems, he made sharing my shop a joy. He didn't have to tell me he appreciated my shop -- he showed it every time he was there through his actions. He could have been half as conscientious, and it would have been fine. But he's a class act, an A+ stand-up guy. And in addition to all the woodworking things we learned from each other while working in the shop together, he reminded me of how I need to act whenever I'm in someone else's workspace, as a student, or a co-worker, or even a visitor.
Brett and his wife moved from Chicago to St. Louis at the end of May to start a new chapter of their life, and I wish them the best of luck. I'll be heading down there to visit and see how his new shop is coming along, and he's always welcome to come back to work in mine. If you're in the St. Louis or southern Illinois area and need some furniture, be sure to look him up. You can find him on Instagram at brettt_haley (note the extra "t" in there).
Thanks Brett!
Boiling Stones
I've been enjoying my new books. Lost Art Press recently released the two book set "The Woodworker: The Charles H. Hayward Years", a release that I've been eagerly awaiting ever since it was announced month (years?) ago. It's an absolutely fantastic curated collection of woodworker and author Hayward's articles from his years as editor of the English The Woodworker magazine from 1939 to 1967. If ever "Lost Art Press" lived up to its its name (by, you know, pressing lost art), its here. Hayward's career spanned the transition from hand work to the modern power tool age, a period when so much fundamental woodworking knowledge went from being common to almost forgotten. At 888 pages, it is a massive collection. But Lost Art Press has organized it by type and topic (and done an amazing job at re-setting the type and reproducing the illustrations) to where it is an engaging and very accessible read. As I go through it, every page seems to reveal a new gem, and authoritatively answers the kinds of questions that pop up on today's woodworking forums with regularity, ones that are often answered only hesitatingly and incompletely, by the well meaning, but ill-informed.
In a recent session going through the book, I came across a little article about cleaning oil stones. I hadn't thought to consider they even needed cleaning - I'd thought I would just keep them oiled up in use, and wipe the slurry off when done. But as my current set of Arkansas stones have been feeling "gummy" lately, and not cutting quite like they did when new, this piece caught my attention. Hayward says to either "... boil it in a strong solution of water and washing soda..." for a couple of hours, or, if you're in a hurry, cook it with a bare gas jet or blowlamp until the oil and grease (and embedded particles) are cooked out. The latter has the caveat that any uneven heating might cause the stones to crack. That seemed cool, but I wasn't ready to risk it.
So, I decided to boil mine, with a little dish soap and water. So far so good. Thanks Mr Hayward.
Follow up: Night and day. The stones are cutting fantastically. After I boiled them for about 2 hours (seeing a big oil slick form on the top of the water), I dried them, then applied some WD-40, went over them briskly with a wire brush, and put them back to work.
A tool cabinet, not a tool display case
A couple of years ago, I got around to making a wall-hanging tool cabinet to store my hand tools. It was made from red oak, with birch plywood for the panels, and while not pretty, did a good job at holding my tools. The design came from the countless other wall hanging tool cabinets I'd seen posted here and there in the world of online woodworking, and I was pretty pleased with the result. Over the following months, I adjusted the tool holders, added more tools, moved other around, and fiddled with it until it became pretty full. More importantly, it became more useful, as I was more comfortable with where everything was stored, it was easy to reach for what I needed, sometimes without looking. It was also easy to know when I had forgotten to put a tool back into place.
But I screwed up on one of the most important things about a tool cabinet - closing the doors. I was so pleased with how the cabinet was set up, and seeing my modest but nice array of tools, that I left the doors open not only when I was working, but also when I was not. I liked walking into the shop for another session, and seeing my tools smiling back at me, all in their nice holders, all in order, ready to go. I felt fine about things. In fact, sometime last year, I'd even purchased one of those rust inhibitor stick-ups, the kind that releases a rust inhibiting vapor, and put it in the case. Of course, those only work in a closed space, and not sitting near my tools in an open cabinet.
And then, recently, I started to see it: little black spots here and there on a chisel, or the sole of a plane, or the blade of a saw. Where there was once jew a few, after while there were quite a few more, and I realized I was starting to have a rust problem. I knew about the theory of protecting my tools from rust, sure, but in the first several years of woodworking, I really hadn't seen it appear on any of my new tools, or on my used/vintage new-to-me tools, after cleaning the rust off them when first acquired.
Bullfrog vapor corrosion inhibitor
So, feeling like a fool, I resolved to slay the beast. I spent all of one afternoon going over every single tool in the cabinet, removing any rust spots, or soon-to-be rust spots, using an abrasive pad and WD-40, then cleaning the remaining parts of each tool, wiping them all over with a WD-40 covered rag. The proceeded to vacuum out the insides of the cabinet, wiping it down with a tack cloth until it was dust free. And finally, I proceeded to place everything back, and even replaced the long since uselessly depleted Bull Frog vapor corrosion inhibitor. And then I CLOSED THE CABINET DOORS.
That evening, with dirty hands, some messy rags, and feeling stupid, I vowed to not be such and idiot. Not only do I now keep those cabinet doors closed when I'm not using the tools, I also make a point to brush and blow any dust off each tool before I put it away, and wipe the metal surfaces it with an oiled rag - stuff I should have been doing all along. Airborne dust and salt settling on your tools attracts water, and that is where the rust comes in. Its pervasive, and one of the dustier places has to be a woodshop. So, yeah, finally, I'm serious about establishing good habits to keep the rust monster at bay. And I can get by without seeing the spread of nice tools all in a row, knowing they're well protected.
After all, its a tool cabinet, not a tool display case.
Not pretty, and that one door hangs a little crooked, but at least they're closed.