Don't Fear the Camber

The progression of learning to use hand planes is often something like this:

Stage 1: I tried to use (my grandpa's / flea market find / Home Depot $19) hand plane, and it sucks. It just chatters across the wood, doesn't make shavings, and doing any work with it would take FOREVER. (I goes onto a shelf or into the back of cabinet, never to be used again for years).

Stage 2: I finally learned how to set up and sharpen a plane, and I'm getting fair results, some nice shavings - still learning how to use it correctly! I like these, but I'm still not confident. It still takes some time to get real work done.

Stage 3: I can sharpen my blades well, and set up the planes to get whisper thin shavings. I get smooth cuts, but getting work done still takes a while.

This post if for you Stage 2 and Stage 3 types out there. Welcome to Stage 4 (which should really be a lesson you learn at Stage 2, and if someone had shown us this stuff earlier, we would never had had to experience Stage 1)! You learned to sharpen planes, either from classes, books, videos, just getting the sharpening thing down was a lot of work. You tried a bunch of the sharpening methods, from sandpaper on glass, to water stones, to oil stones, to diamond plates, and after buying into those, found the one you liked. You bought all the plane sizes; no.s 3,  through no. 8. Along the way, you'd read, or seen, or heard about putting a "camber", or curved edge on some of your plane blades, but you'd never tried it. It was enough working getting a straight across blade sharp. And after searching for that eBay or tool swap plane, doing the restoration on it, or after you saved up and bought that de-luxe Lie Nielsen plane, the thought of "screwing up" that plane's blade by trying to put the curve on it was NOT going to happen.

But it should happen. Let's review what the planes are for. For most work, you really only need three: small, medium, and large. Small: a smoothing plane (a no. 3 or no. 4), Medium: a jack plane (no. 5) and Large: a jointer/try plane (a no. 7). Use the jack plane to rough size your parts, removing a lot of waste. Then use the jointer on larger, longer boards to flatten them, and finally, use the smoothing plane to smooth the surface. Of these three, putting a camber edge on the jack plane is the place to start. By cambering the edge you are able to quickly and easily remove a lot of wood, and GET SOME WORK DONE. The curved edge can take large bites out of the work while still letting you drive the plane through the wood, and get down near your pencil line quickly, so you can move on to the other planes. A jack plane with a straight blade set fine works like trying to paint a house with a toothbrush. A jack plane with a straight blade set deep works like trying to shovel snow with a 4' x 8' sheet of plywood: huge bites that are too big to lift or remove. It's the camber that lets you take nice bites out of you work. So for flattening a board, taking that 1/2" of width off a board without sawing it, the cambered jack is the way to go.

the strong camber on my jack plane

So how to create a camber? You simply tilt the blade side to side when sharpening, alternately applying pressure to the left and right as you work the iron back and forth on the stone. If you're using a honing jig or guide, you can't get a camber, (unless you have a fancy honing guide with a cambering attachment) so it's time to learn to sharpen freehand.

And how much of a camber? That's a matter of personal choice, but on my jack plane, I have a fairly strong camber at about a 10"-11" radius (I just go by eye).

Fir the jointer plane or the smoother, other rules apply. I tend to keep my jointer plane blade with no camber, so that there is no arc to the cut when I am jointing panels for a glue up. On my smoother, I have a very slight, almost non-visible camber, that I get with just adjusting pressure when honing. I also slightly round the corners of the blade to help alleviate any plane tracks that sharp edges would cause. 

But that discussion of for another day. For now, I hope I have encouraged you to try cambering you jack, and discovering the joy of quickly removing a lot of material fast.

Boiling Stones

I've been enjoying my new books. Lost Art Press recently released the two book set "The Woodworker: The Charles H. Hayward Years", a release that I've been eagerly awaiting ever since it was announced month (years?) ago. It's an absolutely fantastic curated collection of woodworker and author Hayward's articles from his years as editor of the English The Woodworker magazine from 1939 to 1967. If ever "Lost Art Press" lived up to its its name (by, you know, pressing lost art), its here. Hayward's career spanned the transition from hand work to the modern power tool age, a period when so much fundamental woodworking knowledge went from being common to almost forgotten. At 888 pages, it is a massive collection. But Lost Art Press has organized it by type and topic (and done an amazing job at re-setting the type and reproducing the illustrations) to where it is an engaging and very accessible read. As I go through it, every page seems to reveal a new gem, and authoritatively answers the kinds of questions that pop up on today's woodworking forums with regularity, ones that are often answered only hesitatingly and incompletely, by the well meaning, but ill-informed.

In a recent session going through the book, I came across a little article about cleaning oil stones. I hadn't thought to consider they even needed cleaning - I'd thought I would just keep them oiled up in use, and wipe the slurry off when done. But as my current set of Arkansas stones have been feeling "gummy" lately, and not cutting quite like they did when new, this piece caught my attention. Hayward says to either "... boil it in a strong solution of water and washing soda..." for a couple of hours, or, if you're in a hurry, cook it with a bare gas jet or blowlamp until the oil and grease (and embedded particles) are cooked out. The latter has the caveat that any uneven heating might cause the stones to crack. That seemed cool, but I wasn't ready to risk it.

So, I decided to boil mine, with a little dish soap and water. So far so good. Thanks Mr Hayward.

Follow up: Night and day. The stones are cutting fantastically. After I boiled them for about 2 hours (seeing a big oil slick form on the top of the water), I dried them, then applied some WD-40, went over them briskly with a wire brush, and put them back to work.

Sharpening Western Saws by "Brit"

Shortly after getting started with woodworking, I started hanging out on the woodworking community site, Lumberjocks. It is a fantastic community that has been around since about 2007 or so, and features thousands of active members who make blog posts, tool reviews, posts about completed projects, all with countless photos, comments and discussion. It's been an invaluable source of learning for me.

Although the signal to noise ratio is very good, with most members being very helpful with links, tips and info, some members really stand out above the rest. One of those is Lumberjock's member Andy Lovelock, aka "Brit", from Dorset, England. He's been posting info, pictures and videos on various topics, but mostly old tool restoration, from braces to saws.

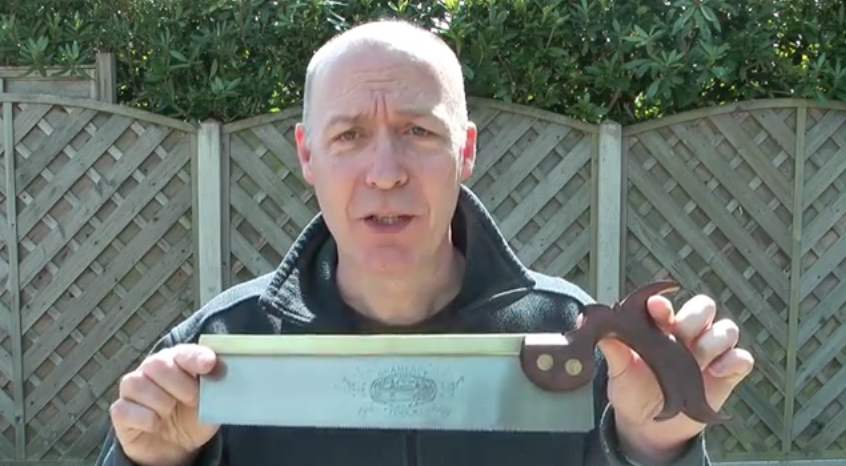
Today, I saw that he has outdone himself, by posting a 2 1/4 hour long video on sharpening western saws. The video is detailed, well edited and paced, and beyond thorough. The most amazing part is that he did this all for the love of sharing what he knows with his fellow woodworkers. As he states in his Lumberjock's blog post...

This instructional video has been provided free of charge and I’m not looking to profit personally from it in any way whatsoever. However, every year my local community puts on a charity Christmas carnival, the purpose of which is to raise money for local charities by collecting donations from the general public on the day. If you find the video useful and would like to show your appreciation, please consider making a donation at http://www.highcliffecarnival.org.uk/

It's this sort of "we're all learning together, so let's help each other out" attitude on Lumberjocks, and elsewhere in the woodworking community, that has made my journey of woodworking richer and more rewarding. I'll be making a donation in thanks, and I'll be watching this video over and over as I learn more about saw sharpening.

Take a look at his post and video here. 

Thank you Andy!


Sharp Saws

I recently acquired two old back saws on eBay, to fill out my western saw collection. One was a steel backed carcass saw with no visible makers marks, and the other was a 1920s era Disston tenon saw.

​the saws after a little brass, blade, and handle clean up.

But the condition of the carcass saw's teeth were lousy, and needed jointing. The tenon saw wasn't so bad, but needed some TLC. So I decided to send them off to a saw filing pro, Bob Rozaieski of Logan Cabinet Shoppe and the excellent Hand Tools & Techniques podcast. I've enjoyed learning from his podcast and blog, and seeing as he offers a reasonable sharpening service, I thought I would get these started out on the right foot. My saw filing skills are pretty new (everything I've learned to date is from this site, and trial and error), and I feel better touching up saws that I know are configured correctly, rather than trying to bang my head against saws that started out way out of whack.

Bob turned them around right away, took time to answer at length several questions I had. A really great experience over all. I'm anxiously awaiting their return.​


IMG_1296.jpg

Update: The saws came back in, and were in awesome shape. Thanks Bob!