At Last, a Morris Chair, Part 1

When I started woodworking, as in really serious furniture making, my #1 bucket list piece to build was a classic Stickley Morris chair. Something about this chair called to me, and I felt that getting to the point of being able to build it would be a significant point on my woodworking path. But since then, I've built larger and more complex pieces, with that chair in always in the back of my mind. This past spring, I finally got the chance to check that one off the list. 

My friend and fellow woodworker Brett got his first big commission to build a Morris chair, and as we were sharing a shop at the time, I couldn't resist the chance to build one too. Scores of woodworkers have made this chair before me. Not just scores, zillions, It's a classic, icon design, and many are drawn by the same charms that I succumbed to. And it's not that it is a masterfully difficult piece to build, but it has it's challenges. There are also many, many, many variations on how to build one, both in design choices, and construction methods. But in my mind, this is a standard bearer of what I like about being a woodworker, and what appeals to me about the Craftsman style aesthetic. It's both simple, and elegant. It is plain, but with subtle proportions that speak to a strong, solid form. I set out to build a up reproduction Gustav Stickley #369 Morris Chair. I took a lot of direction from Bob Lang's article in Popular Woodworking #189 from April 2011, as well as from his blog post on it. When it was all said and done, or mainly done, It came out fantastic. Did I mention it is comfortable too?

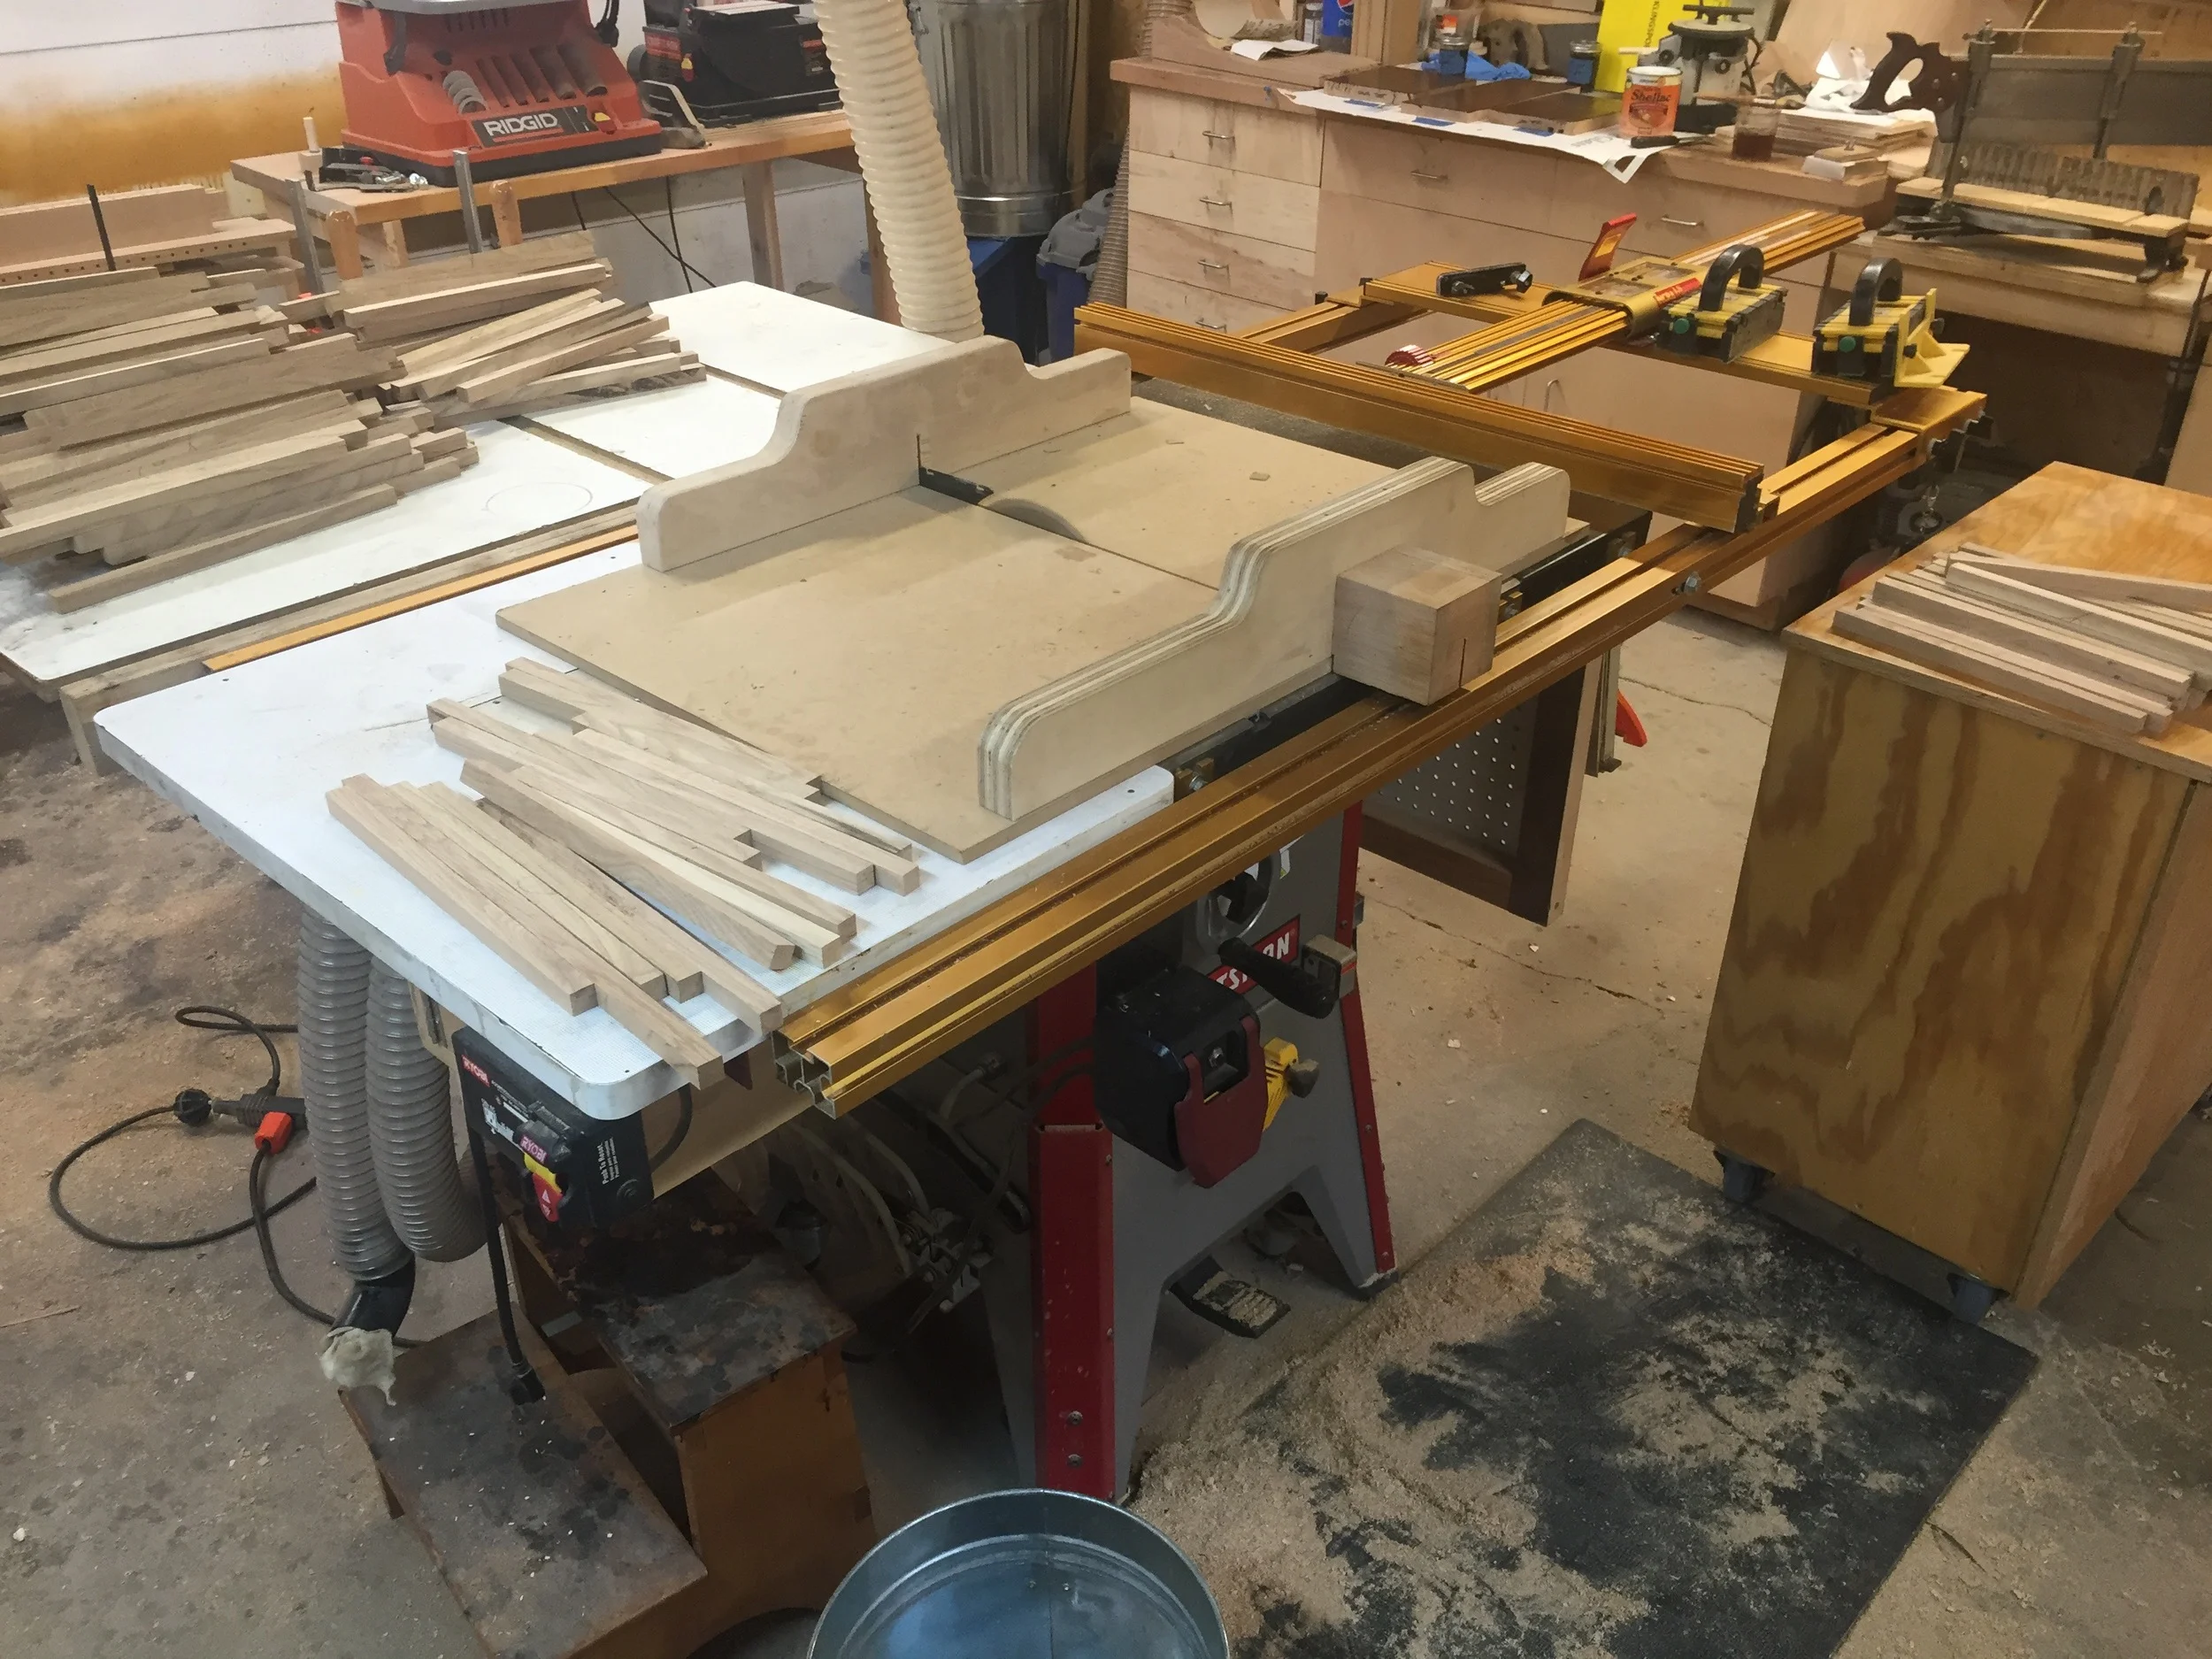
I'll run through the build sort of quickly here, for you woodworkers out there that like that sort of thing.

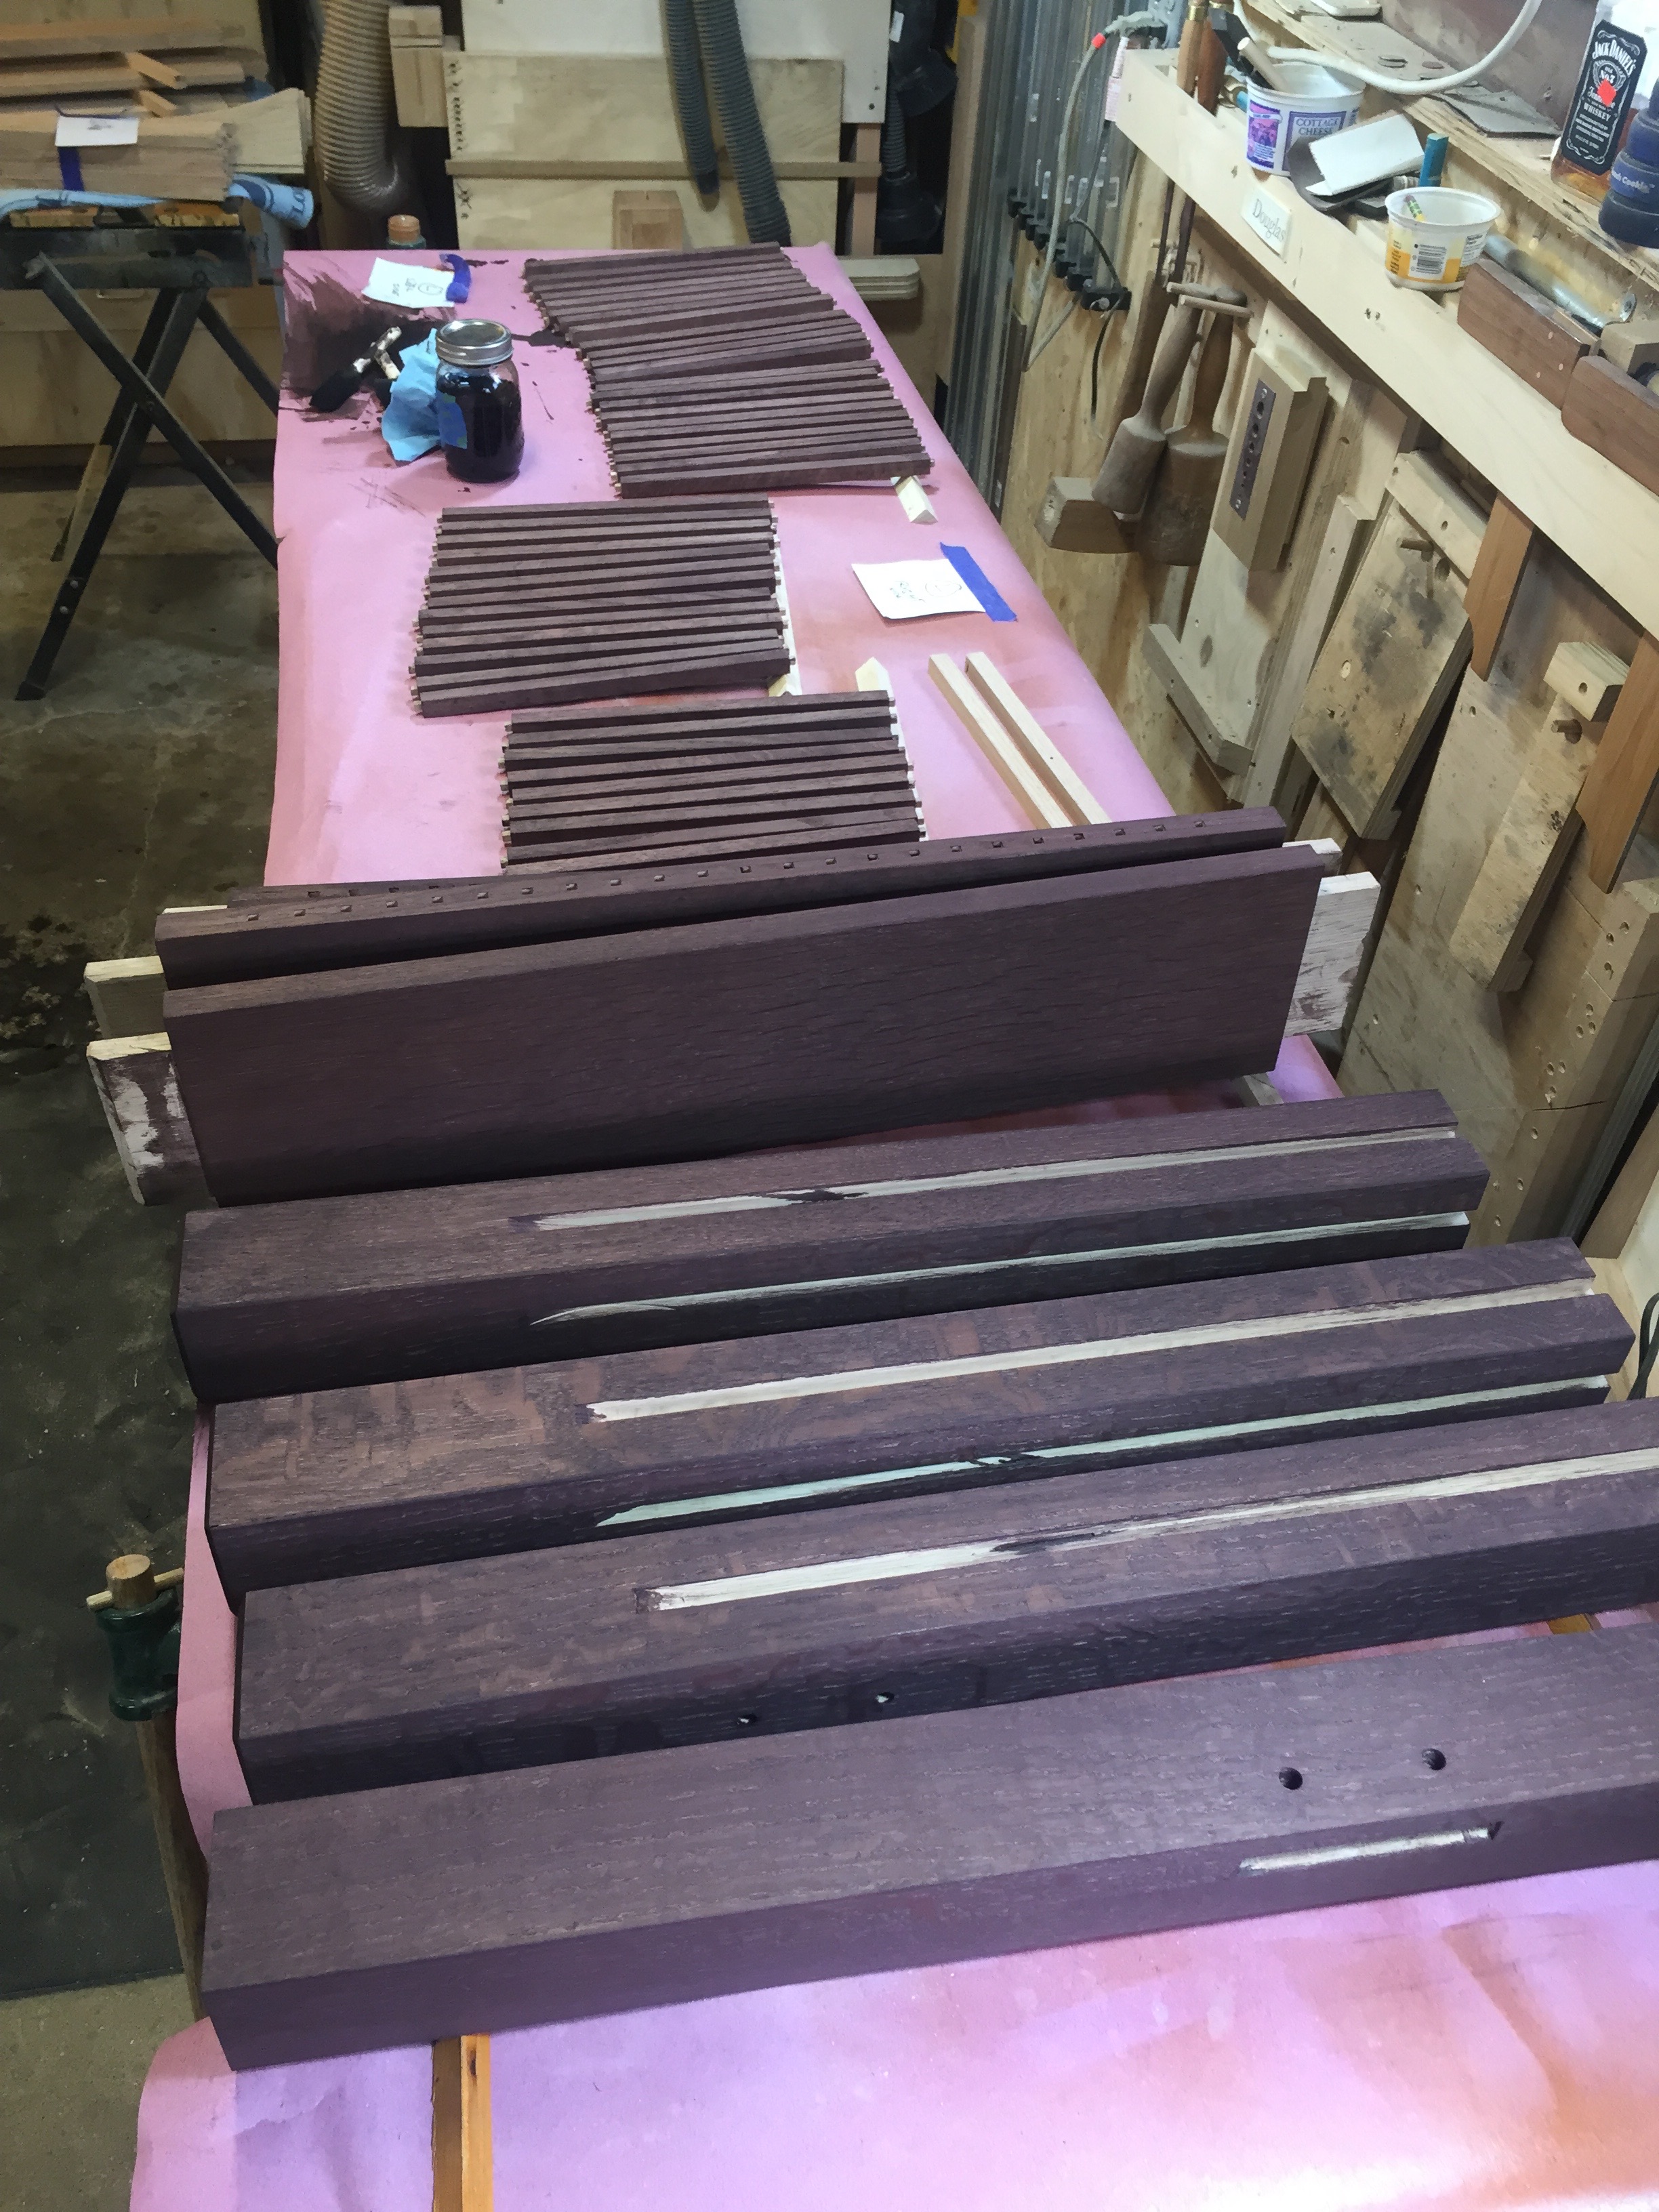
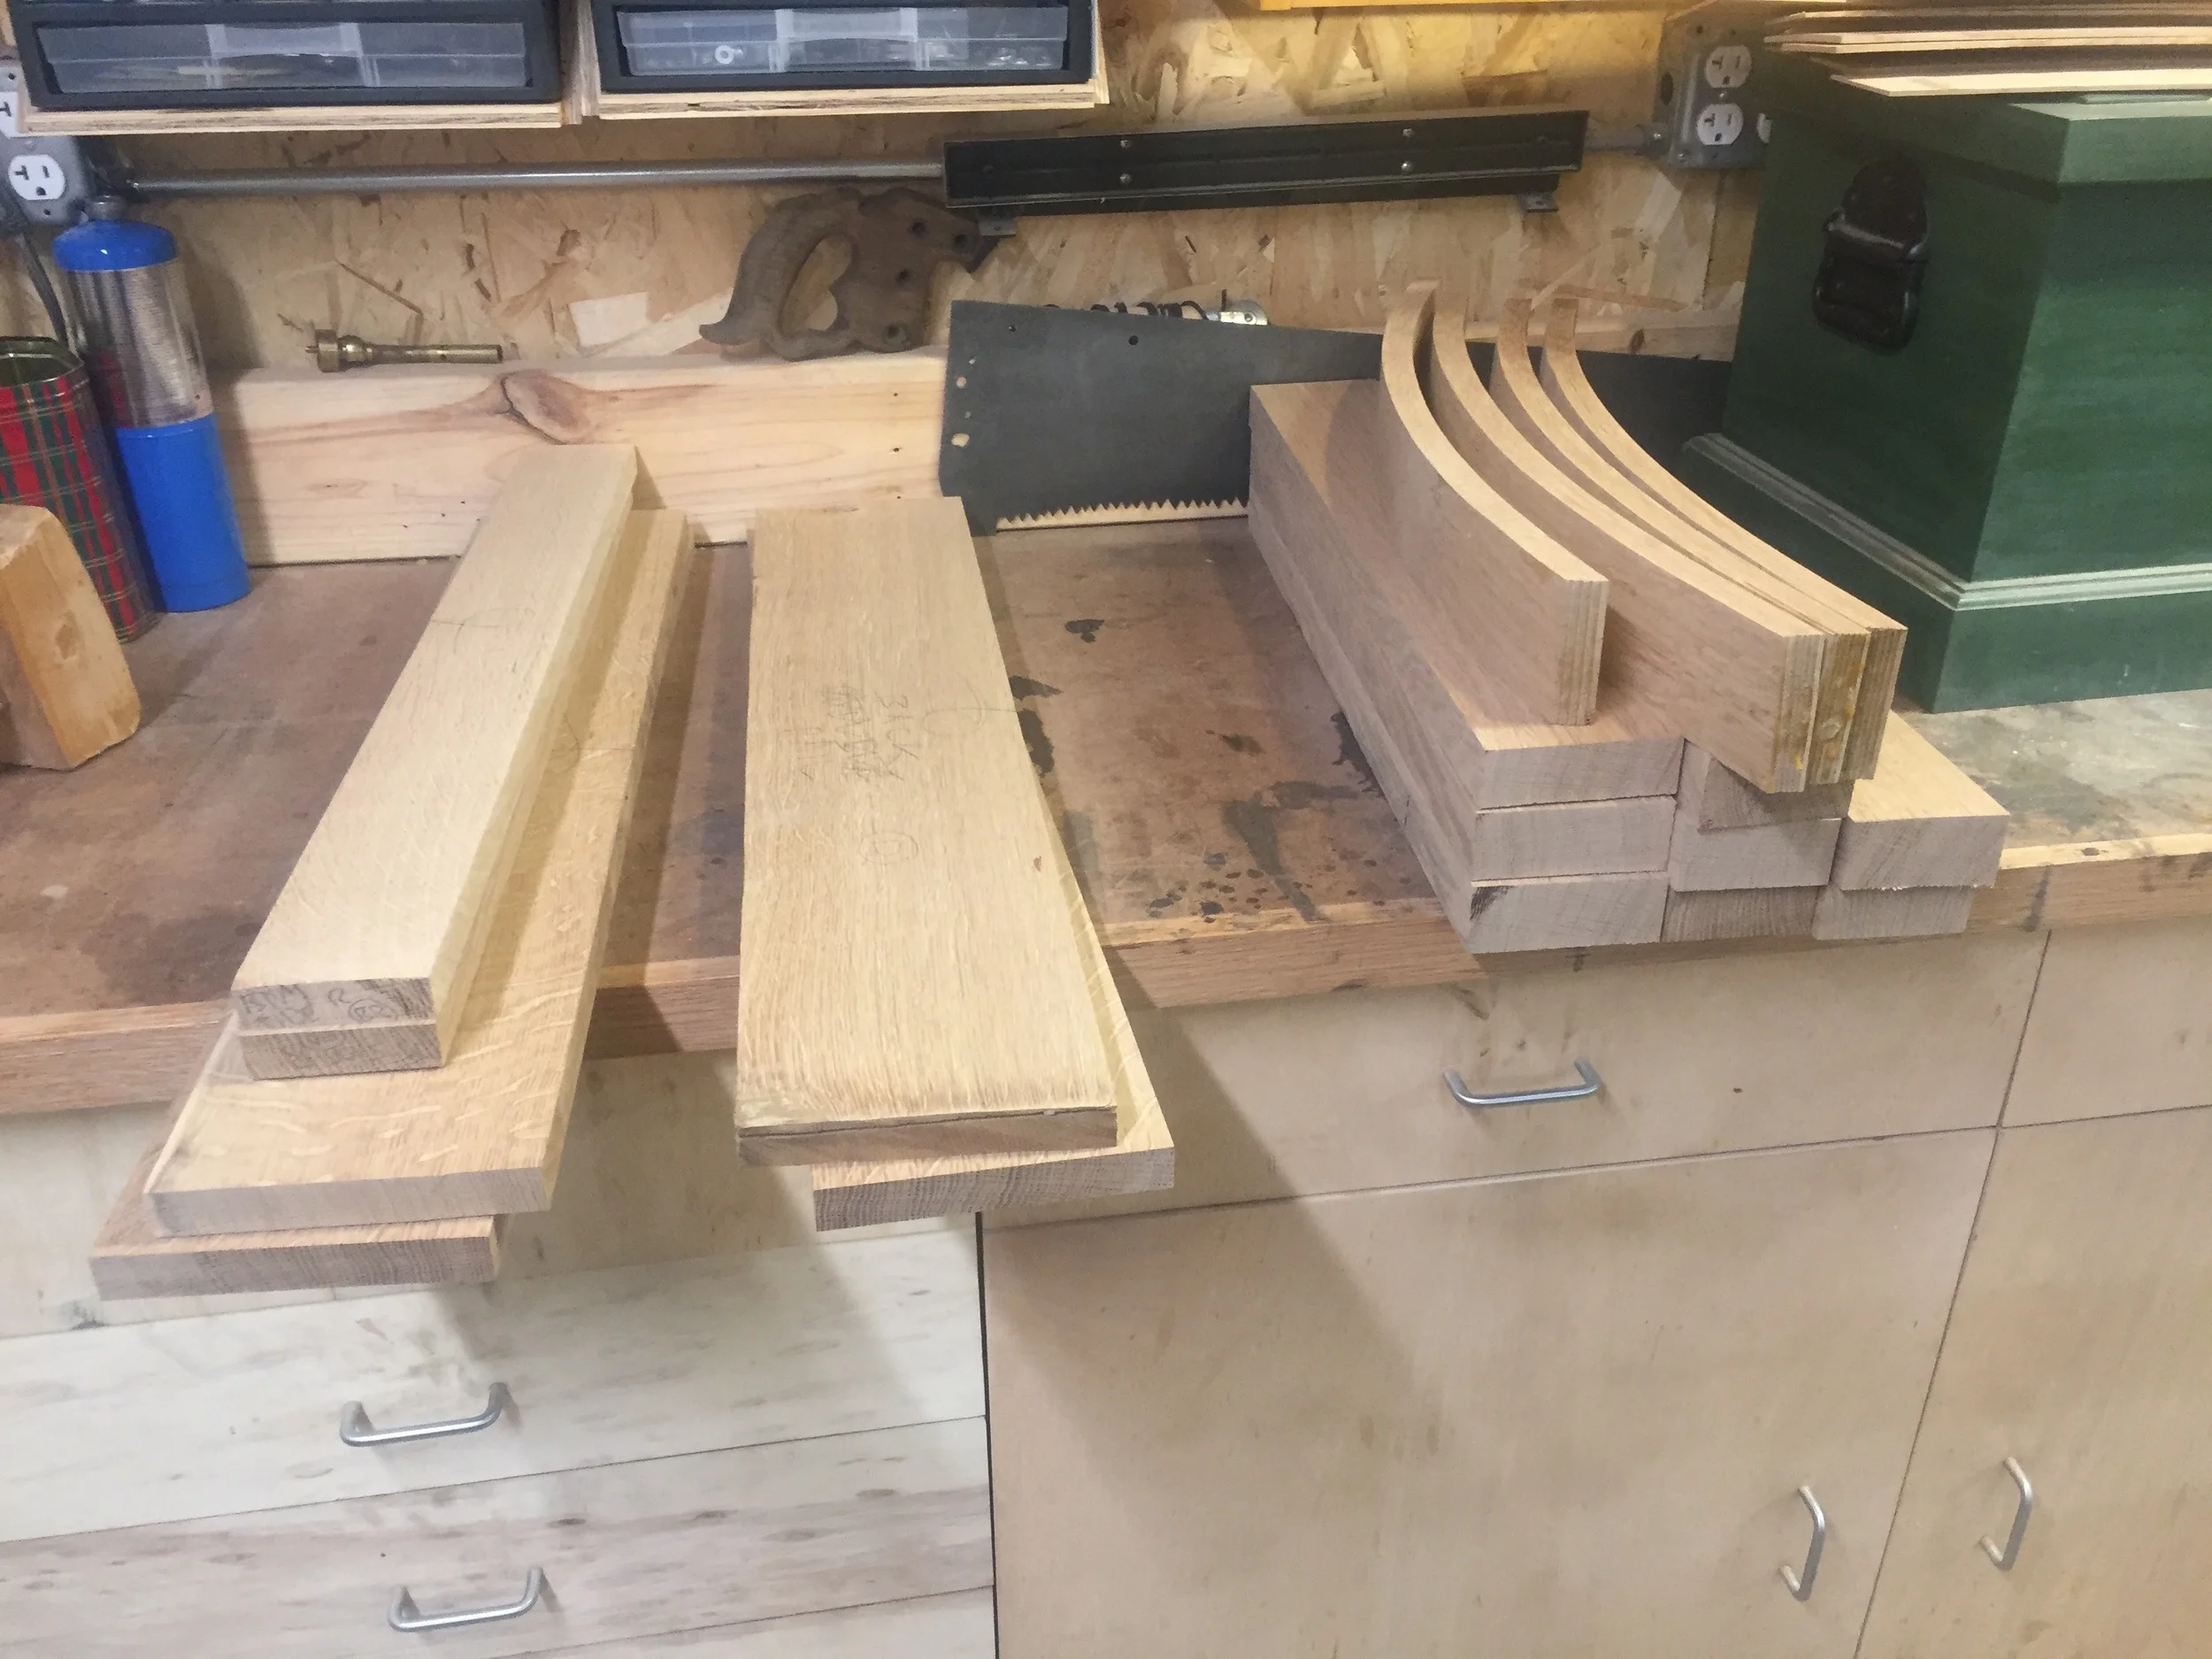
As it's a reproduction, the style calls for using quarter sawn white oak. Again. I'm getting pretty used to QSWO. Good thing I love it. i've seen plenty of "modern" revision of the Morris chair in other woods (cherry and walnut look the best), but nothing works nearly as well as good old white oak. 

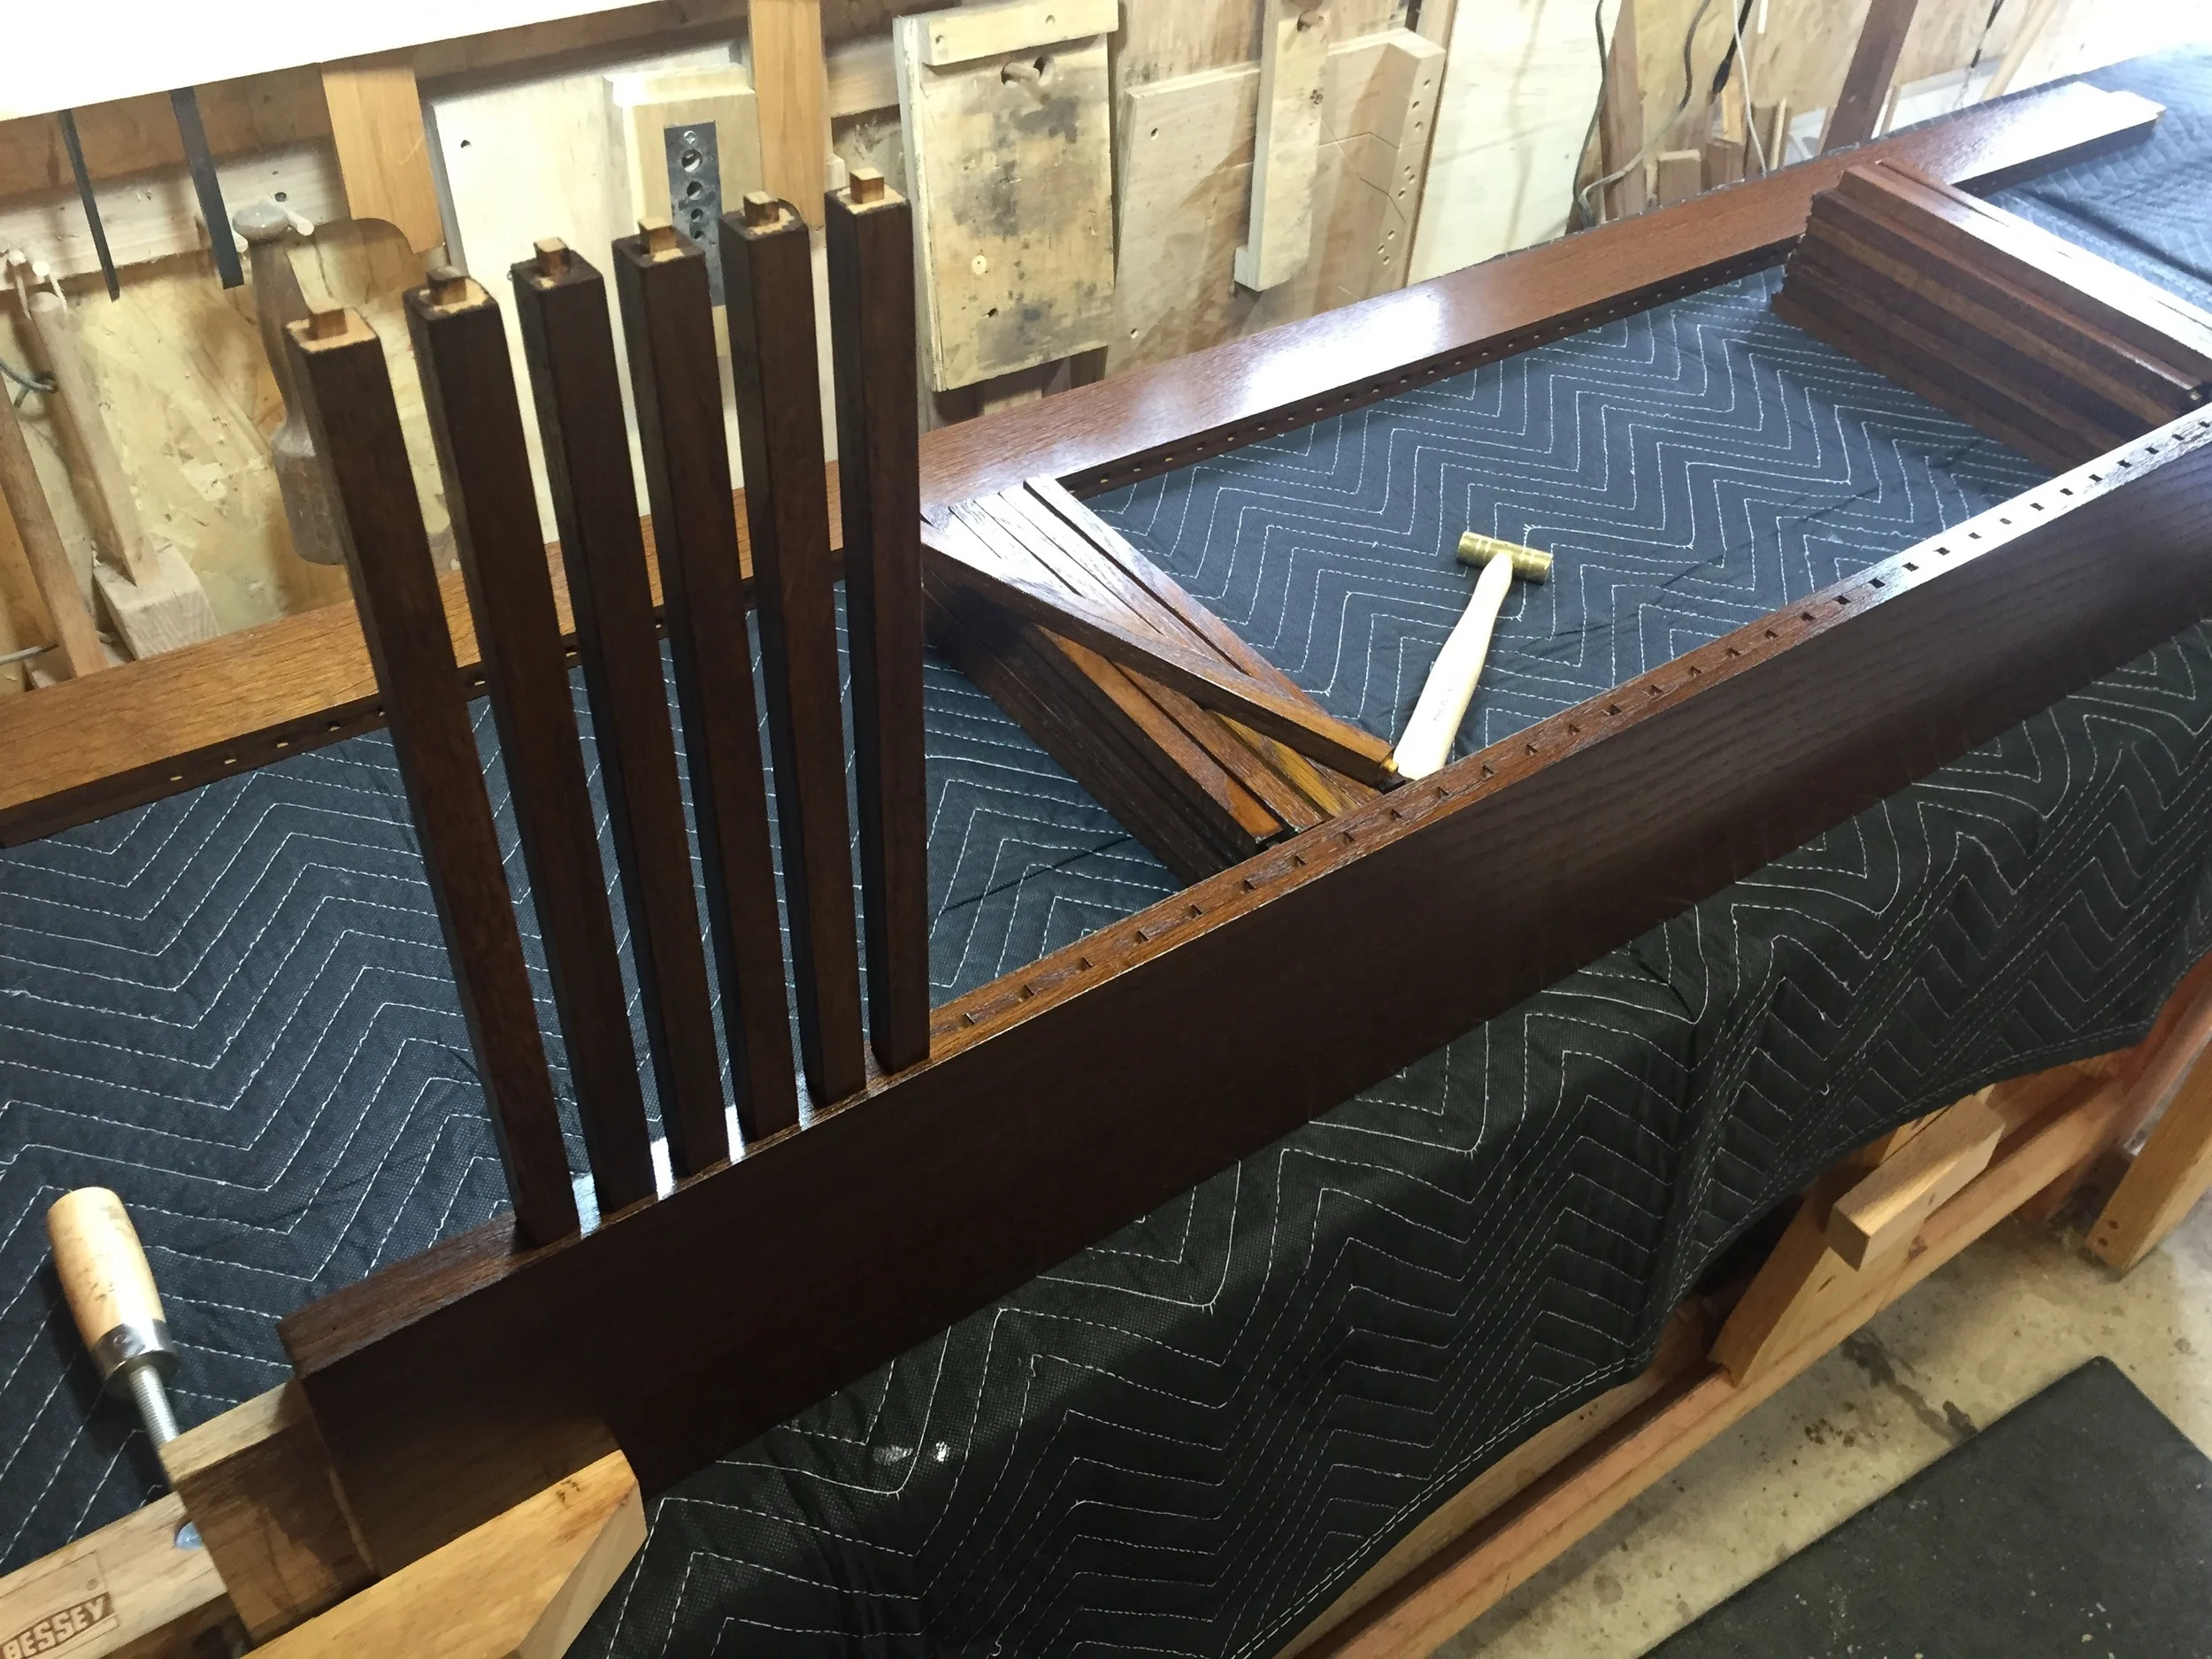
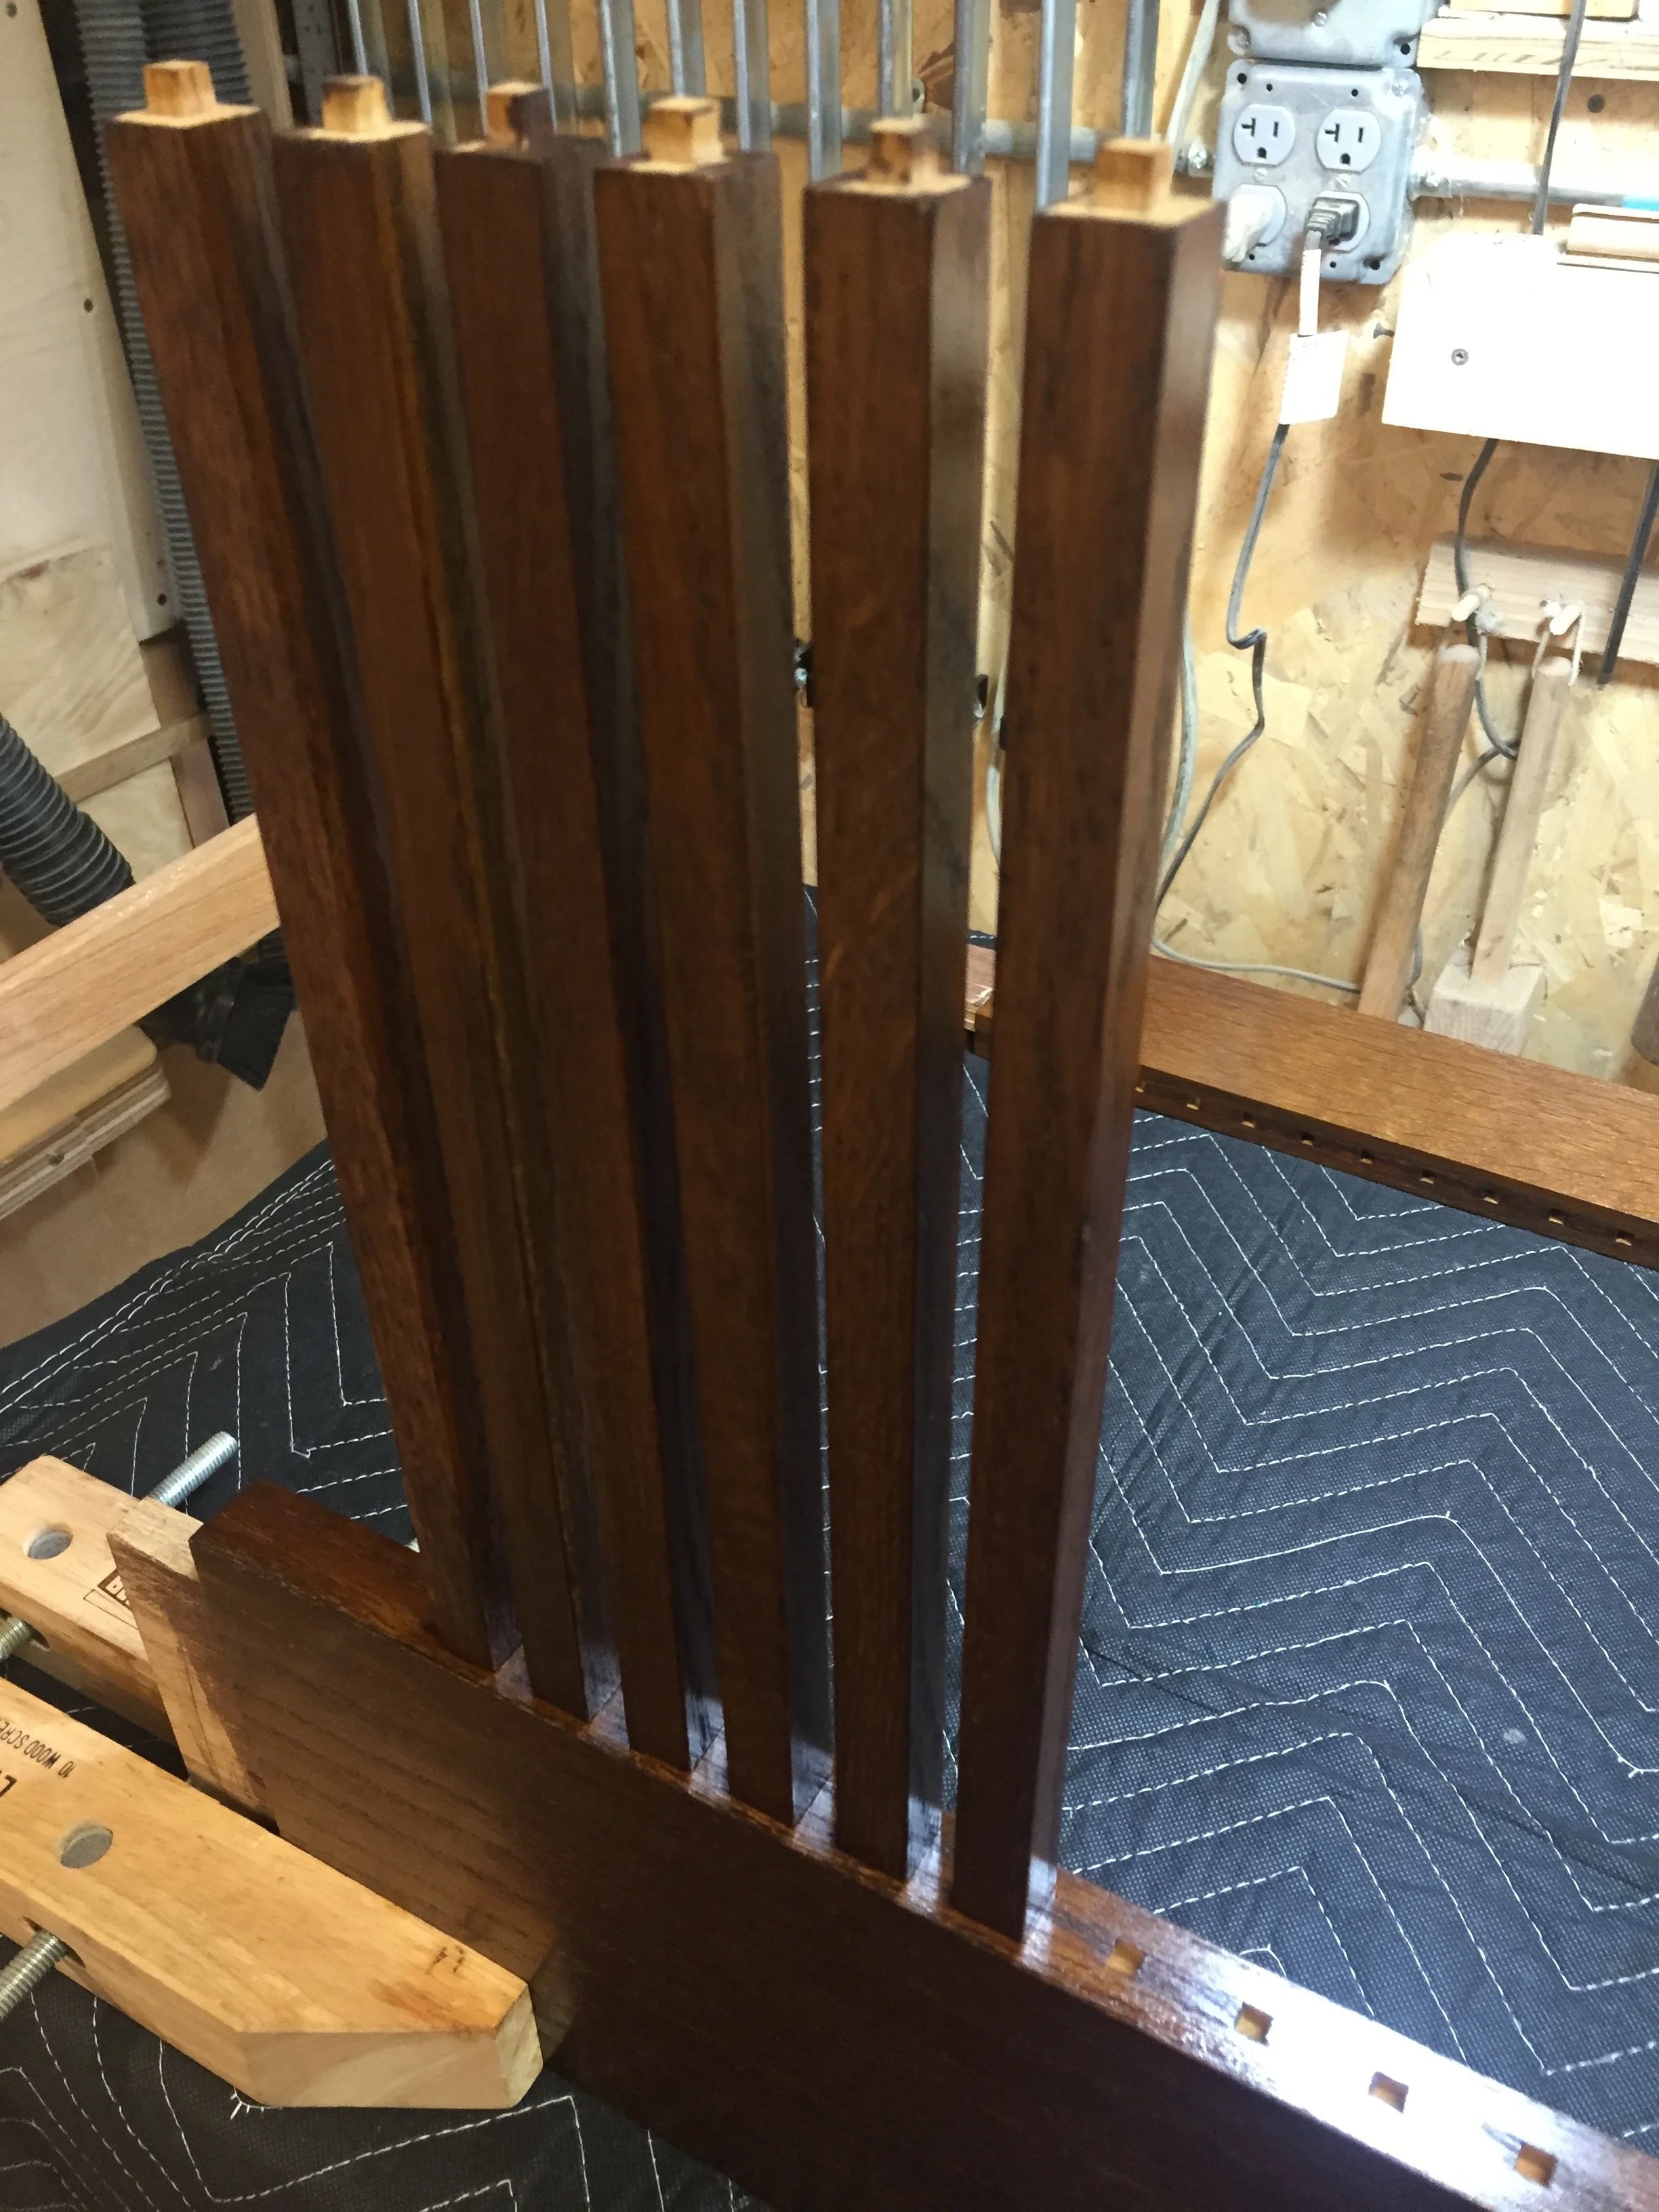
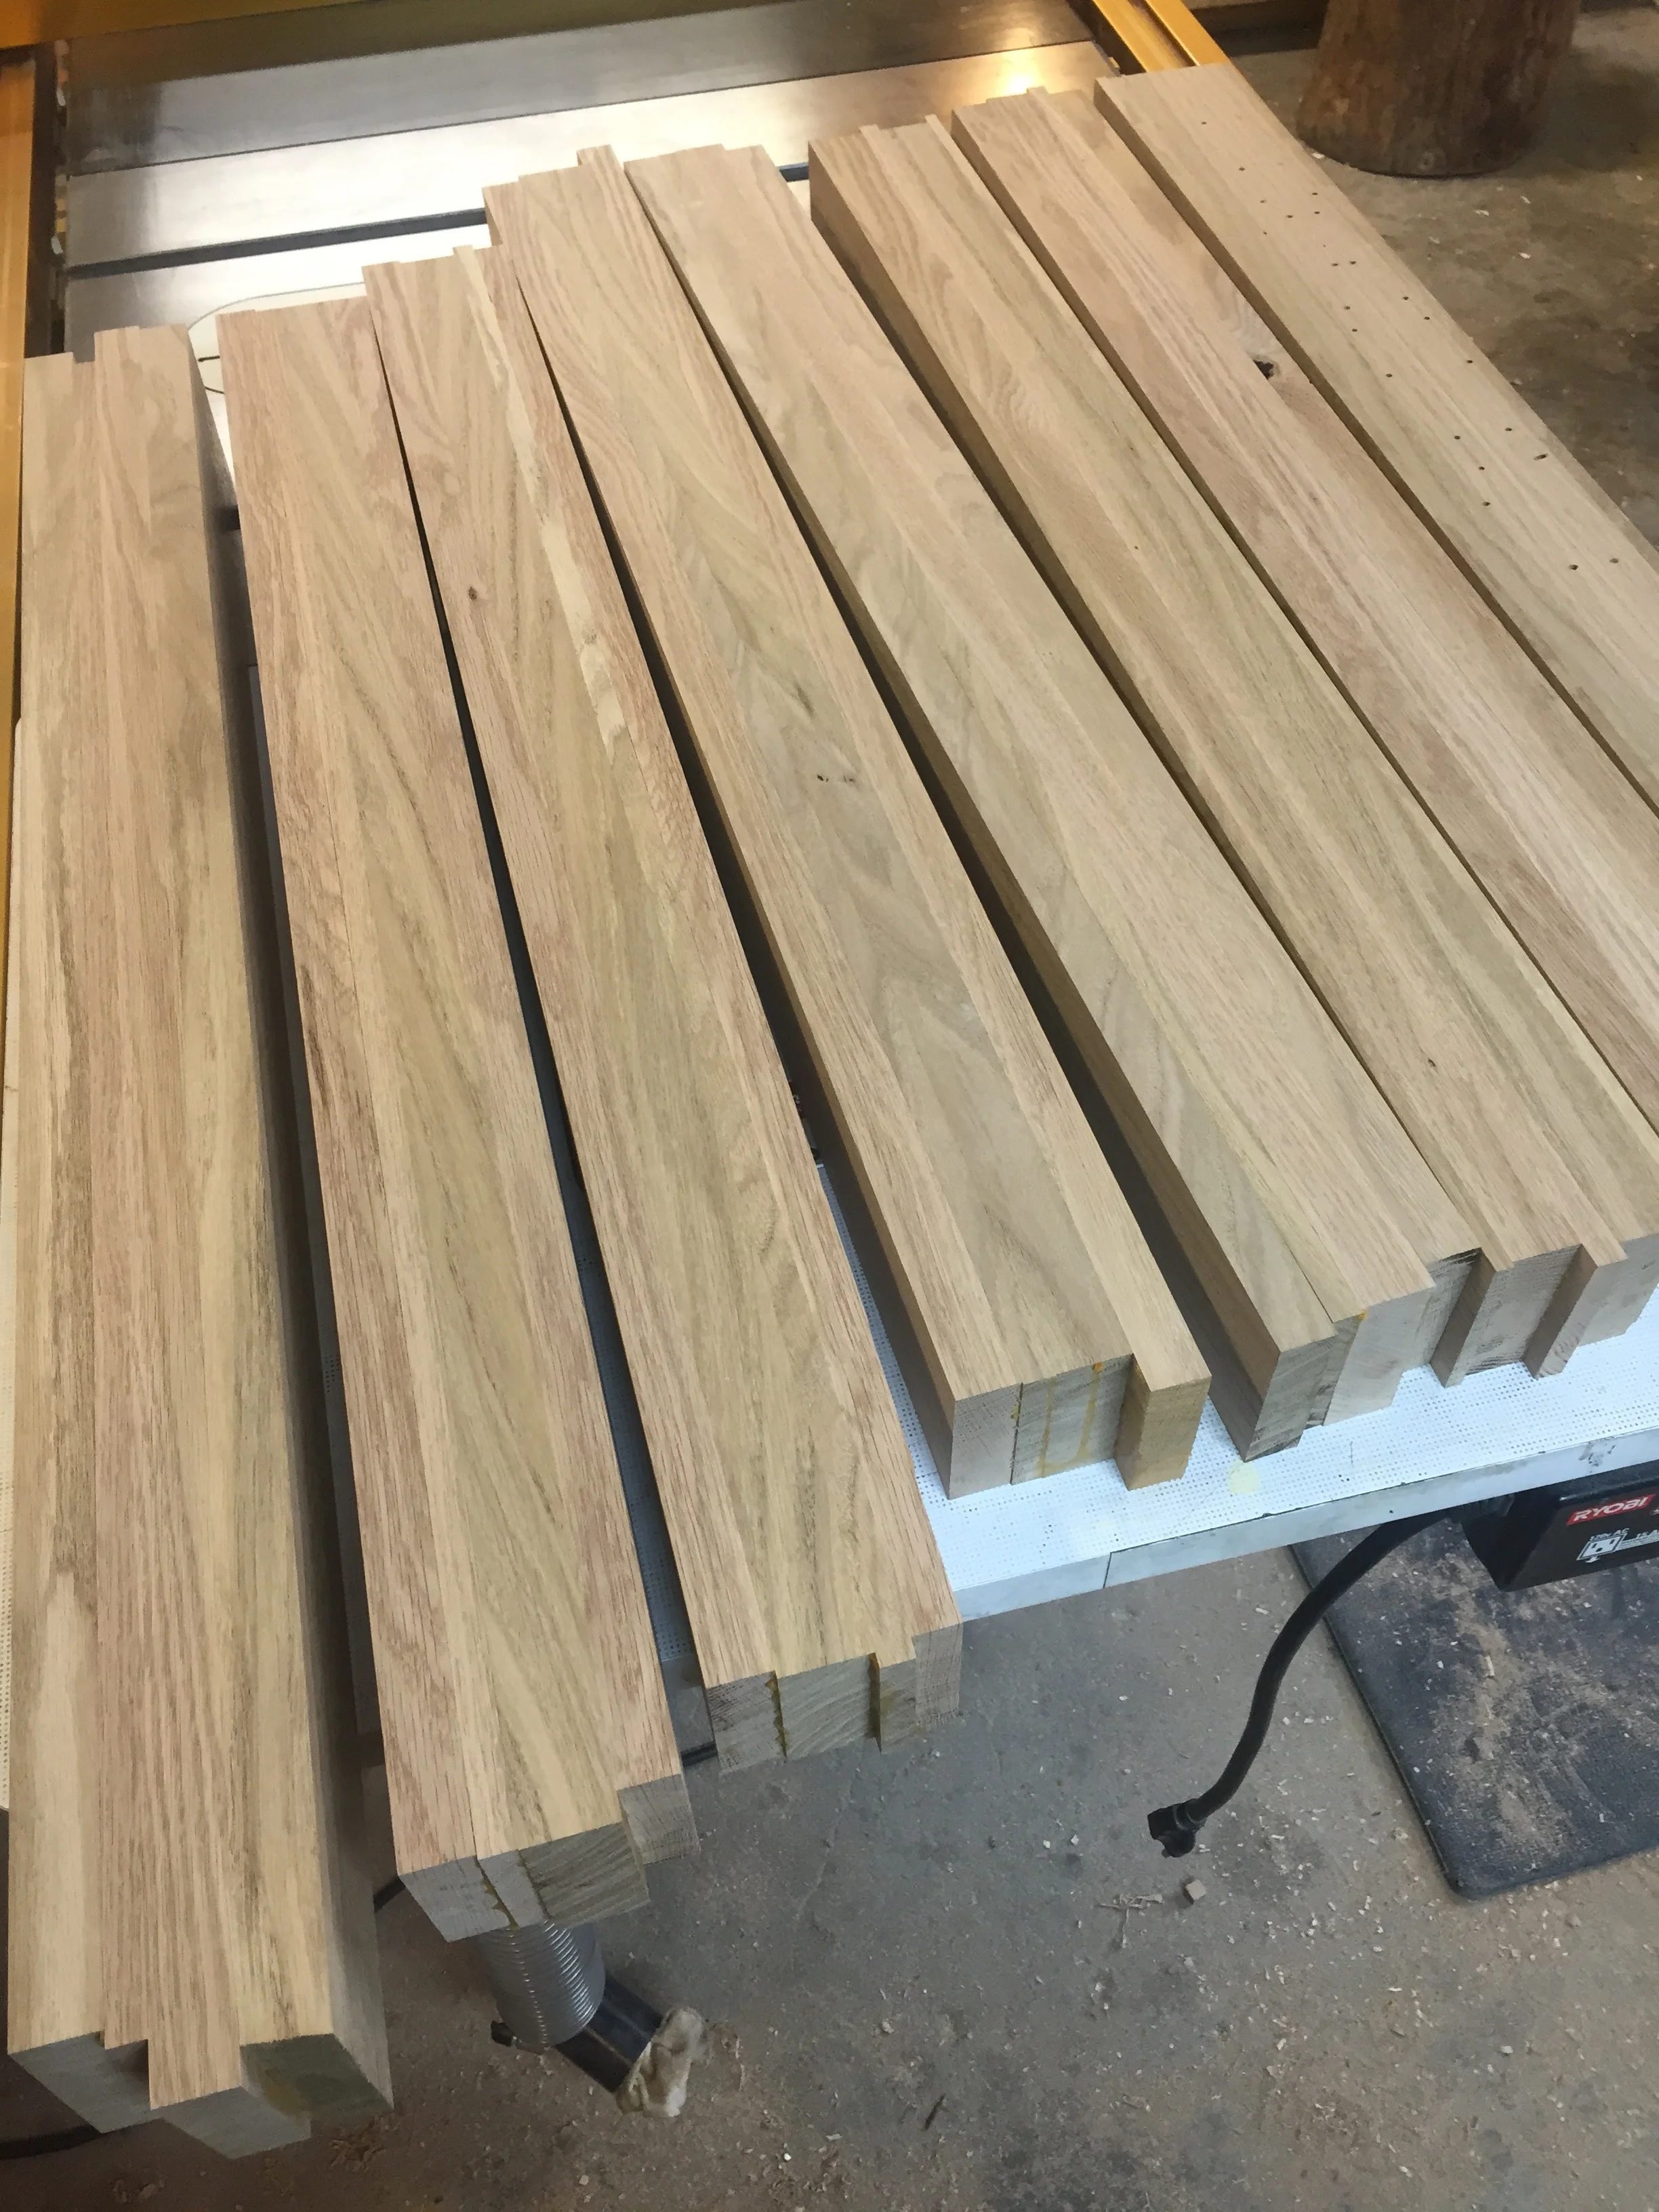
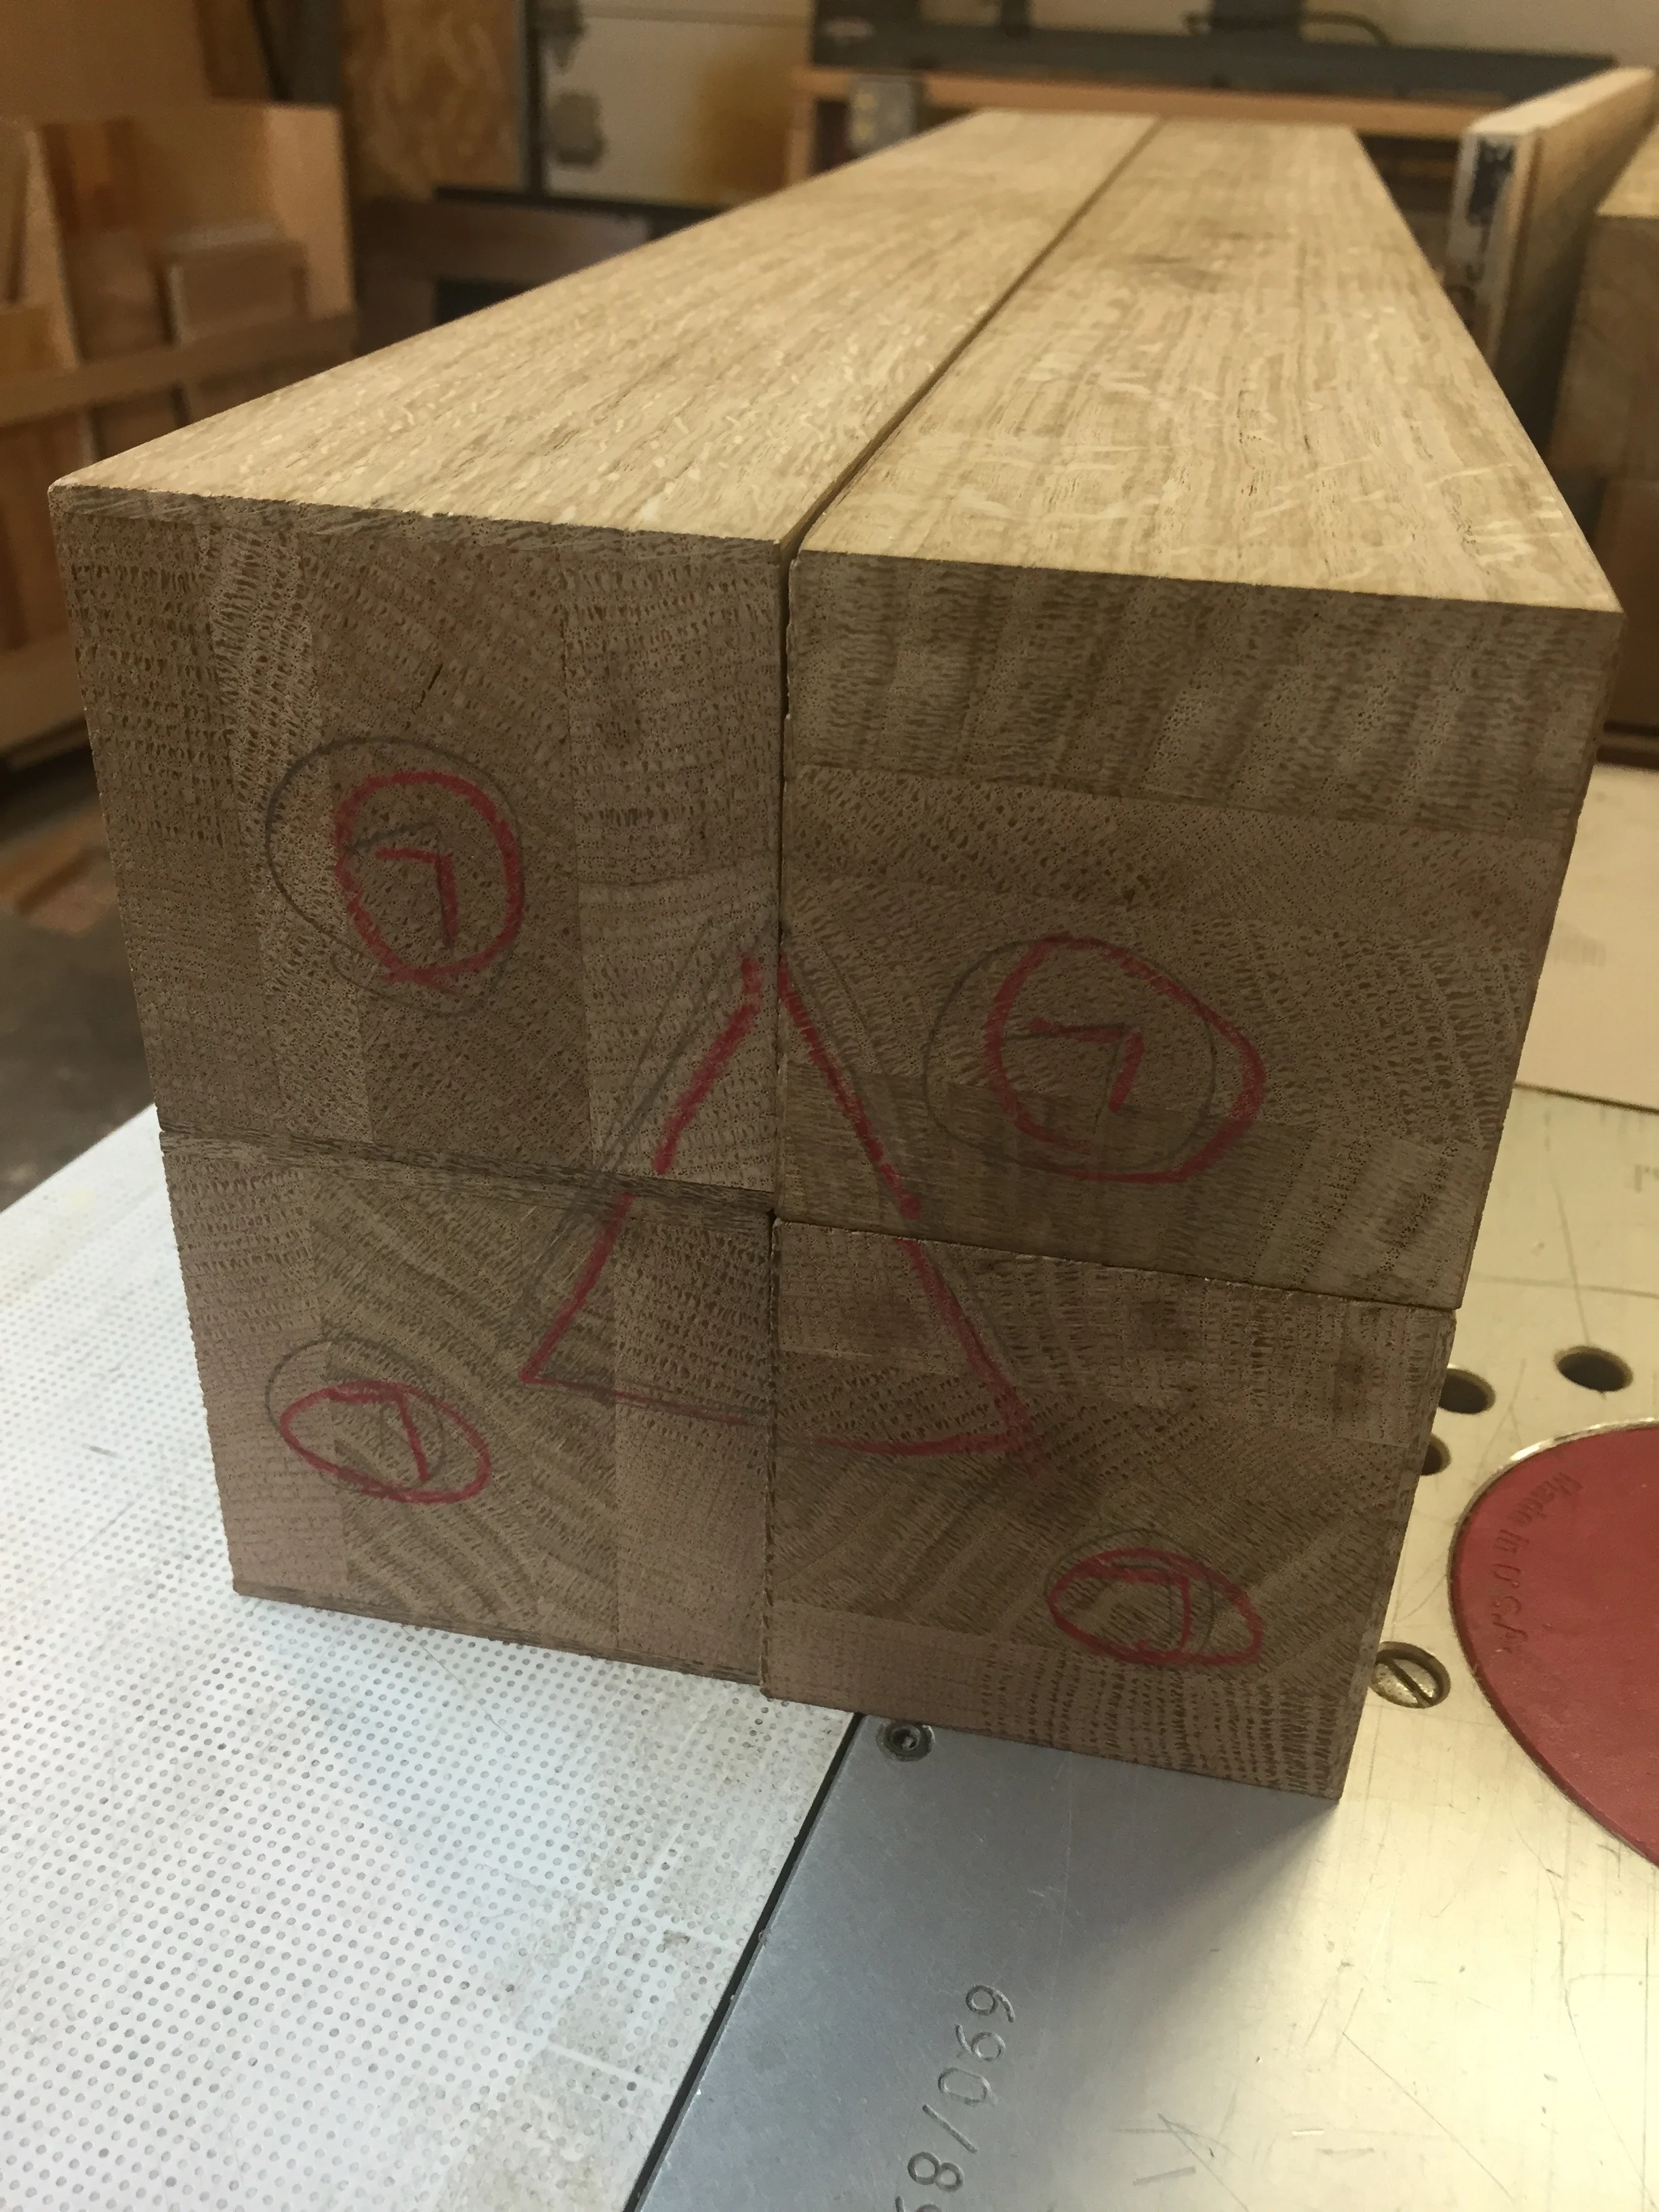
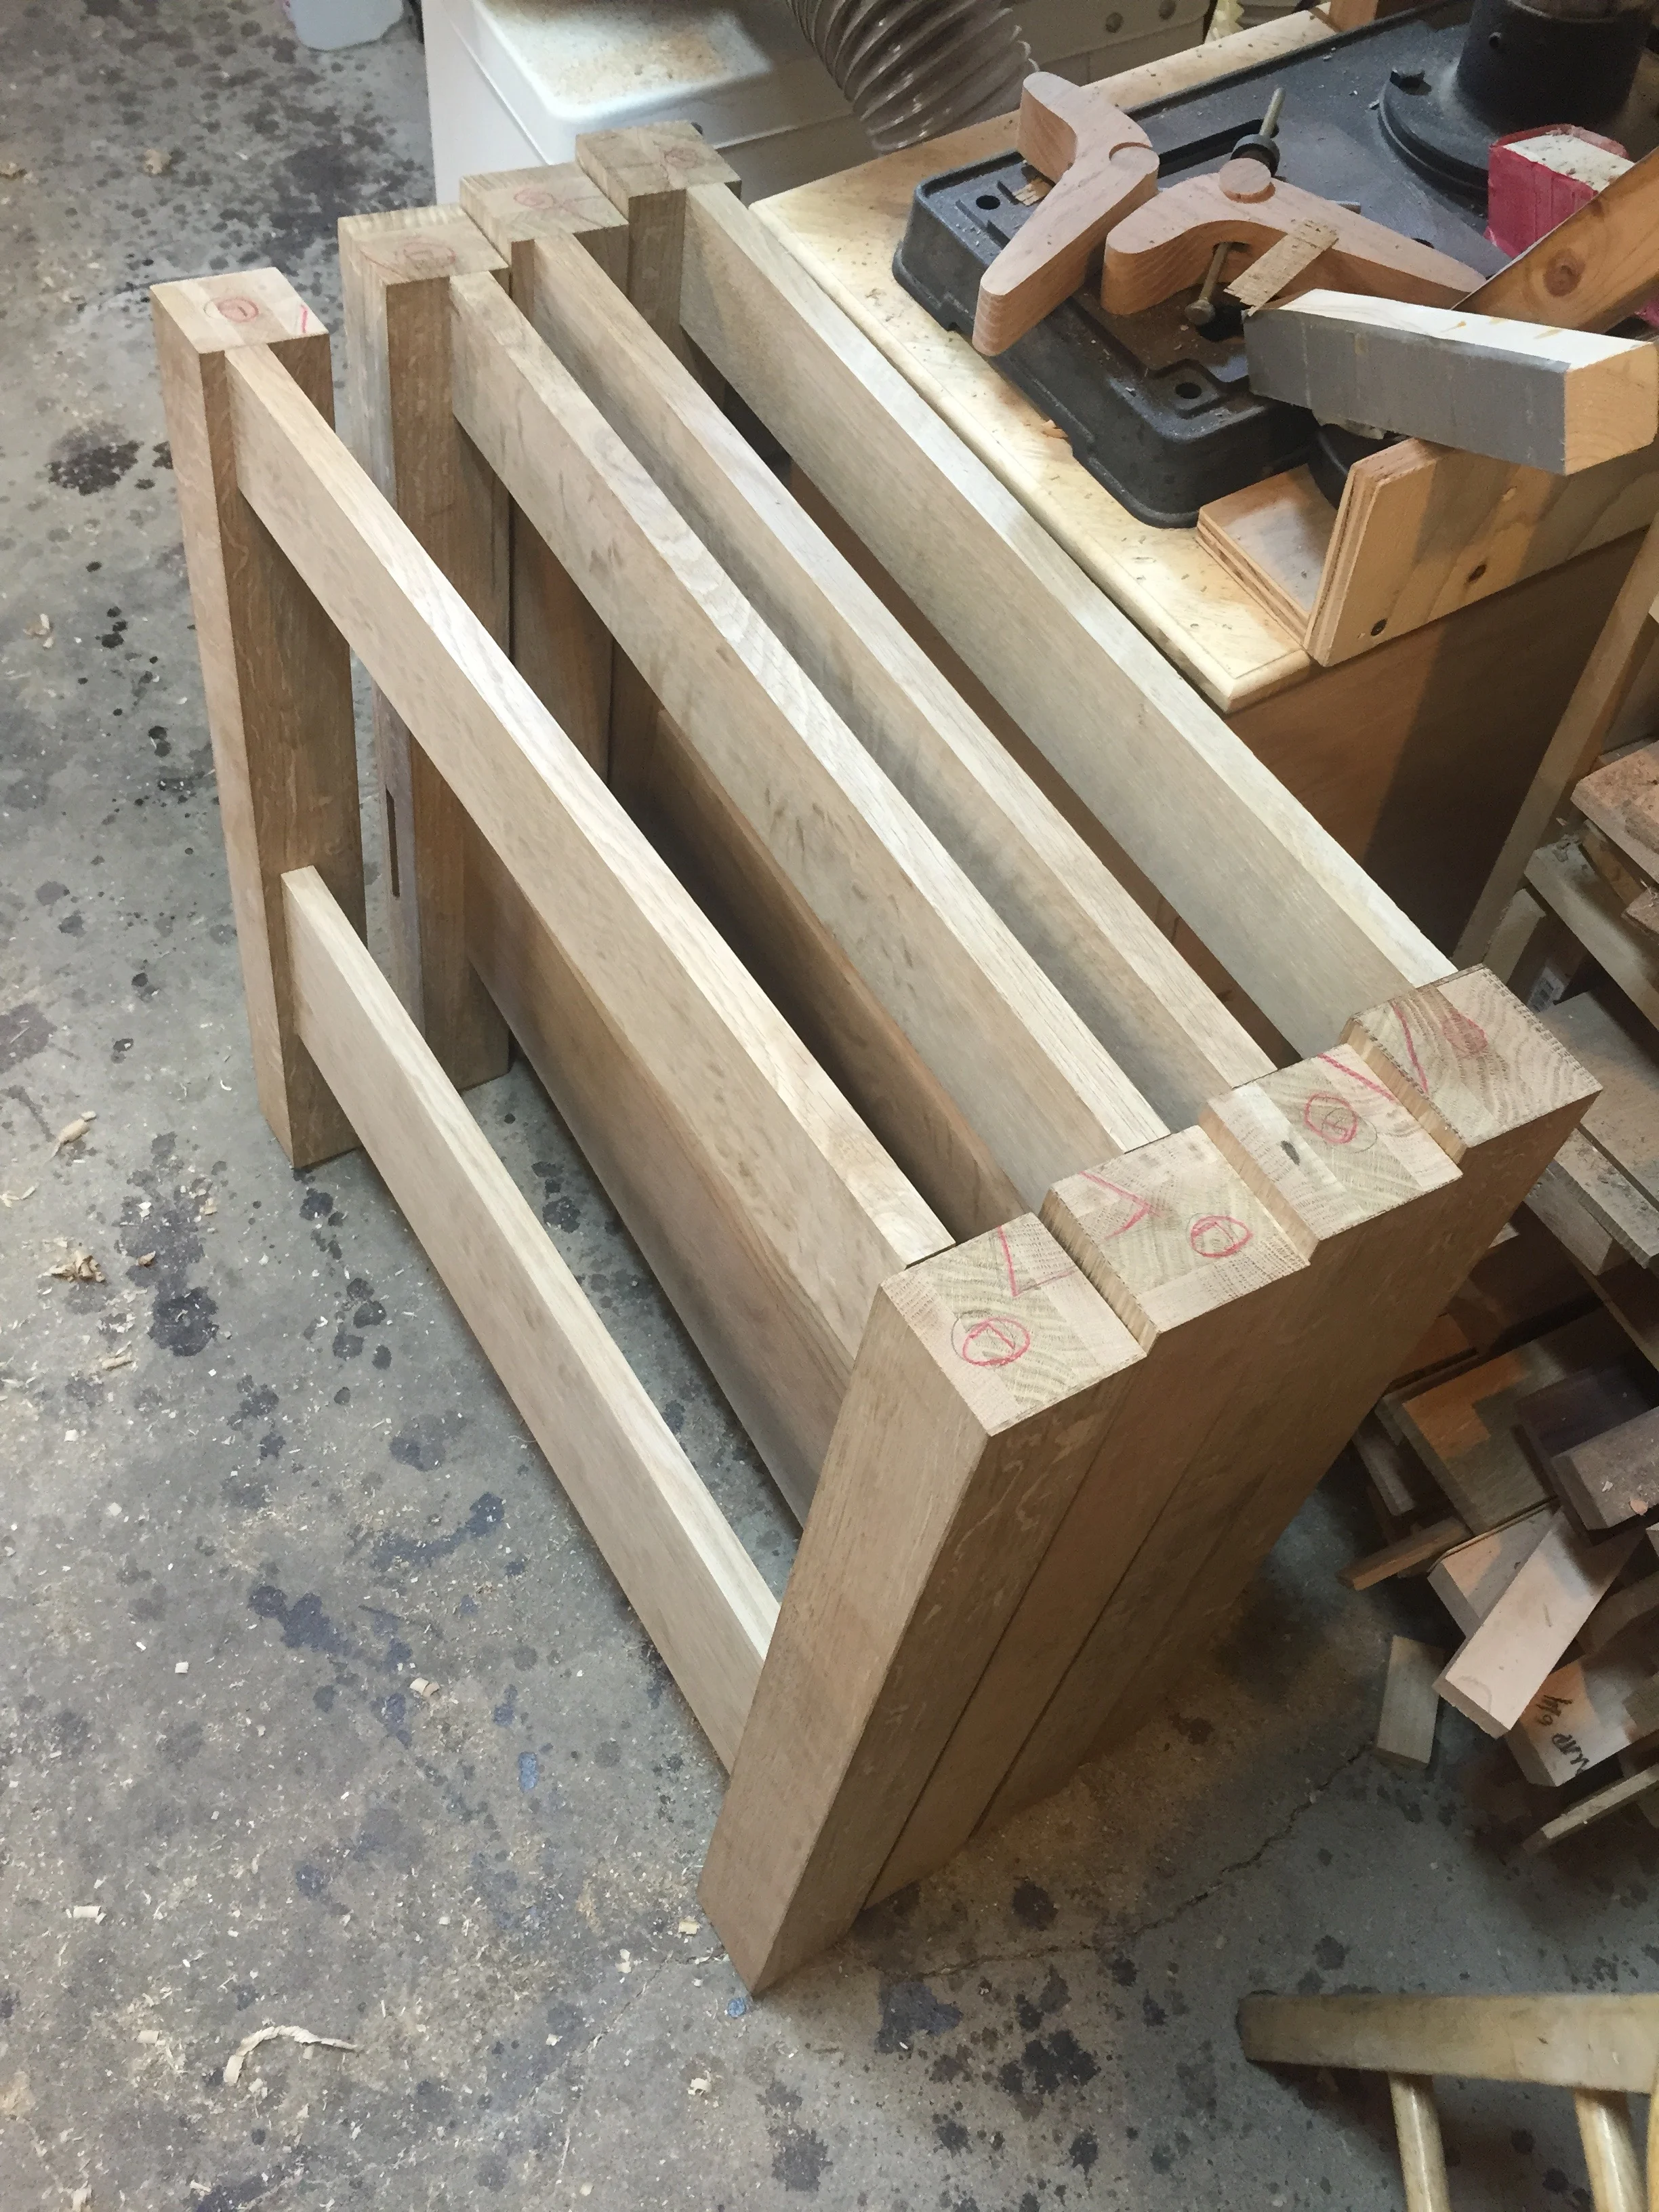
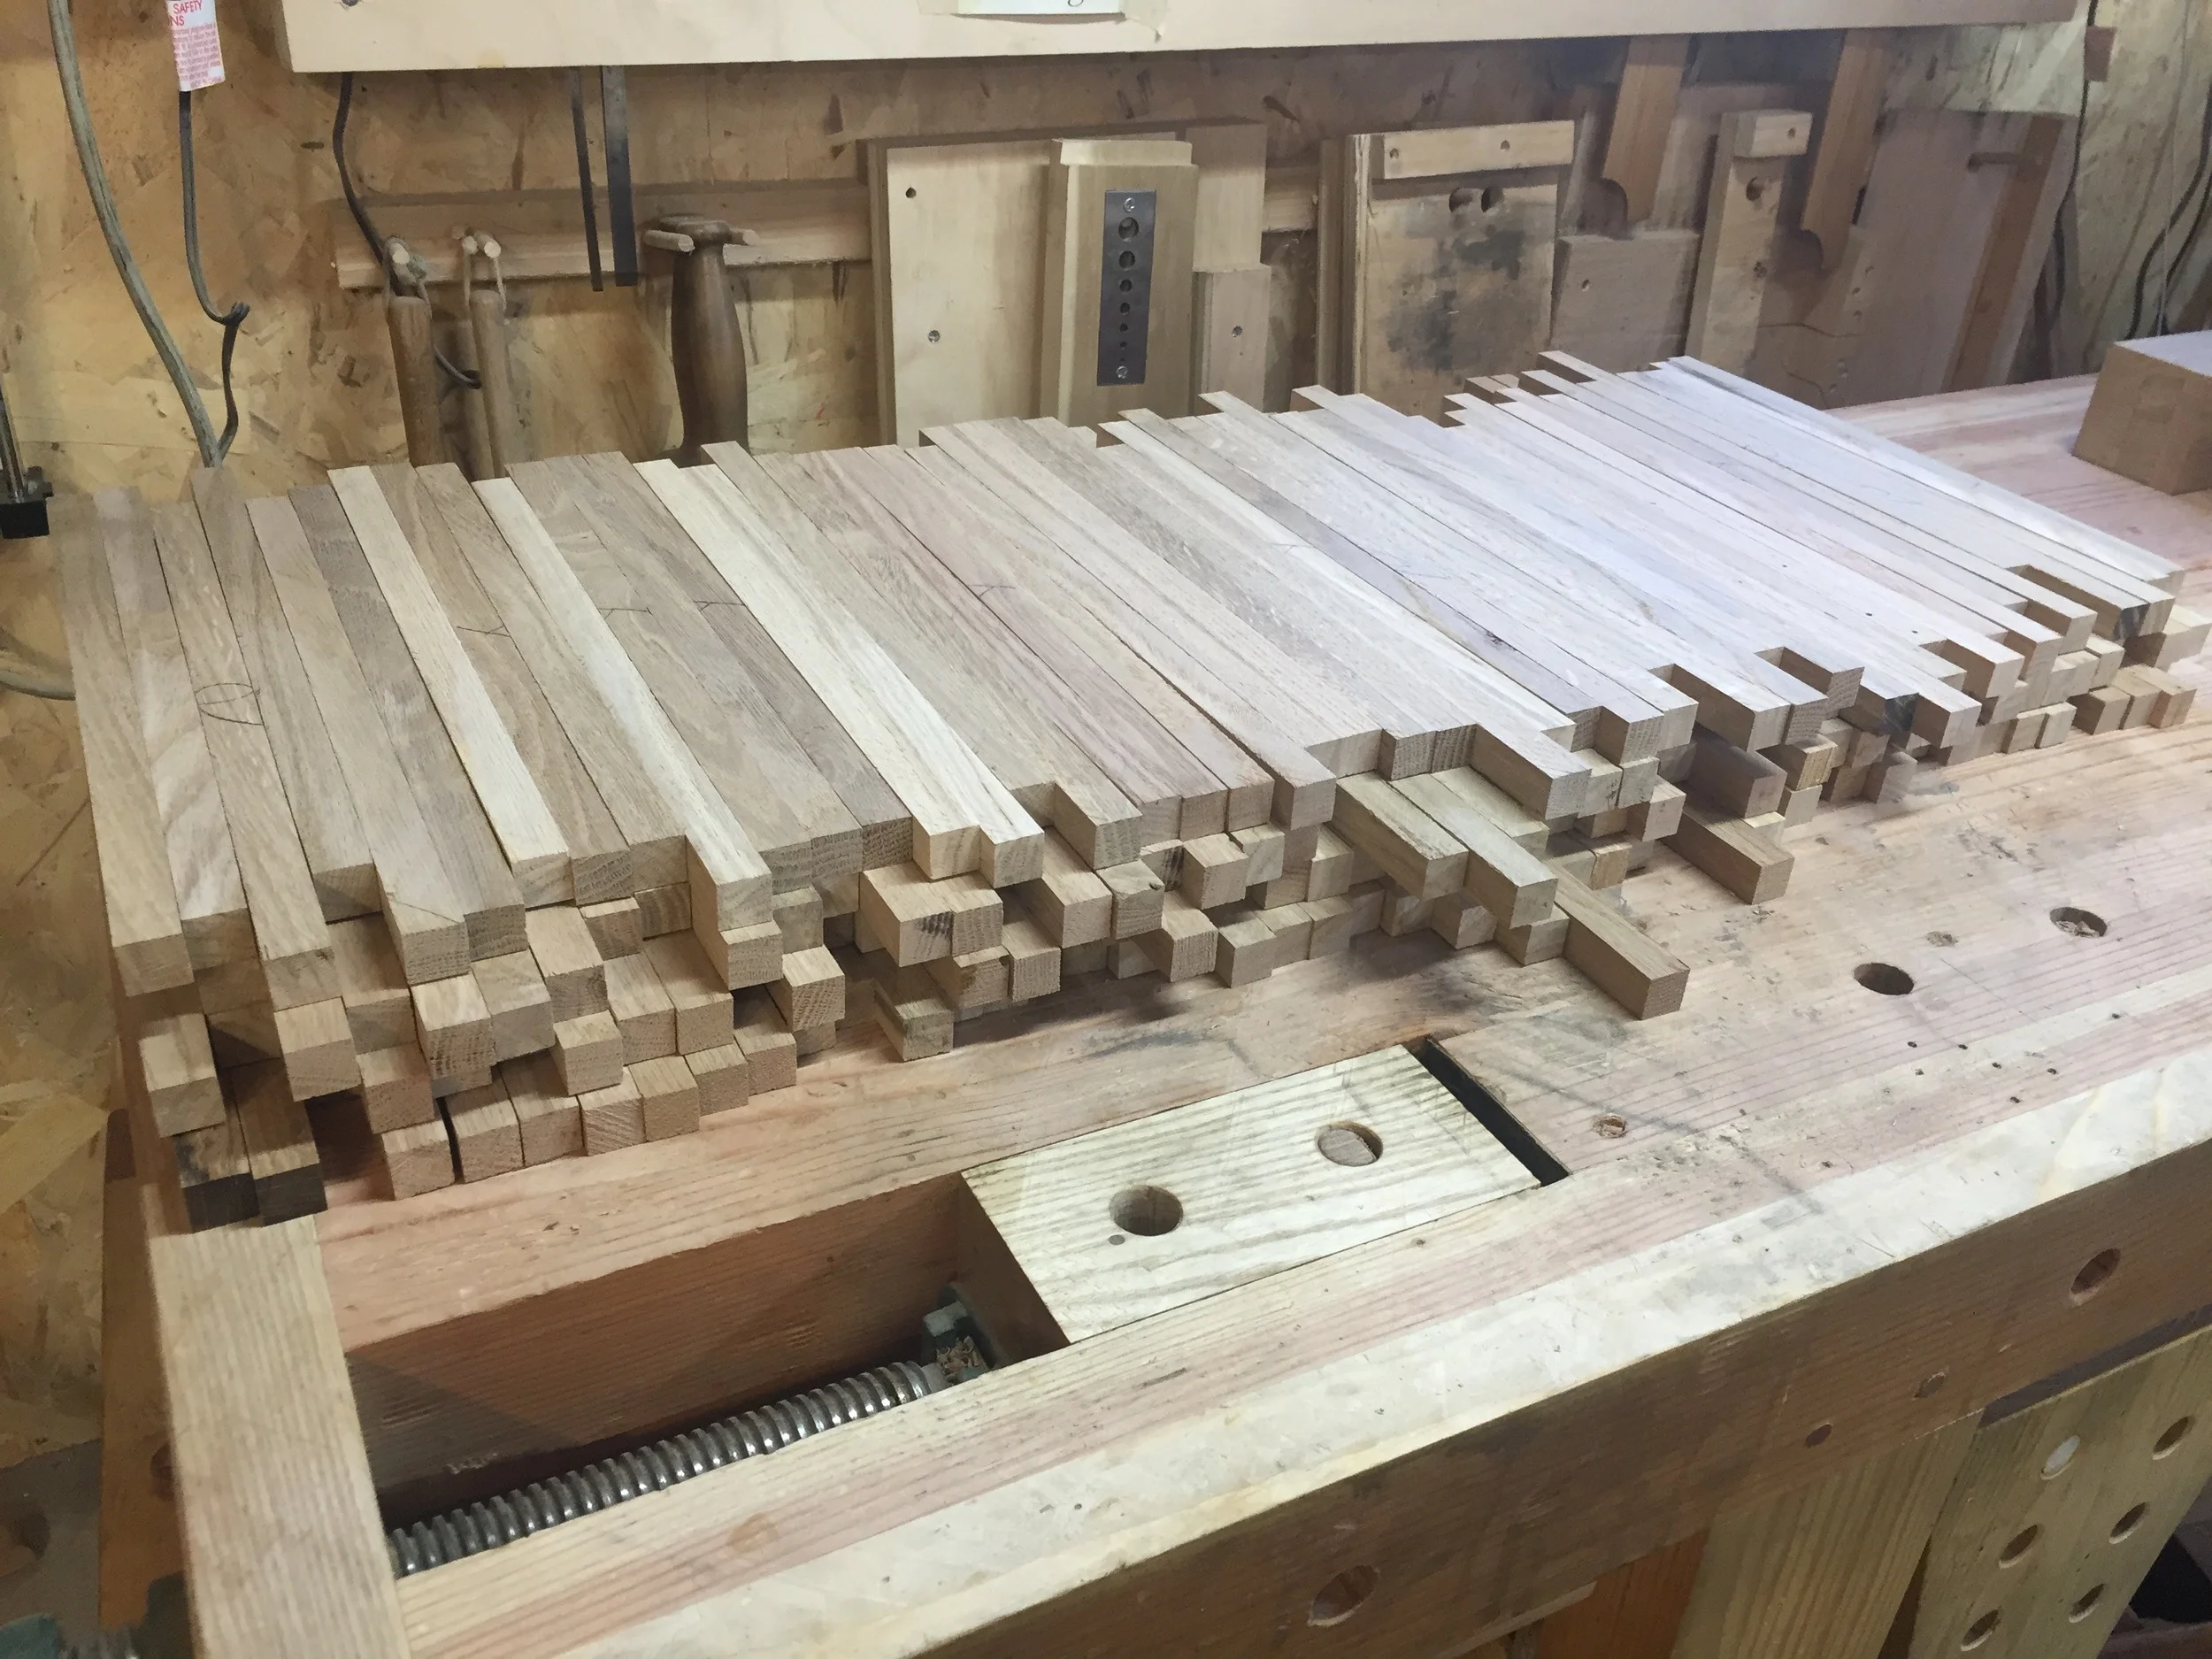
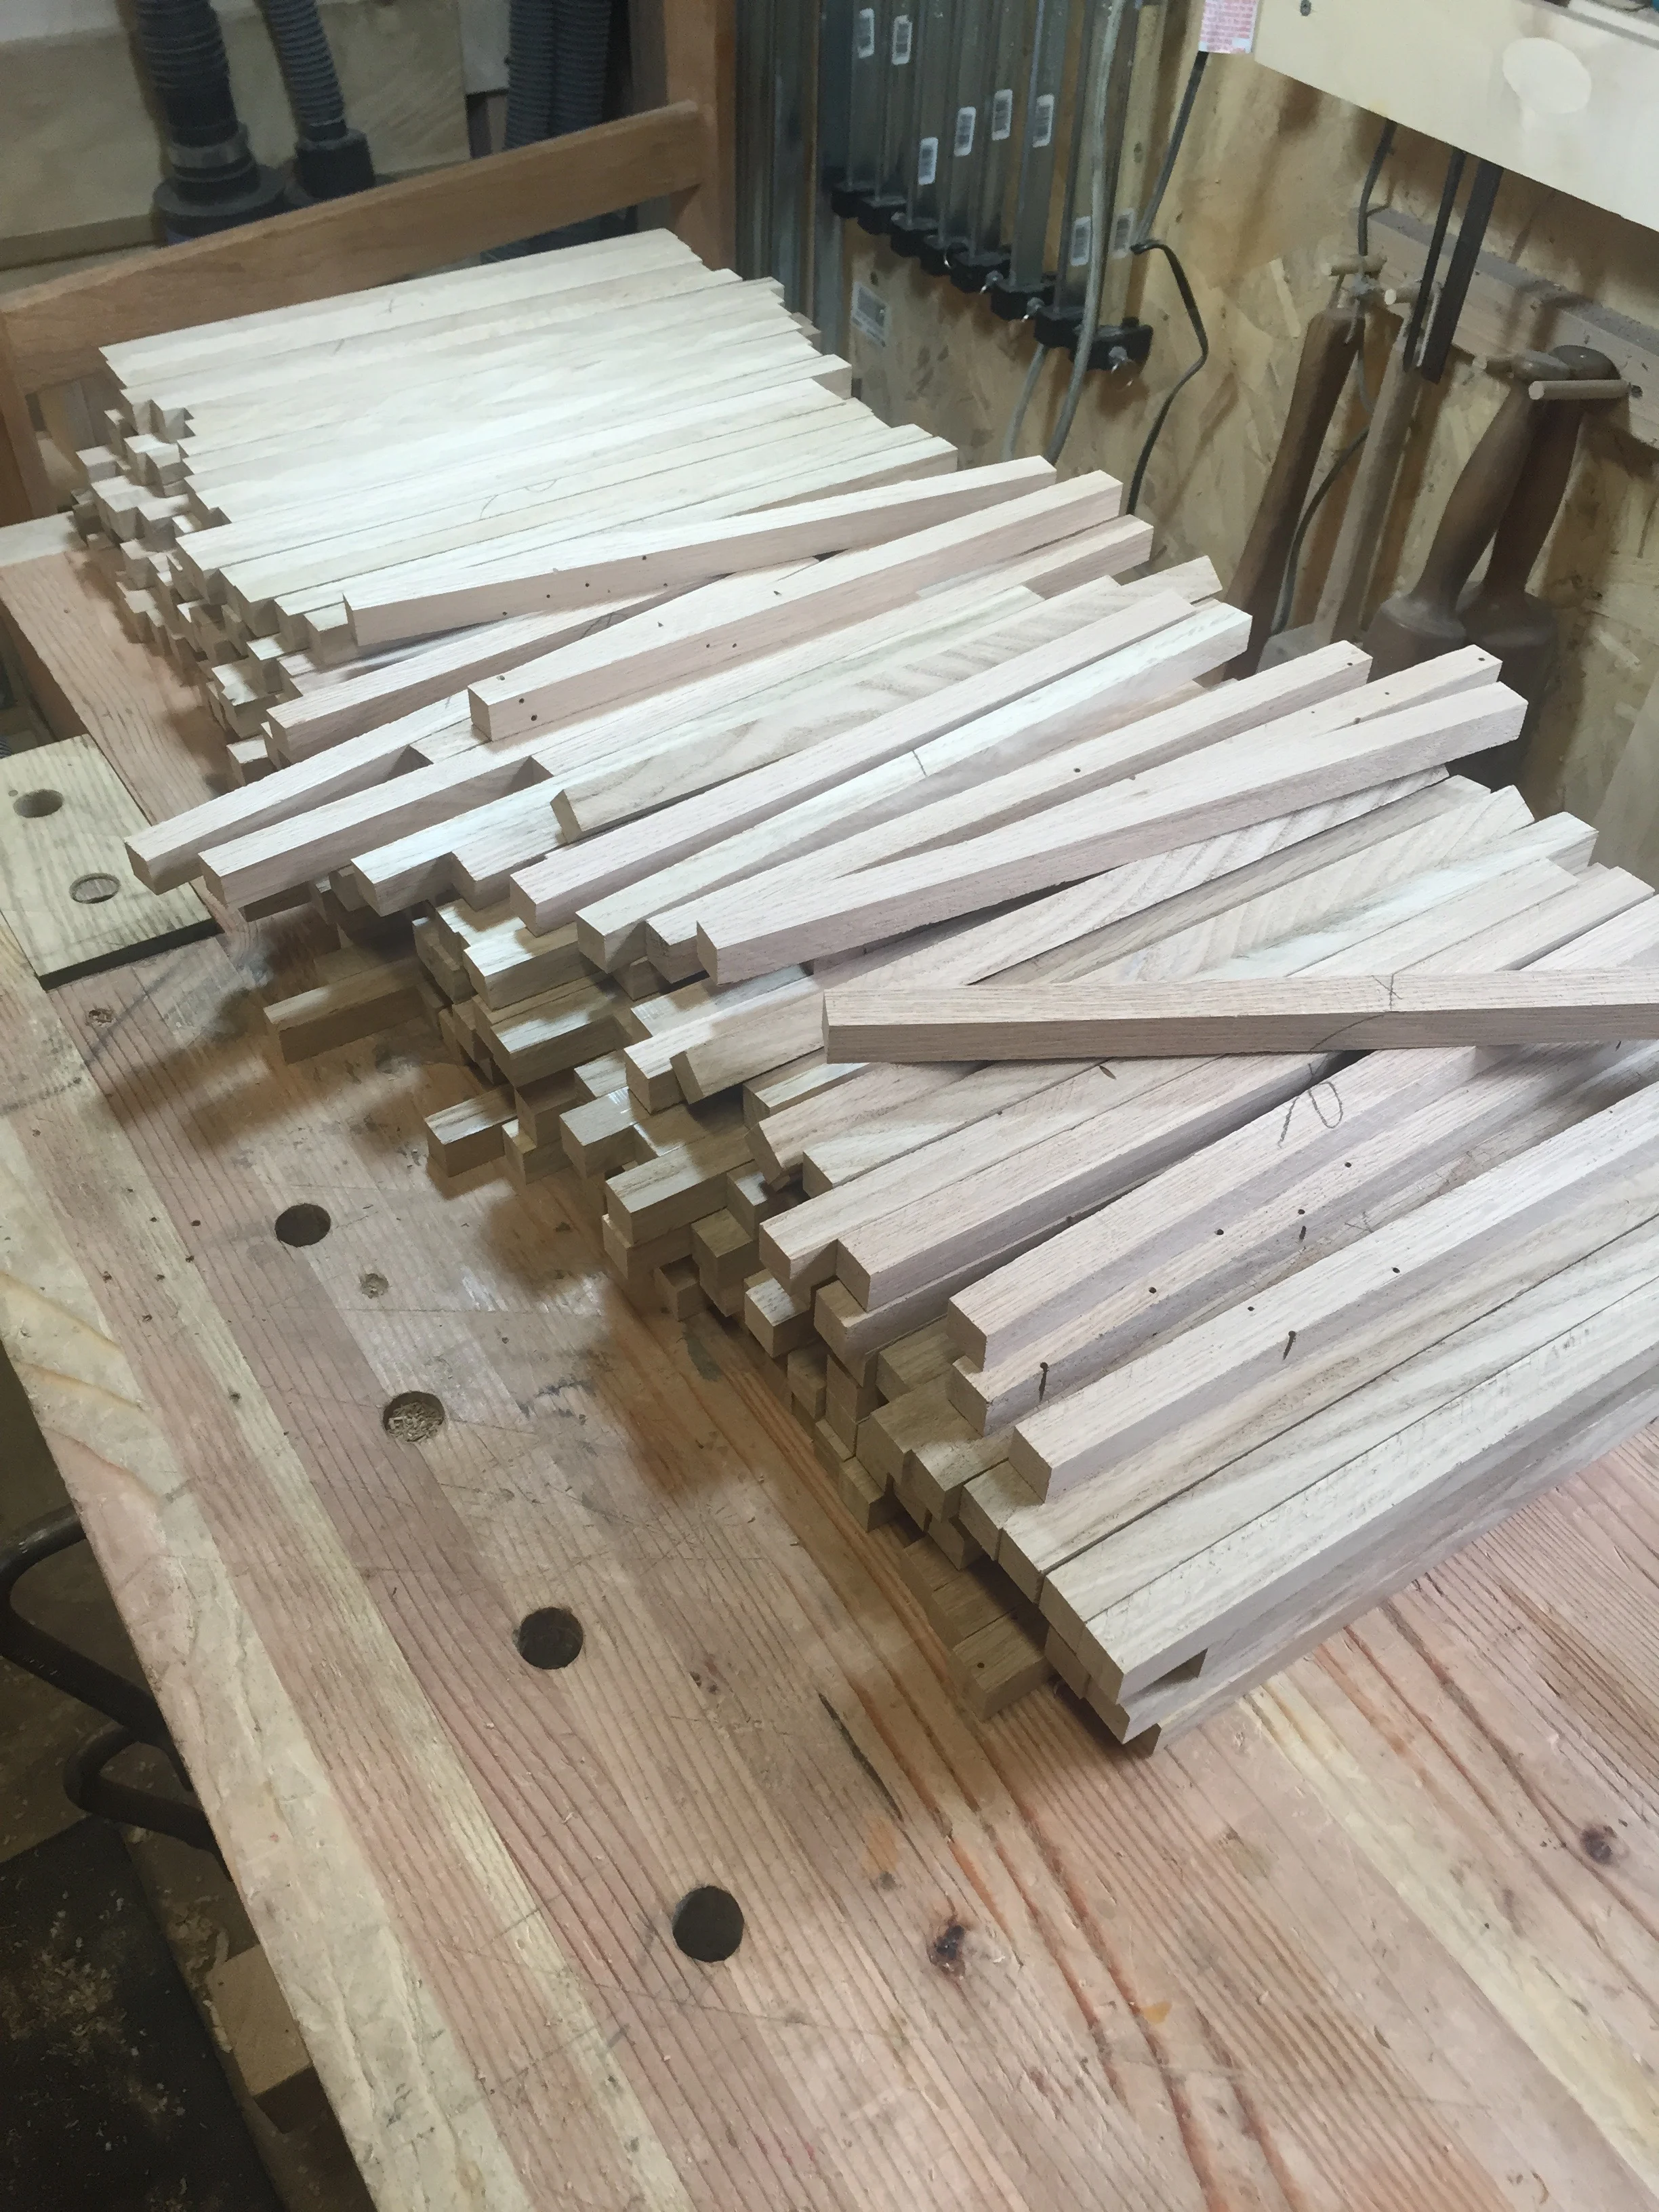
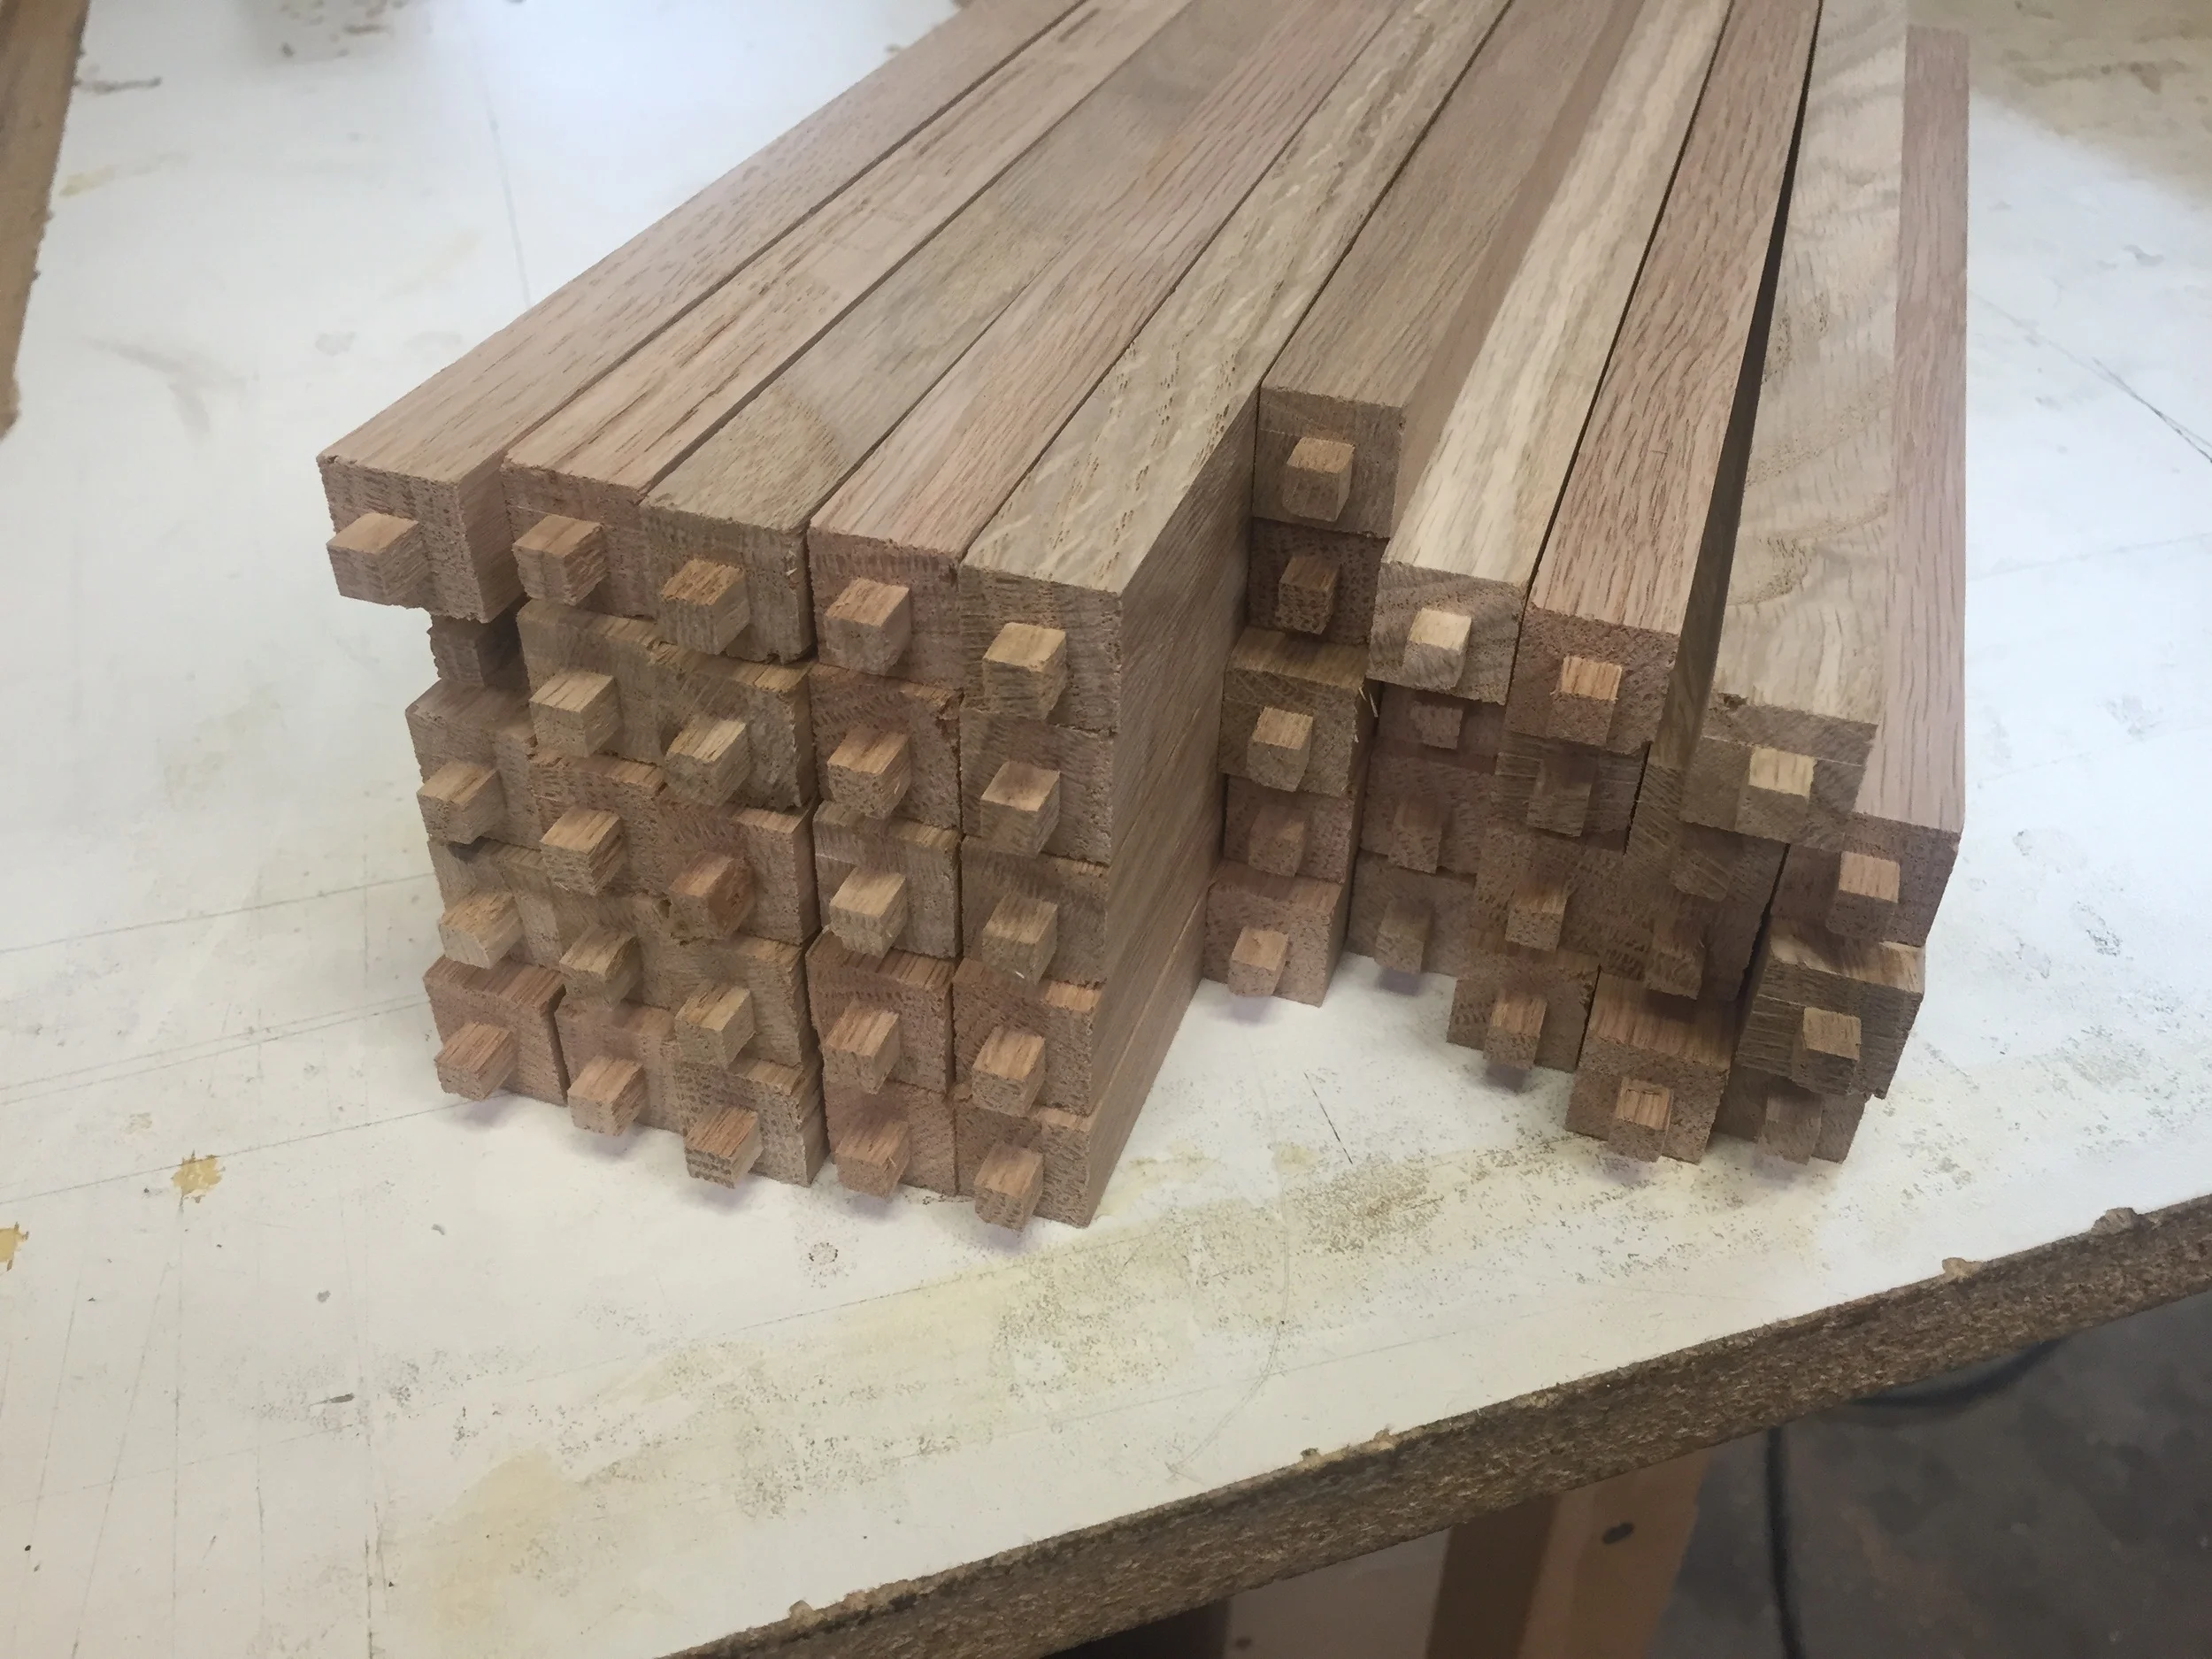
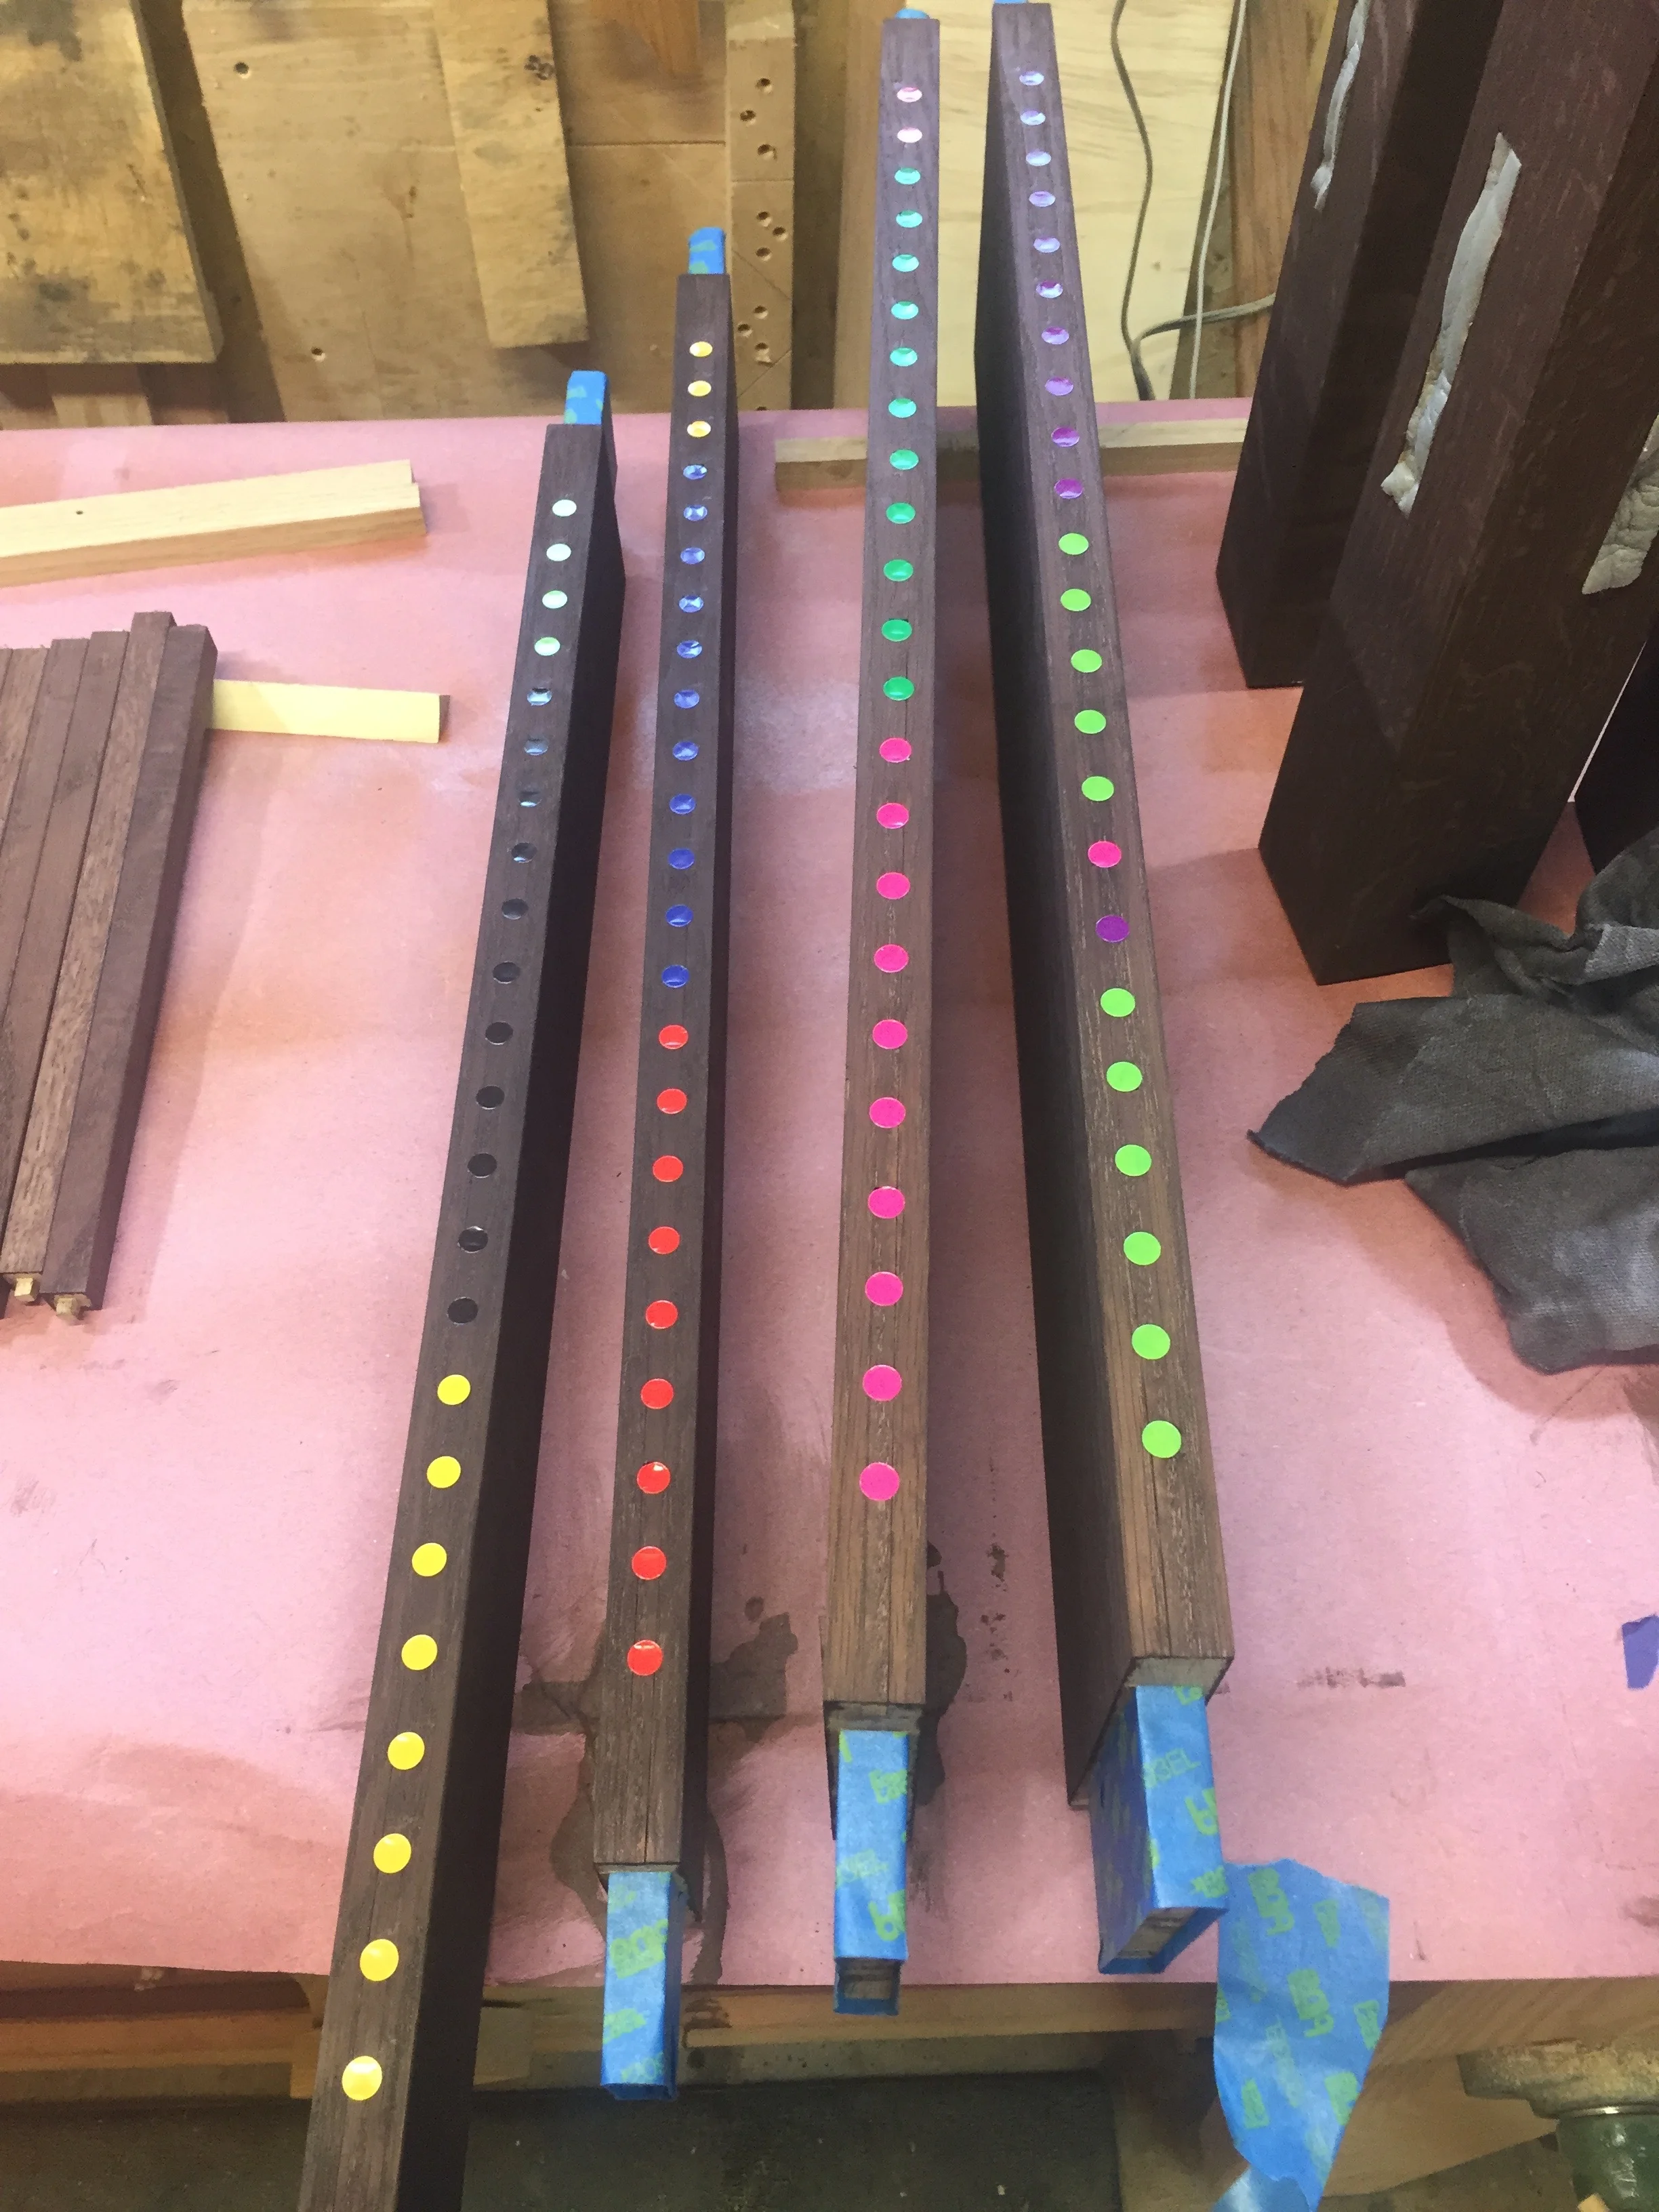
enough legs for two chairs

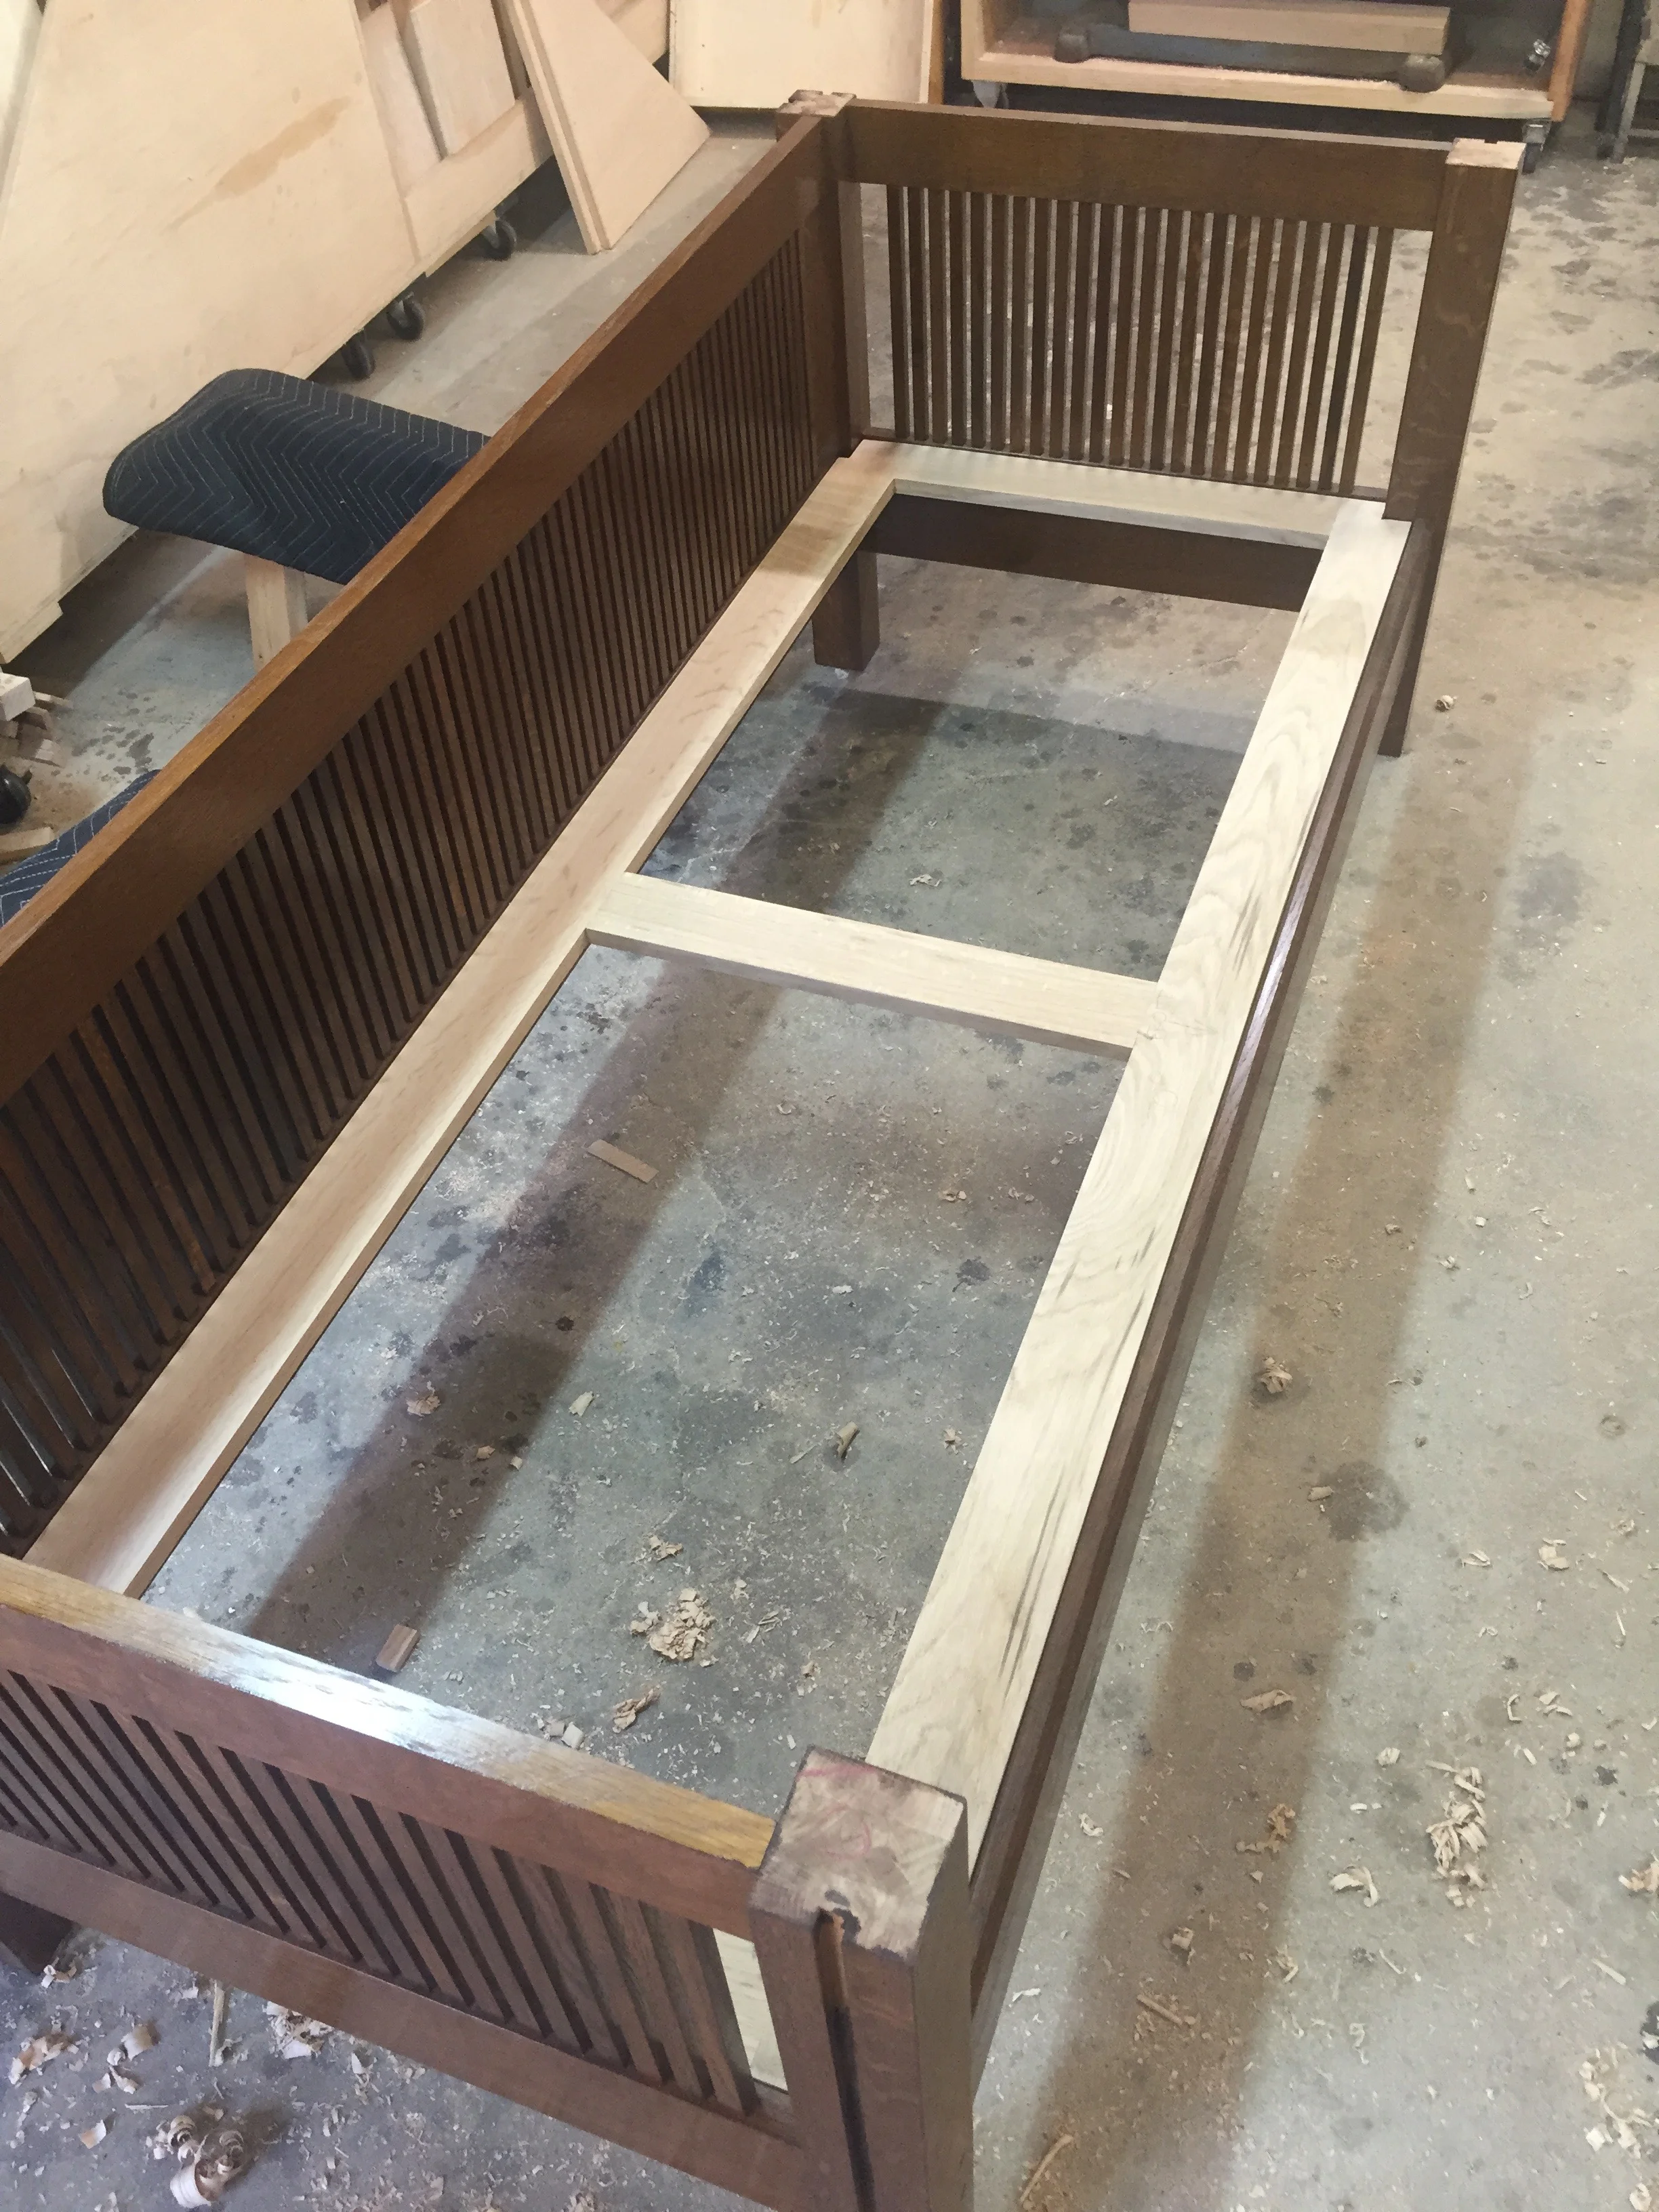
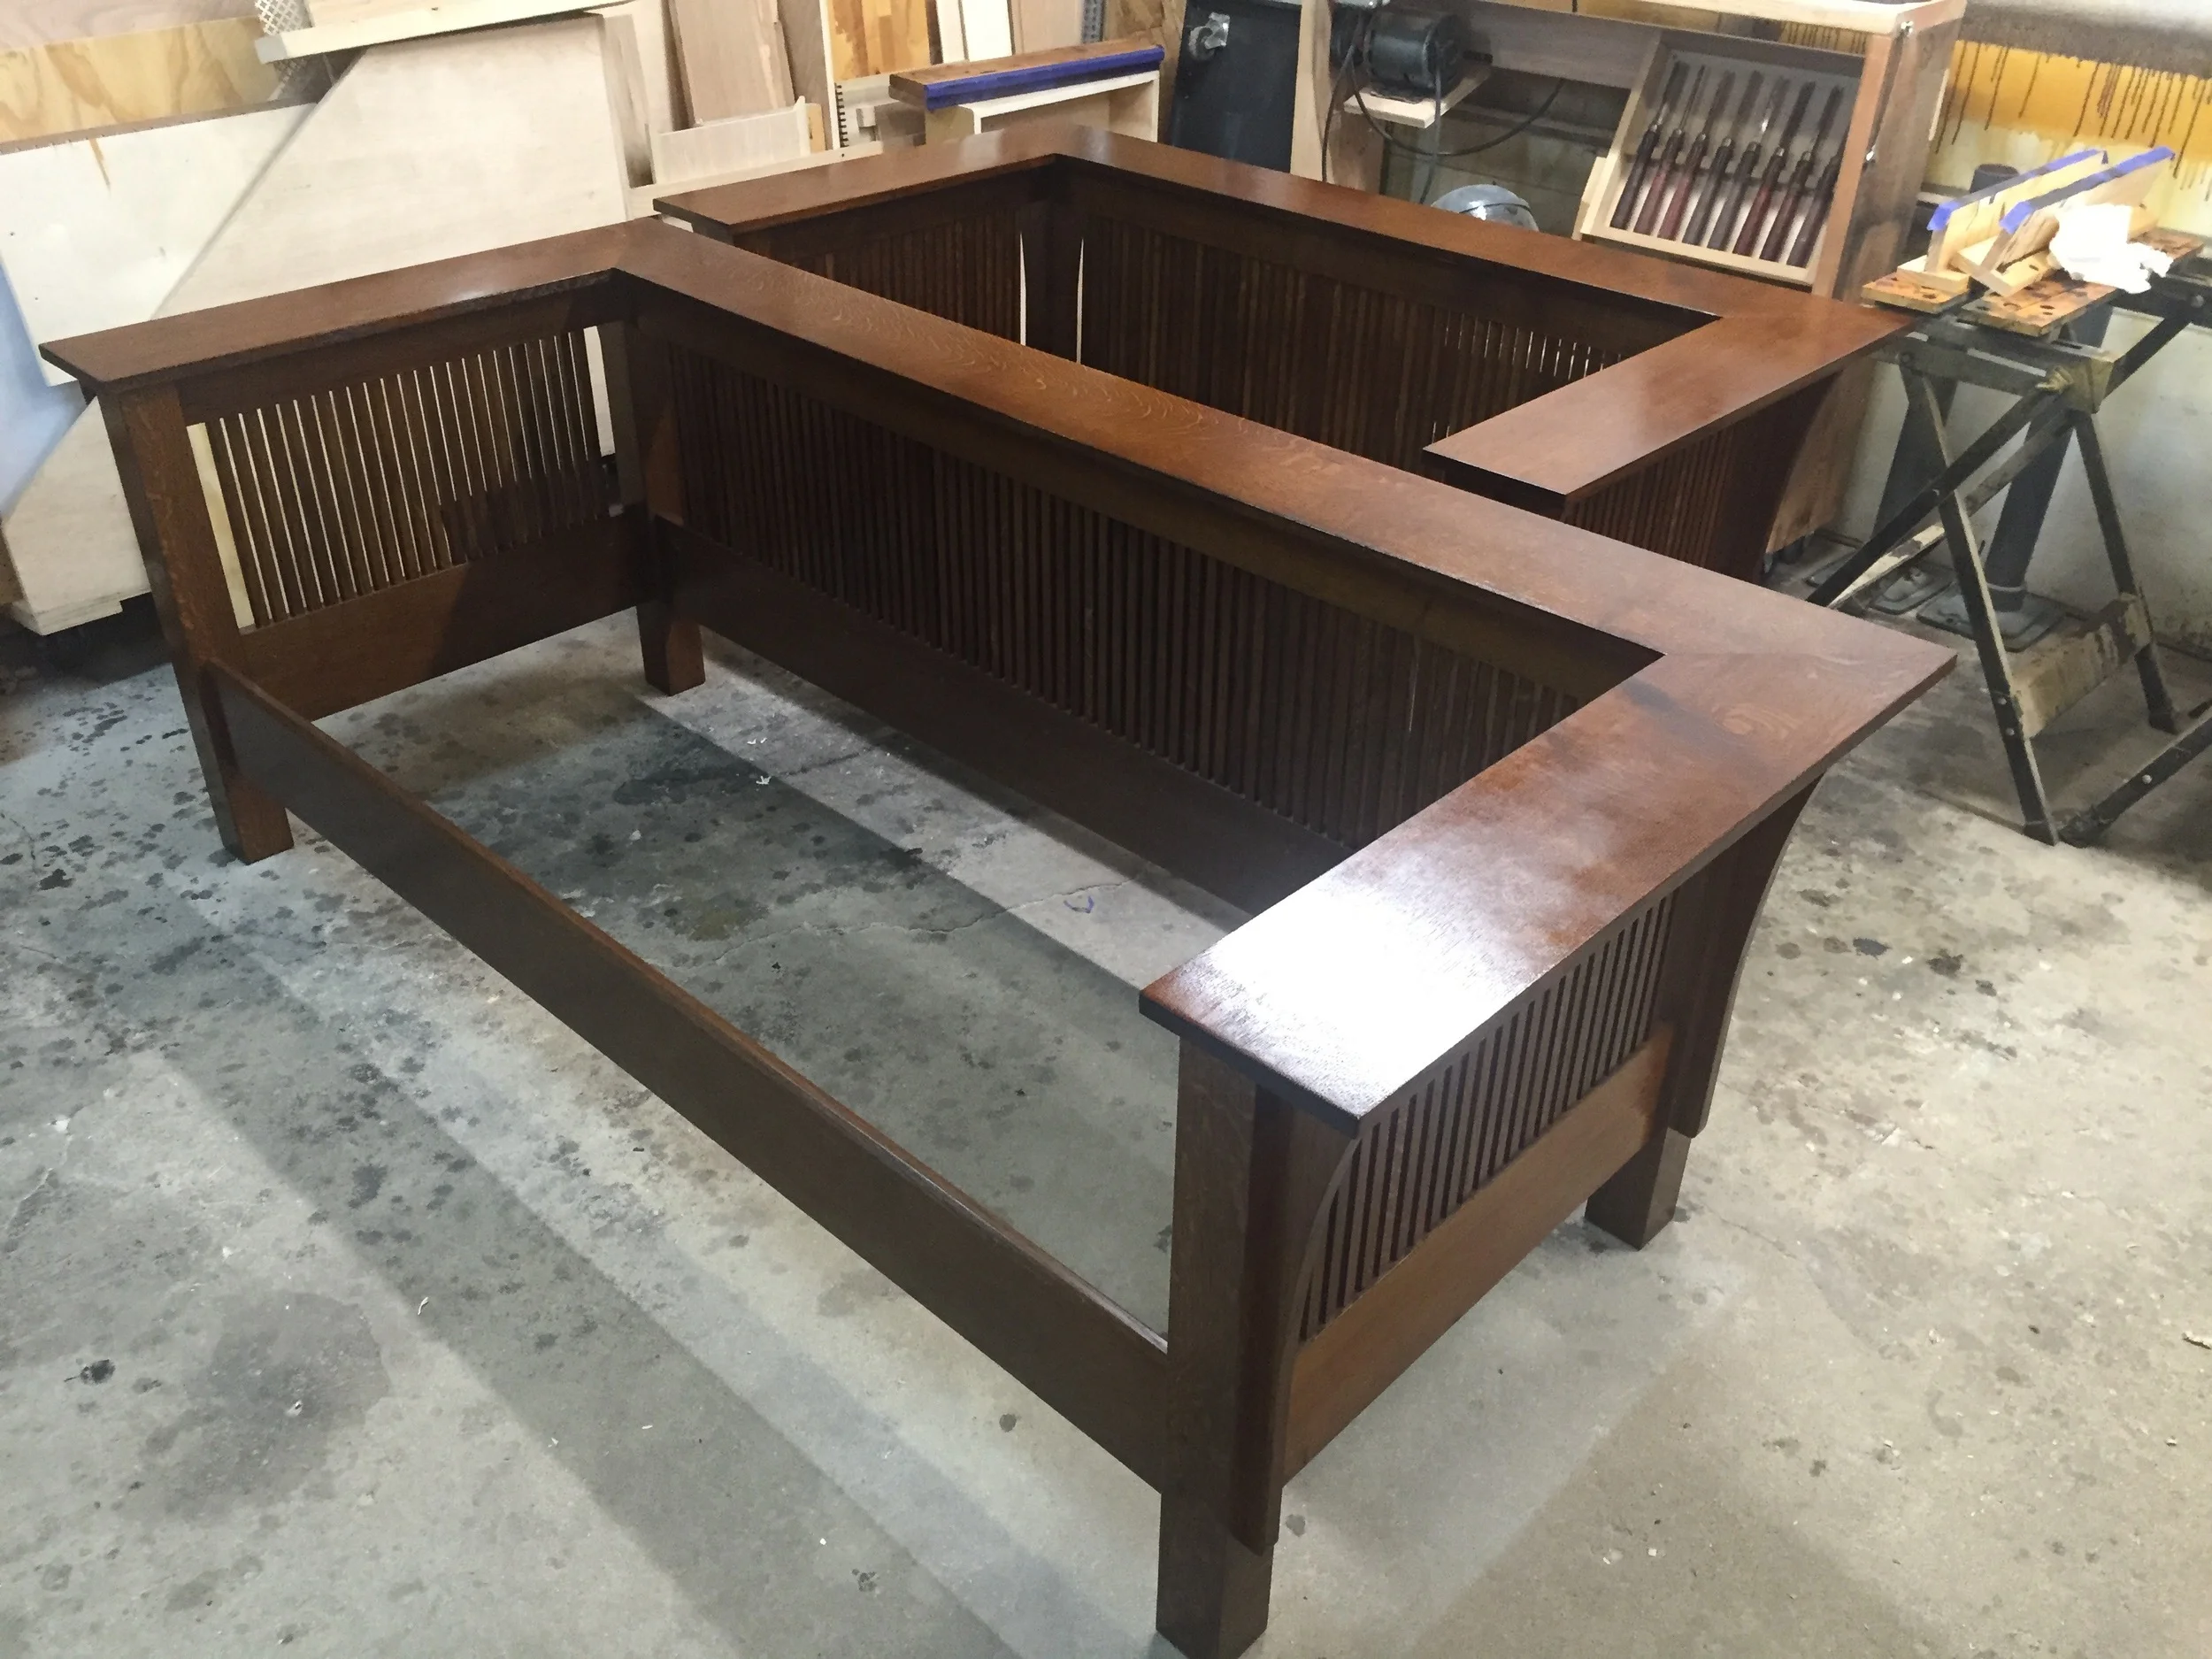
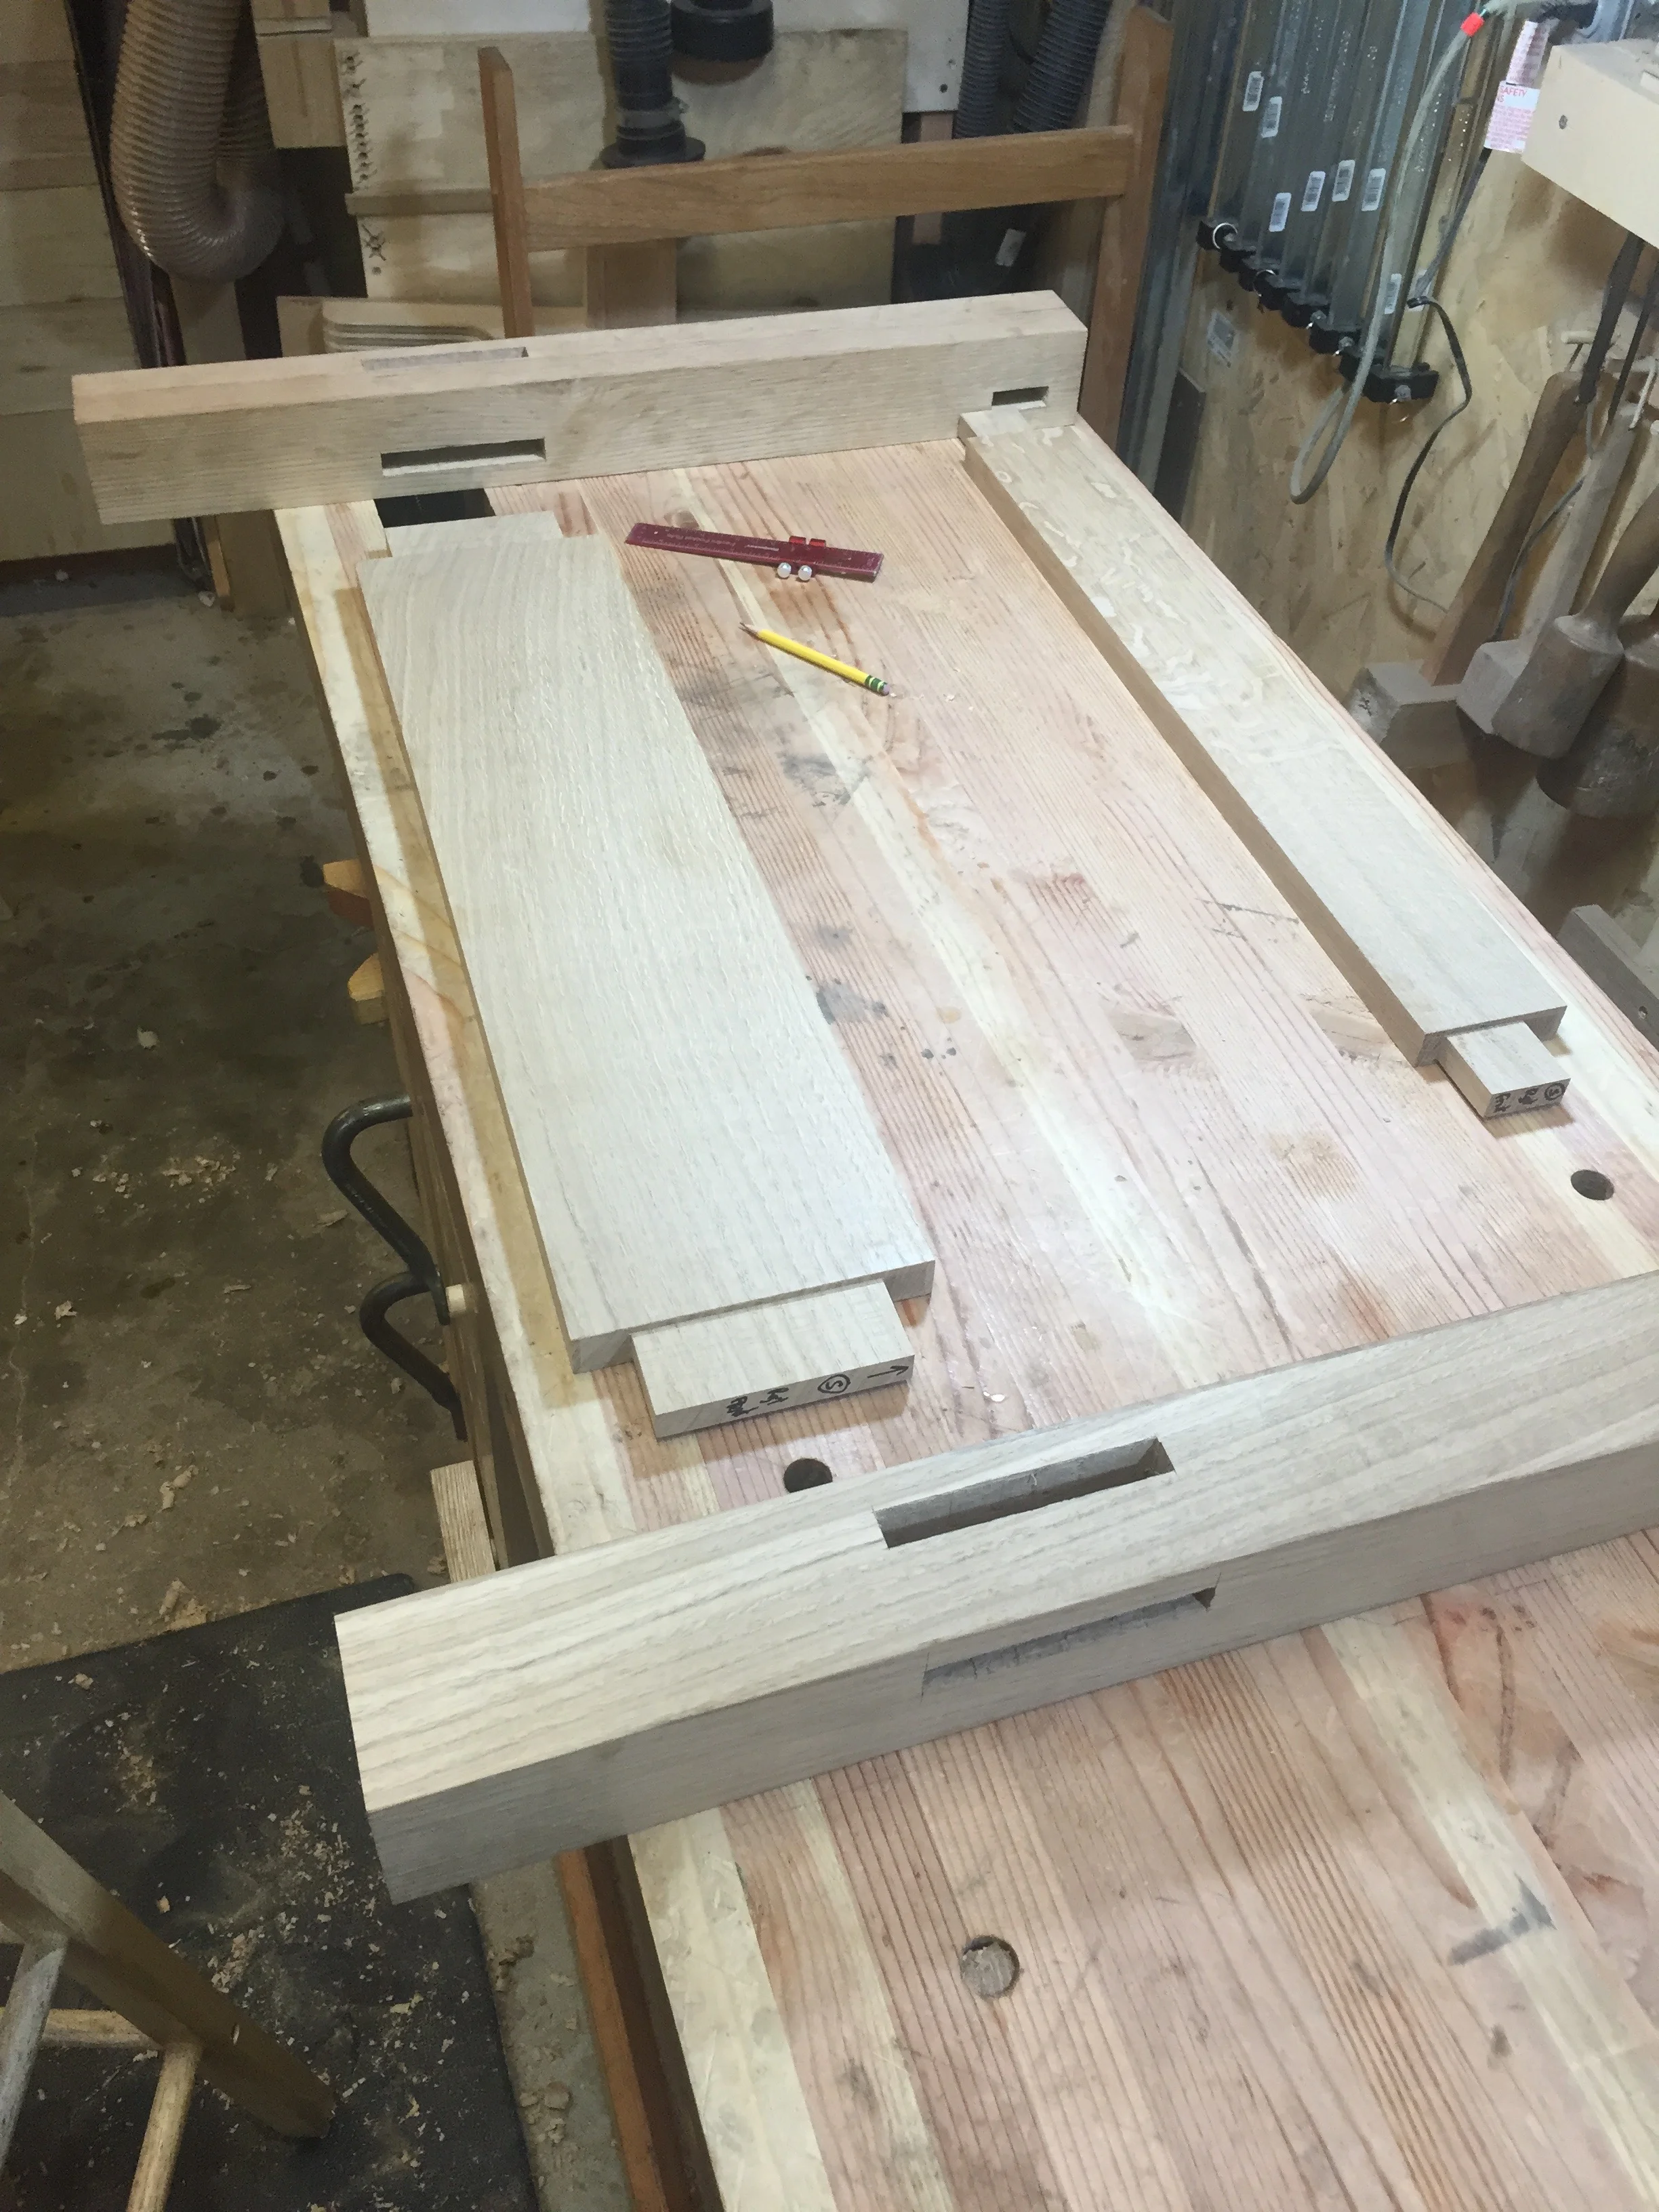
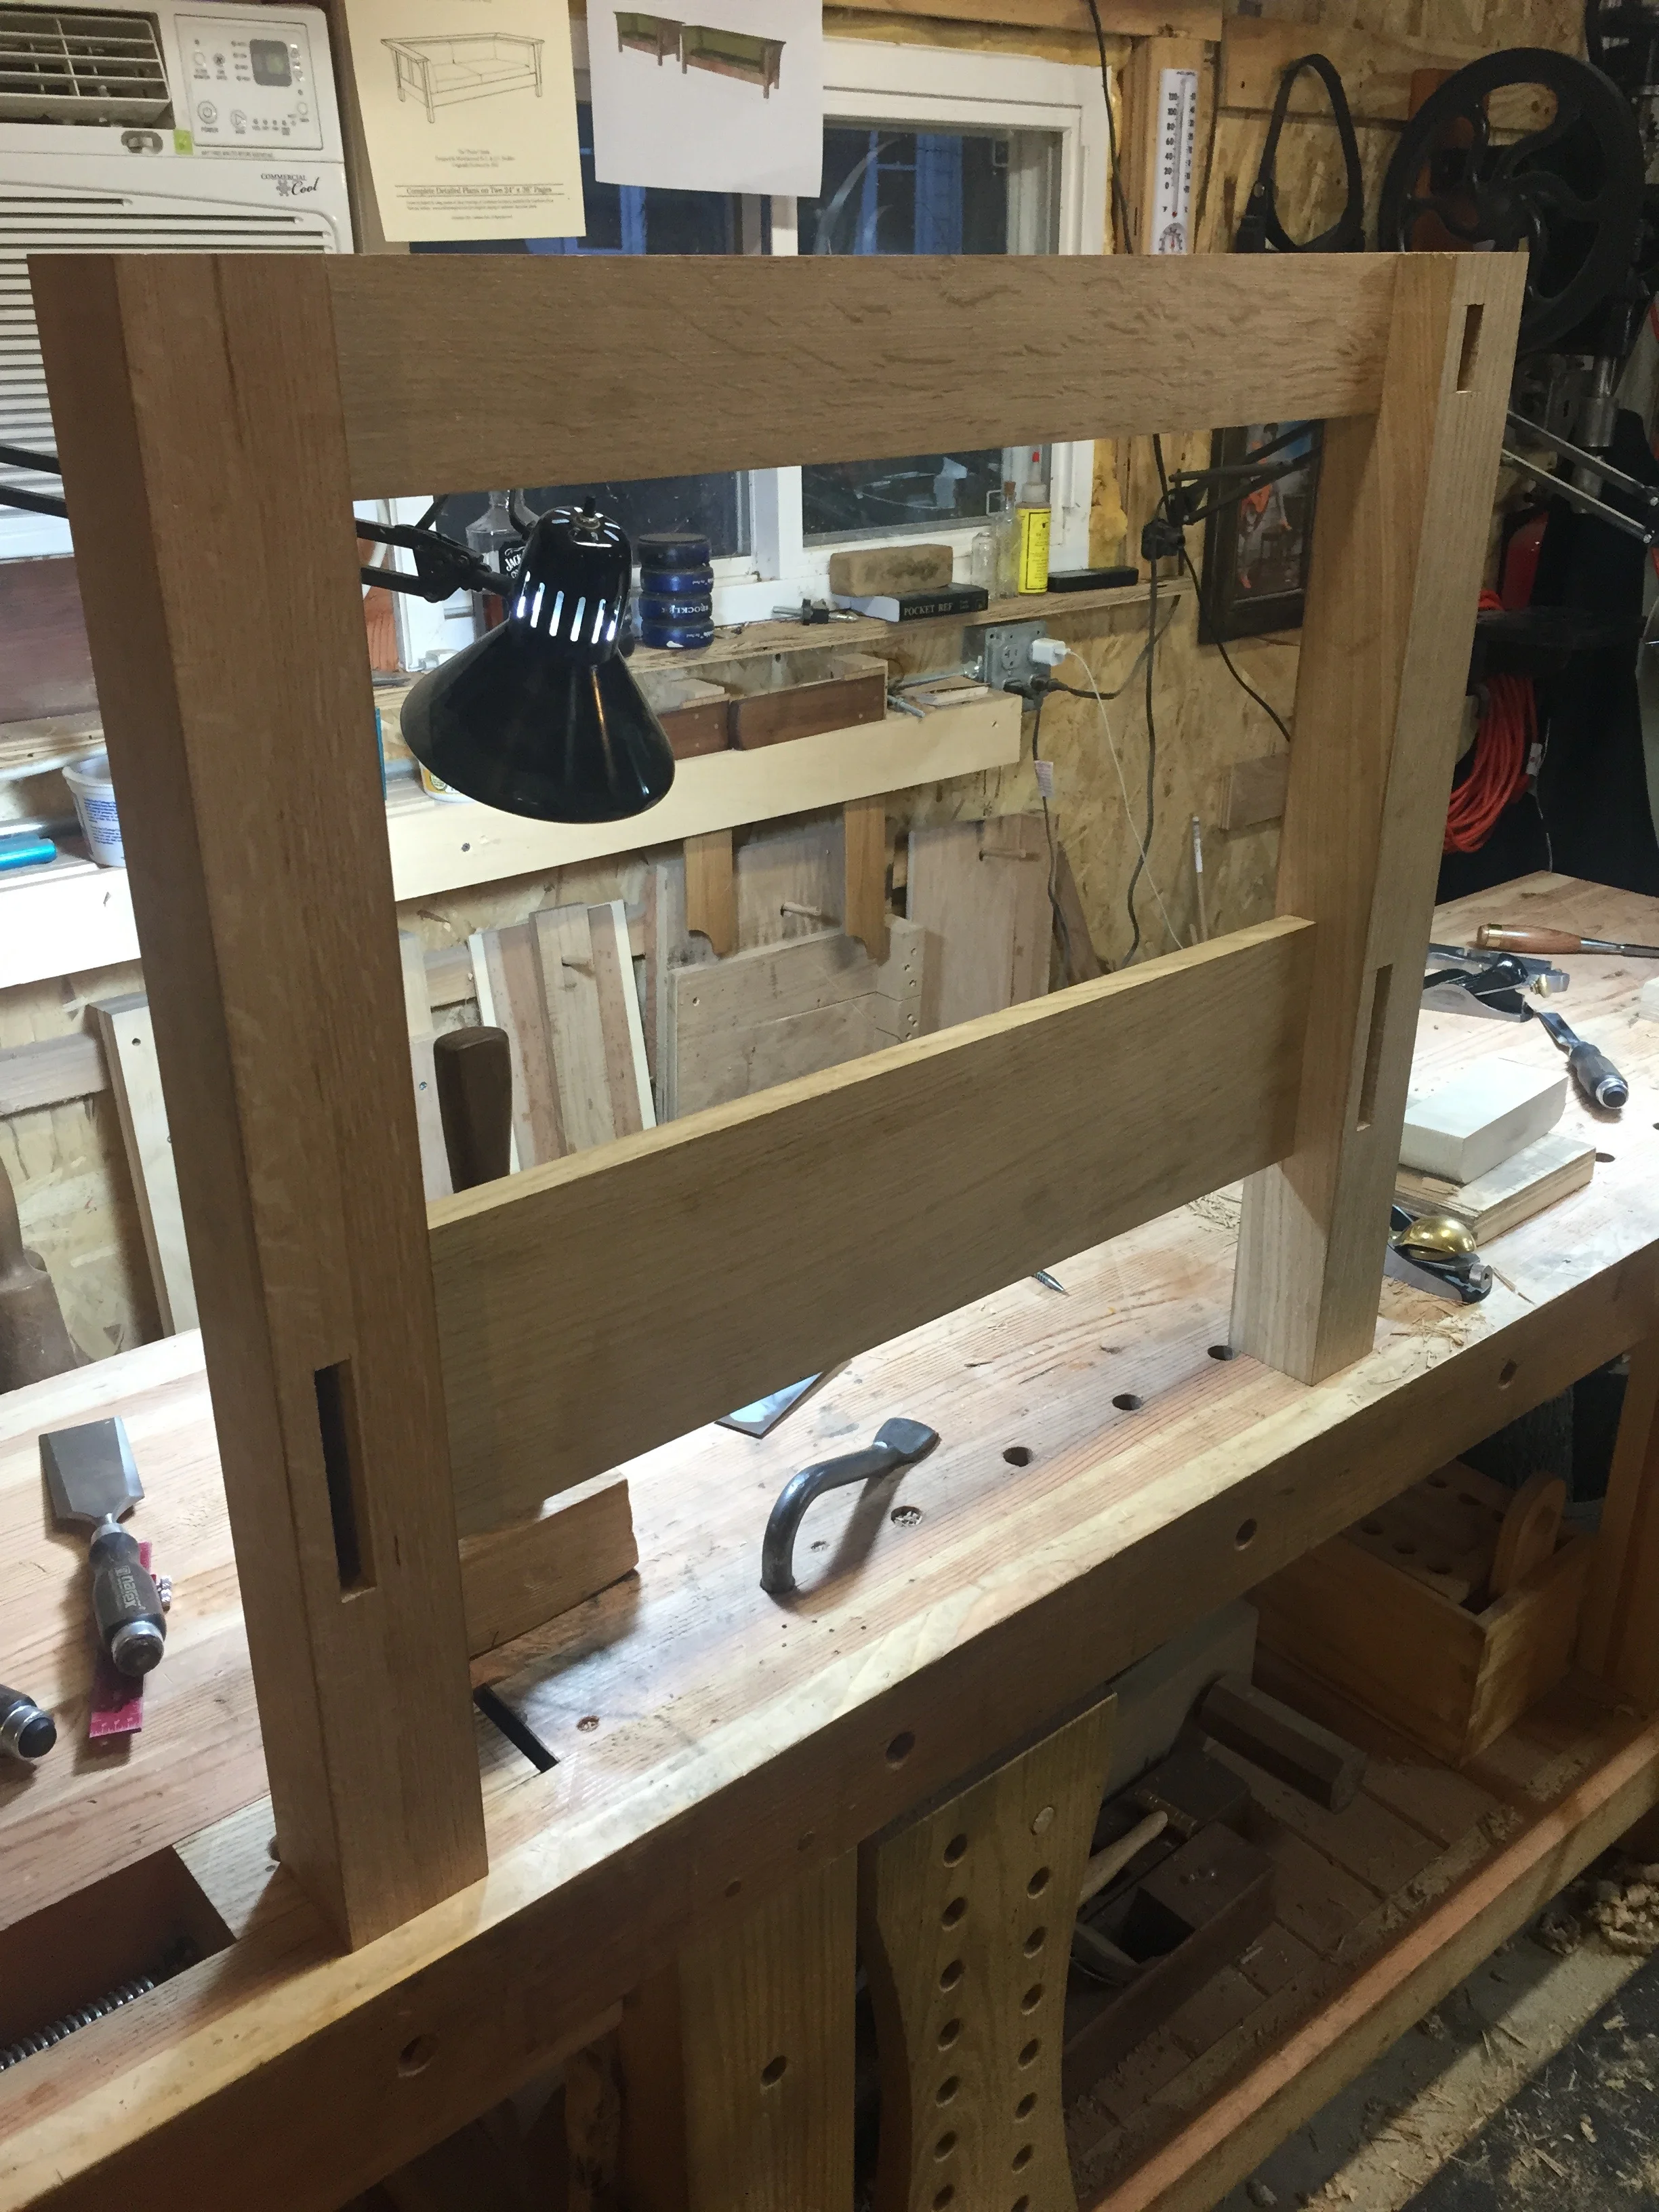
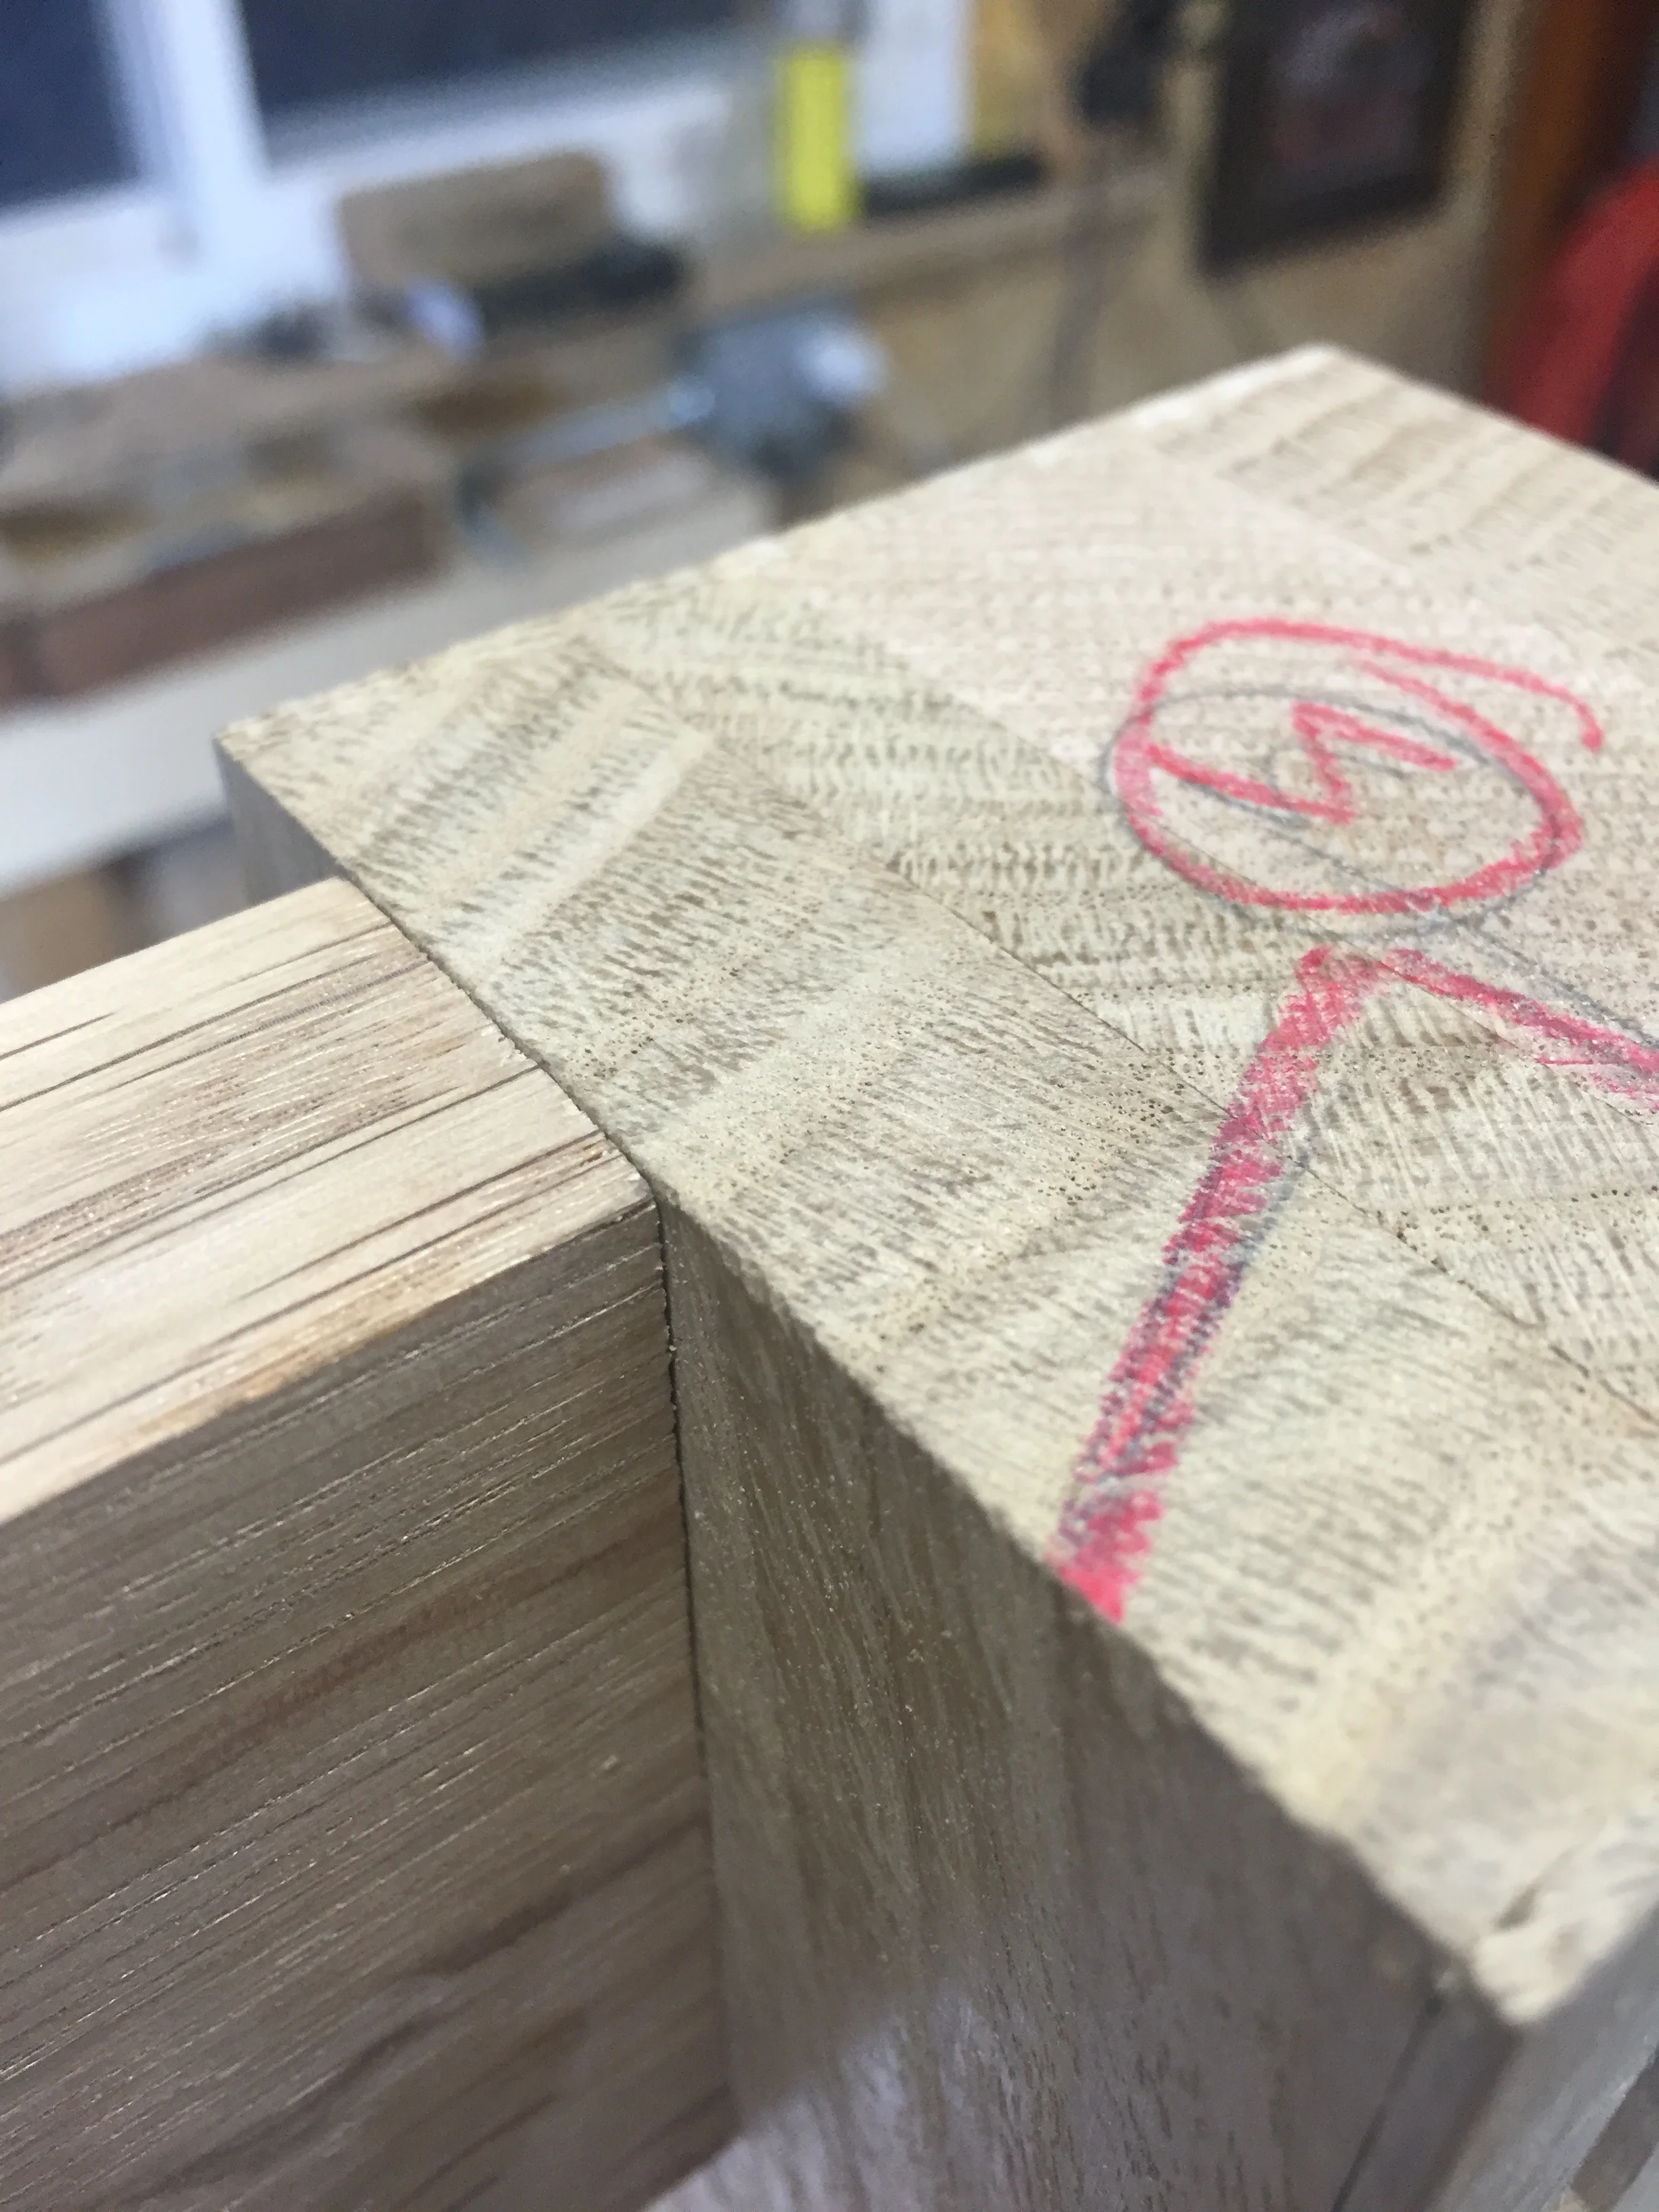
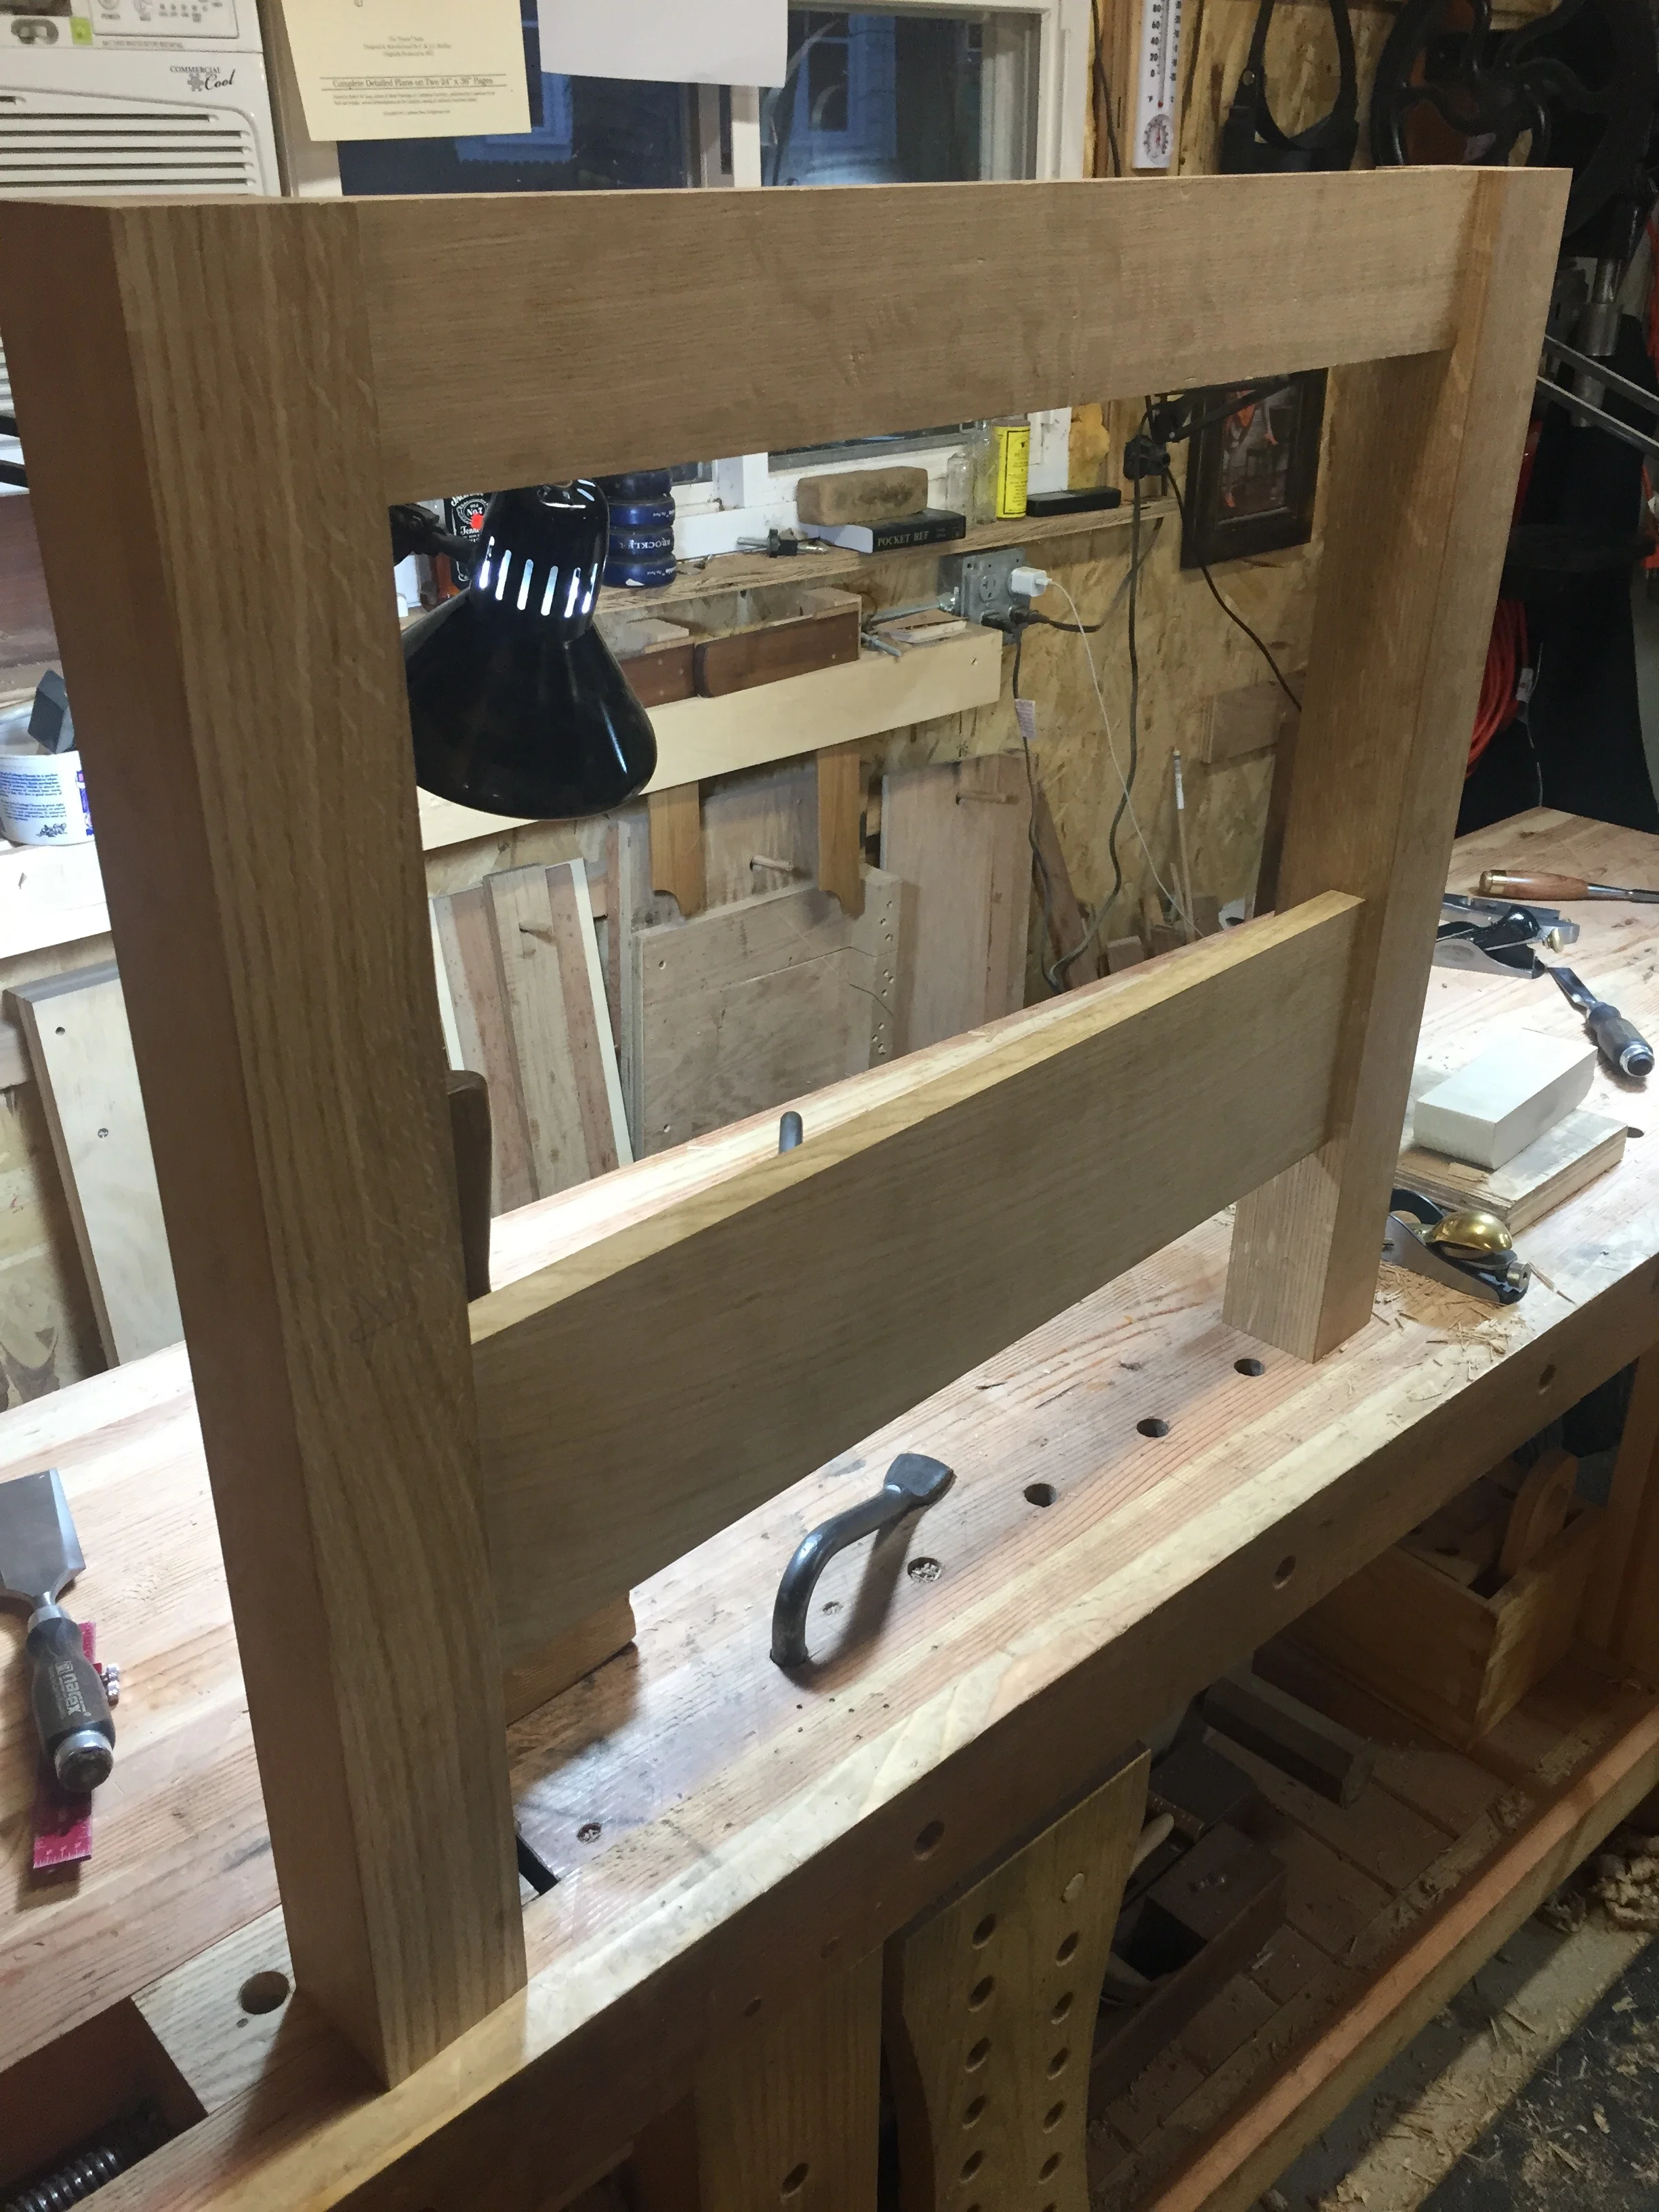
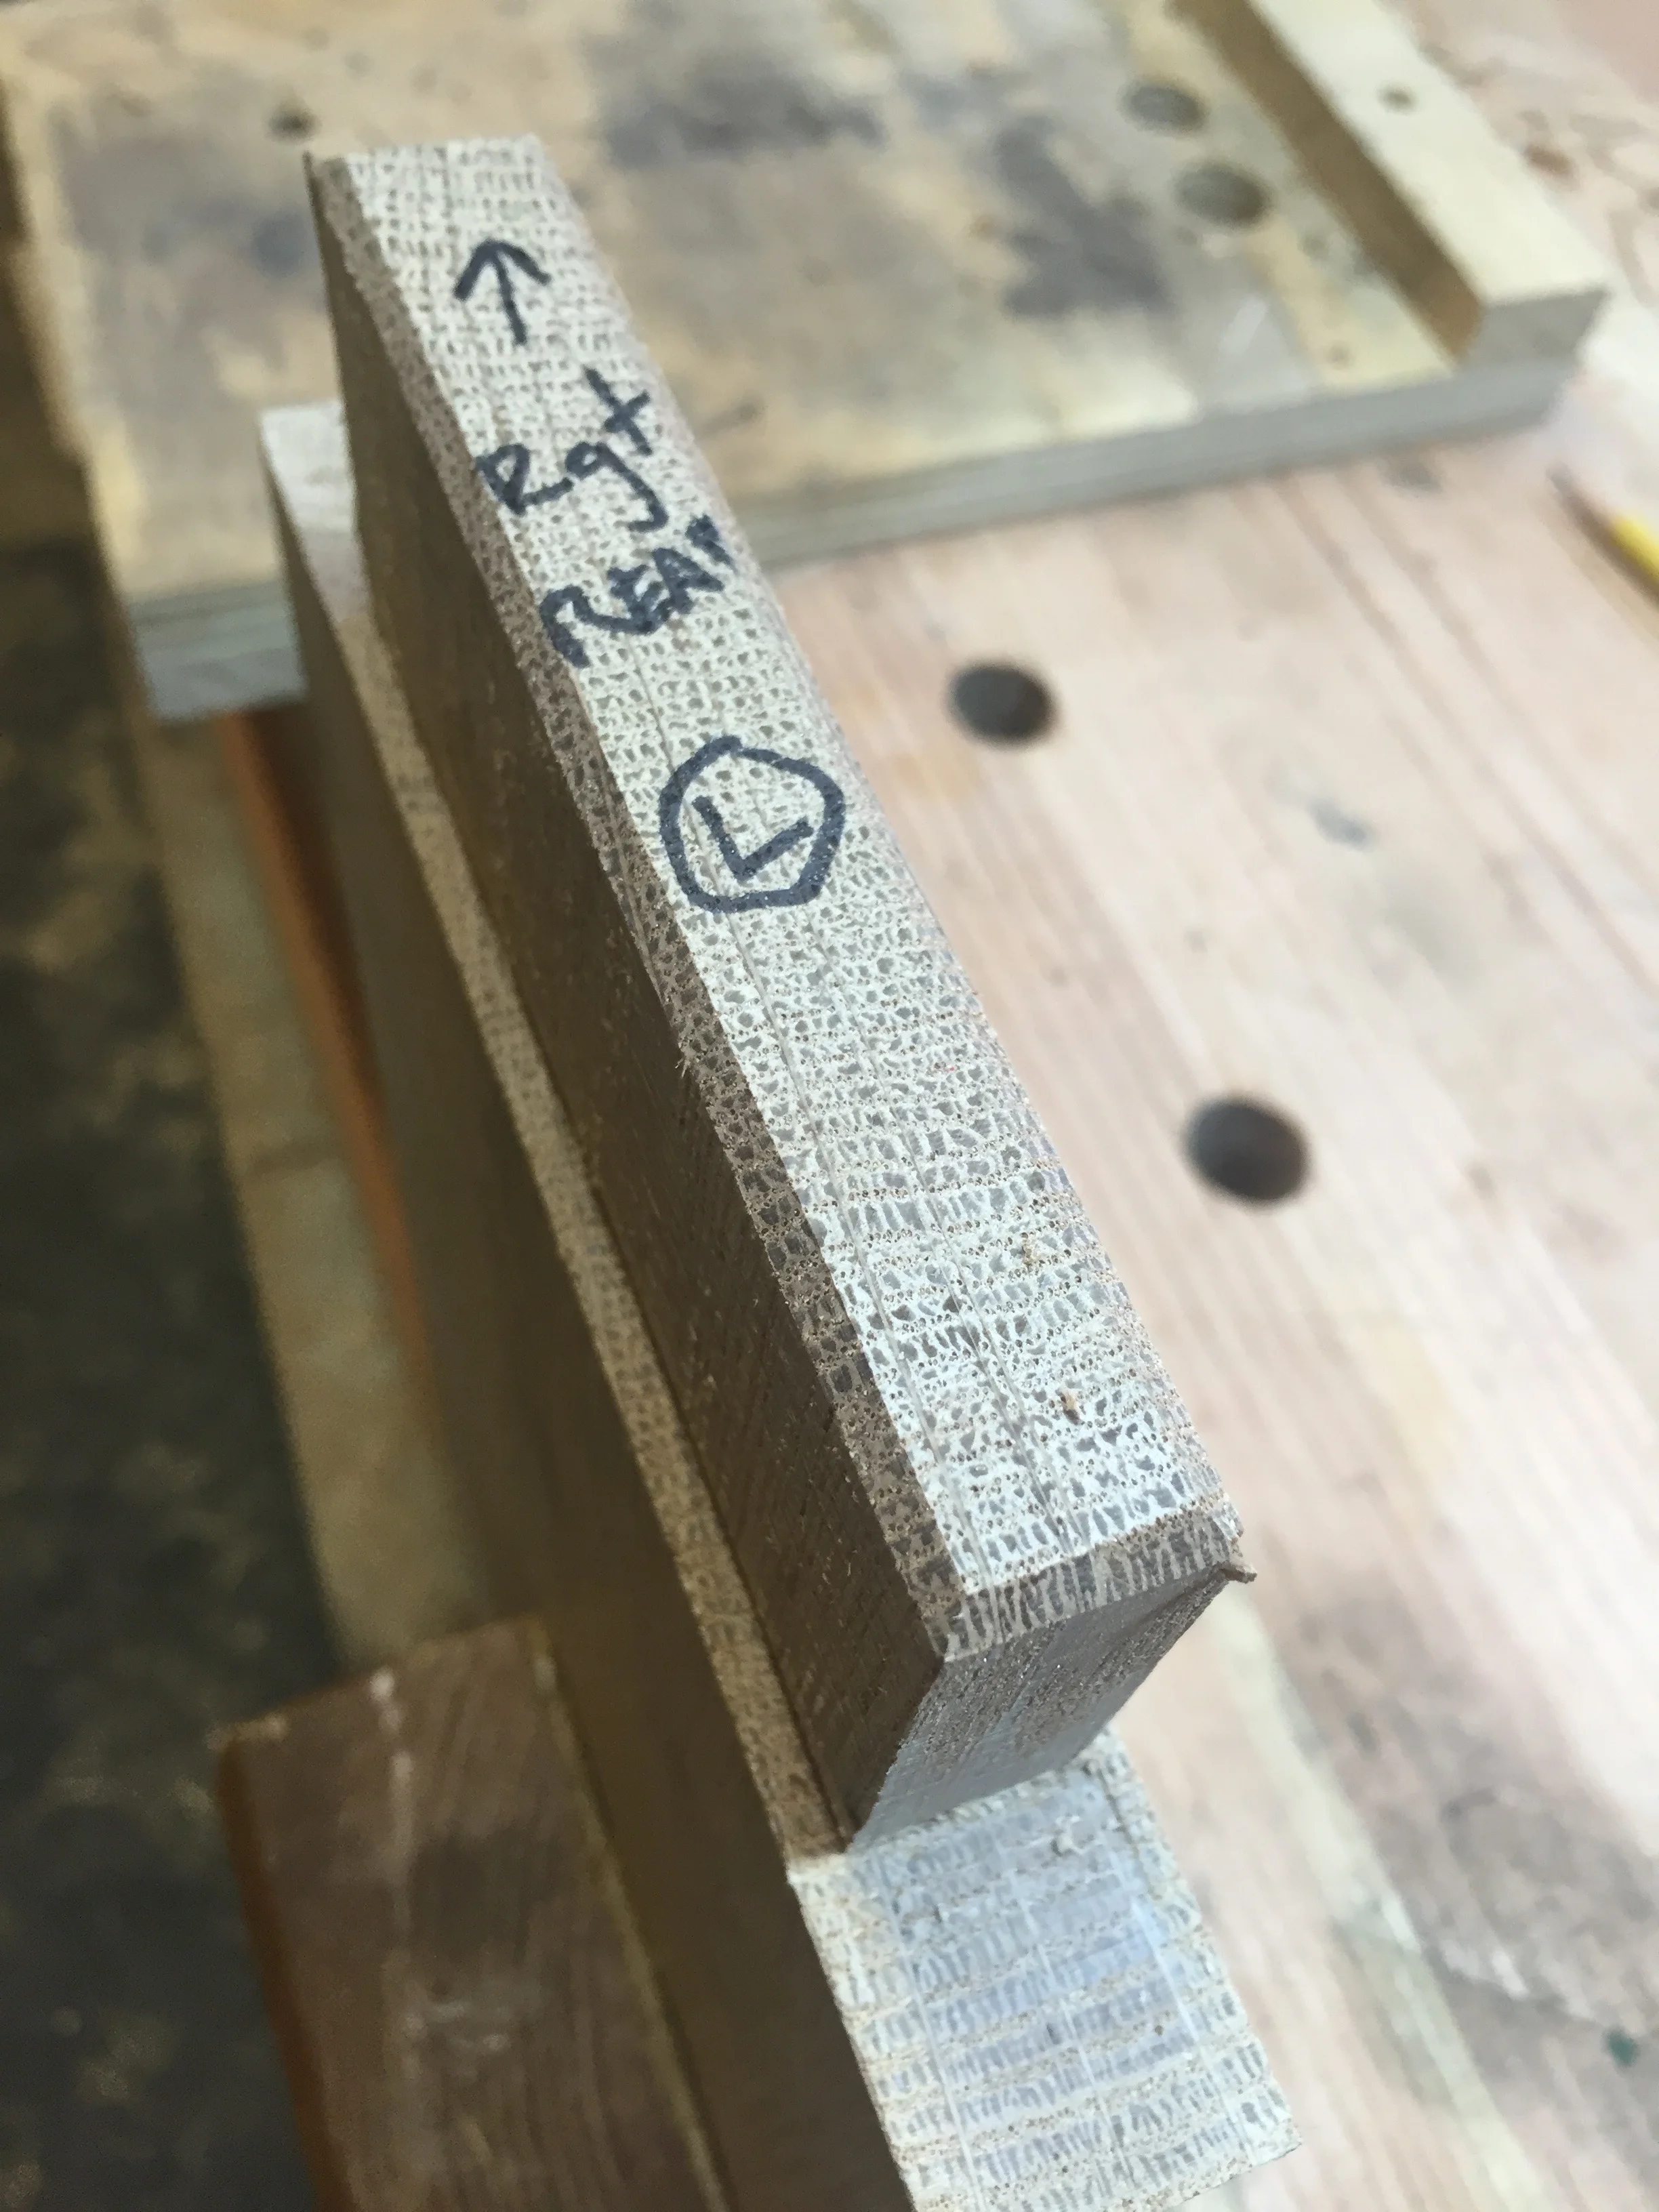
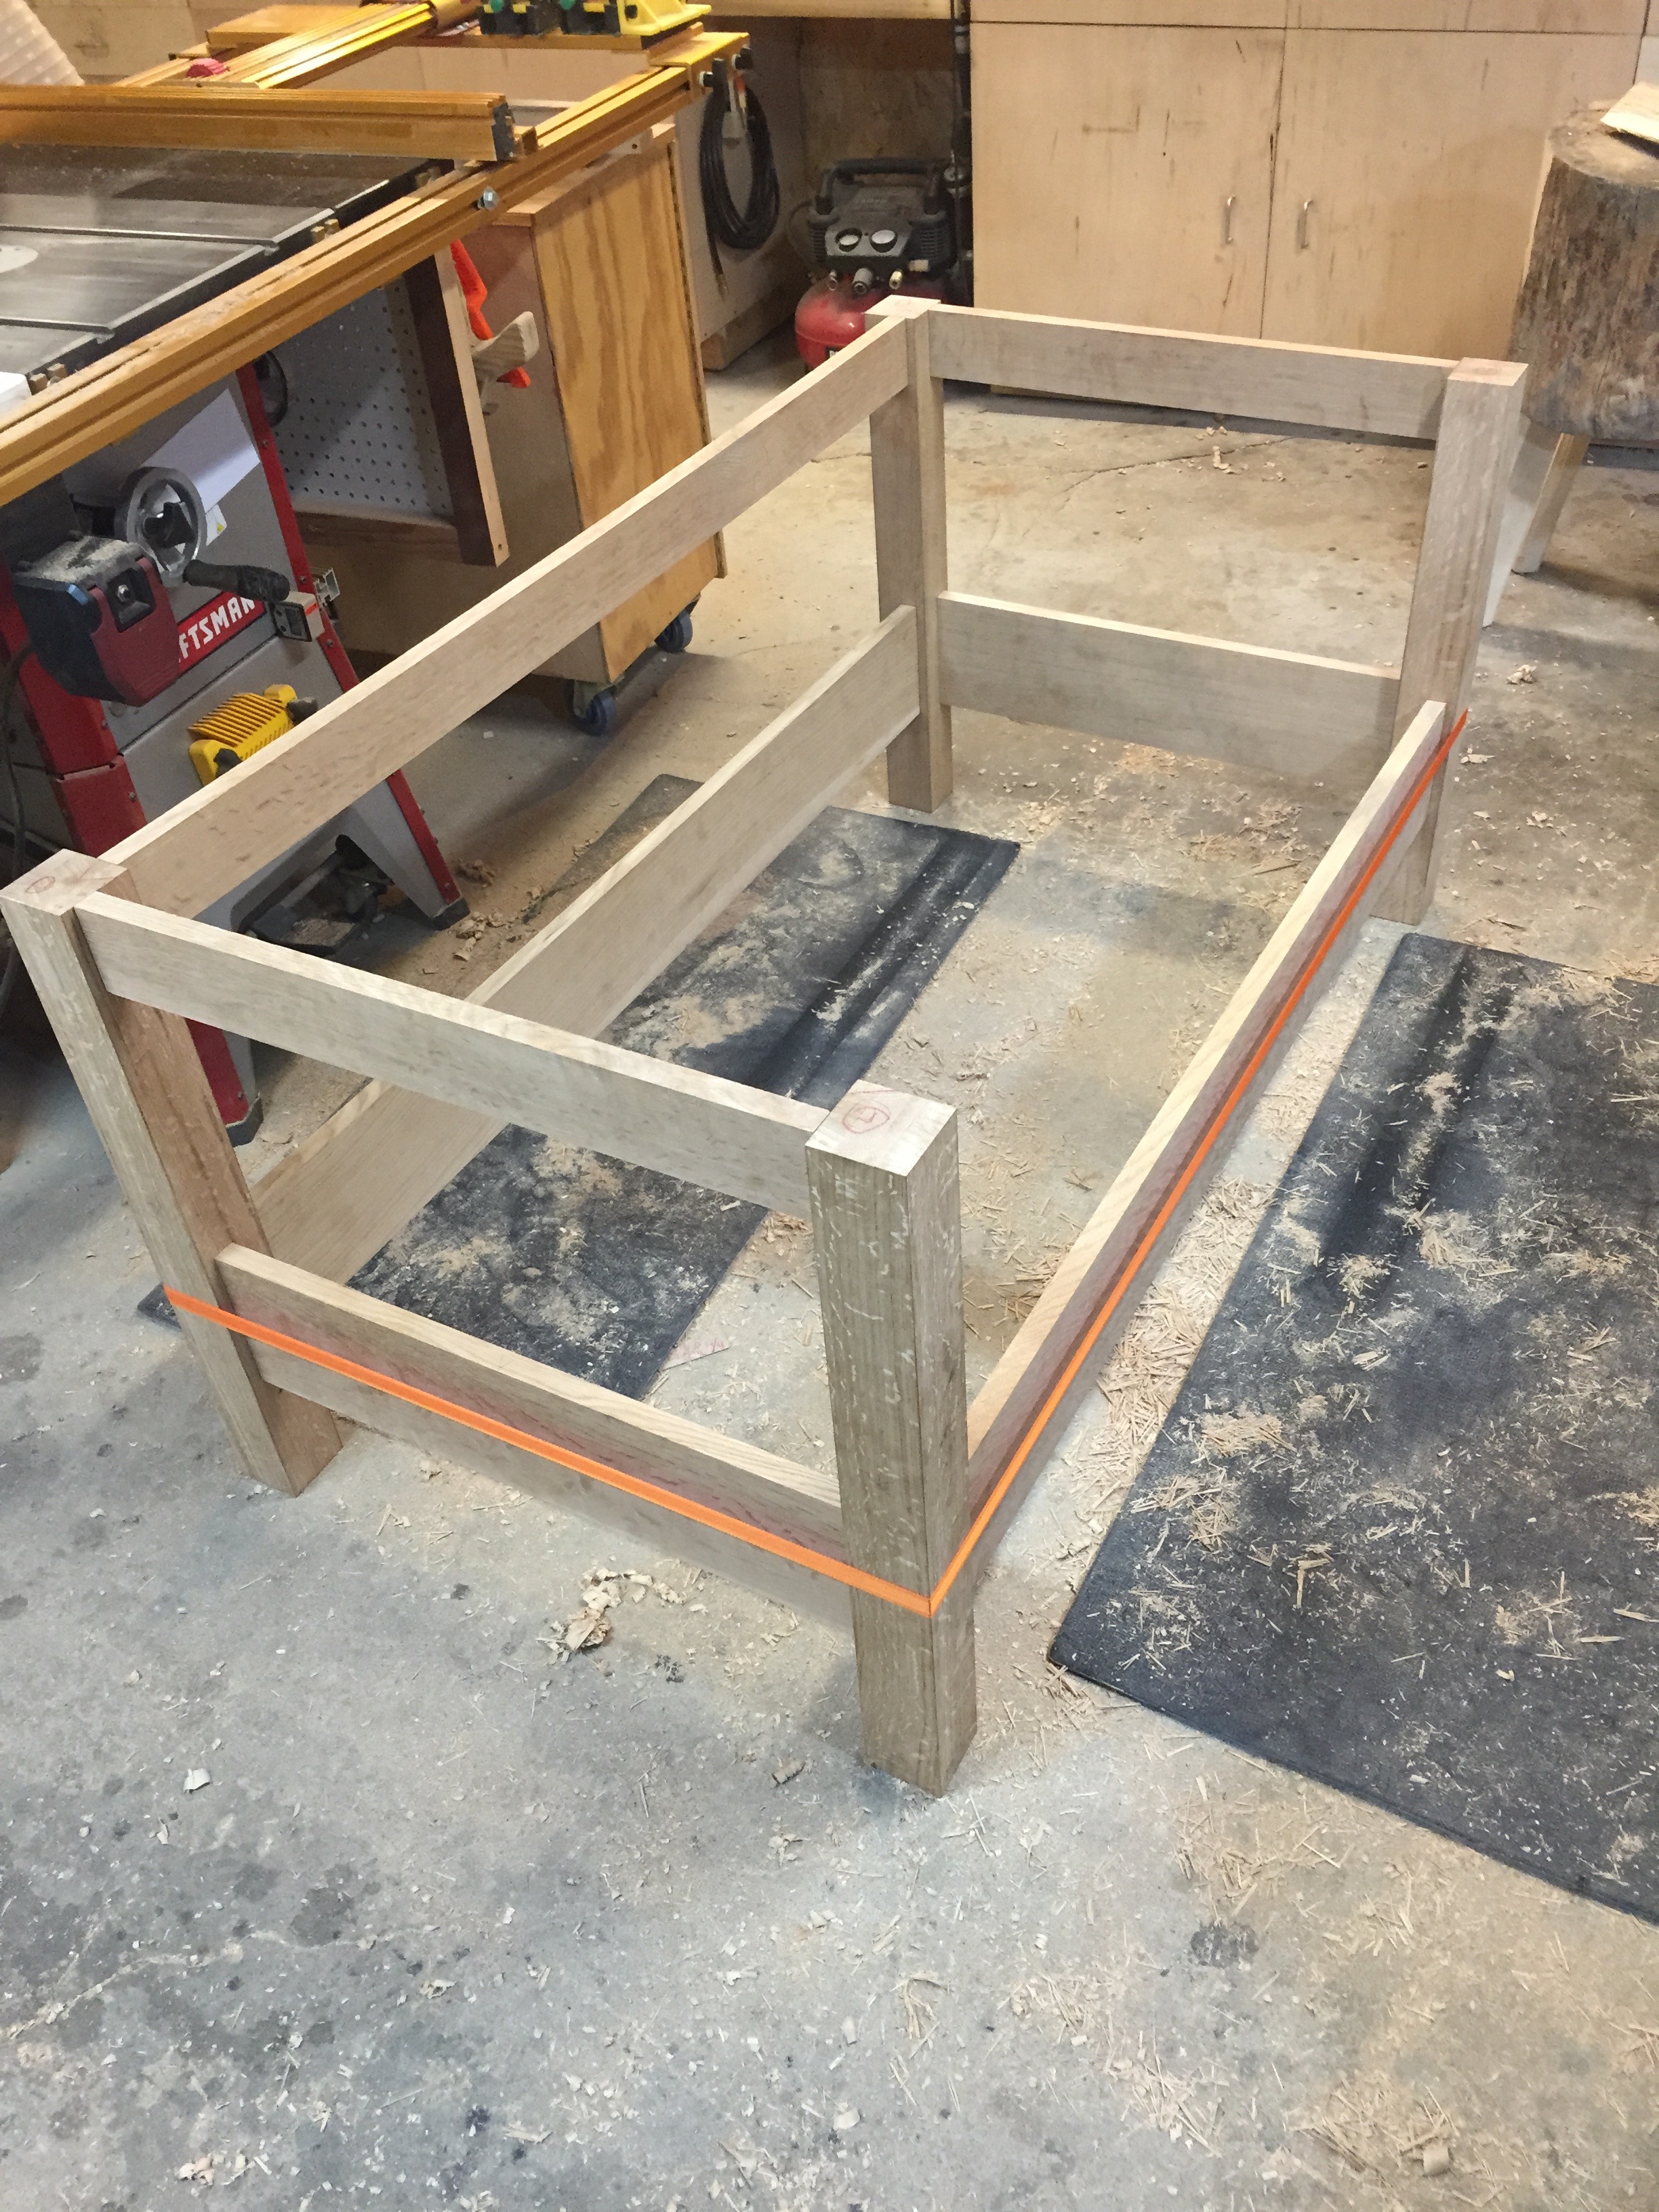
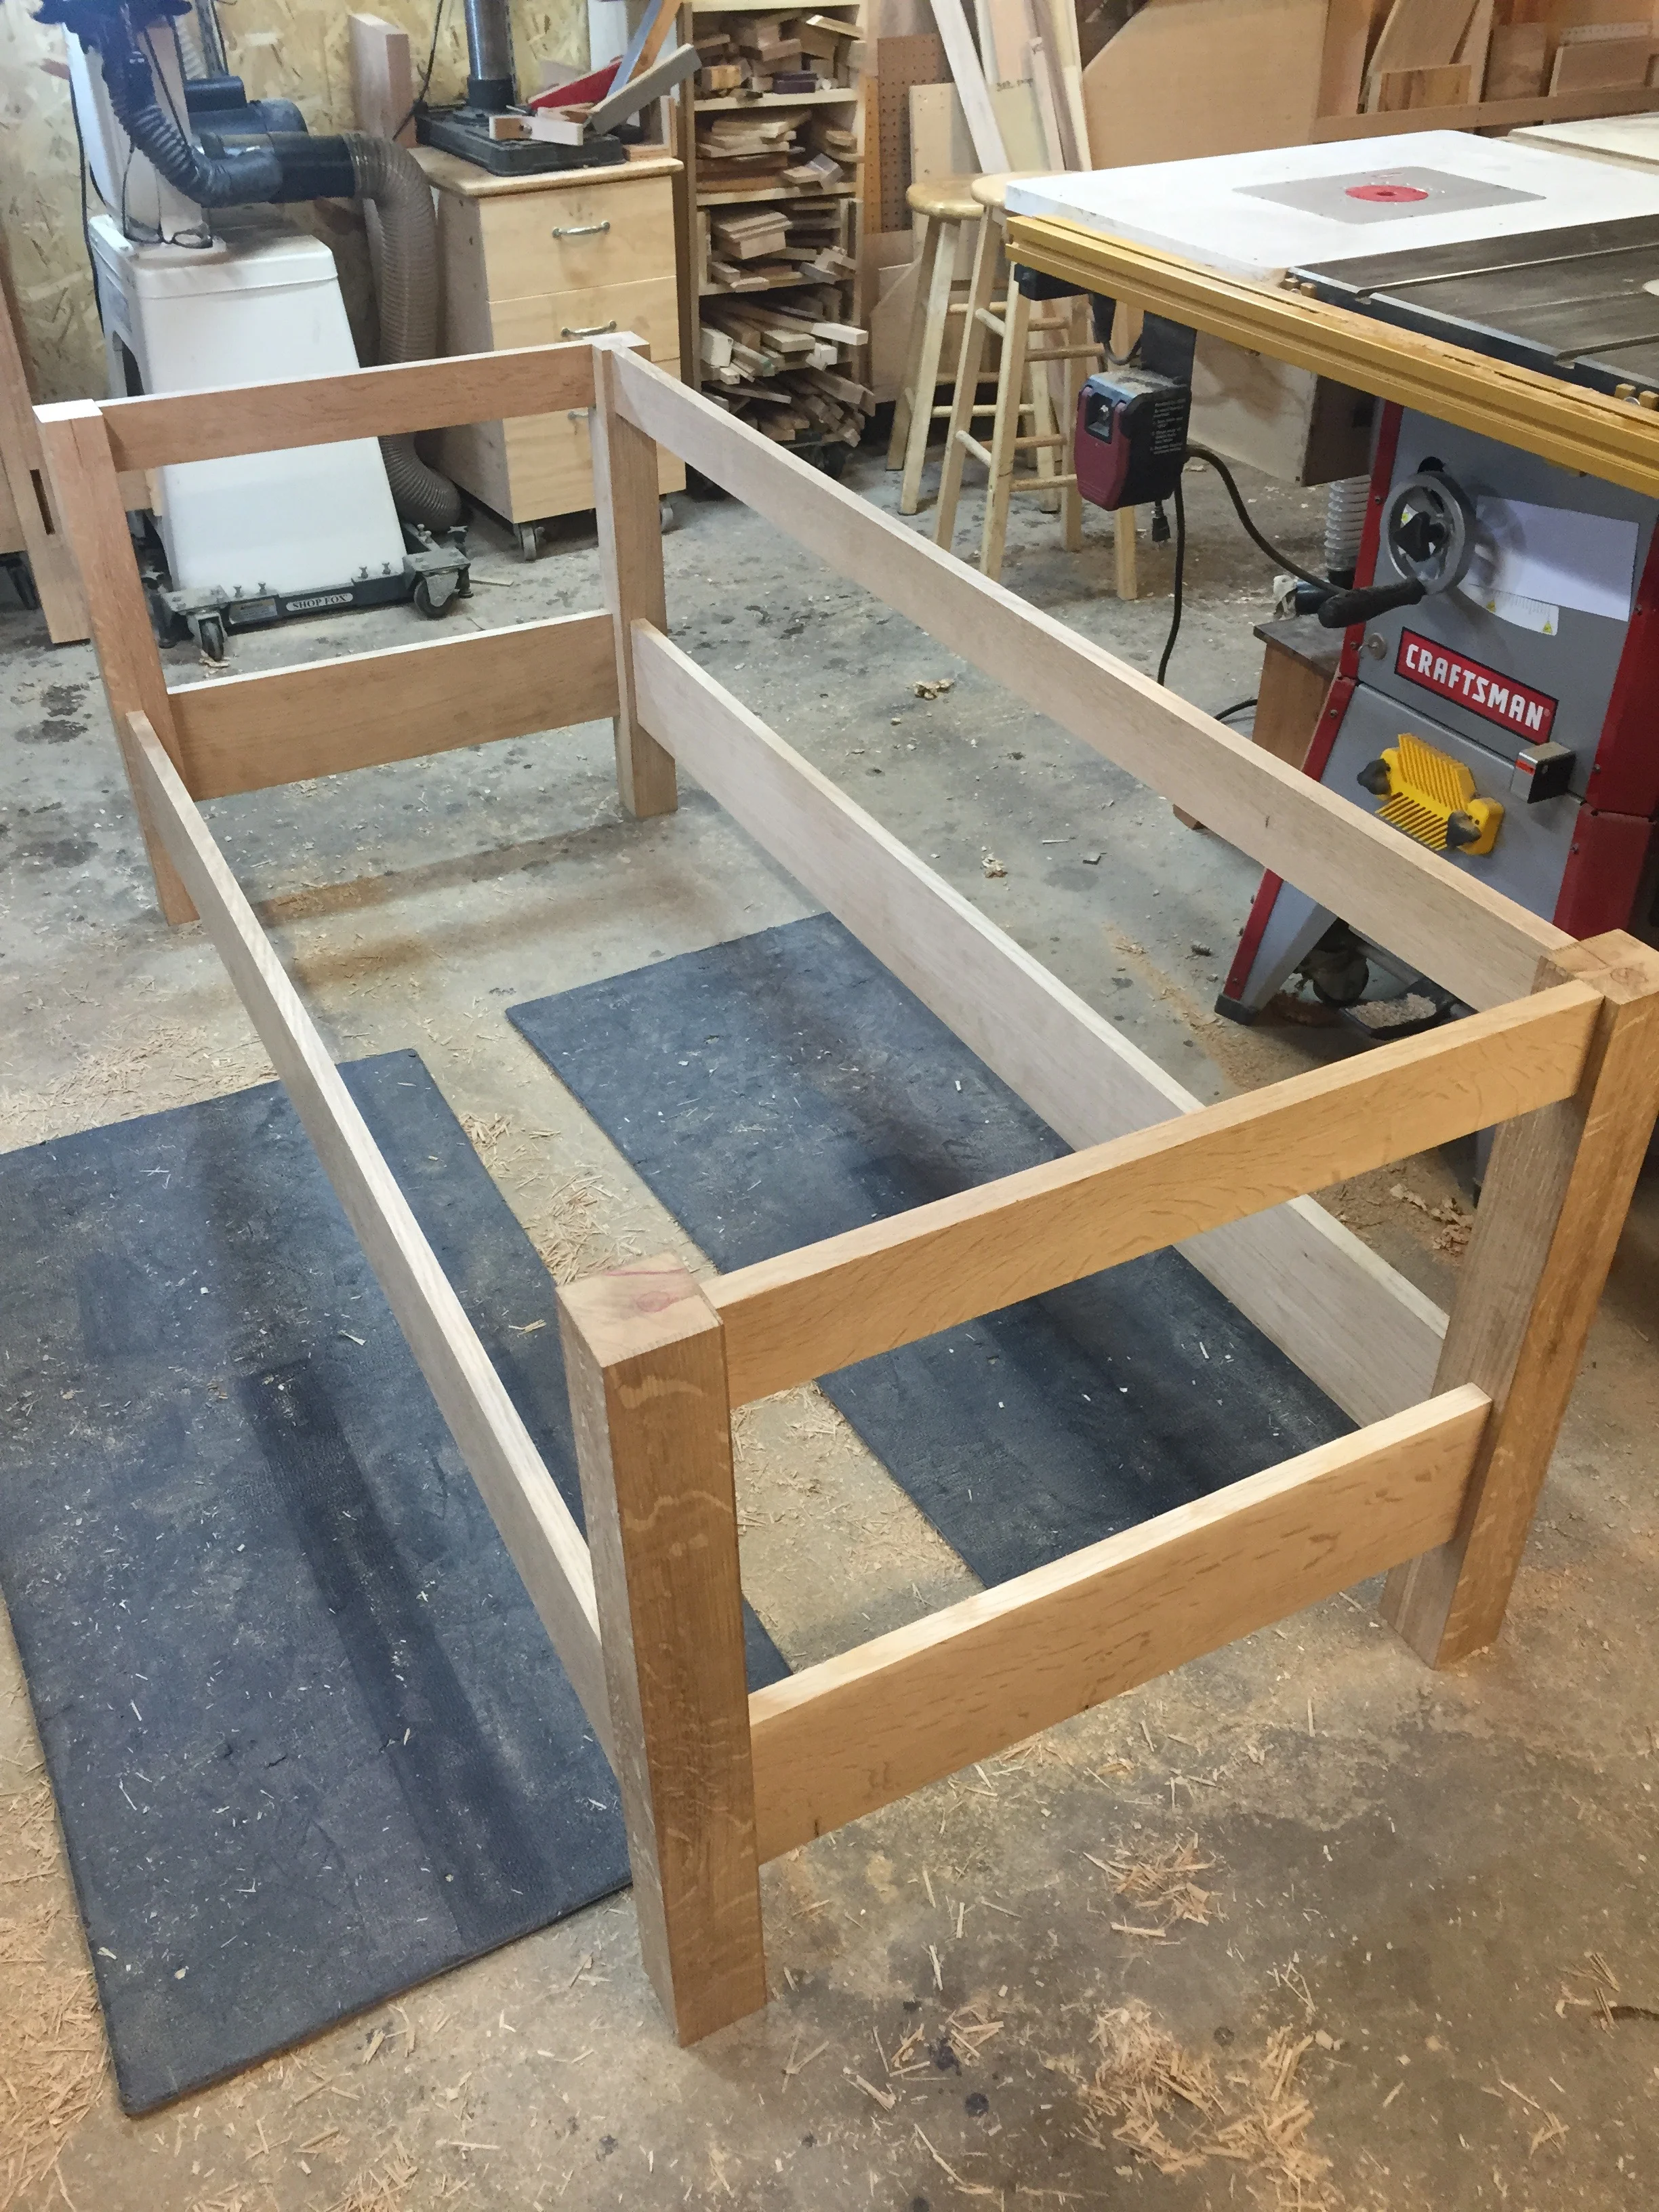
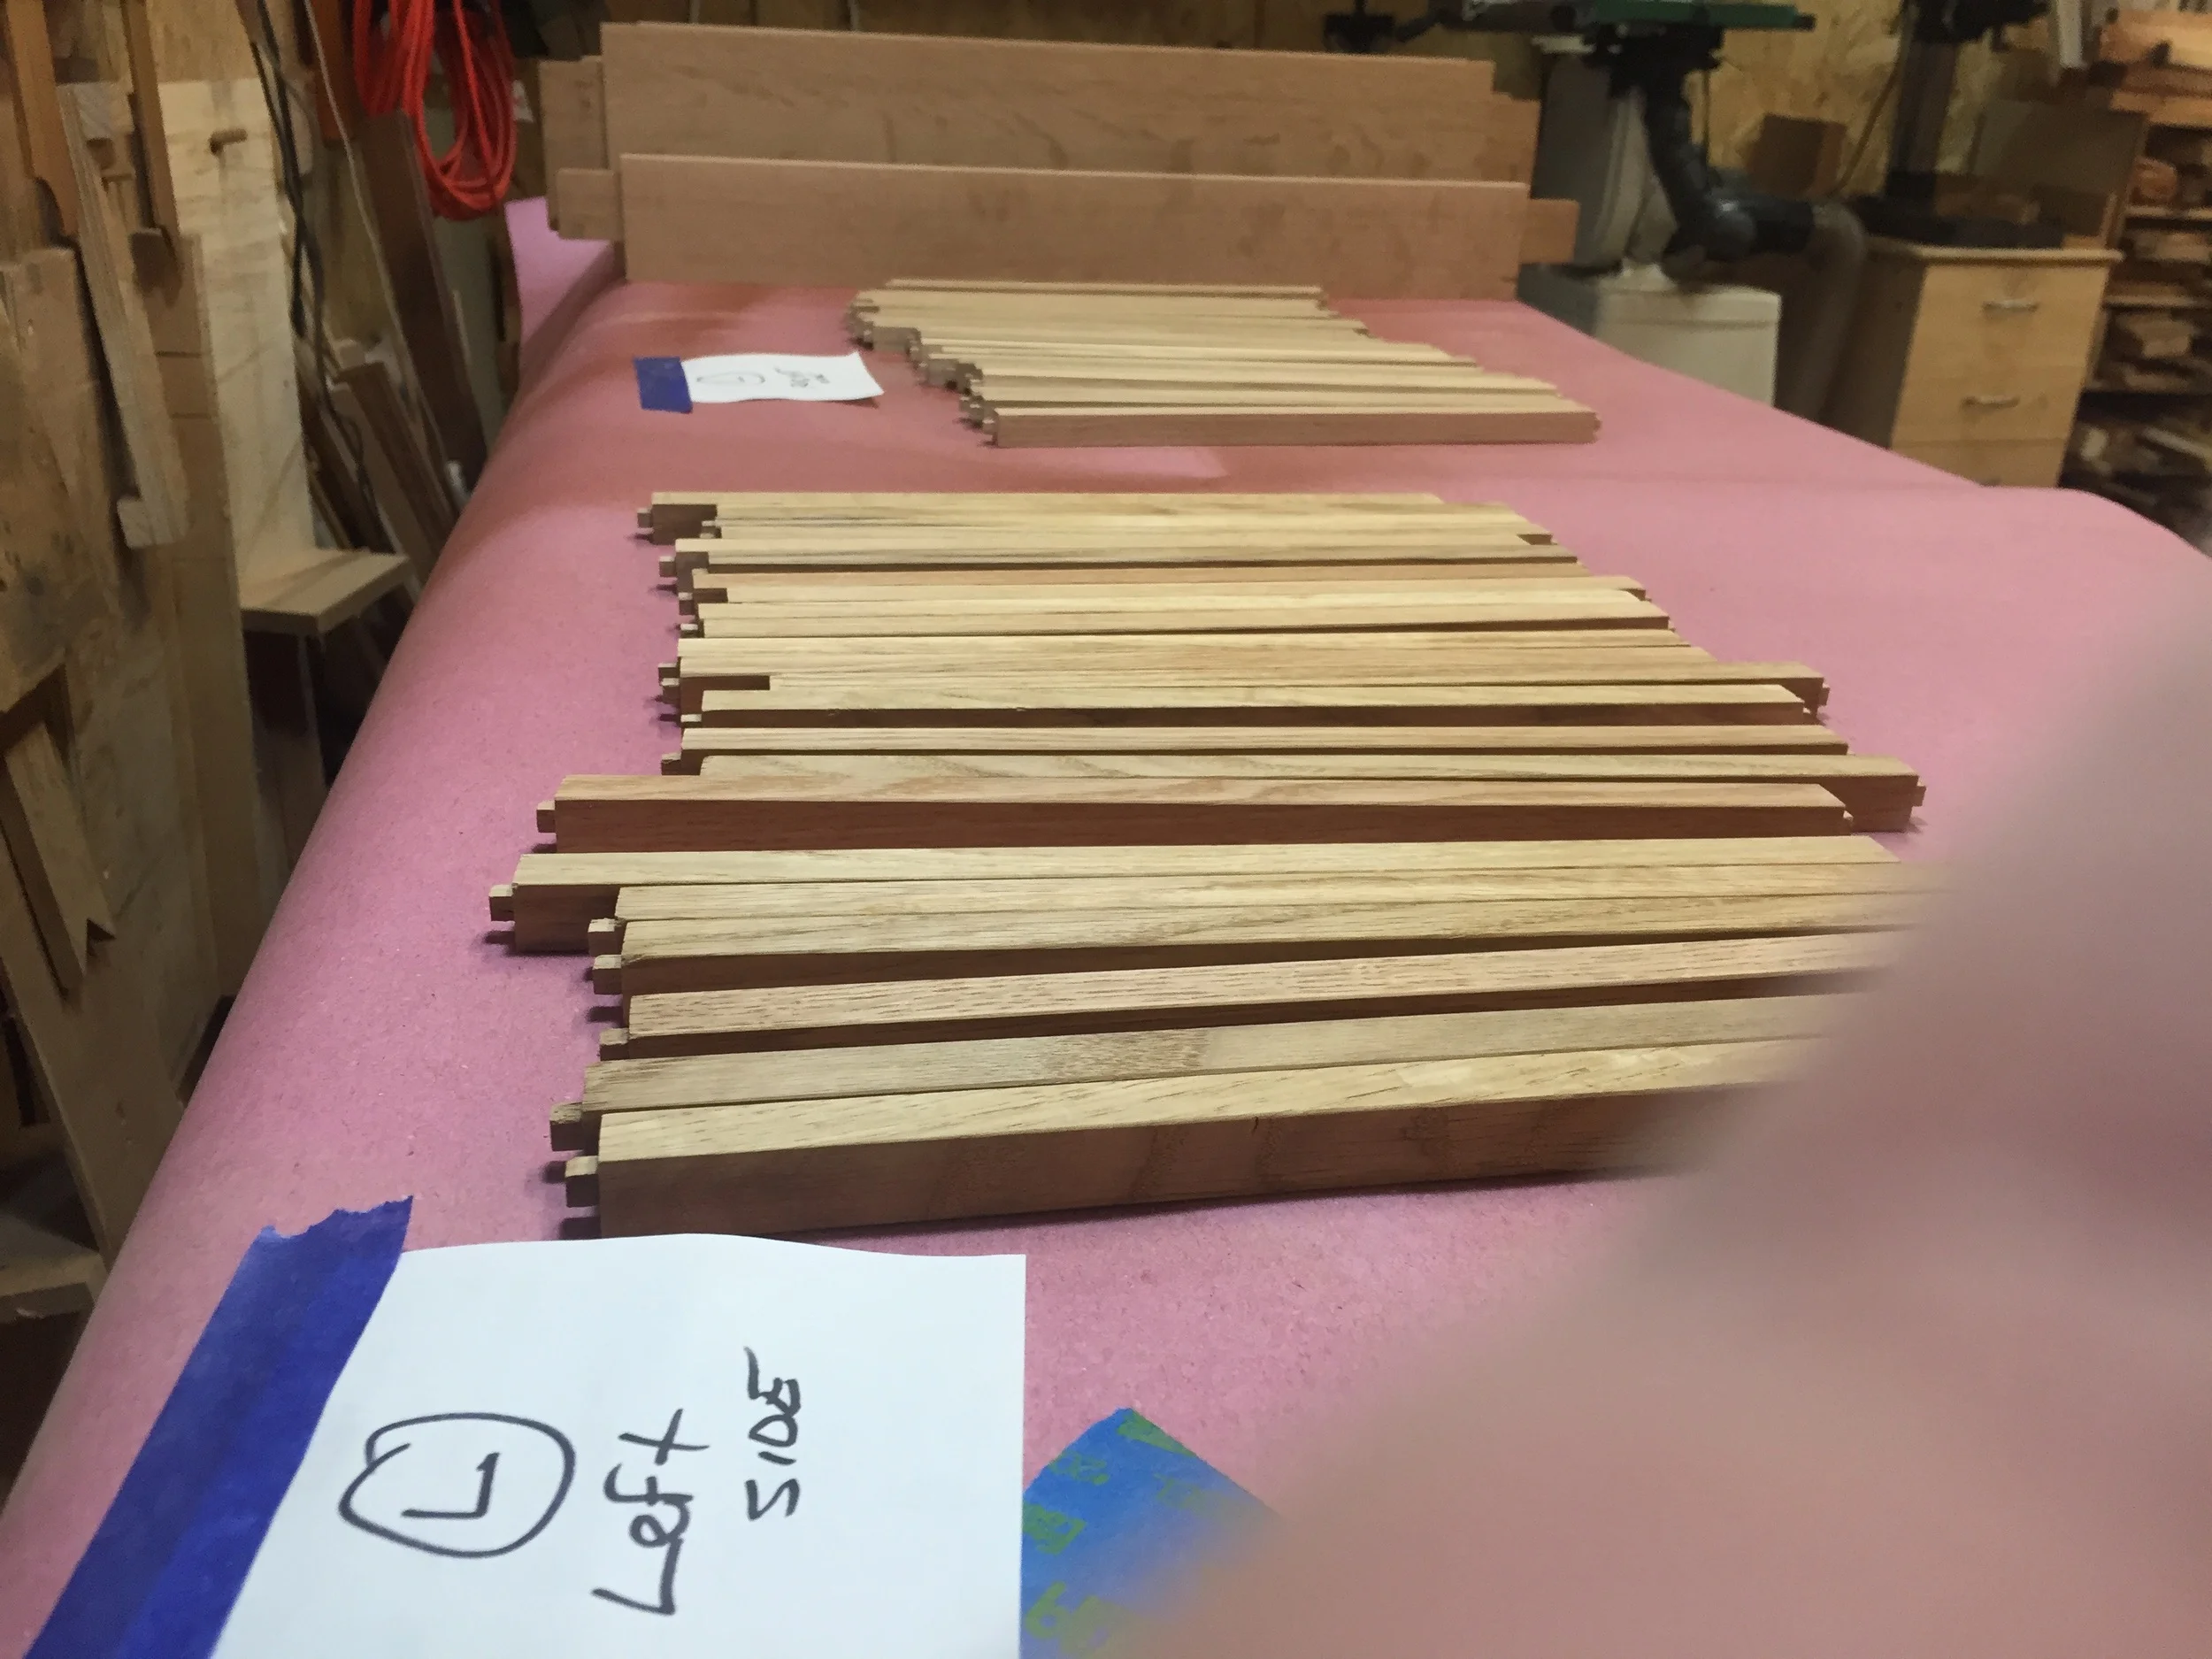
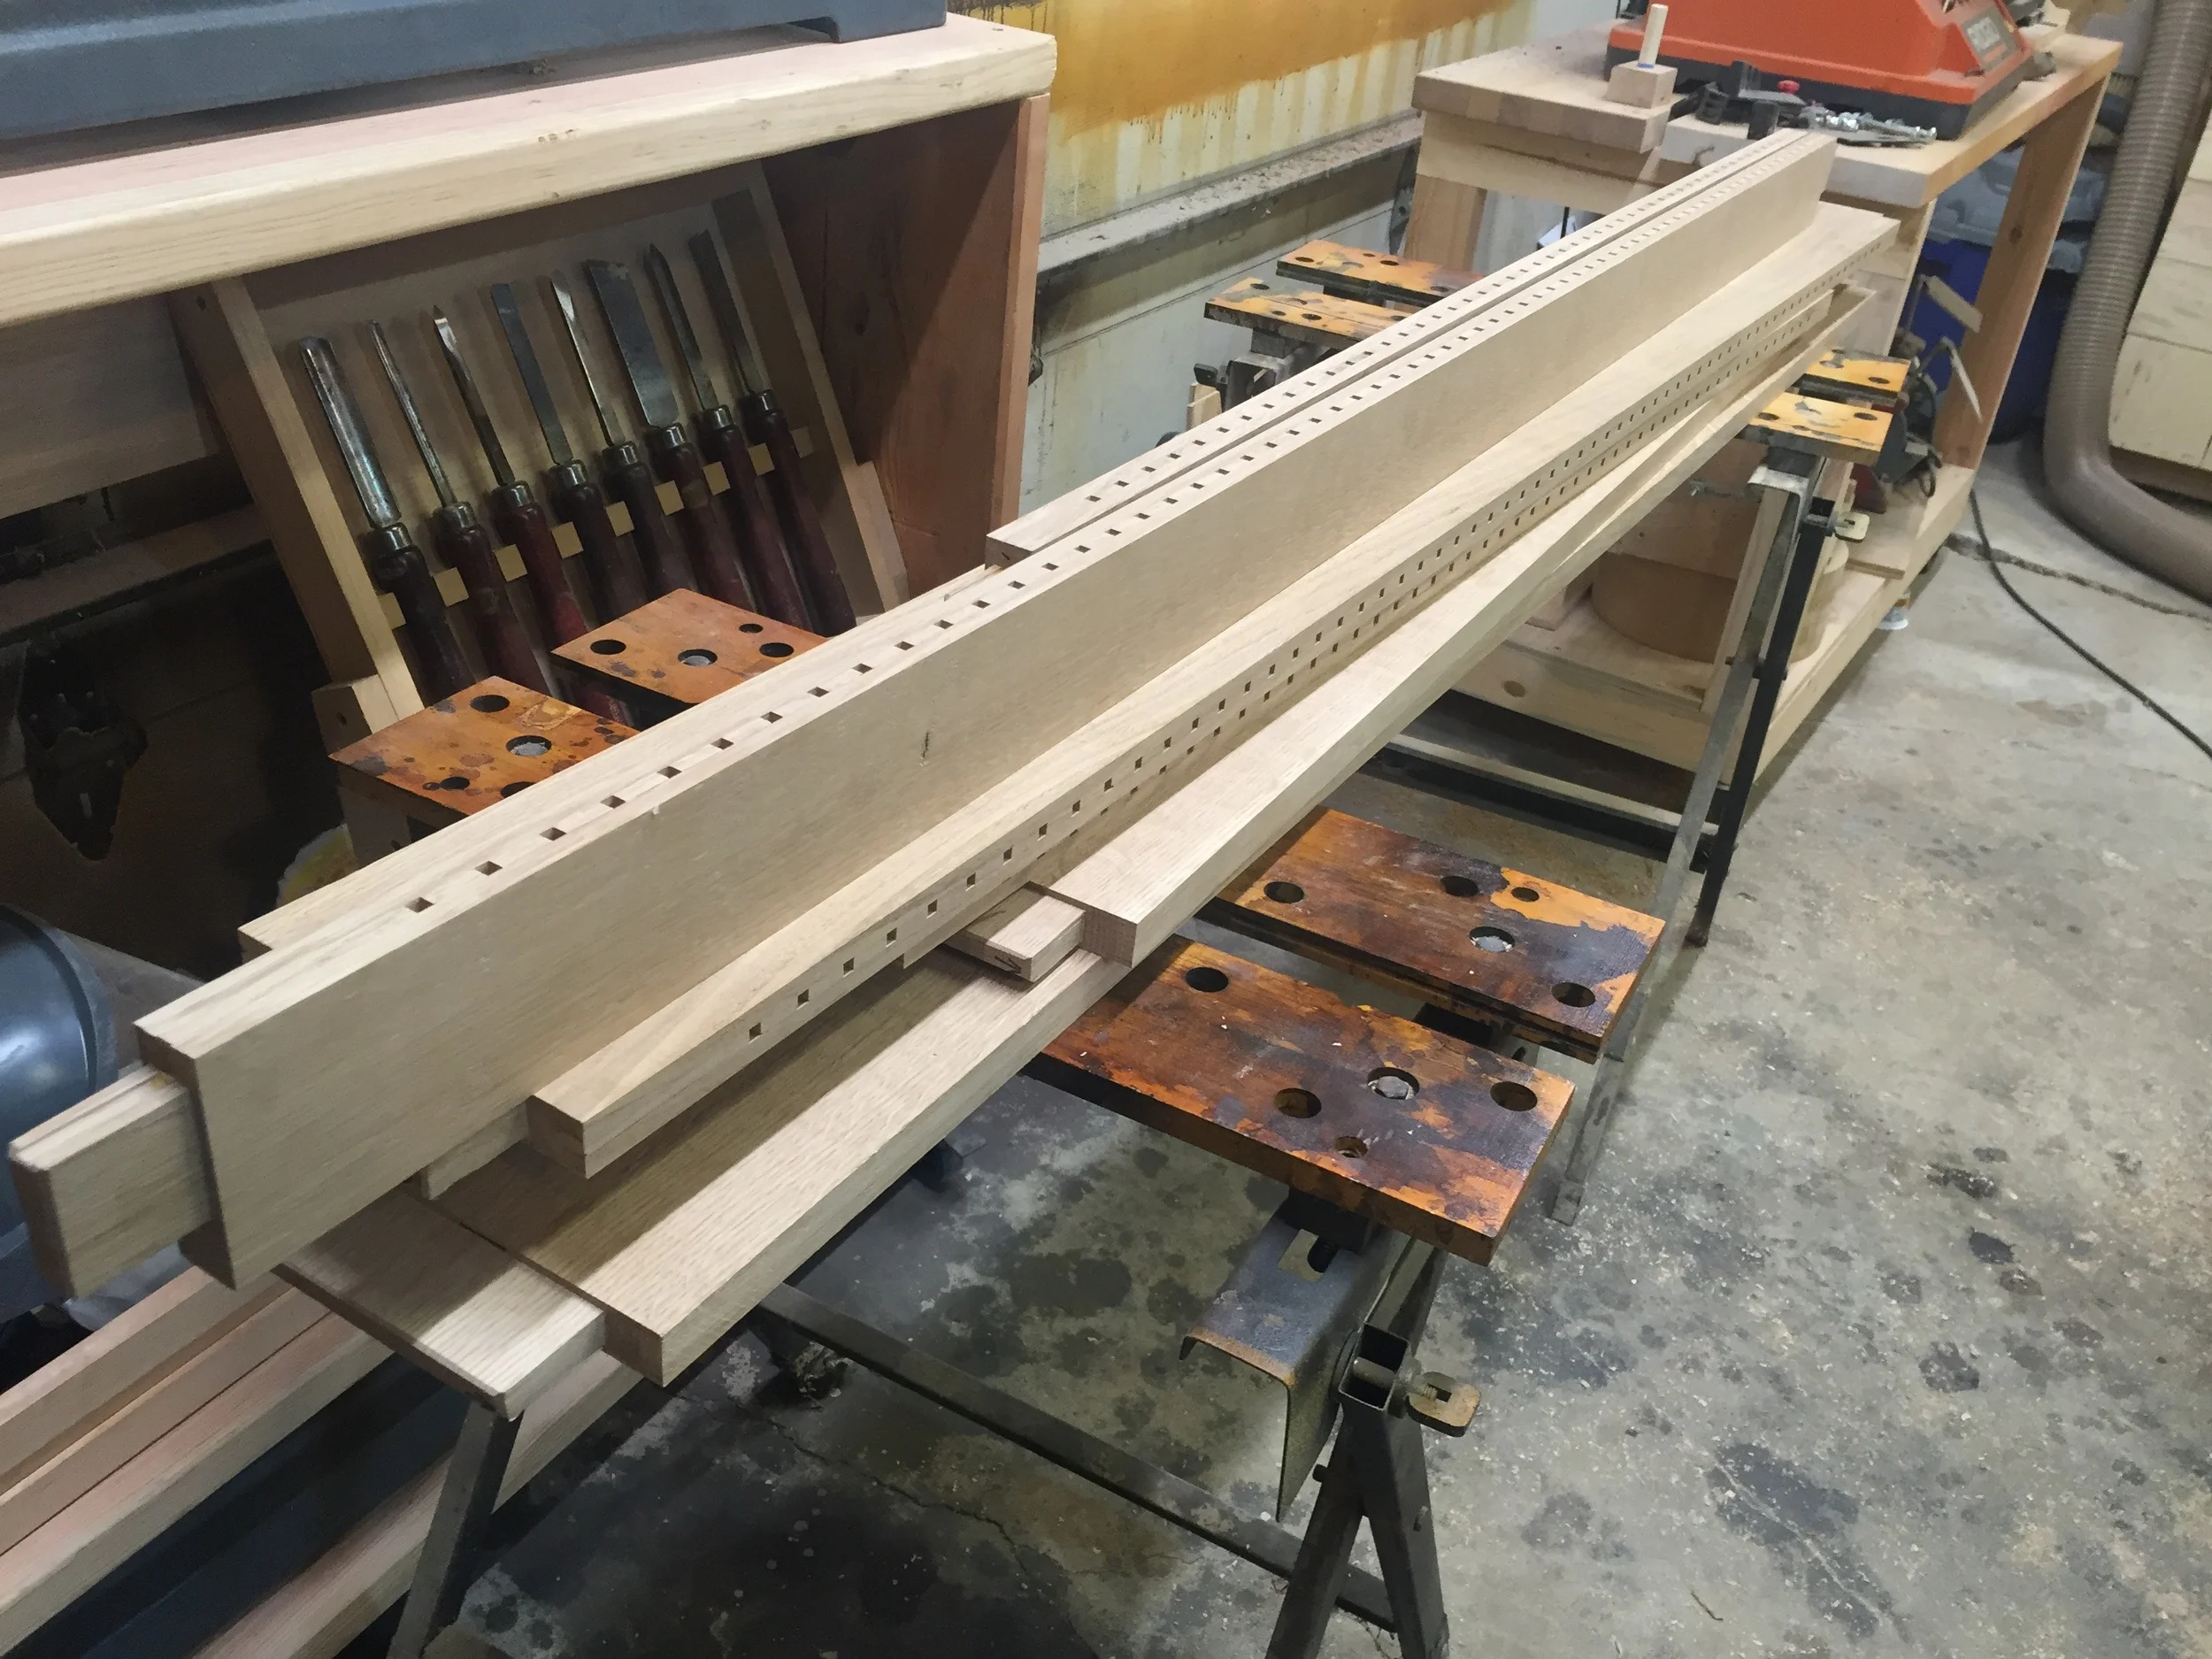
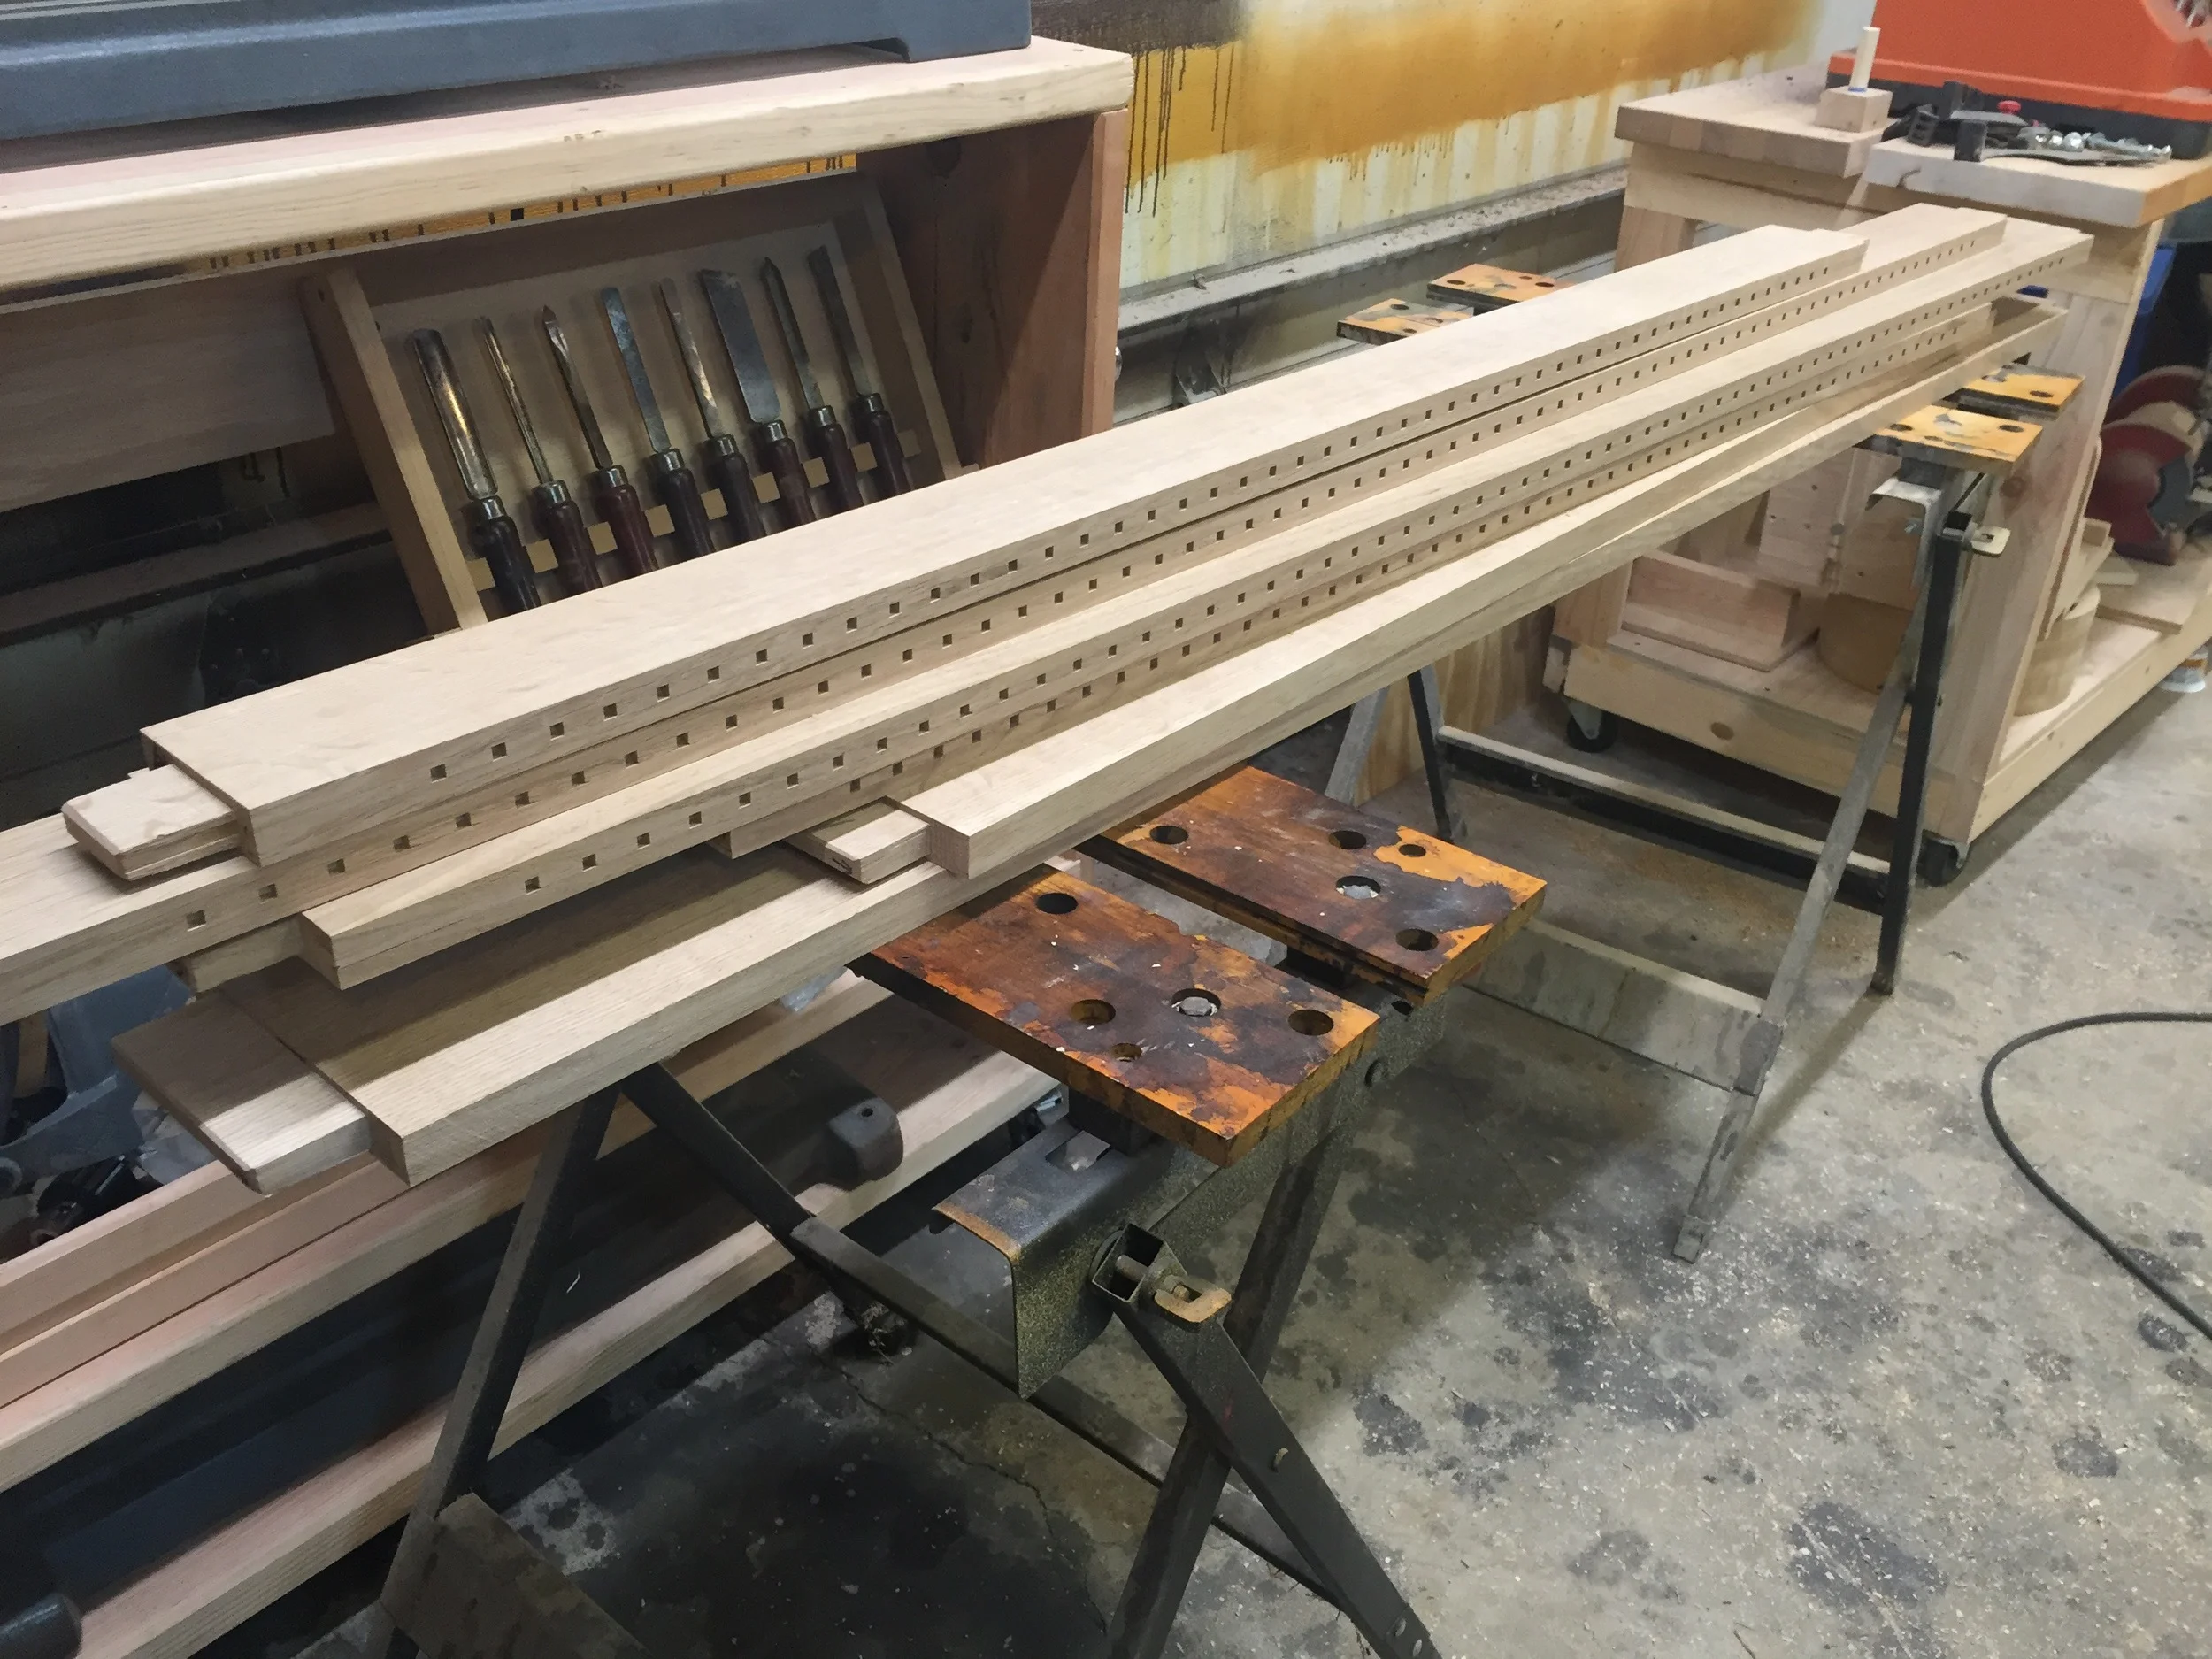
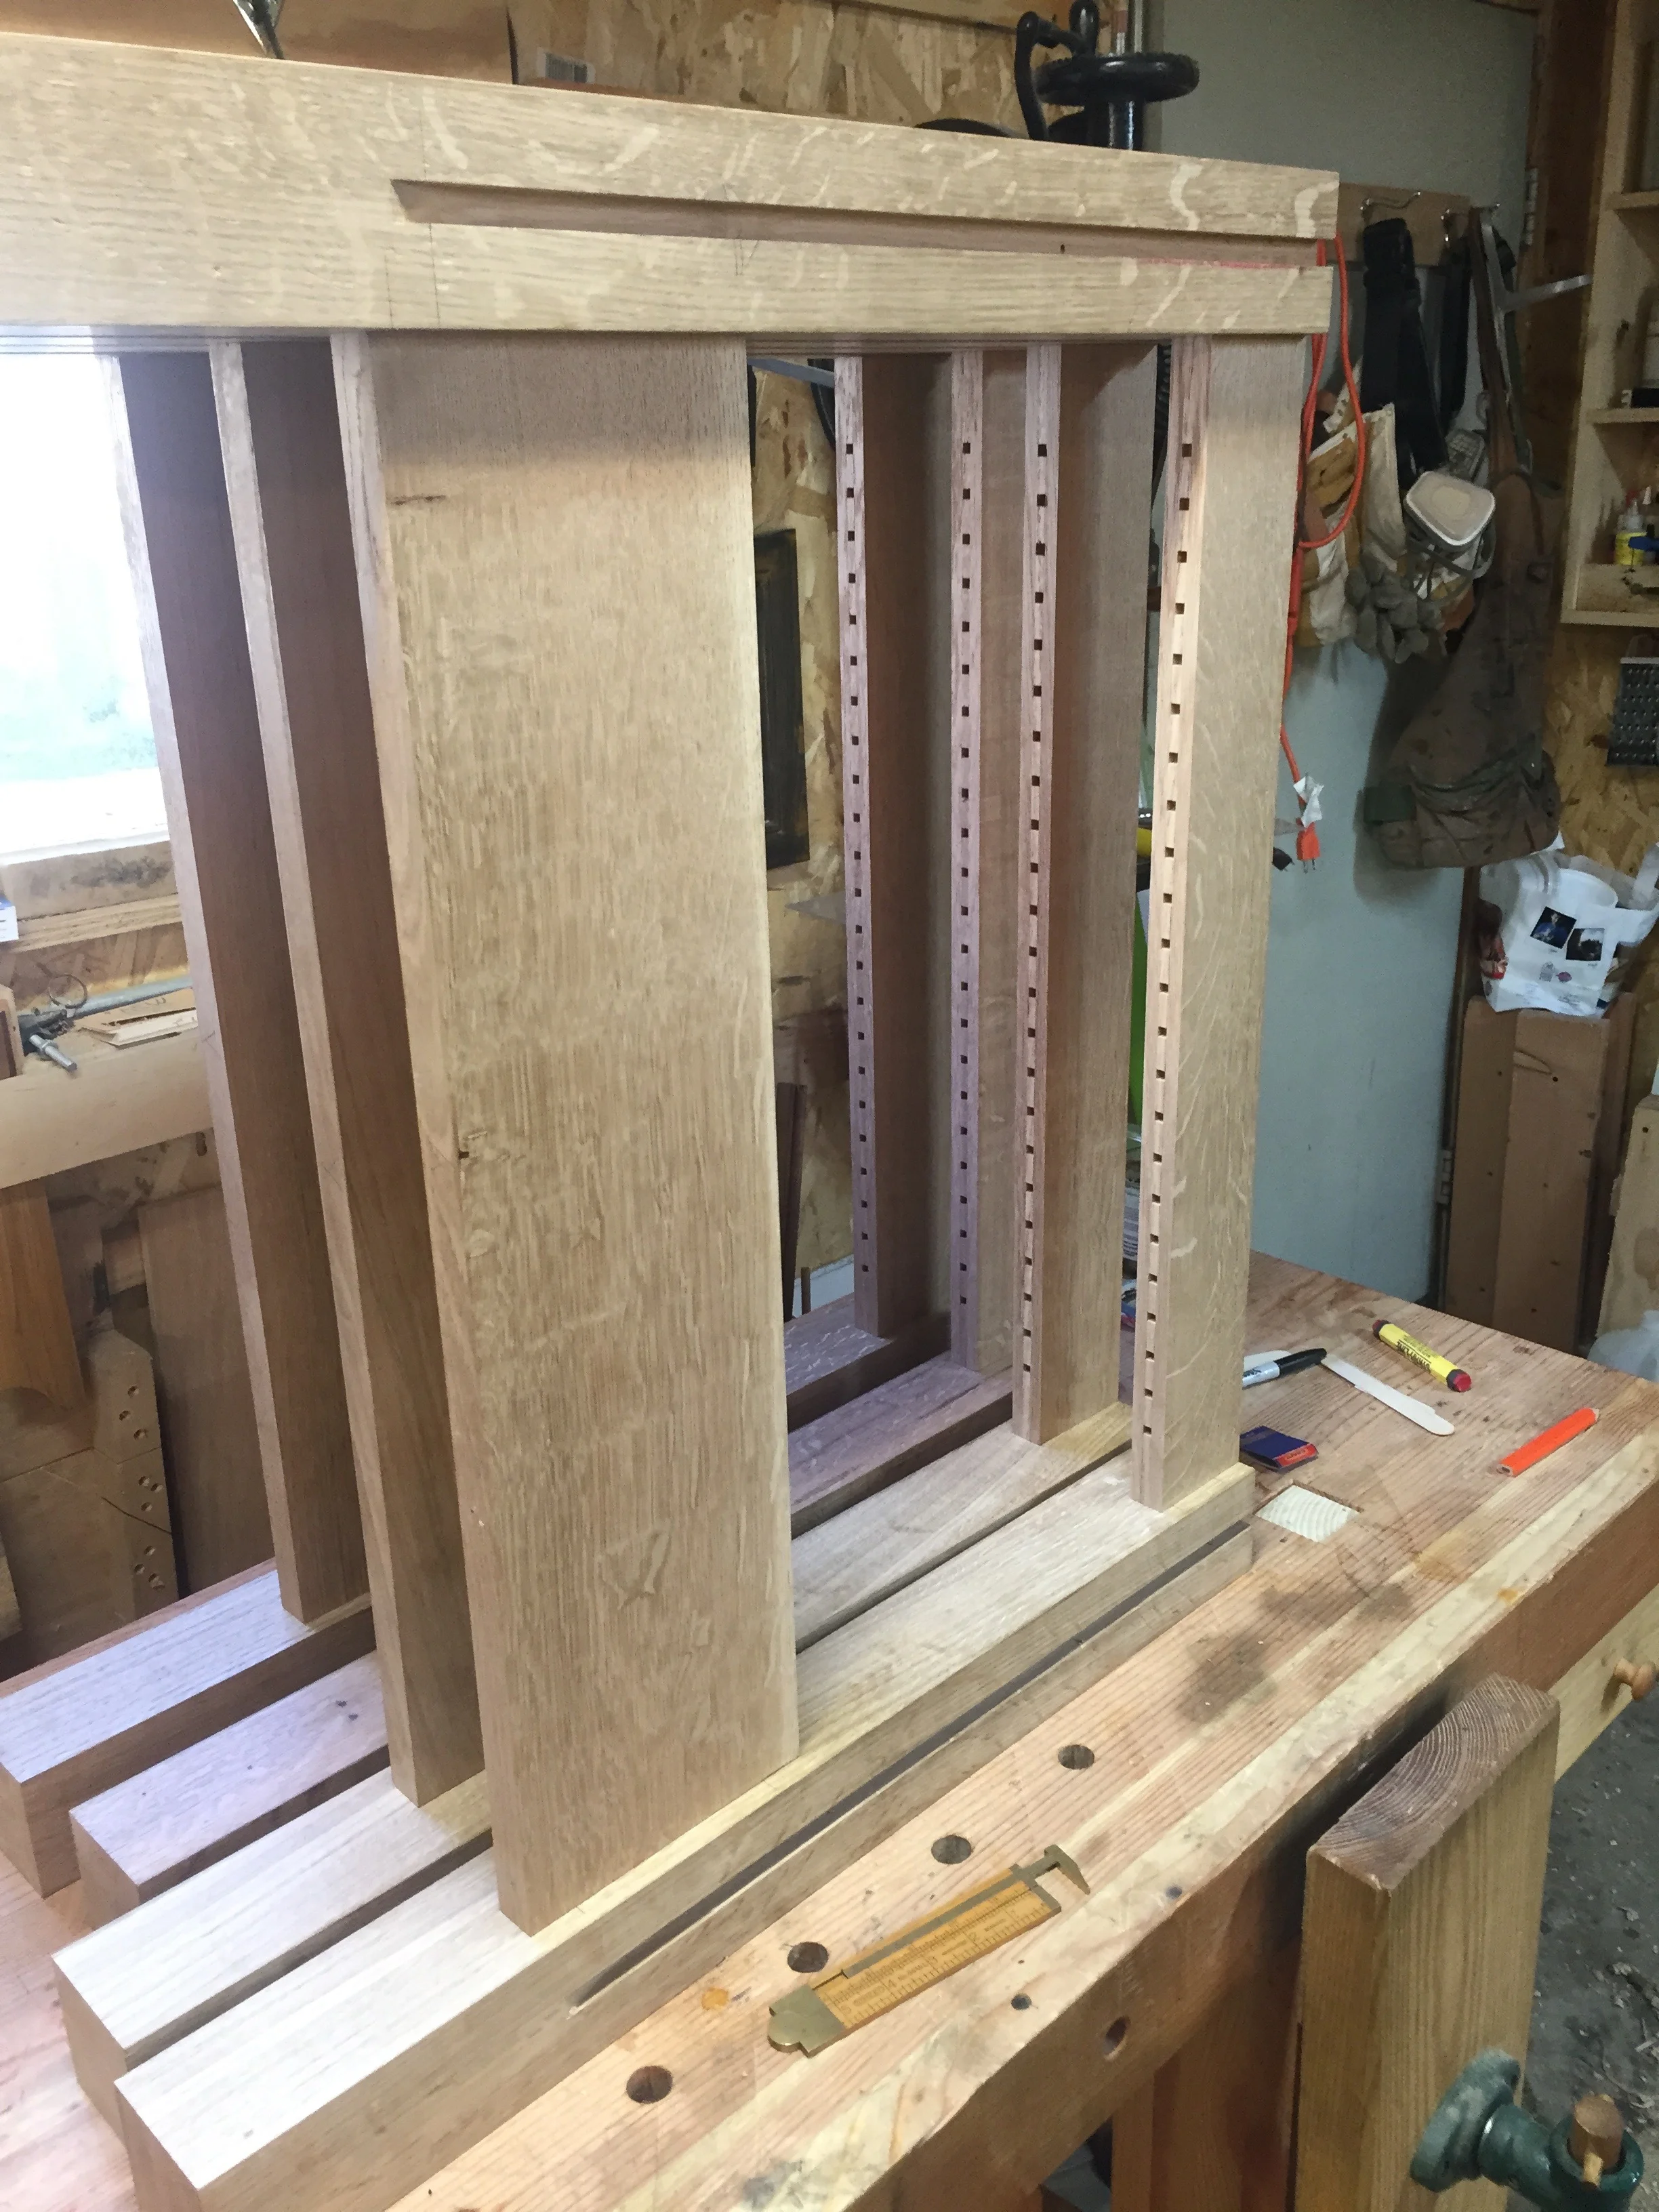
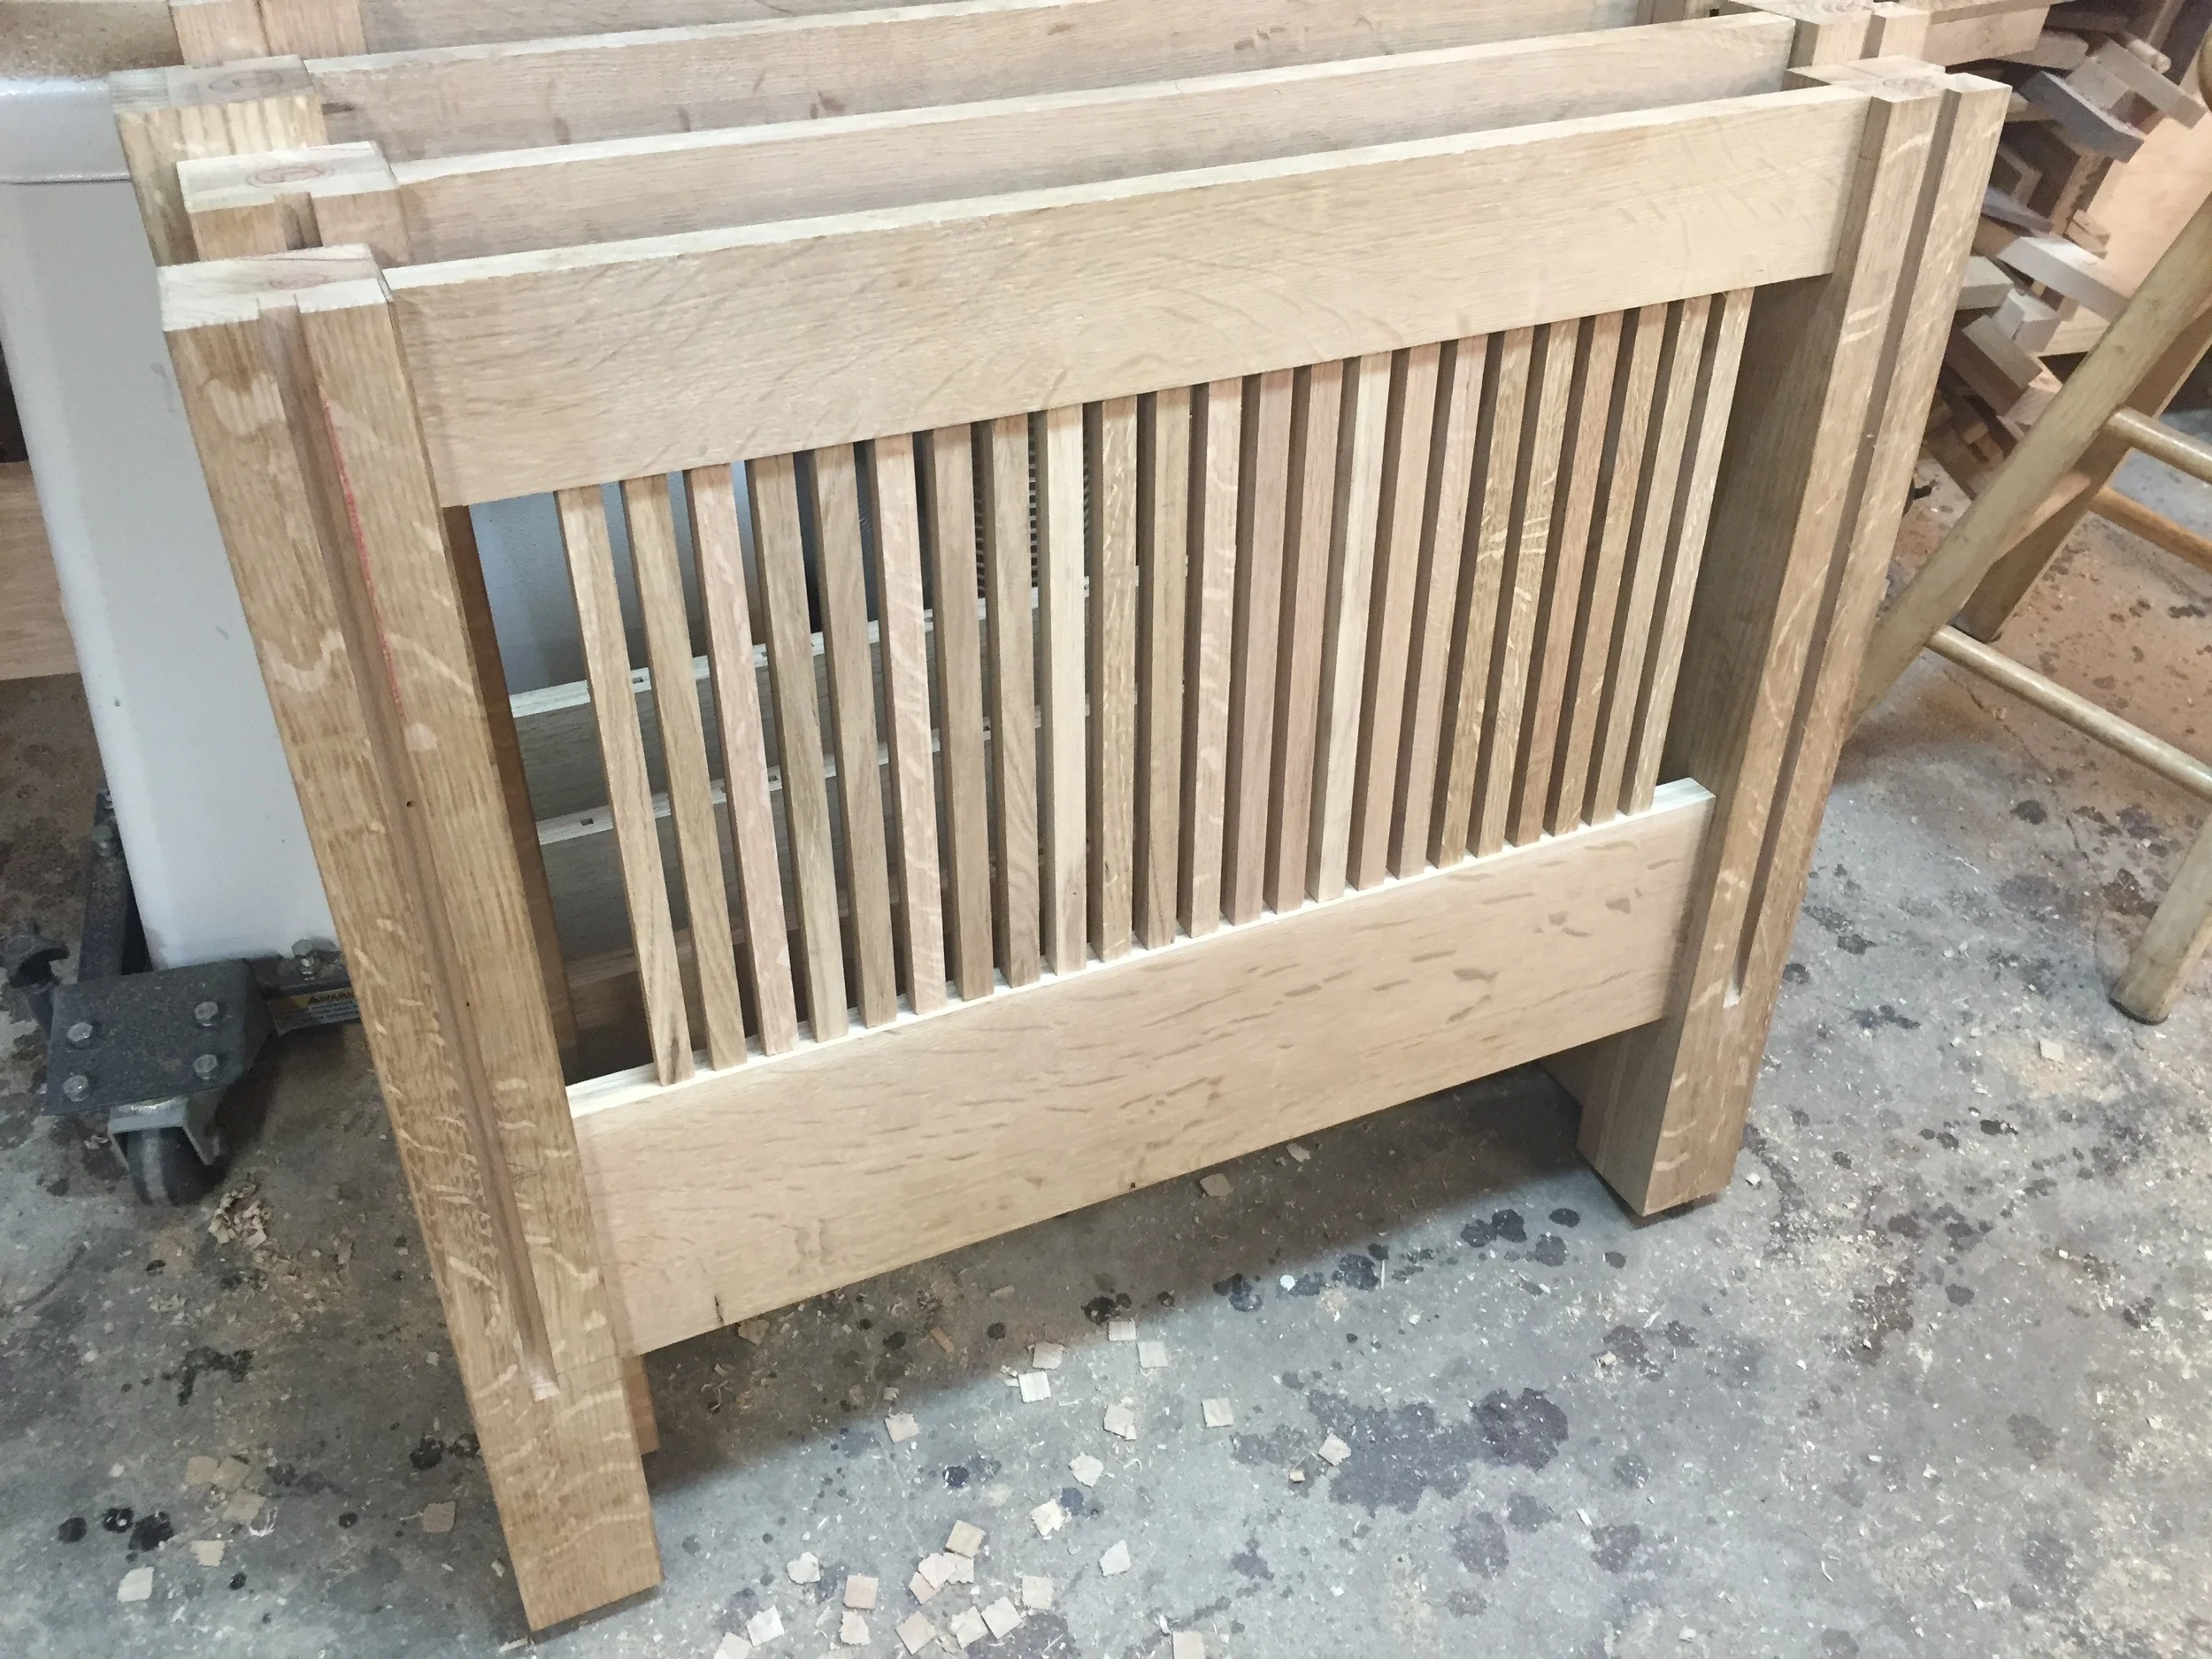
The build started with the legs. And a hallmark of the style is to make quarter sawn grain appear on all four sides of the legs, but adding veneers to two of the faces. Then it was on to milling the rails/stretchers, and side slats. The sides are where one of the first complications in this build arises. At first glance, the side assemblies look like simple square "ladders". Where the top arm is an obvious slat front to back, the bottom rail also is at an angle, and is about 3/4" lower in the back than in the front. The means the shoulders of the bottom rails where they meet the legs are angled. and all the shoulders on the bottom of the slats are angled. Each slat is a slightly different length. And then there's the angled shoulder for the through tenon where the back leg meets the slanted arm. There is a lot to consider.

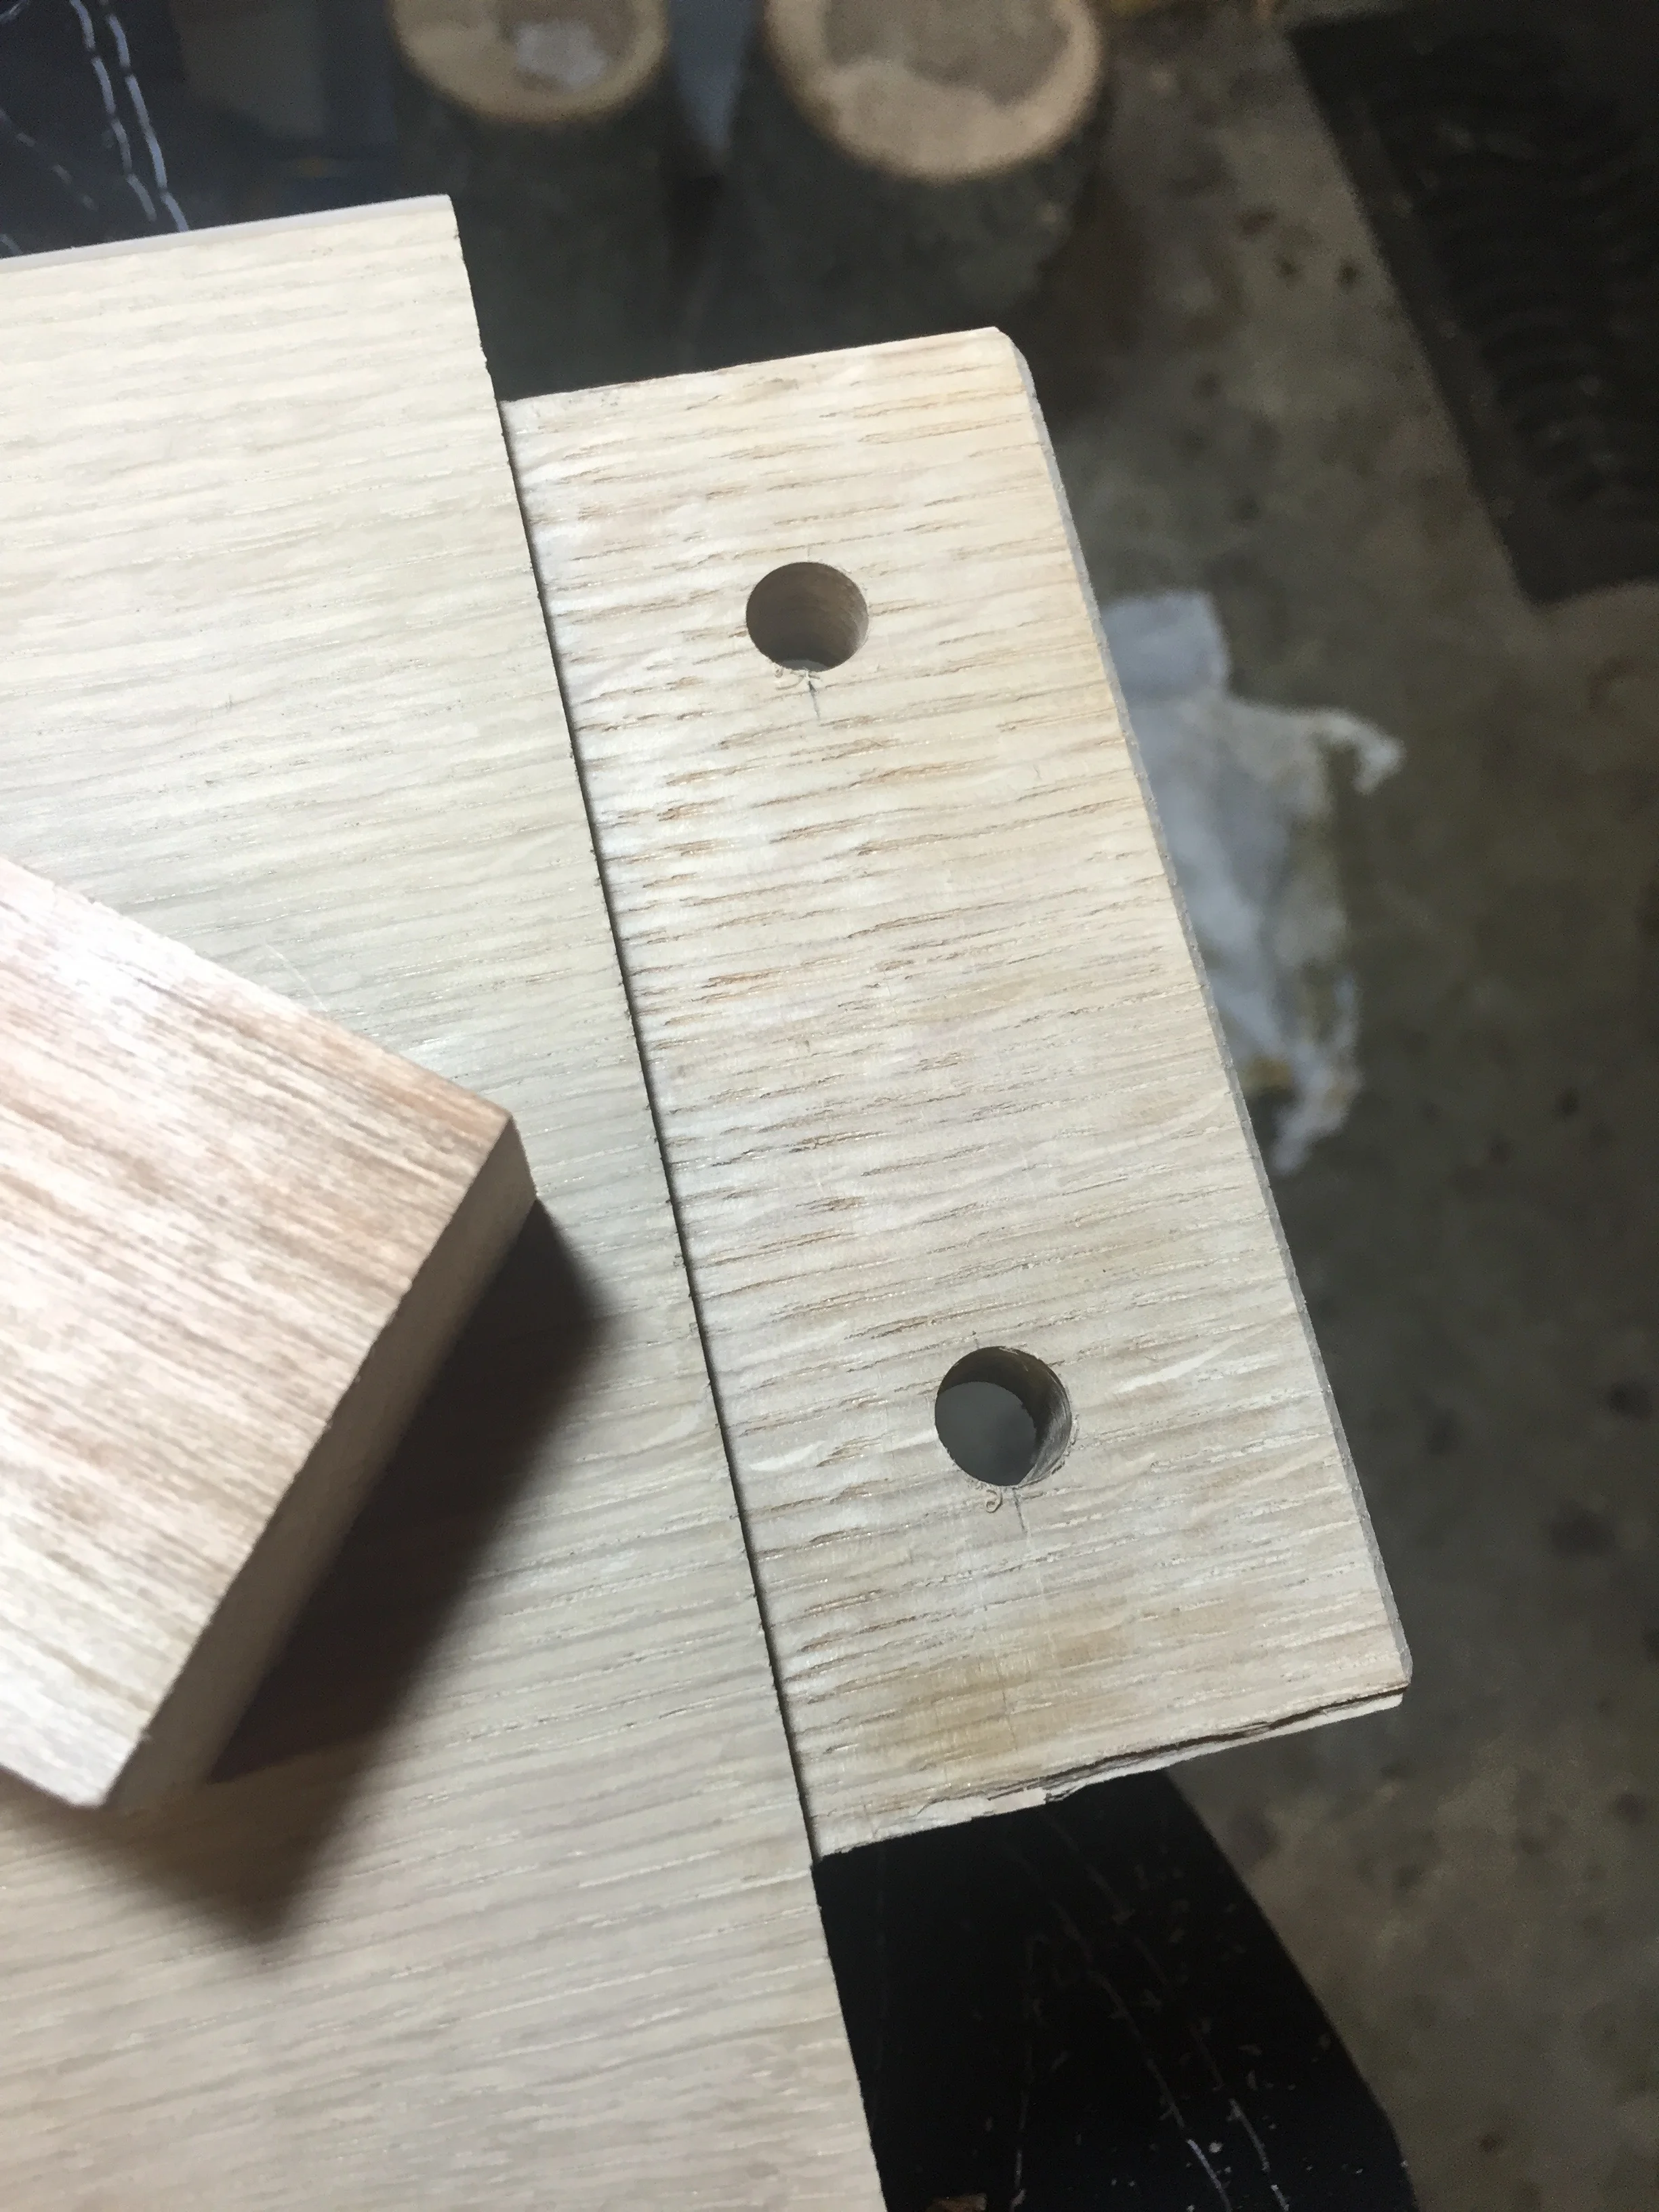
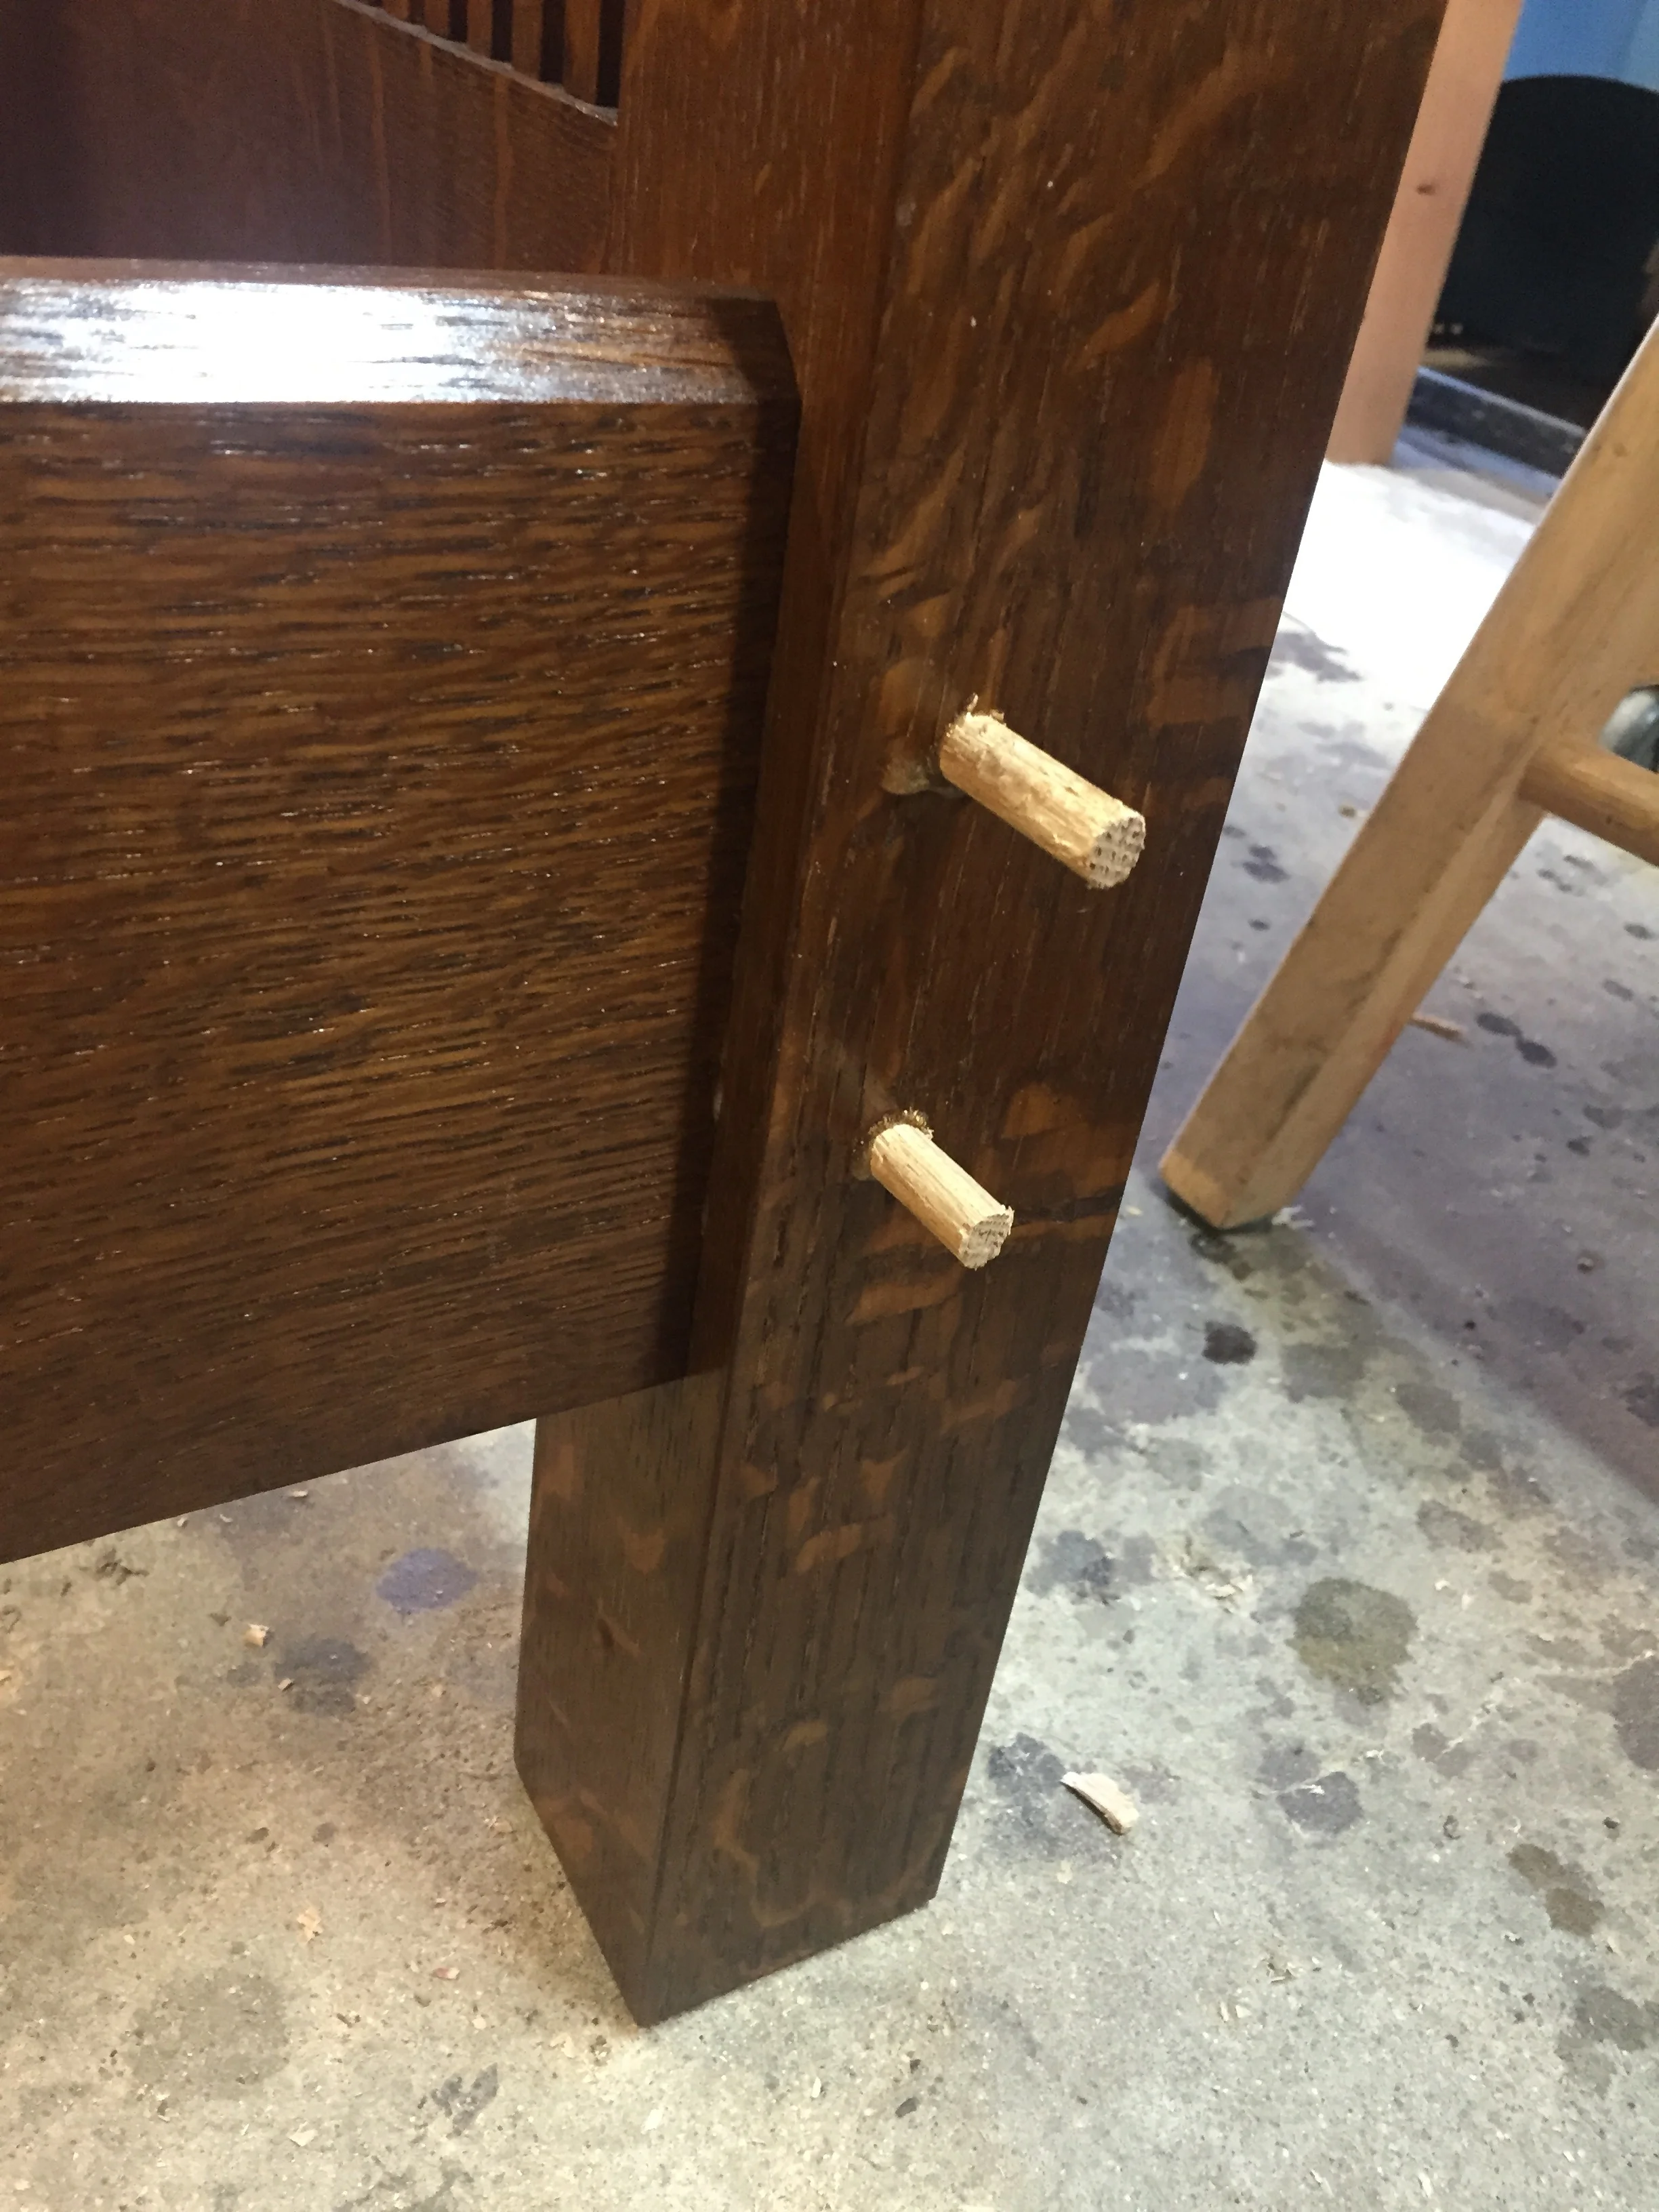
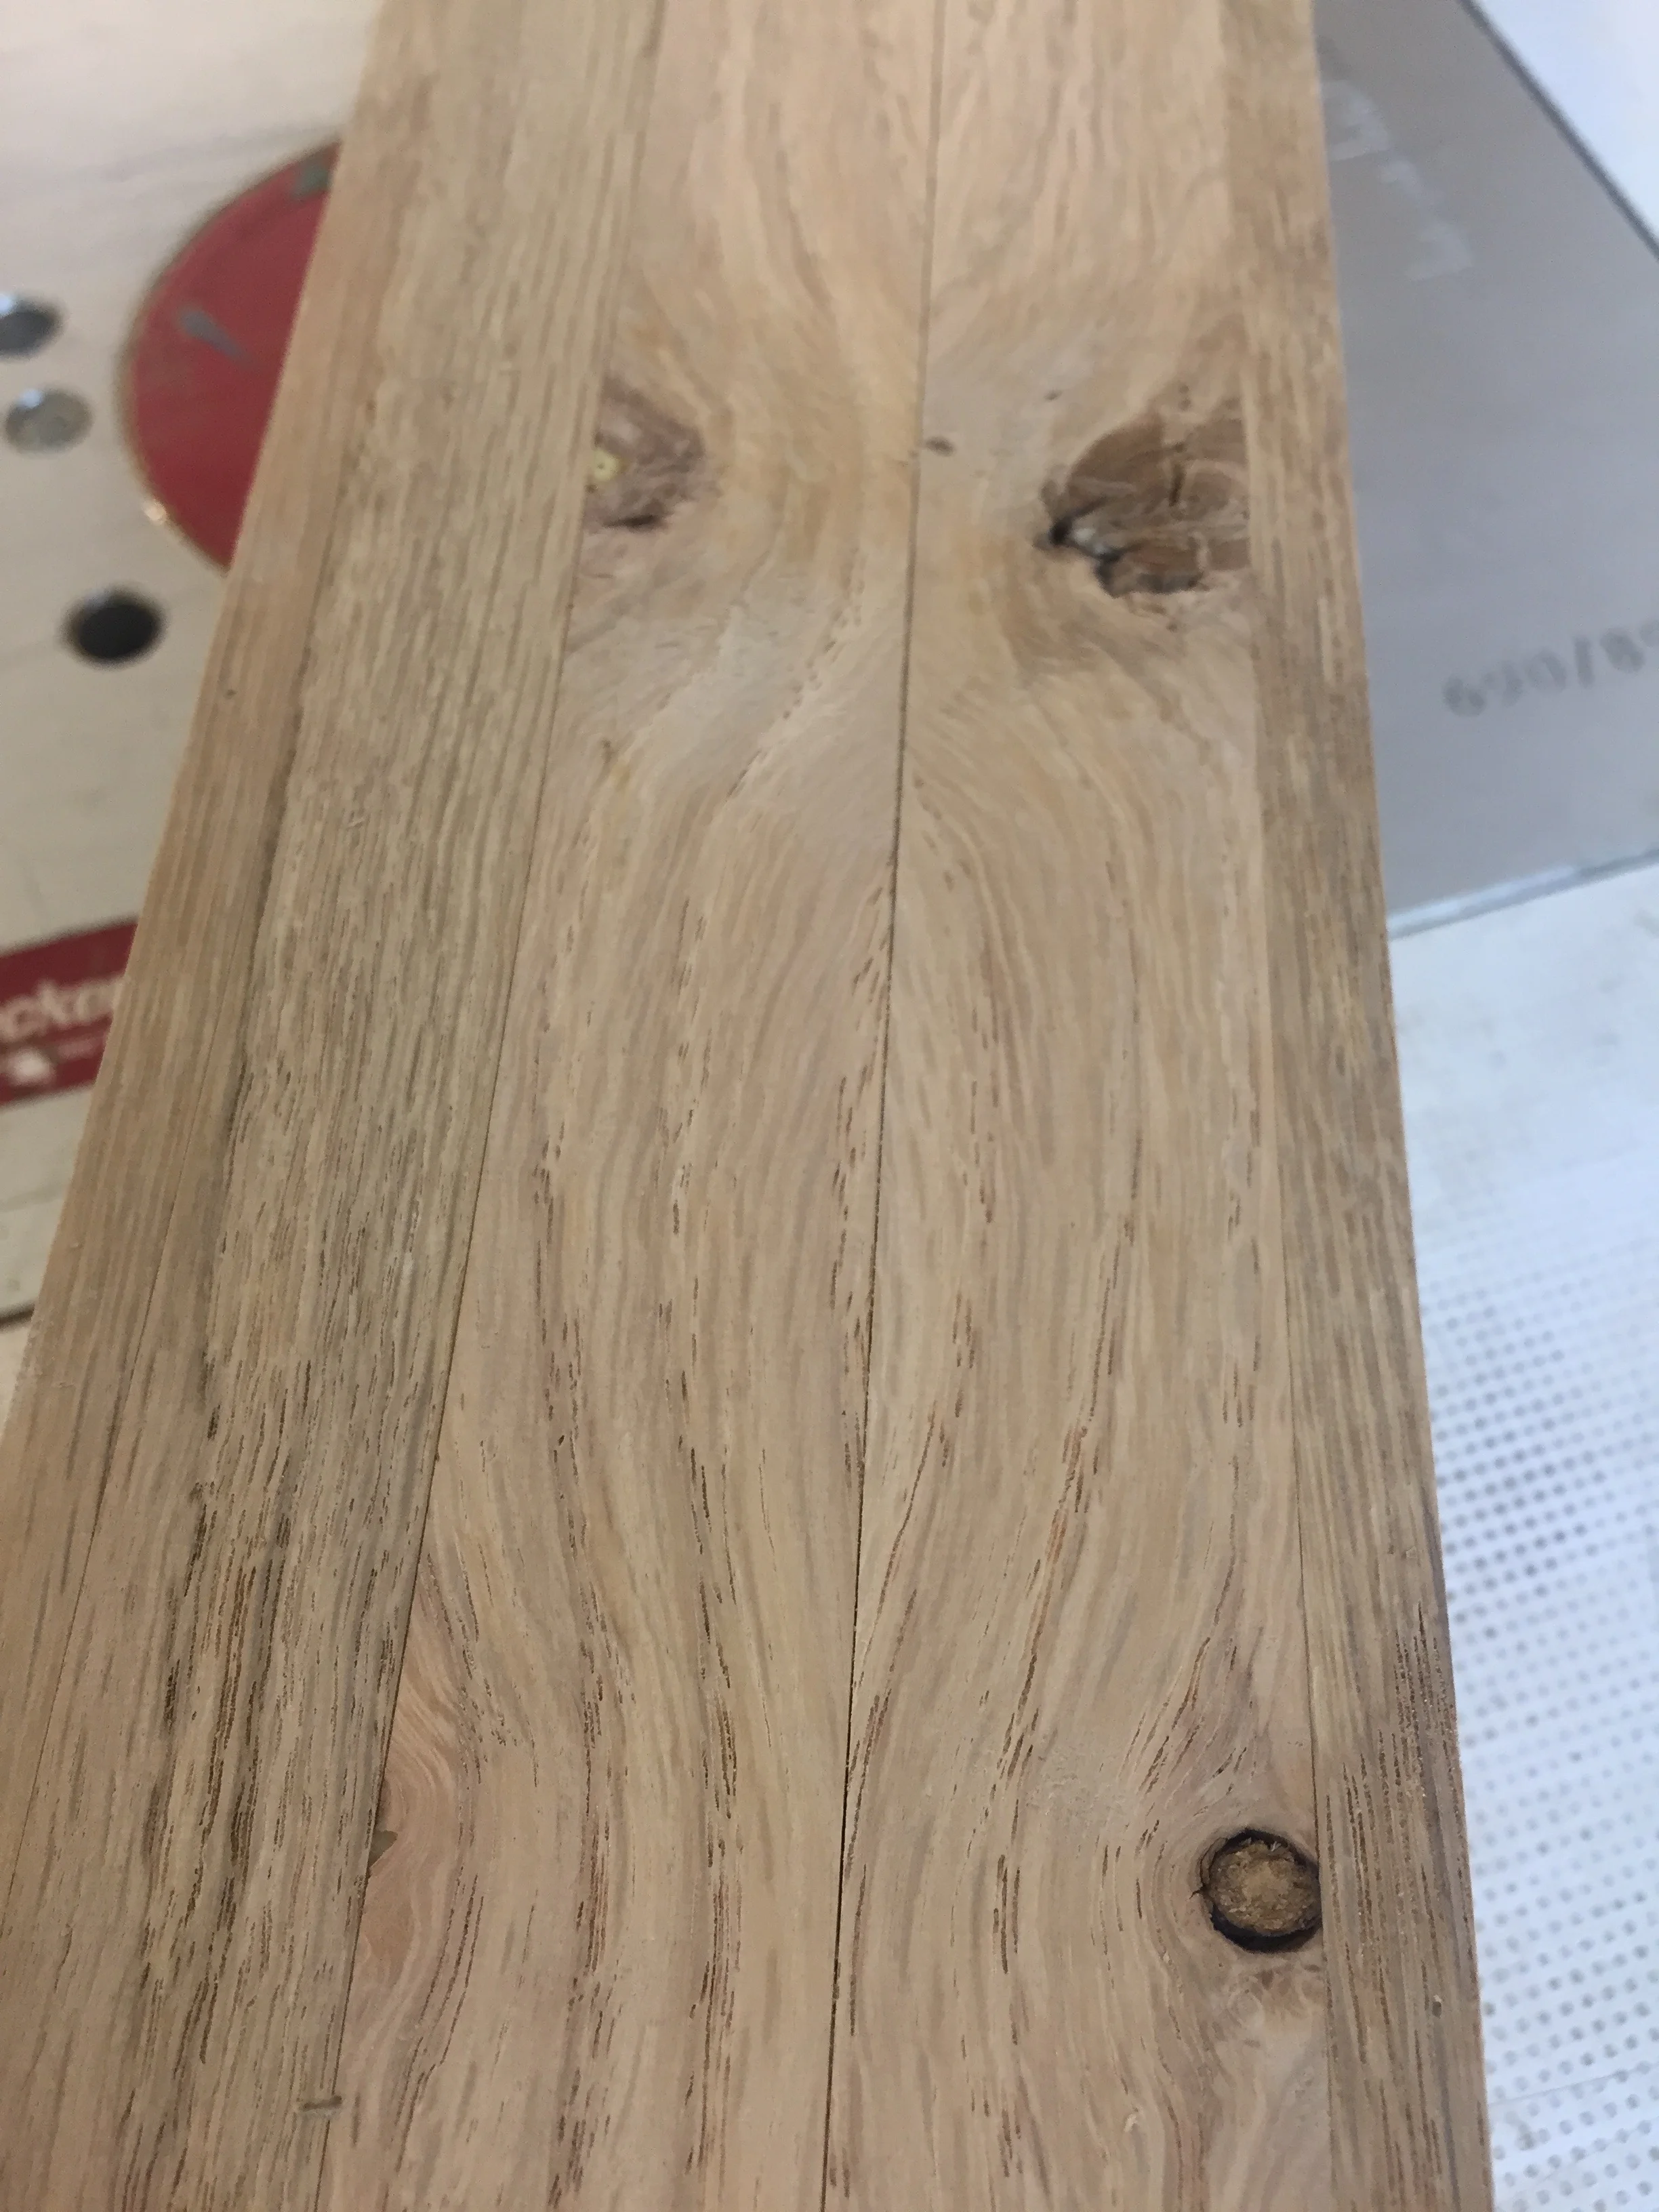
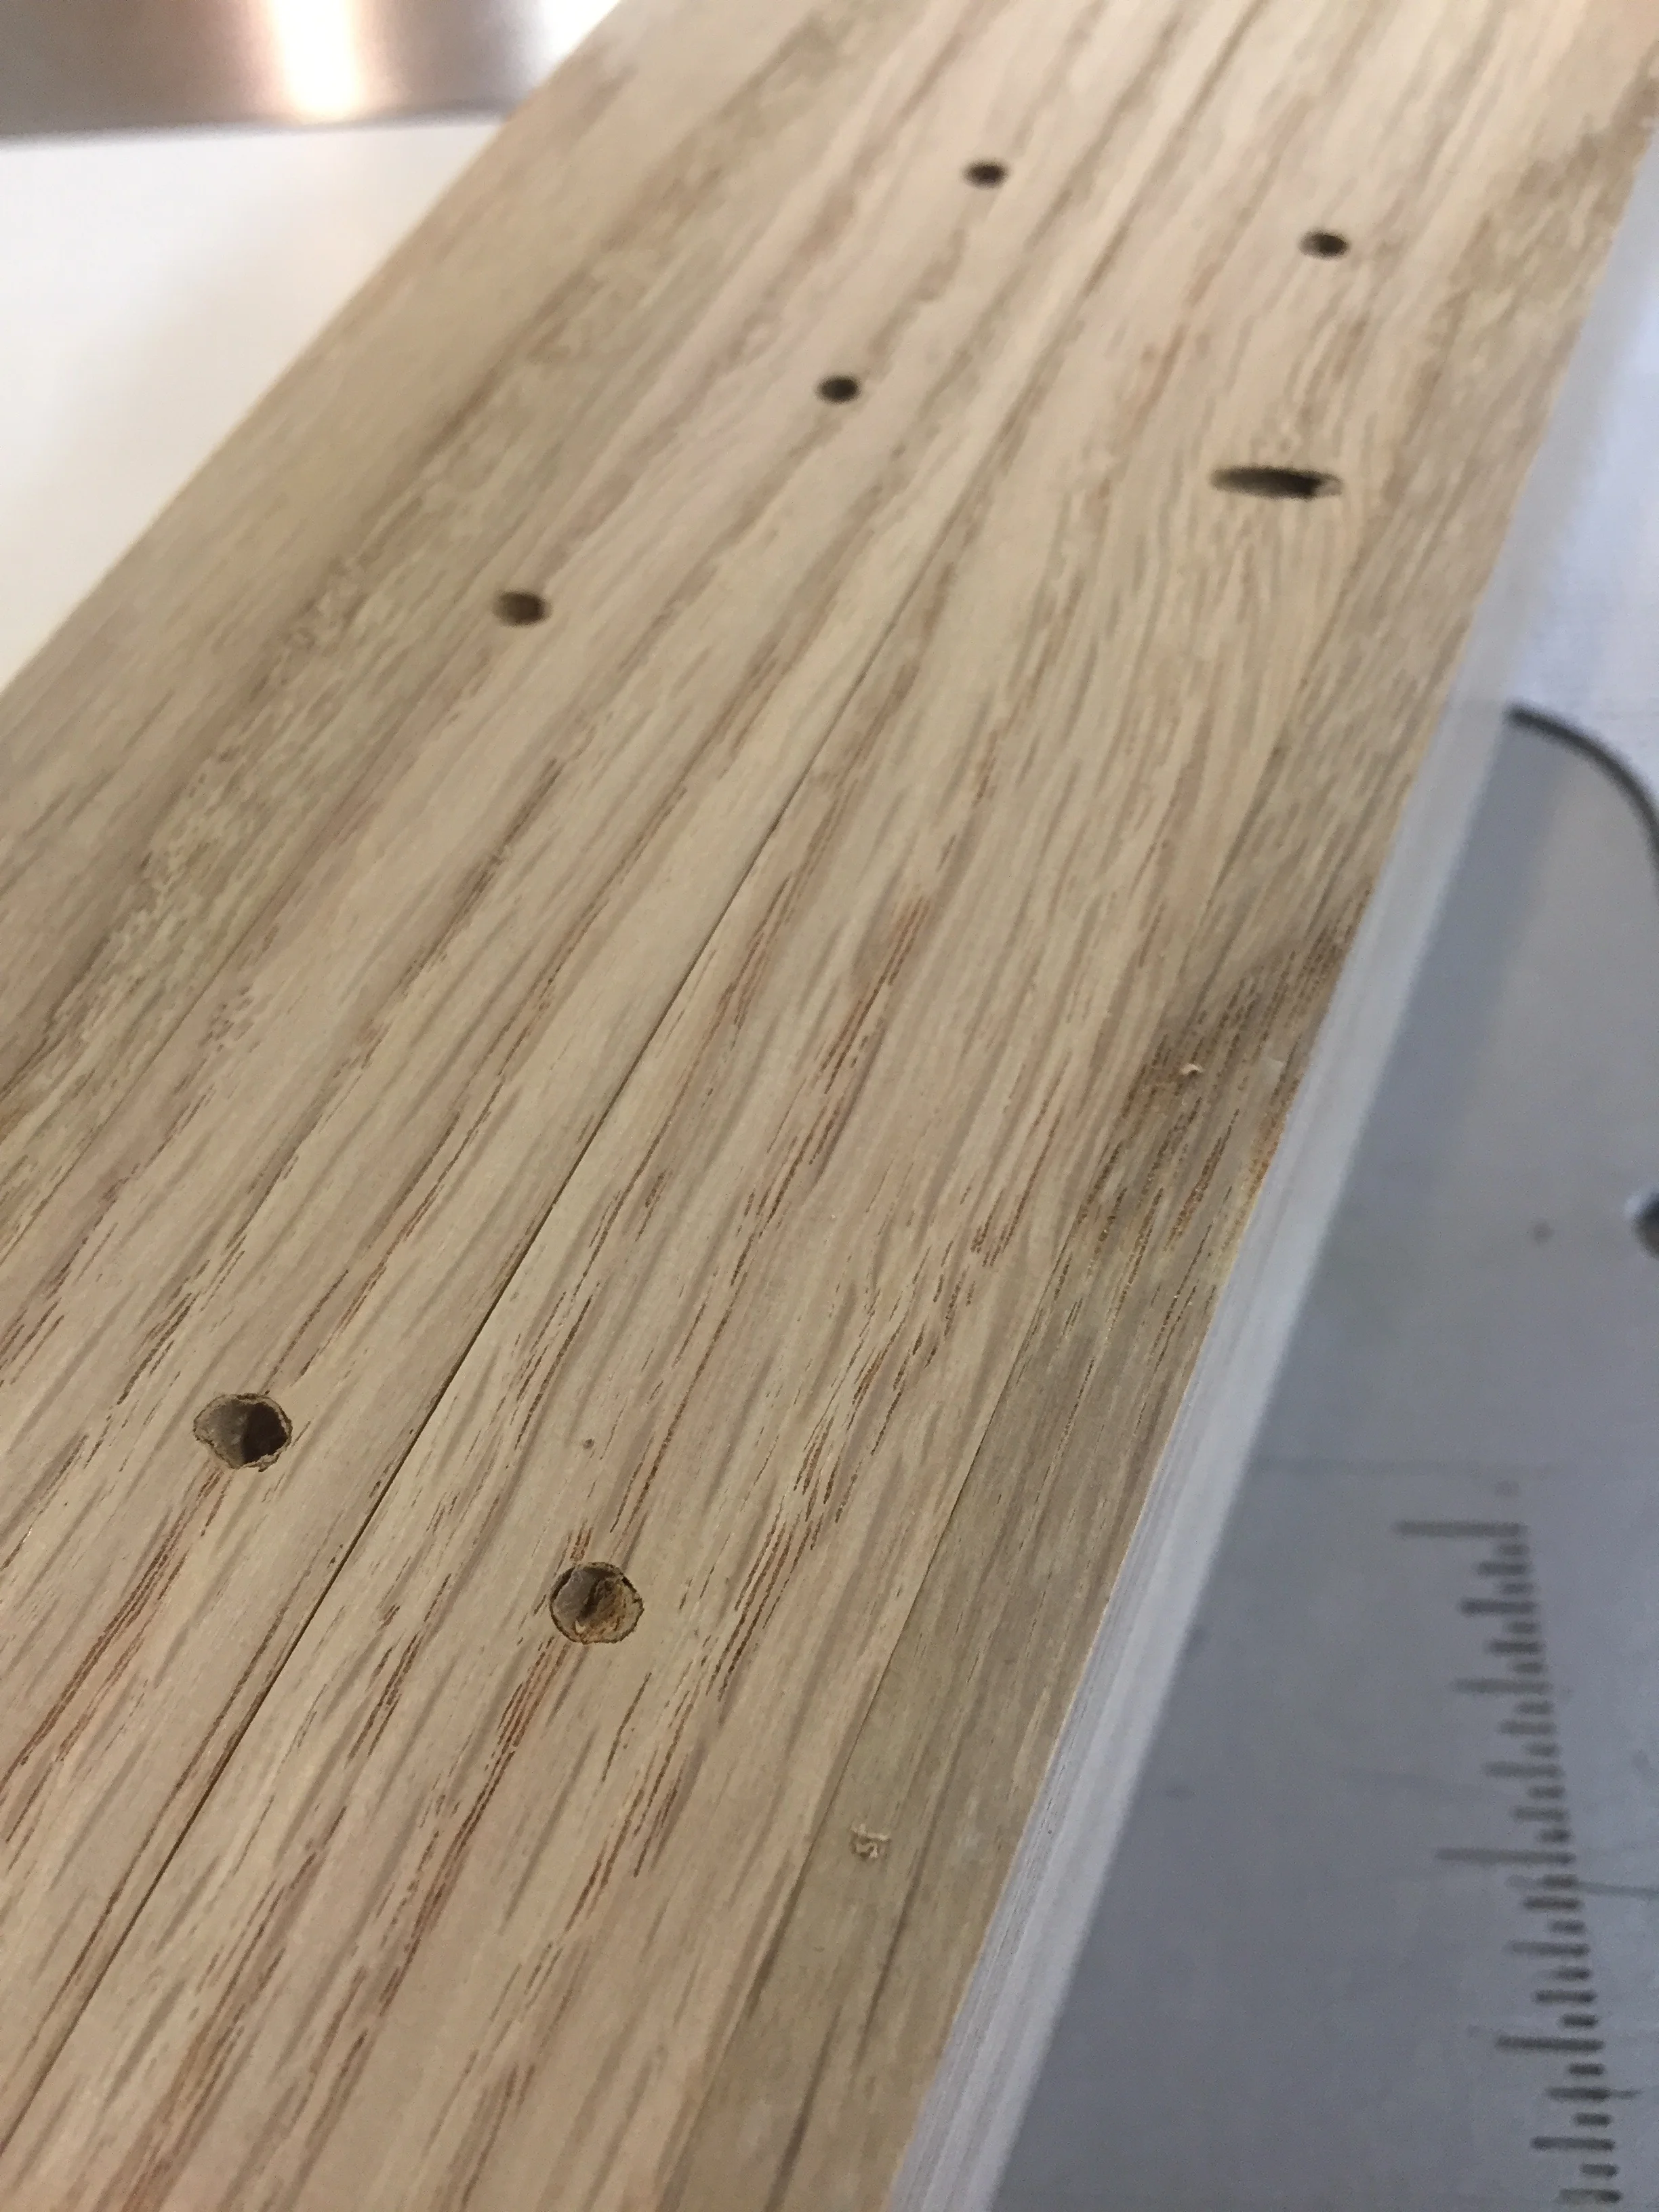
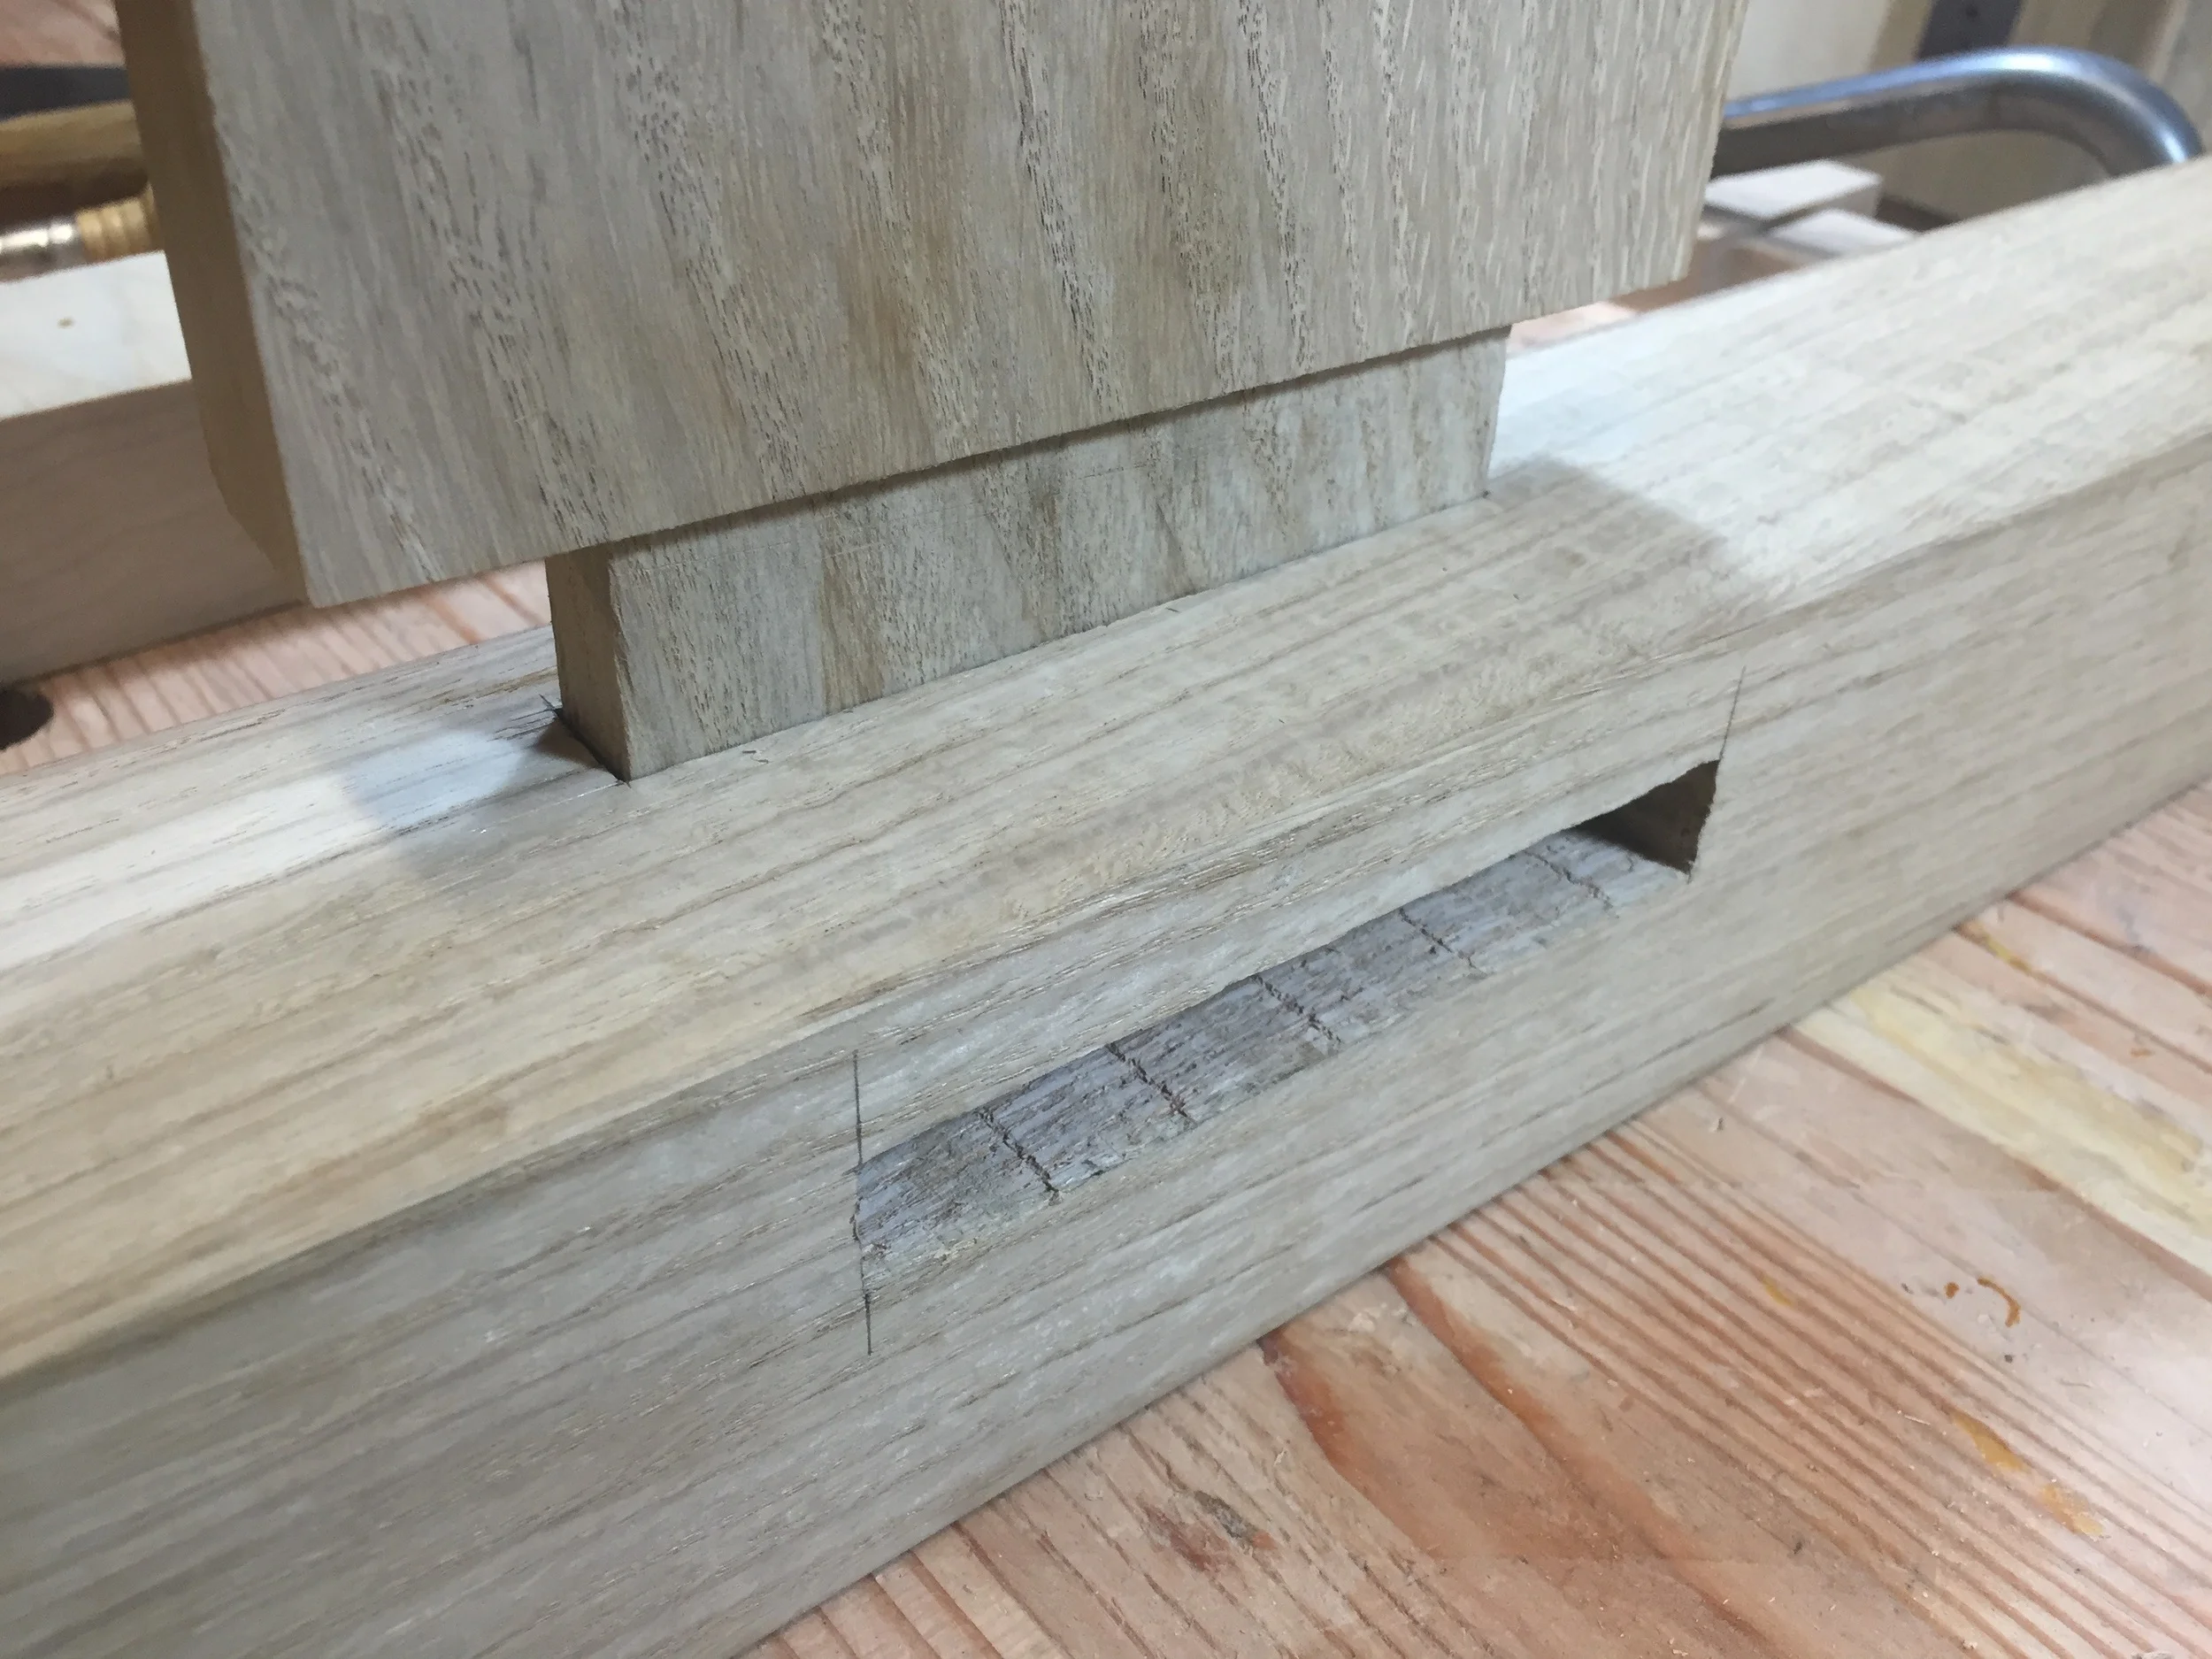
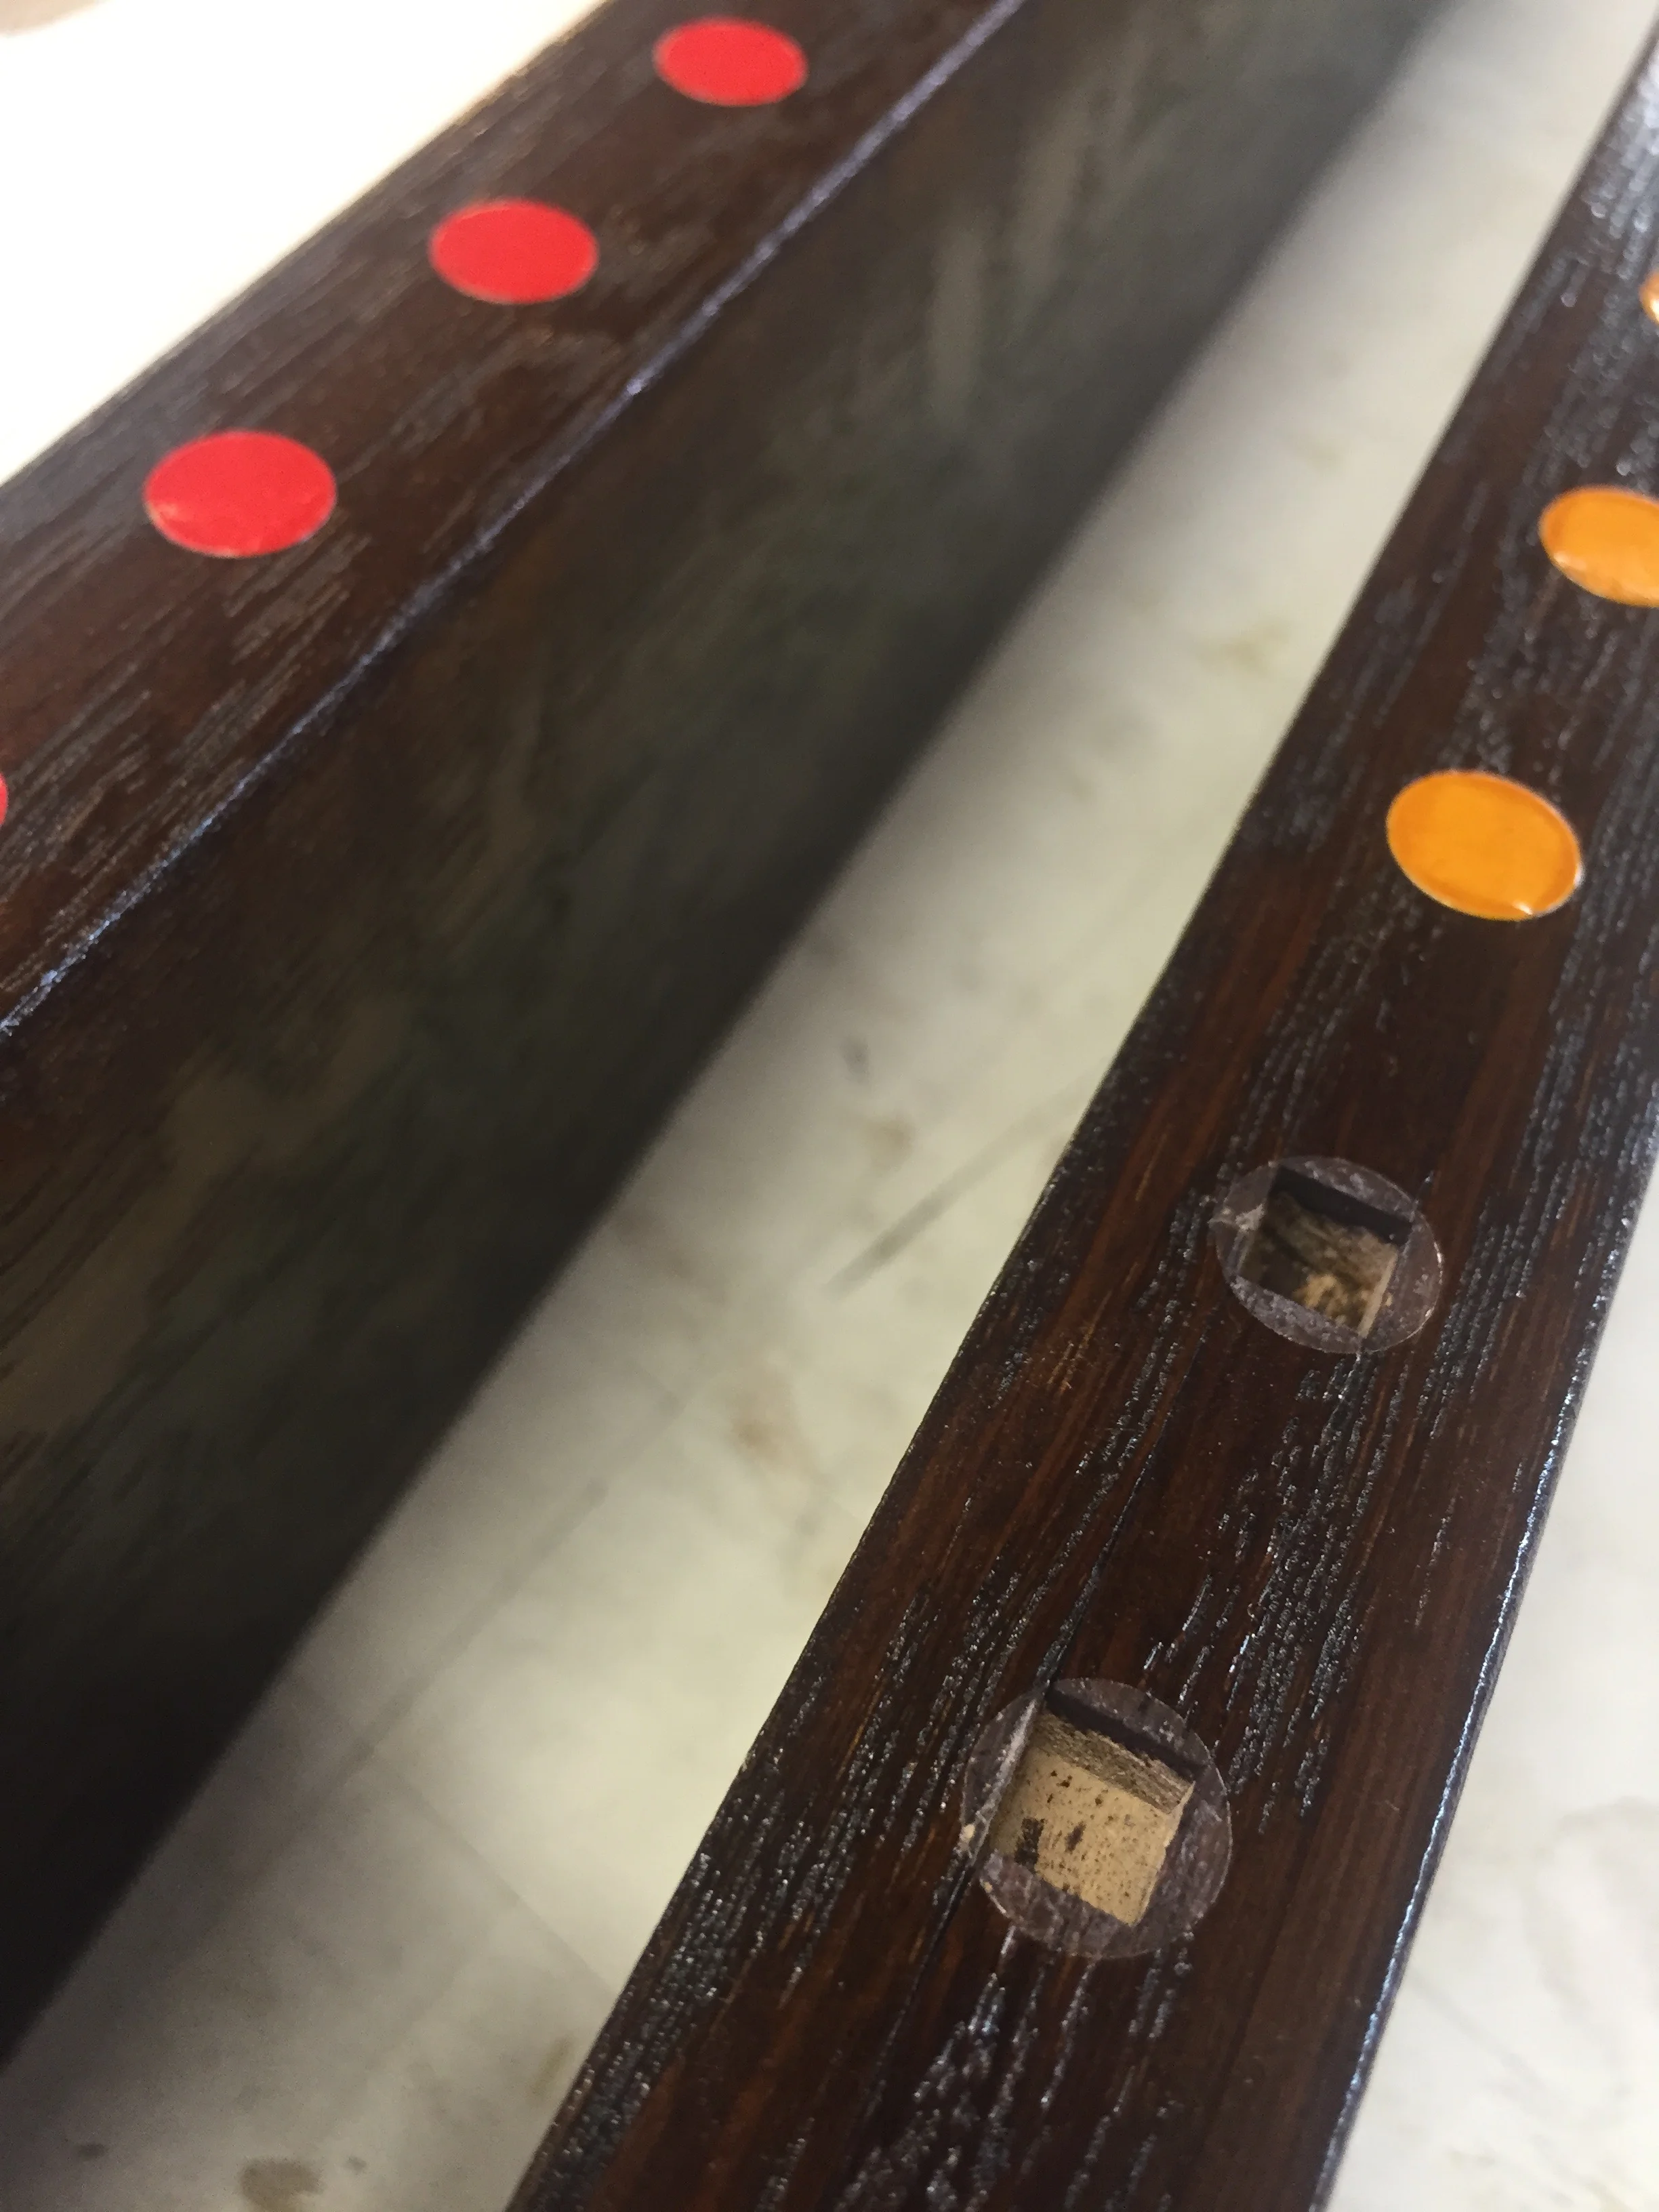
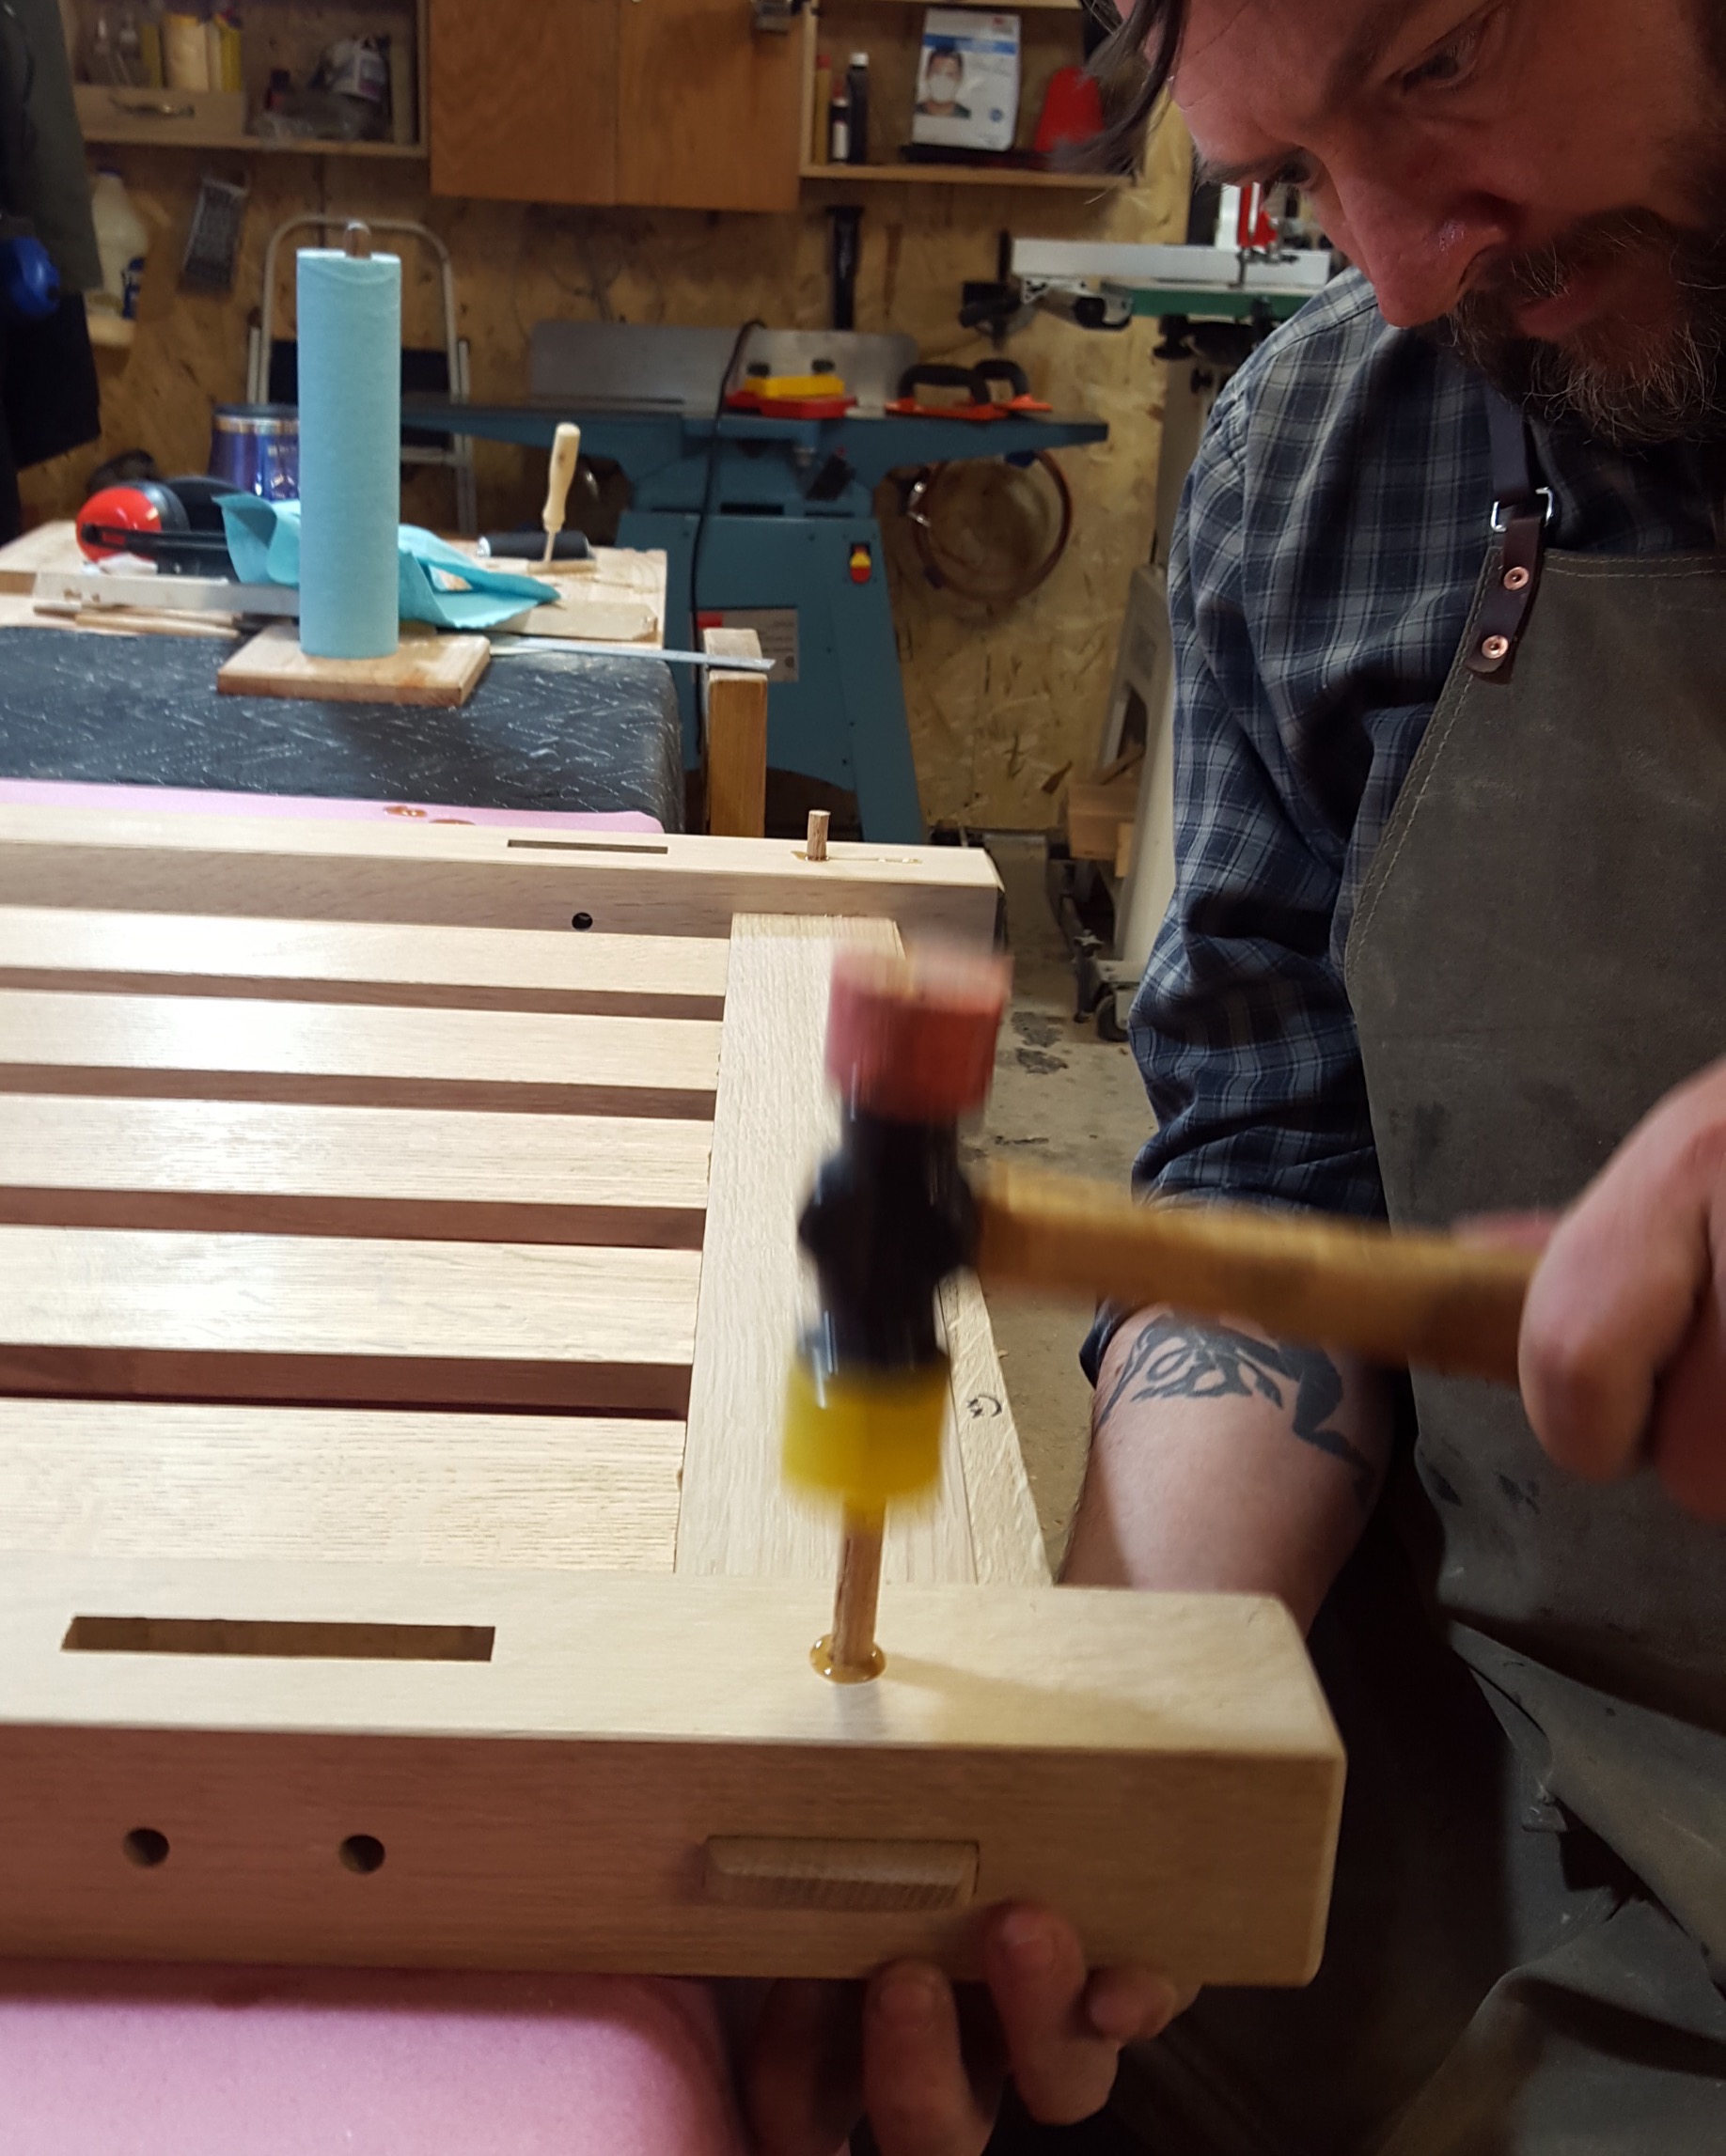
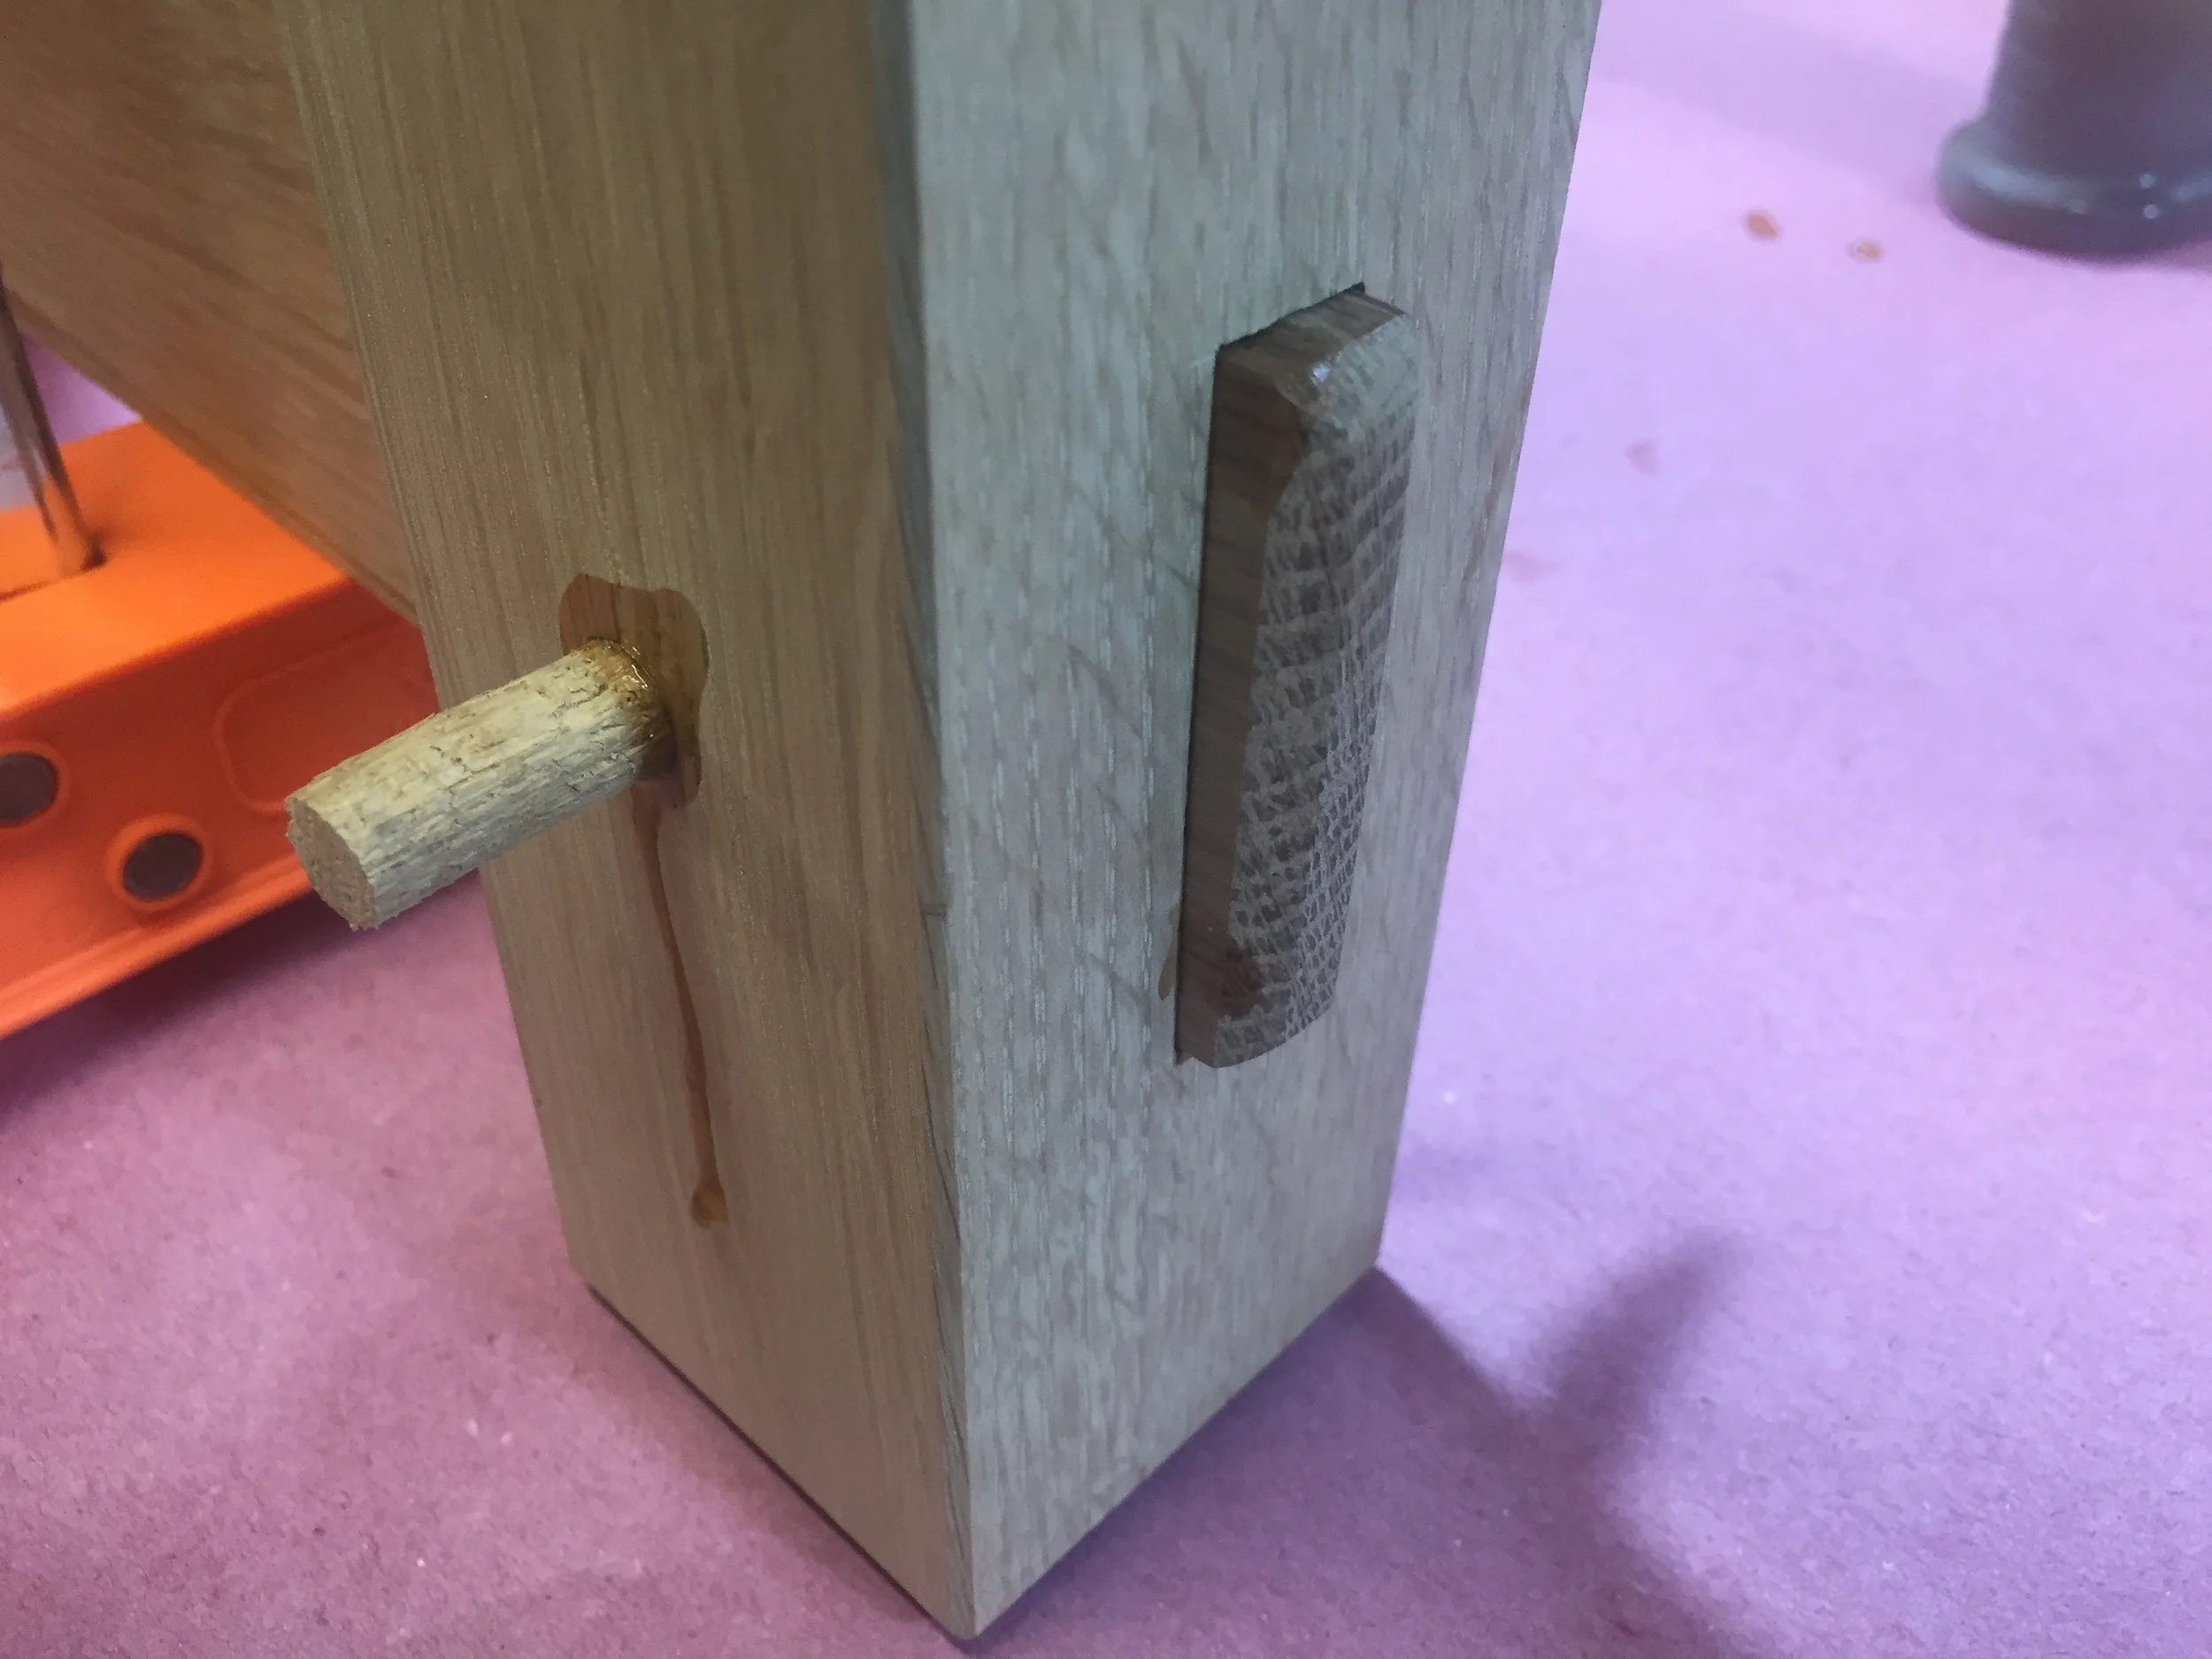
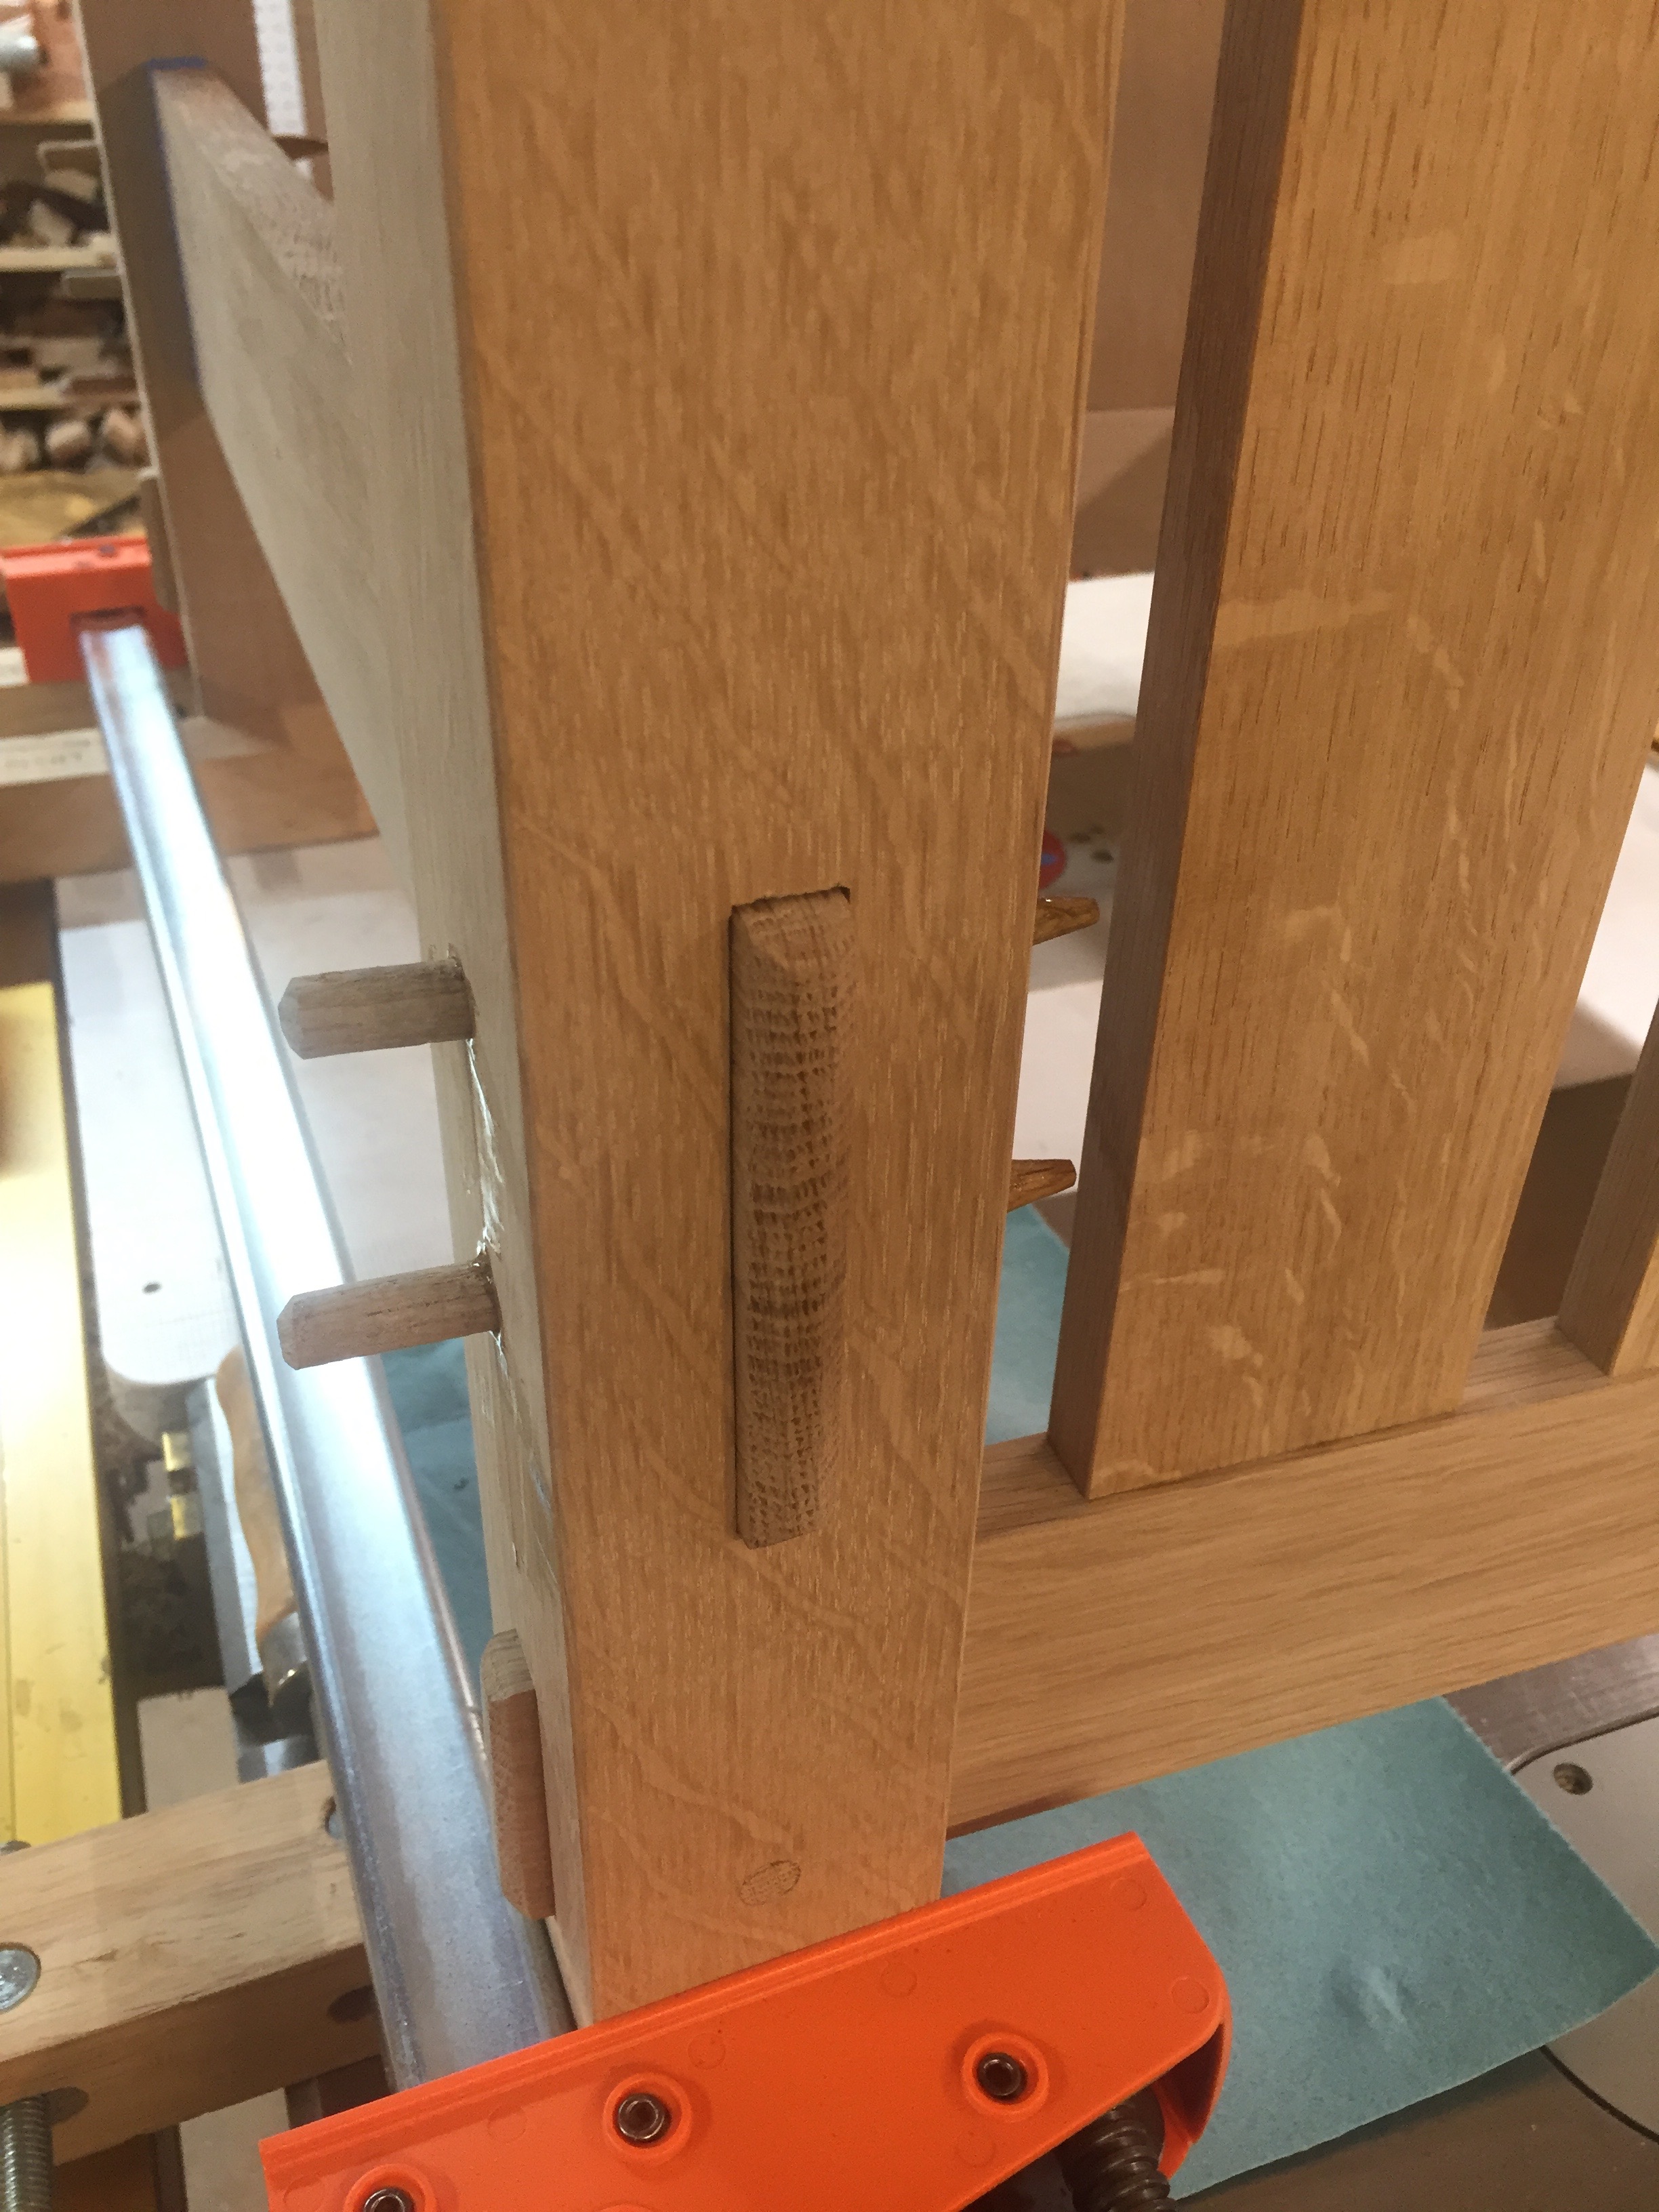
After the sides are assembled, the two sides are joined by two beefy stretchers. These stretchers, like the bottom side rails, feature pegged through tenons, a feature I enjoy making a lot. The pegs are draw bored to pull the shoulder's tight, then trimmed off and chiseled flush.

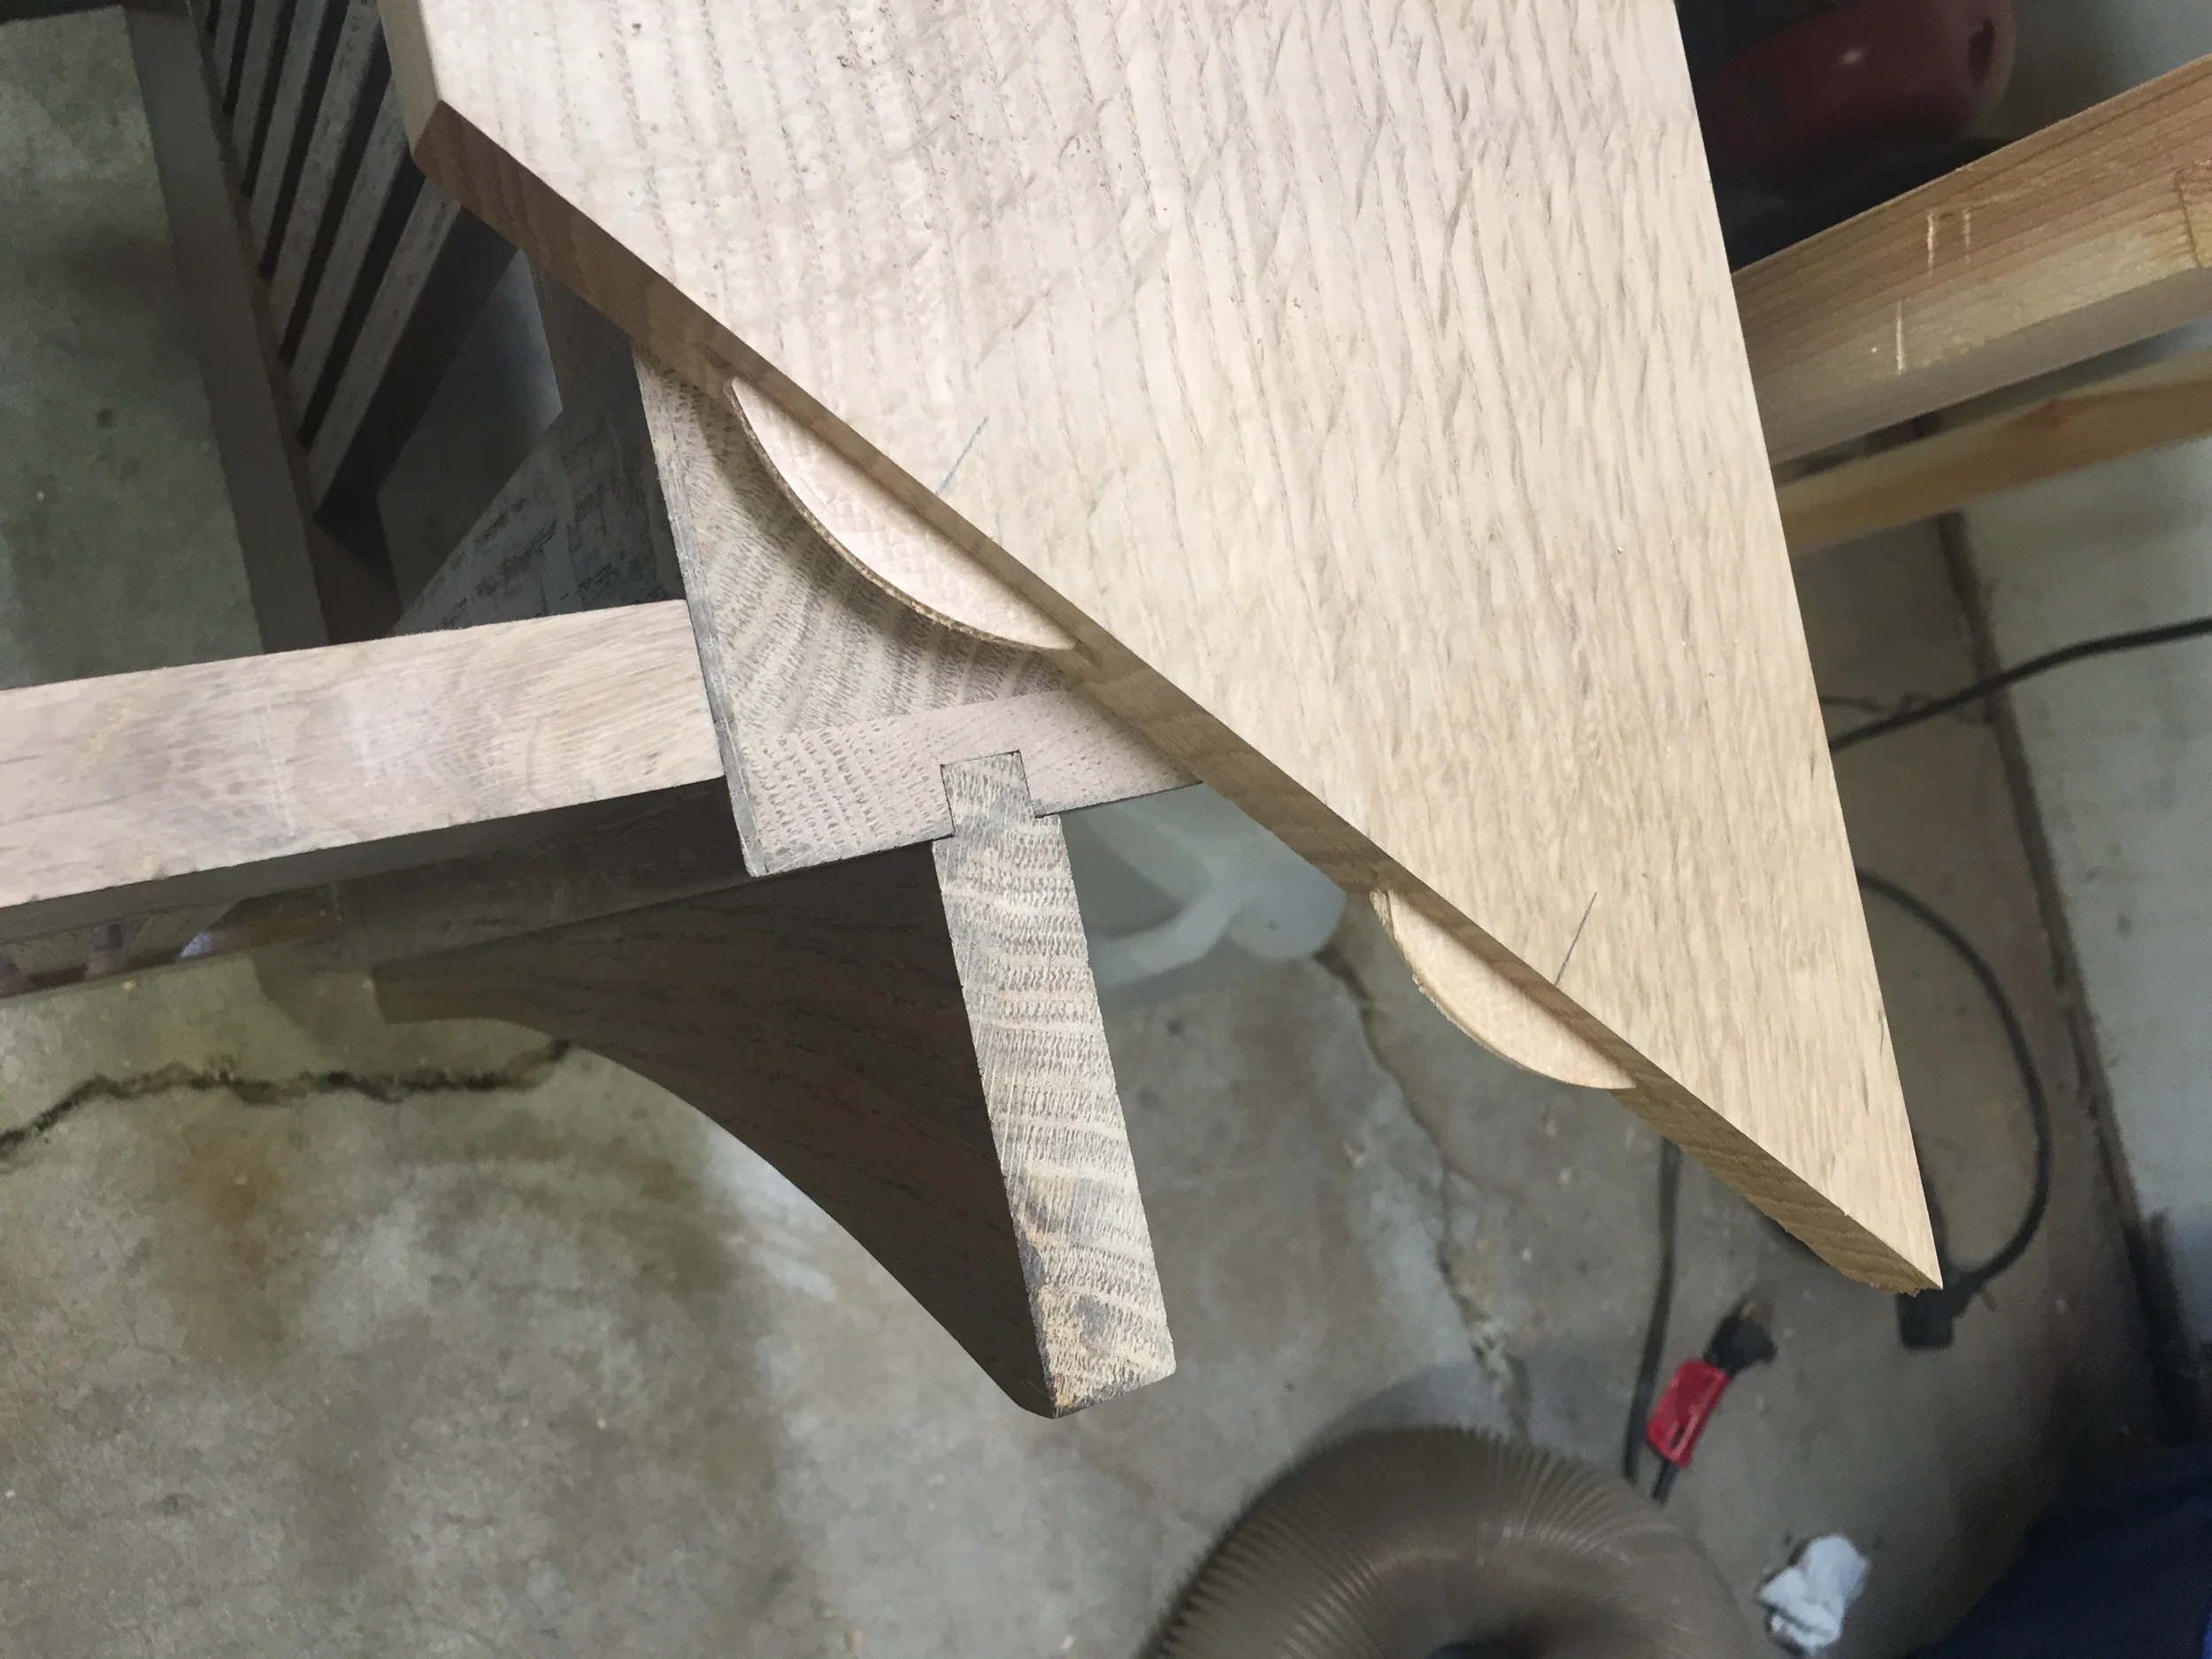
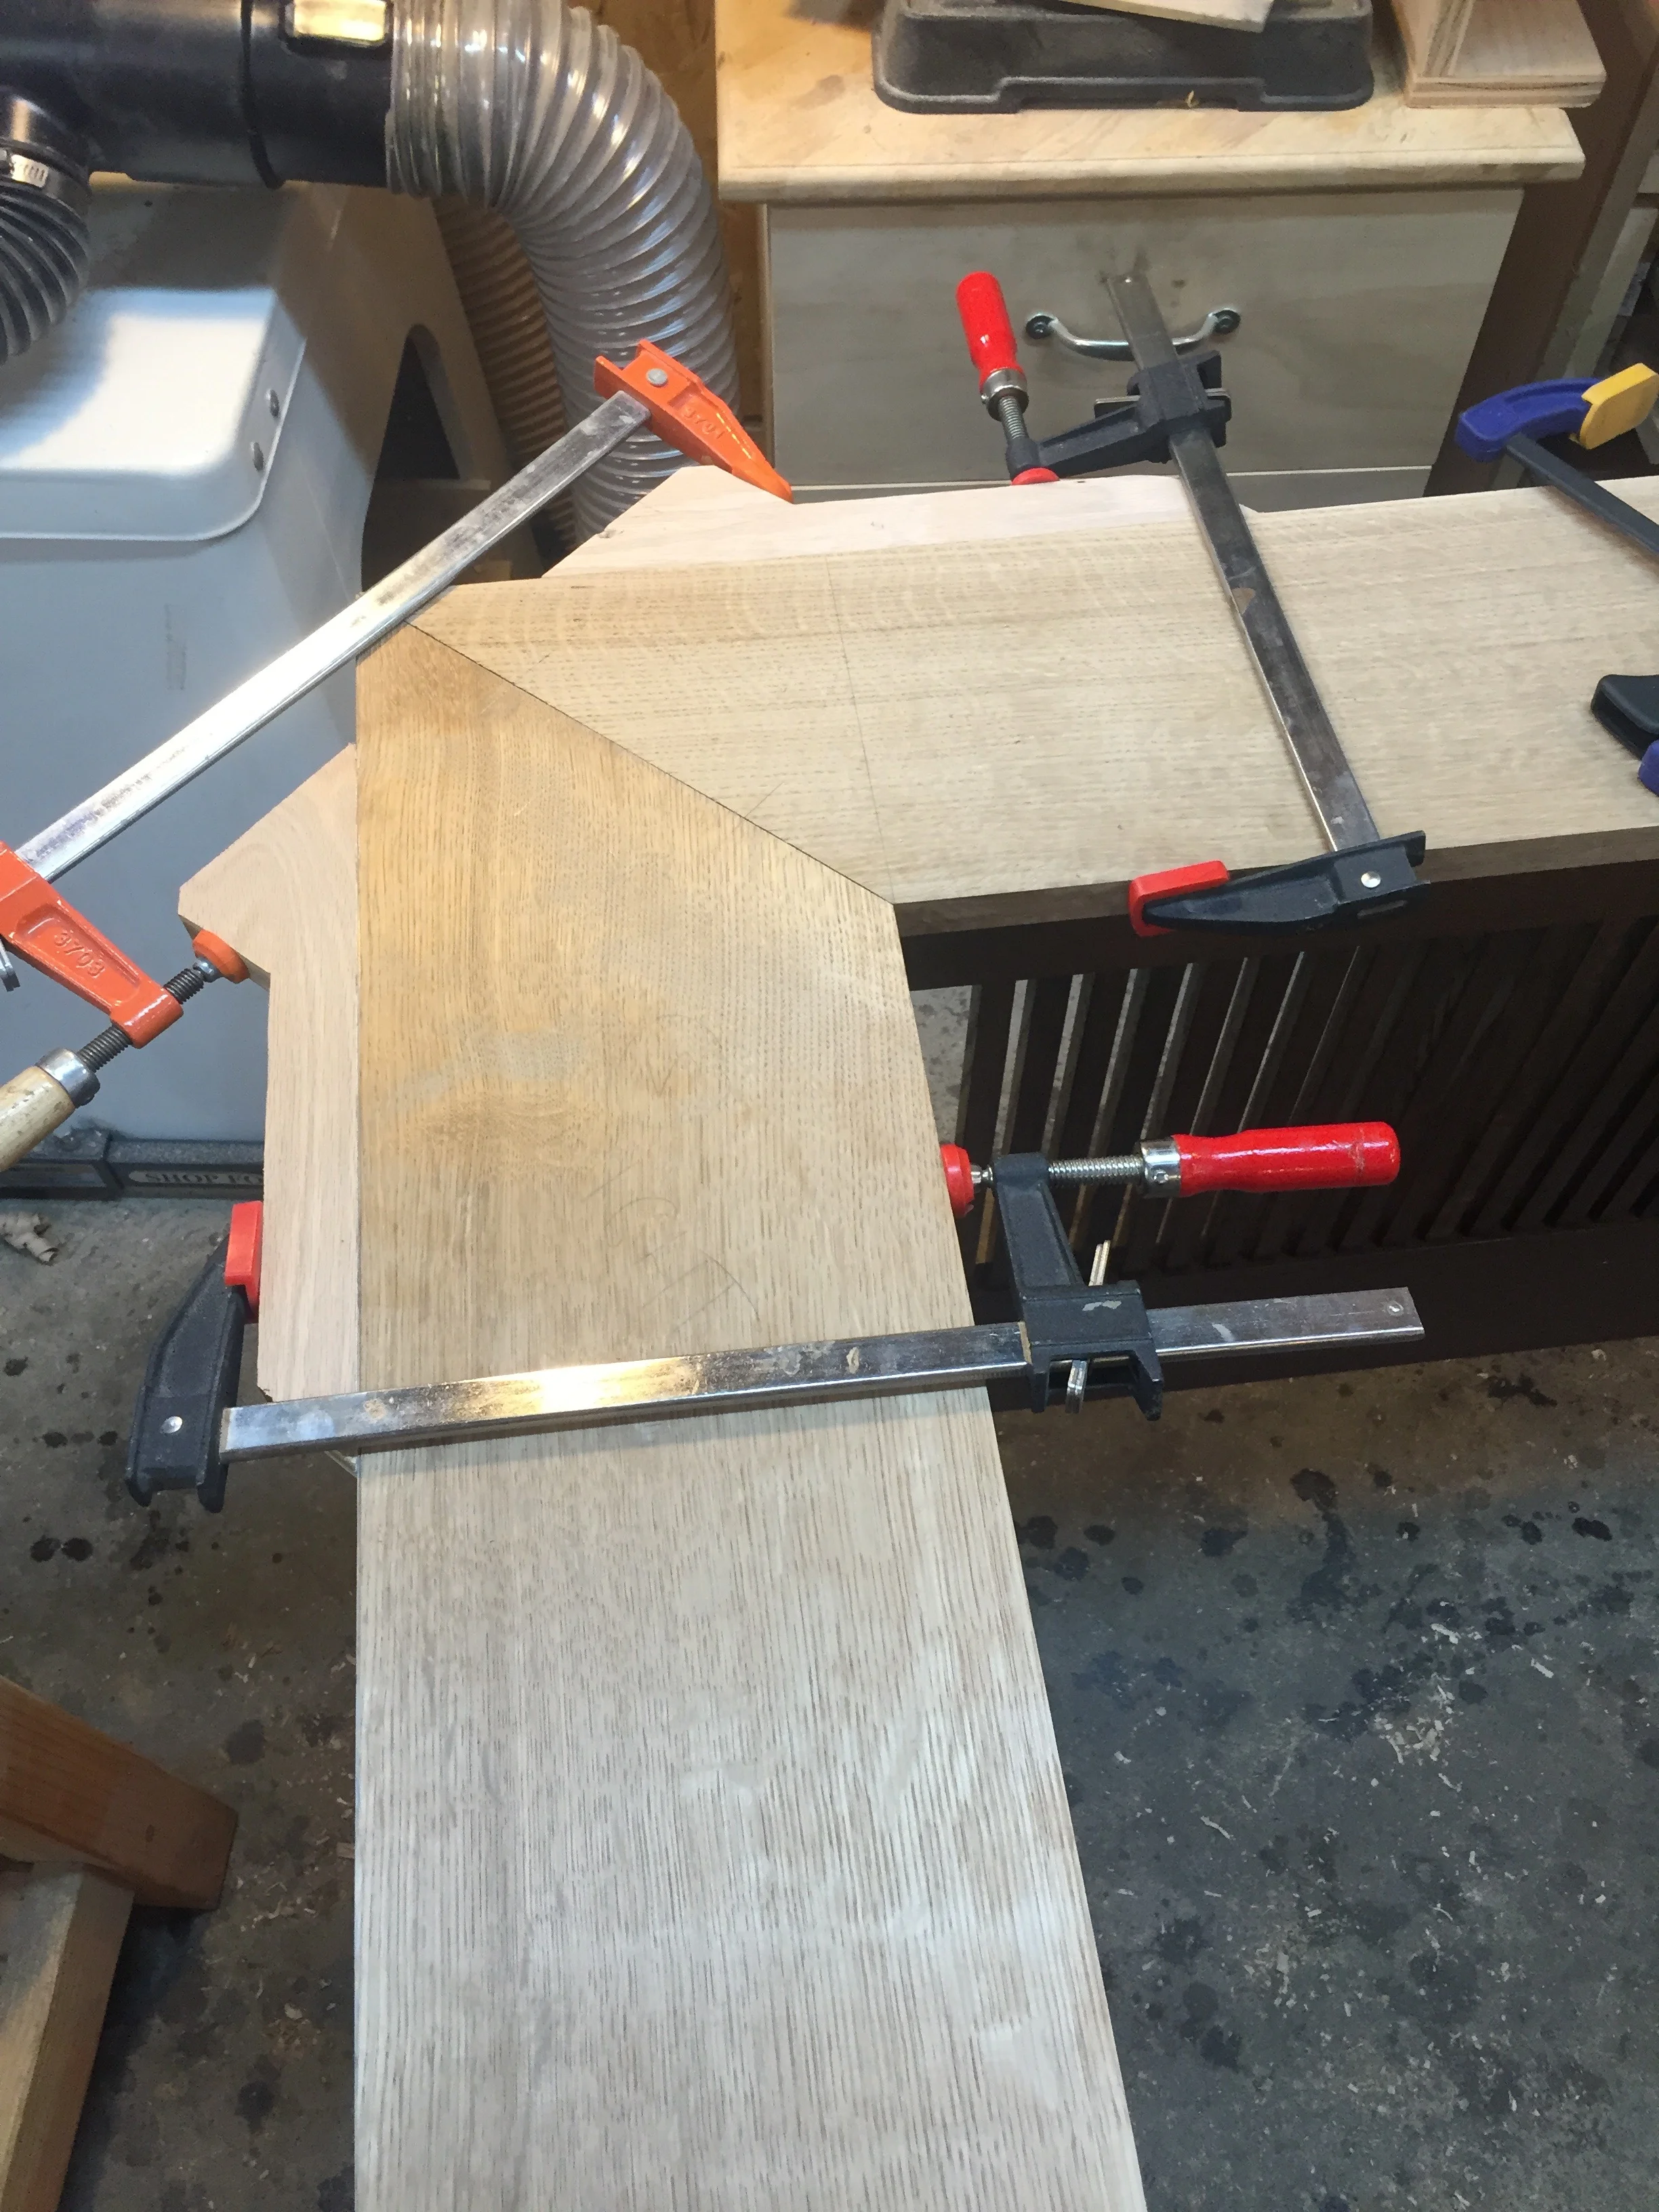
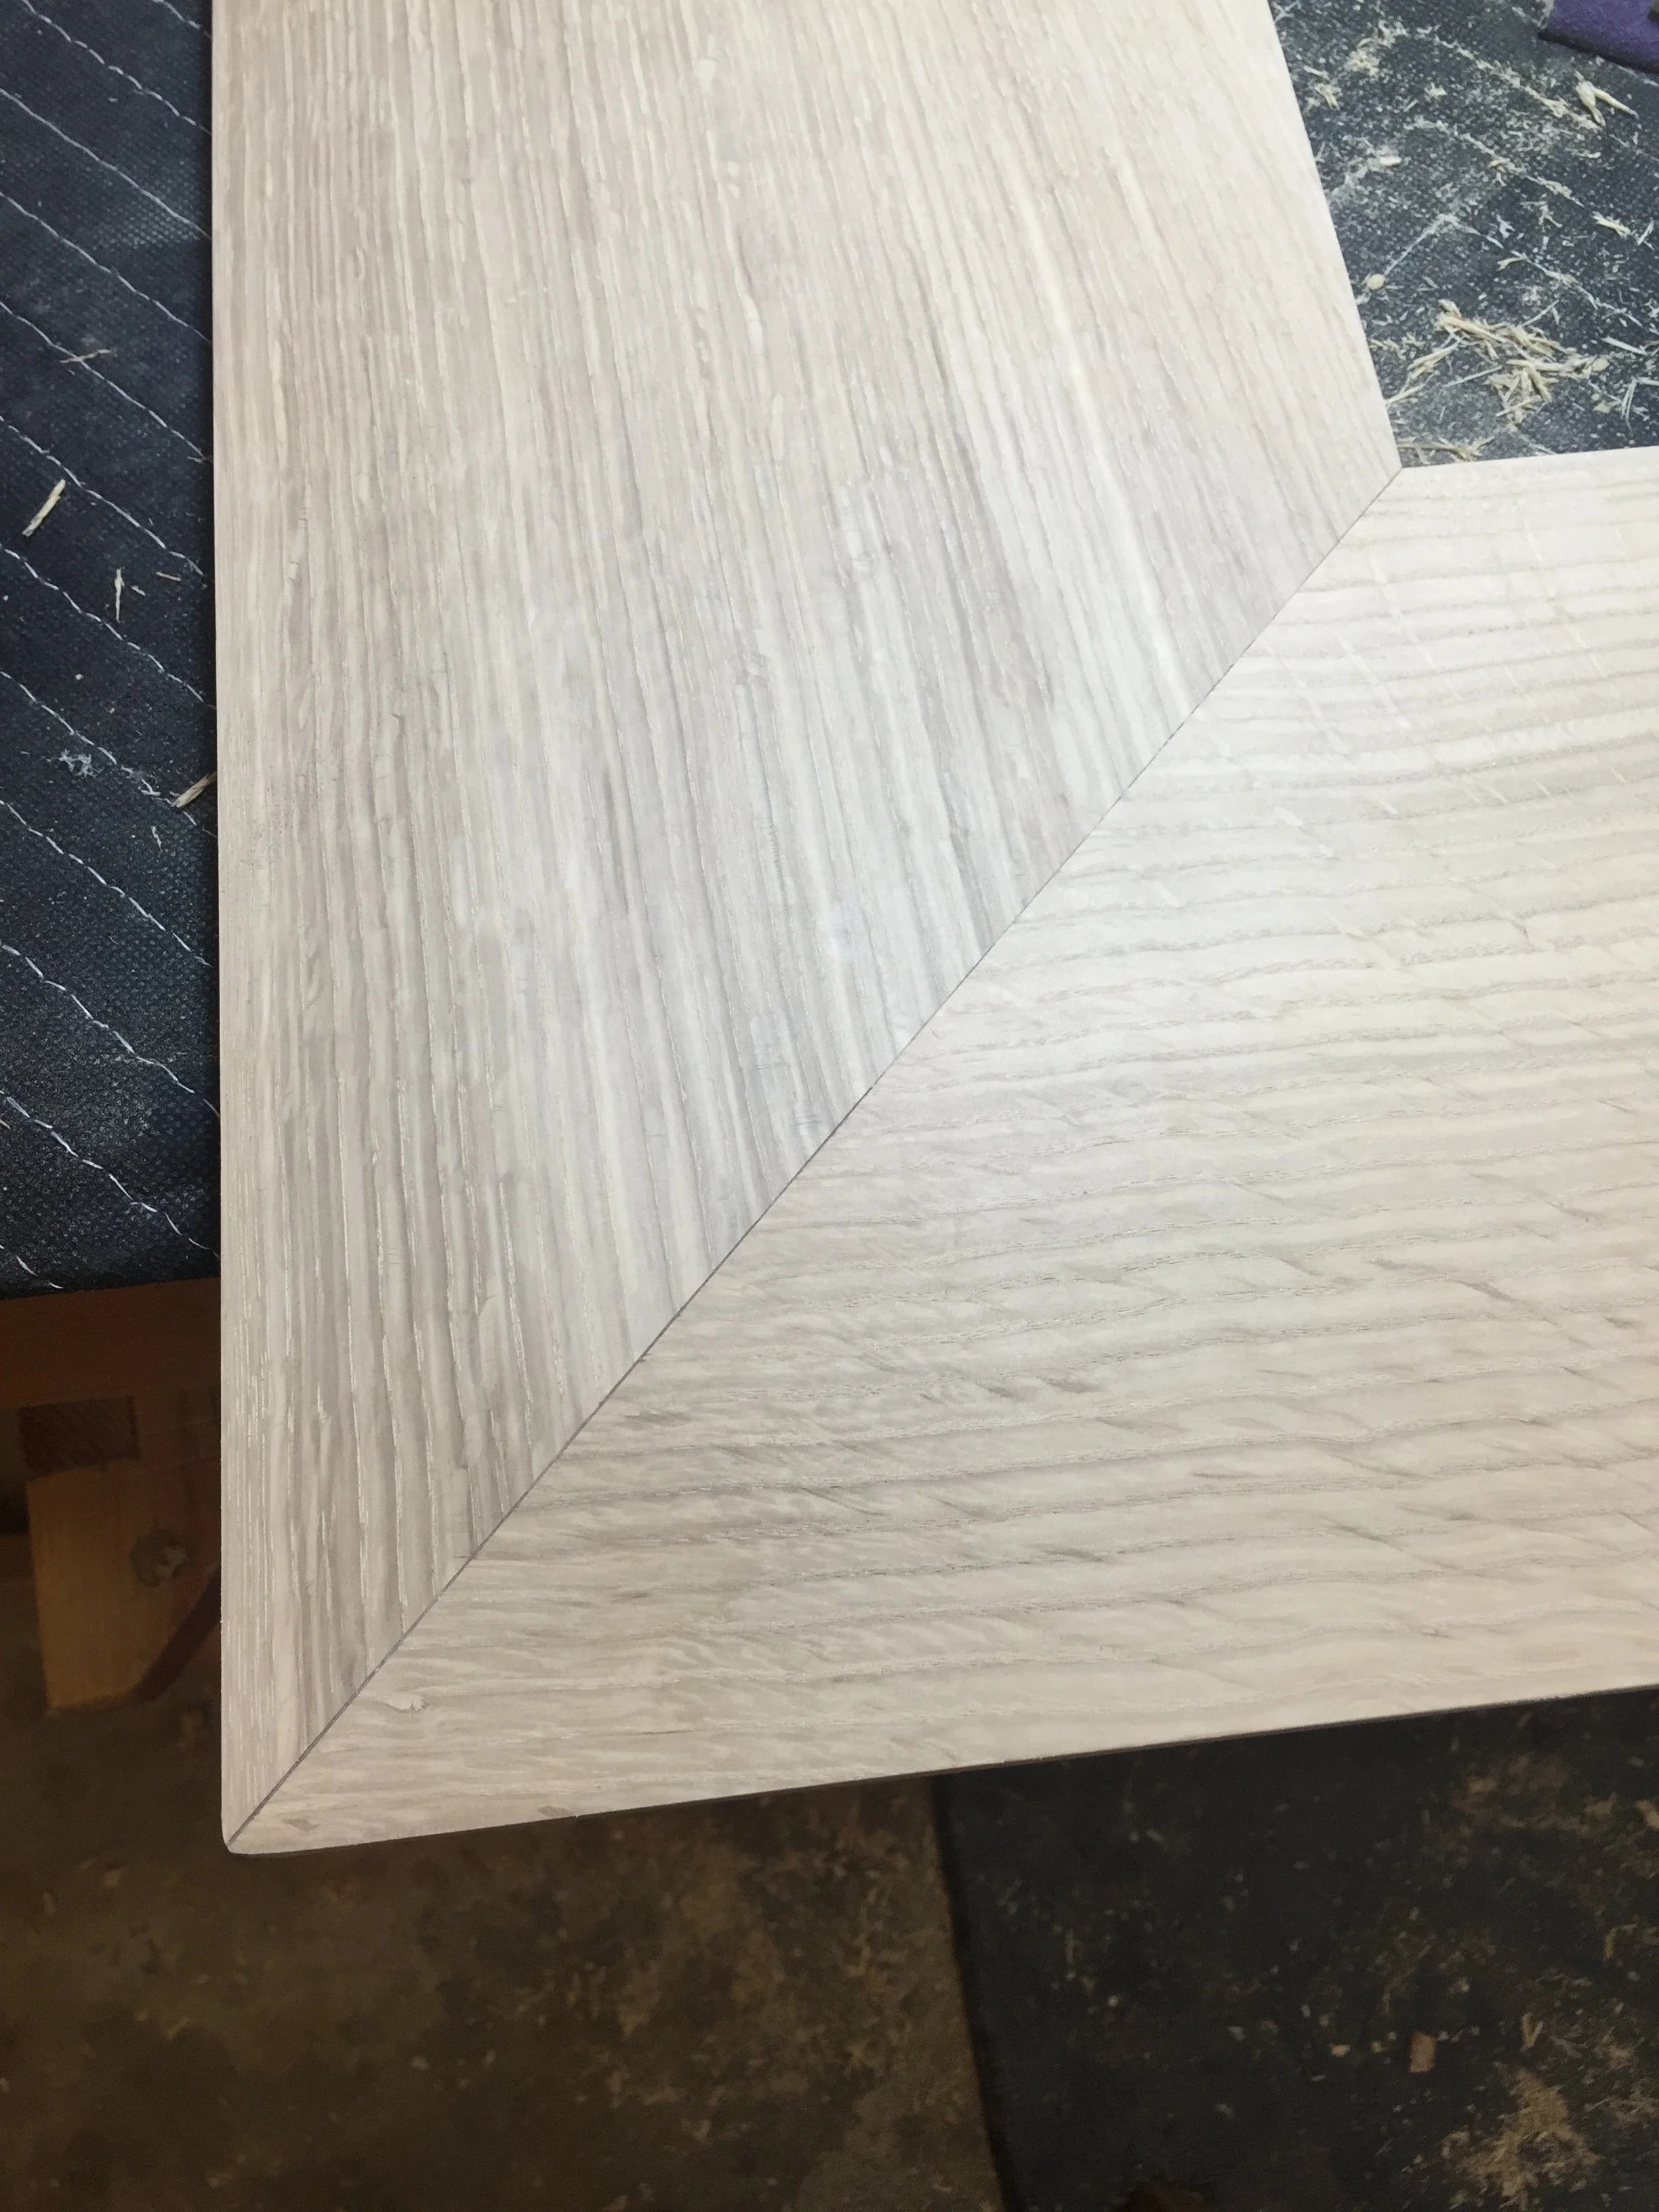
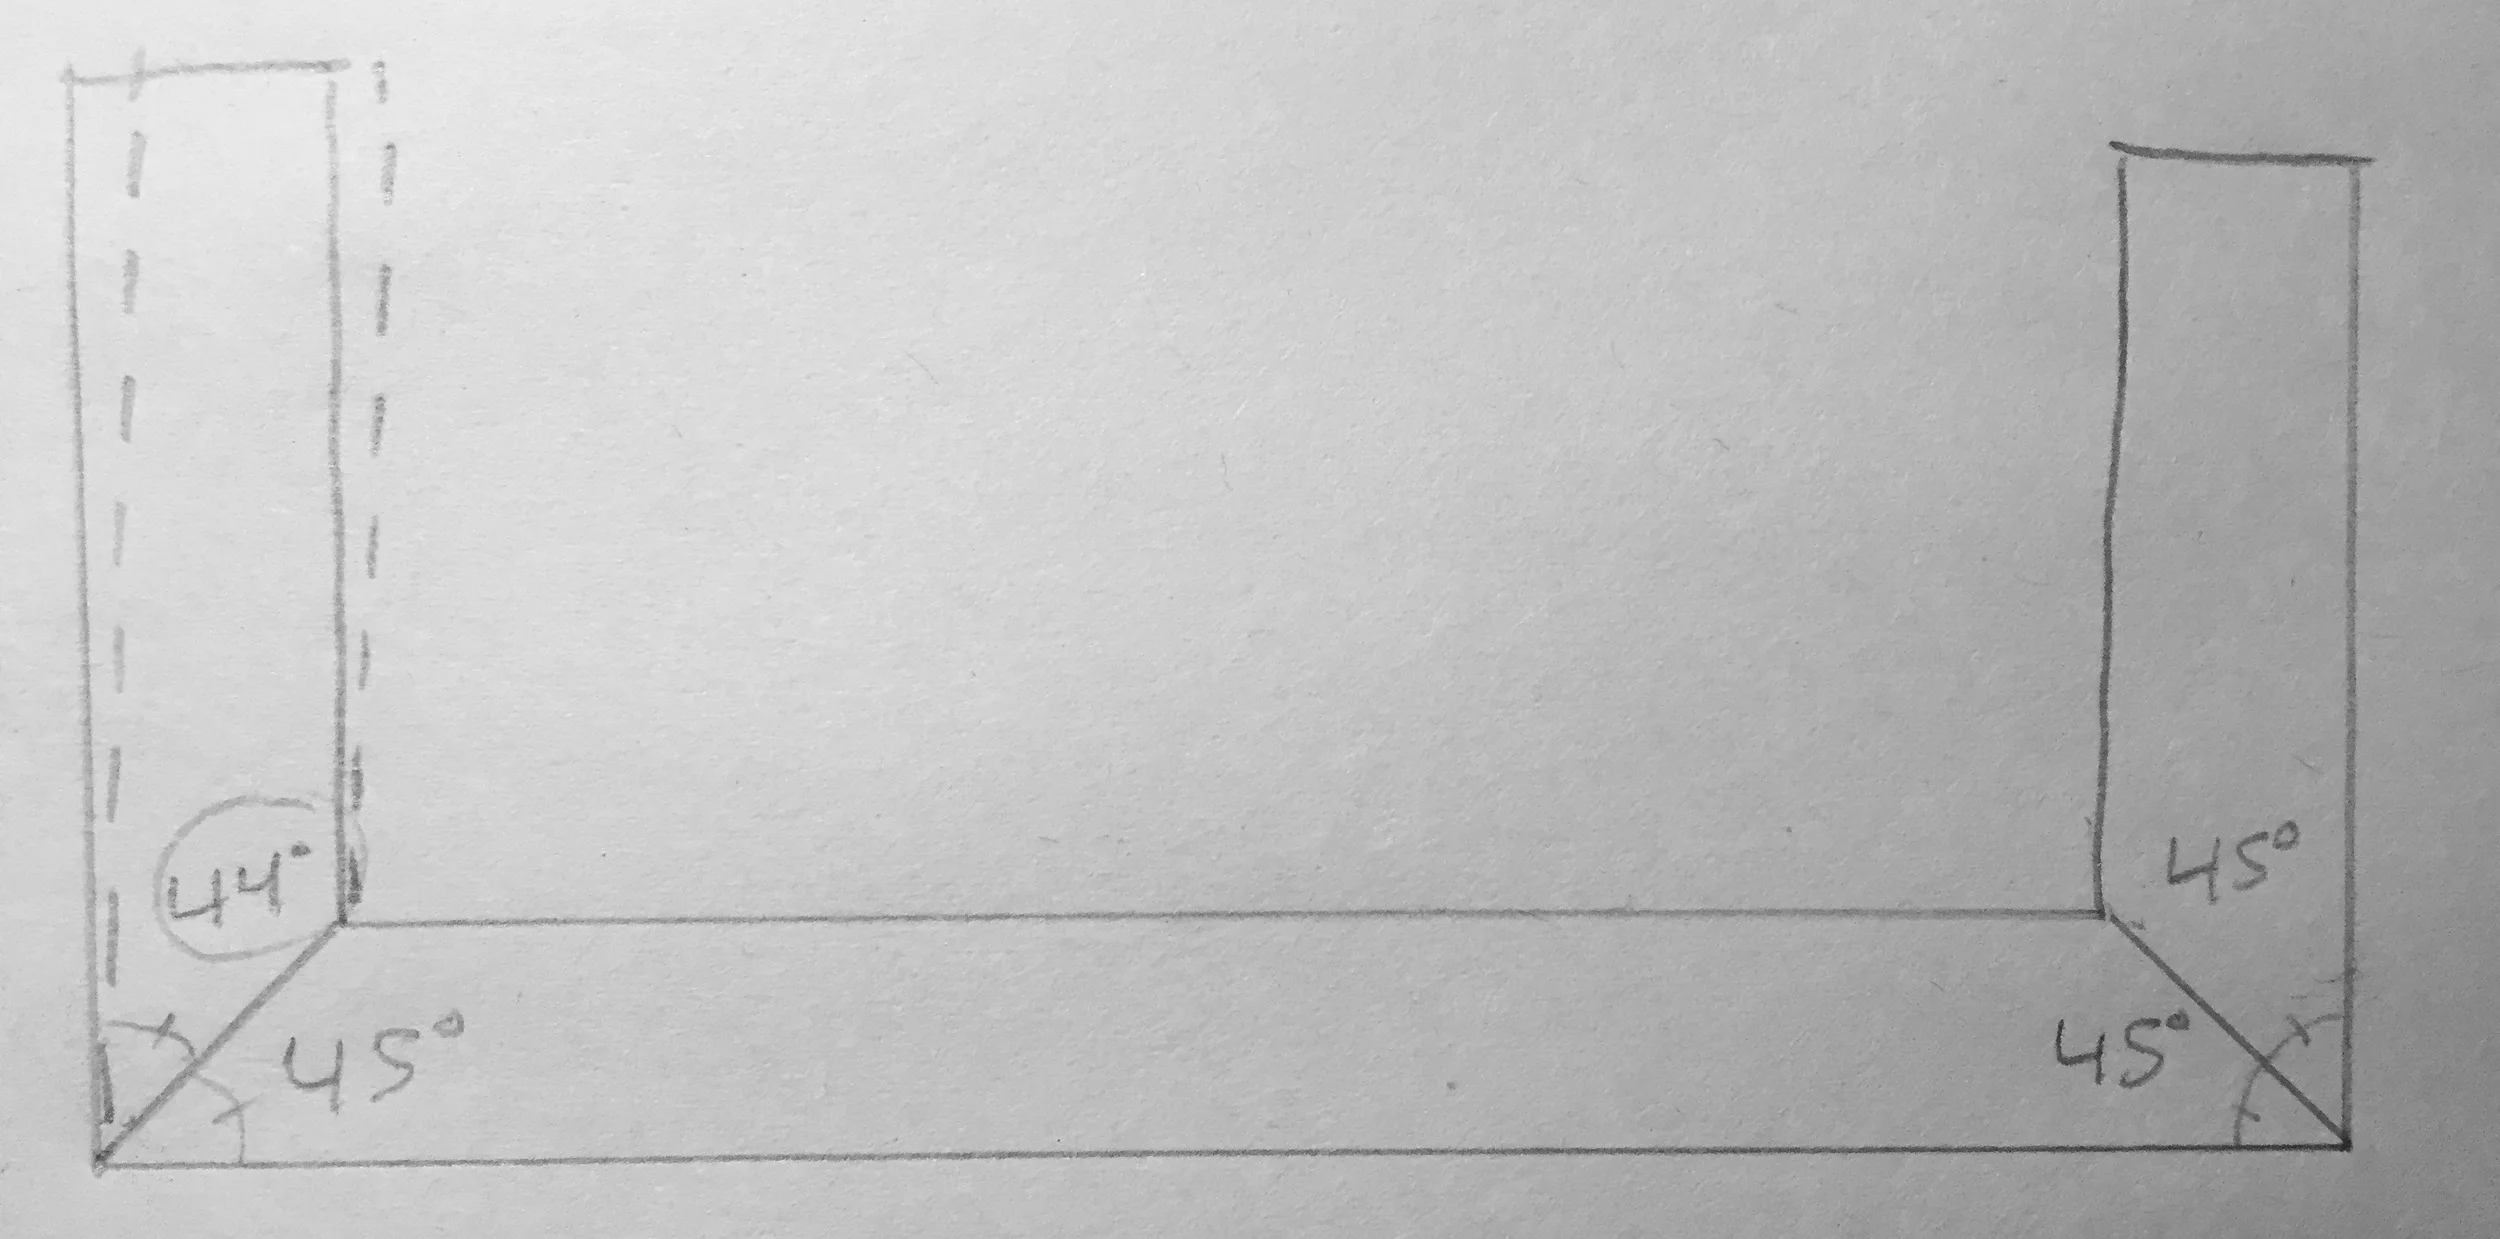
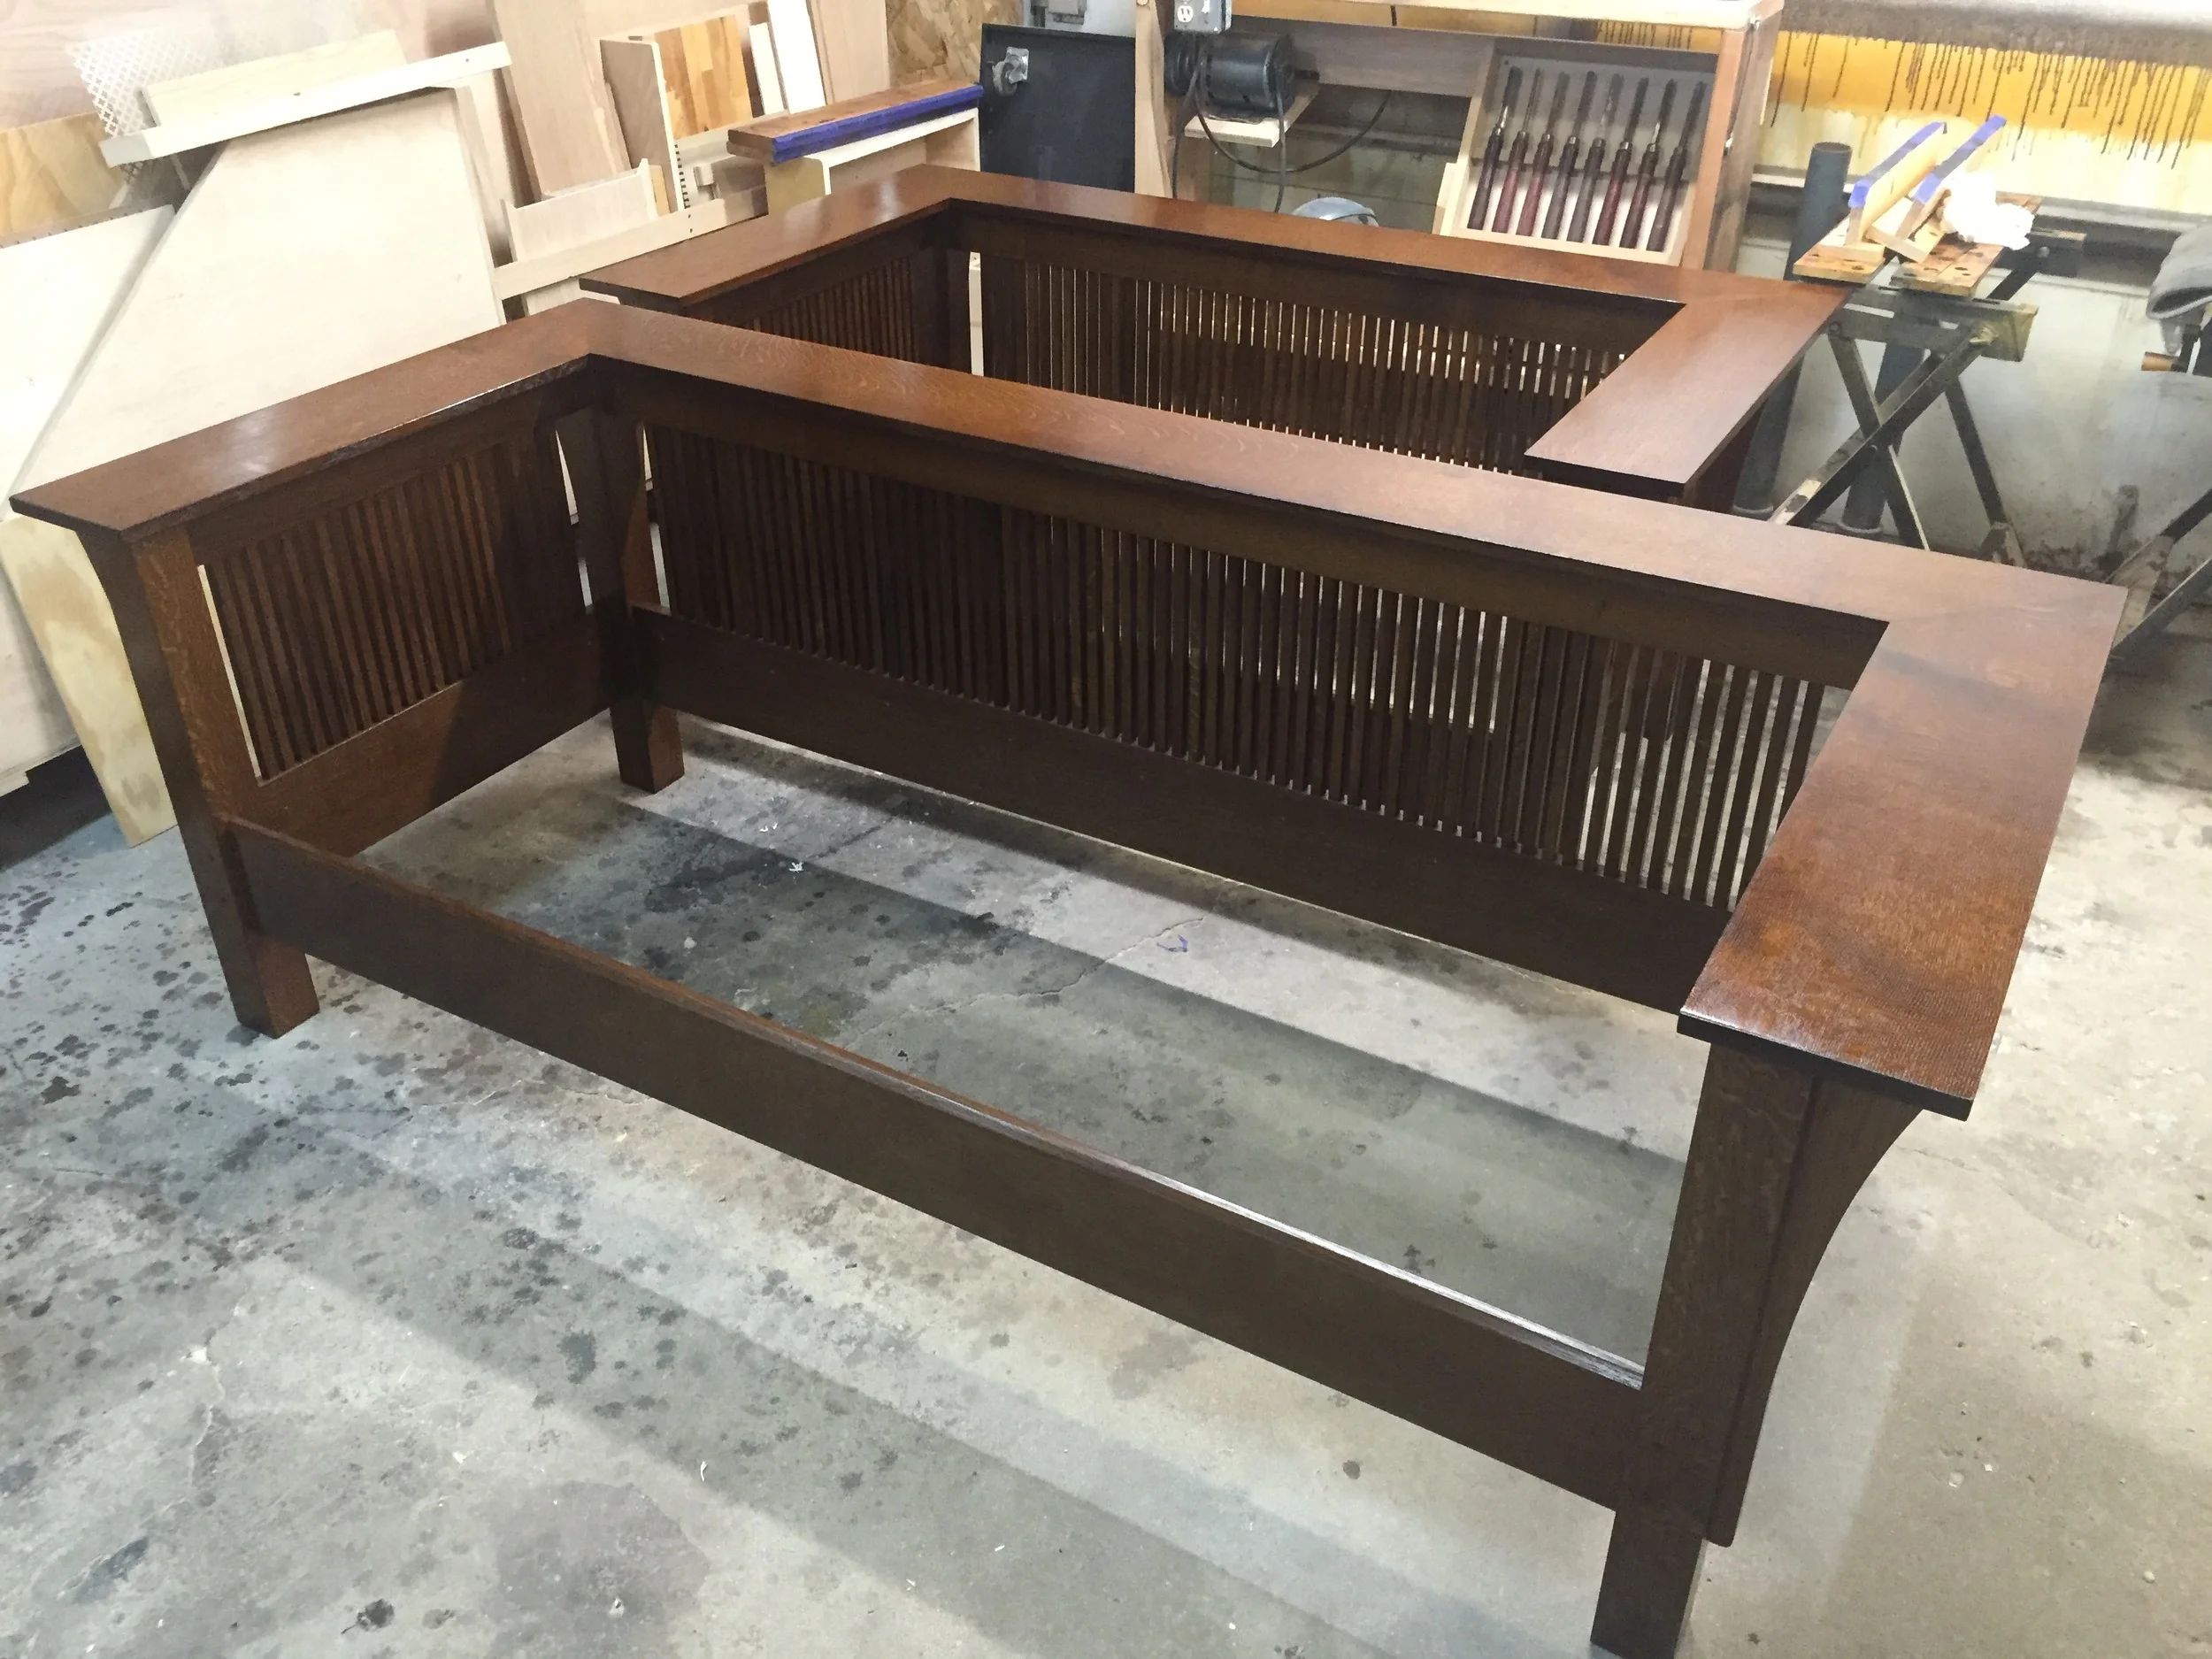
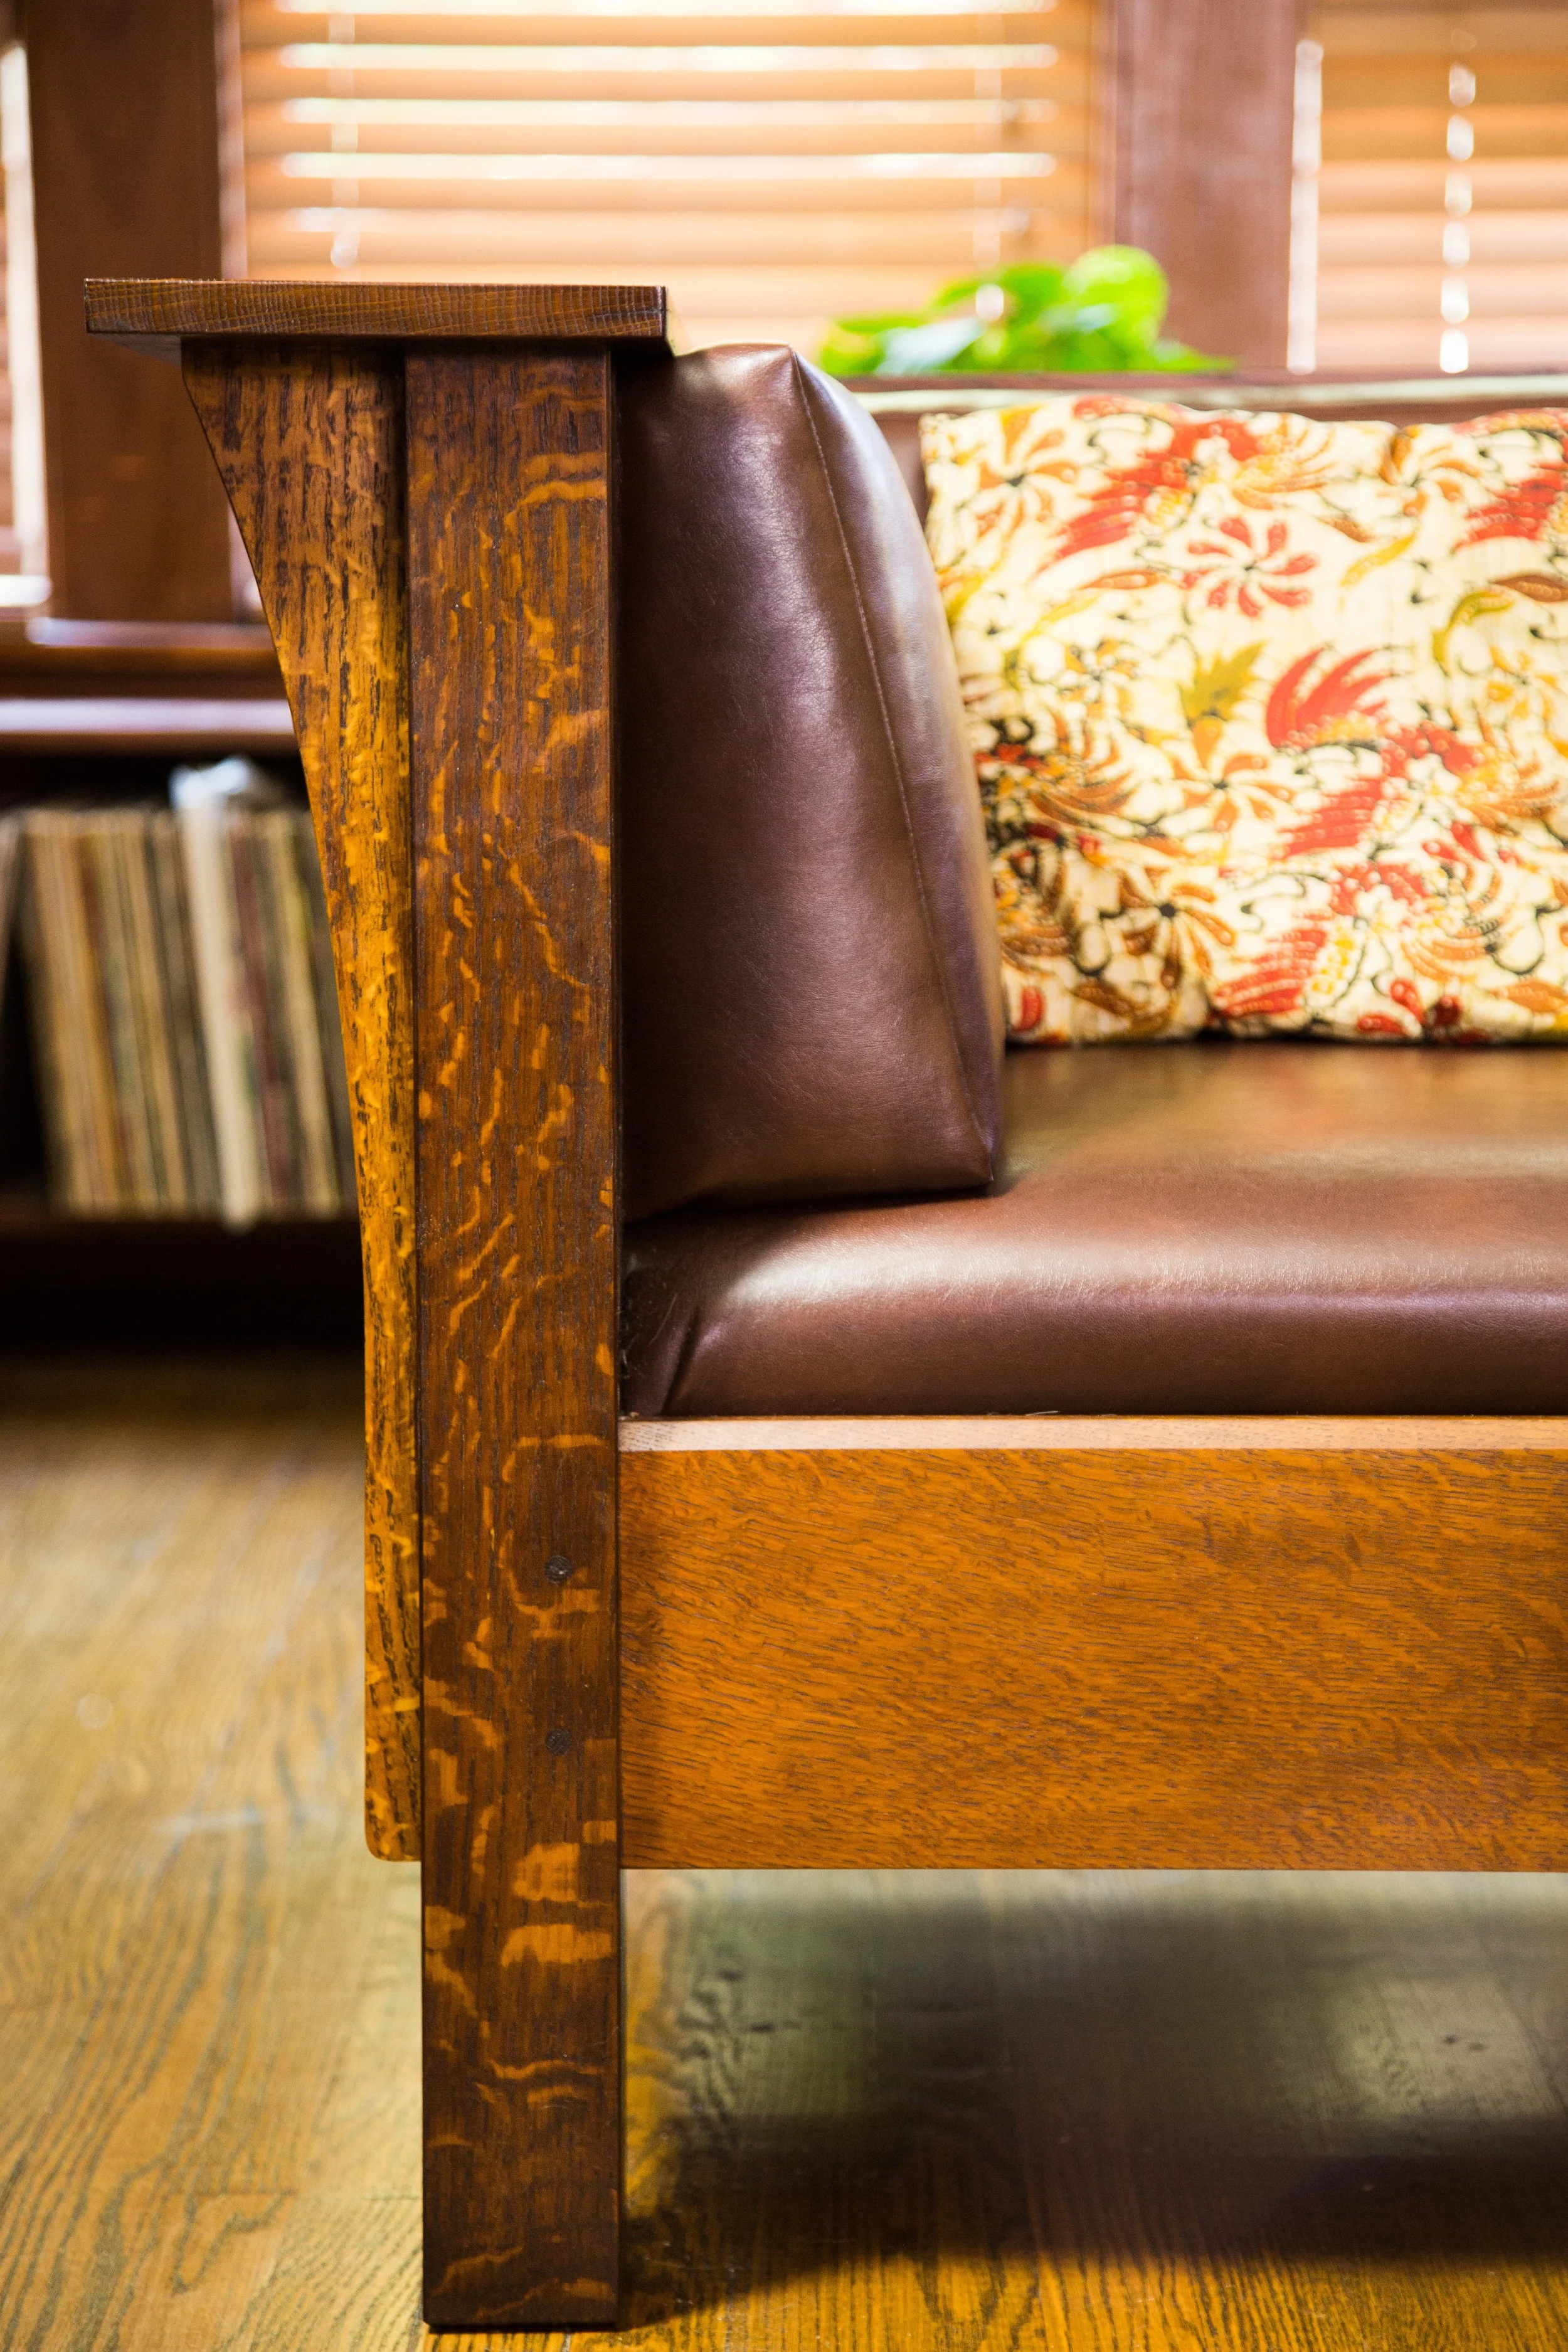
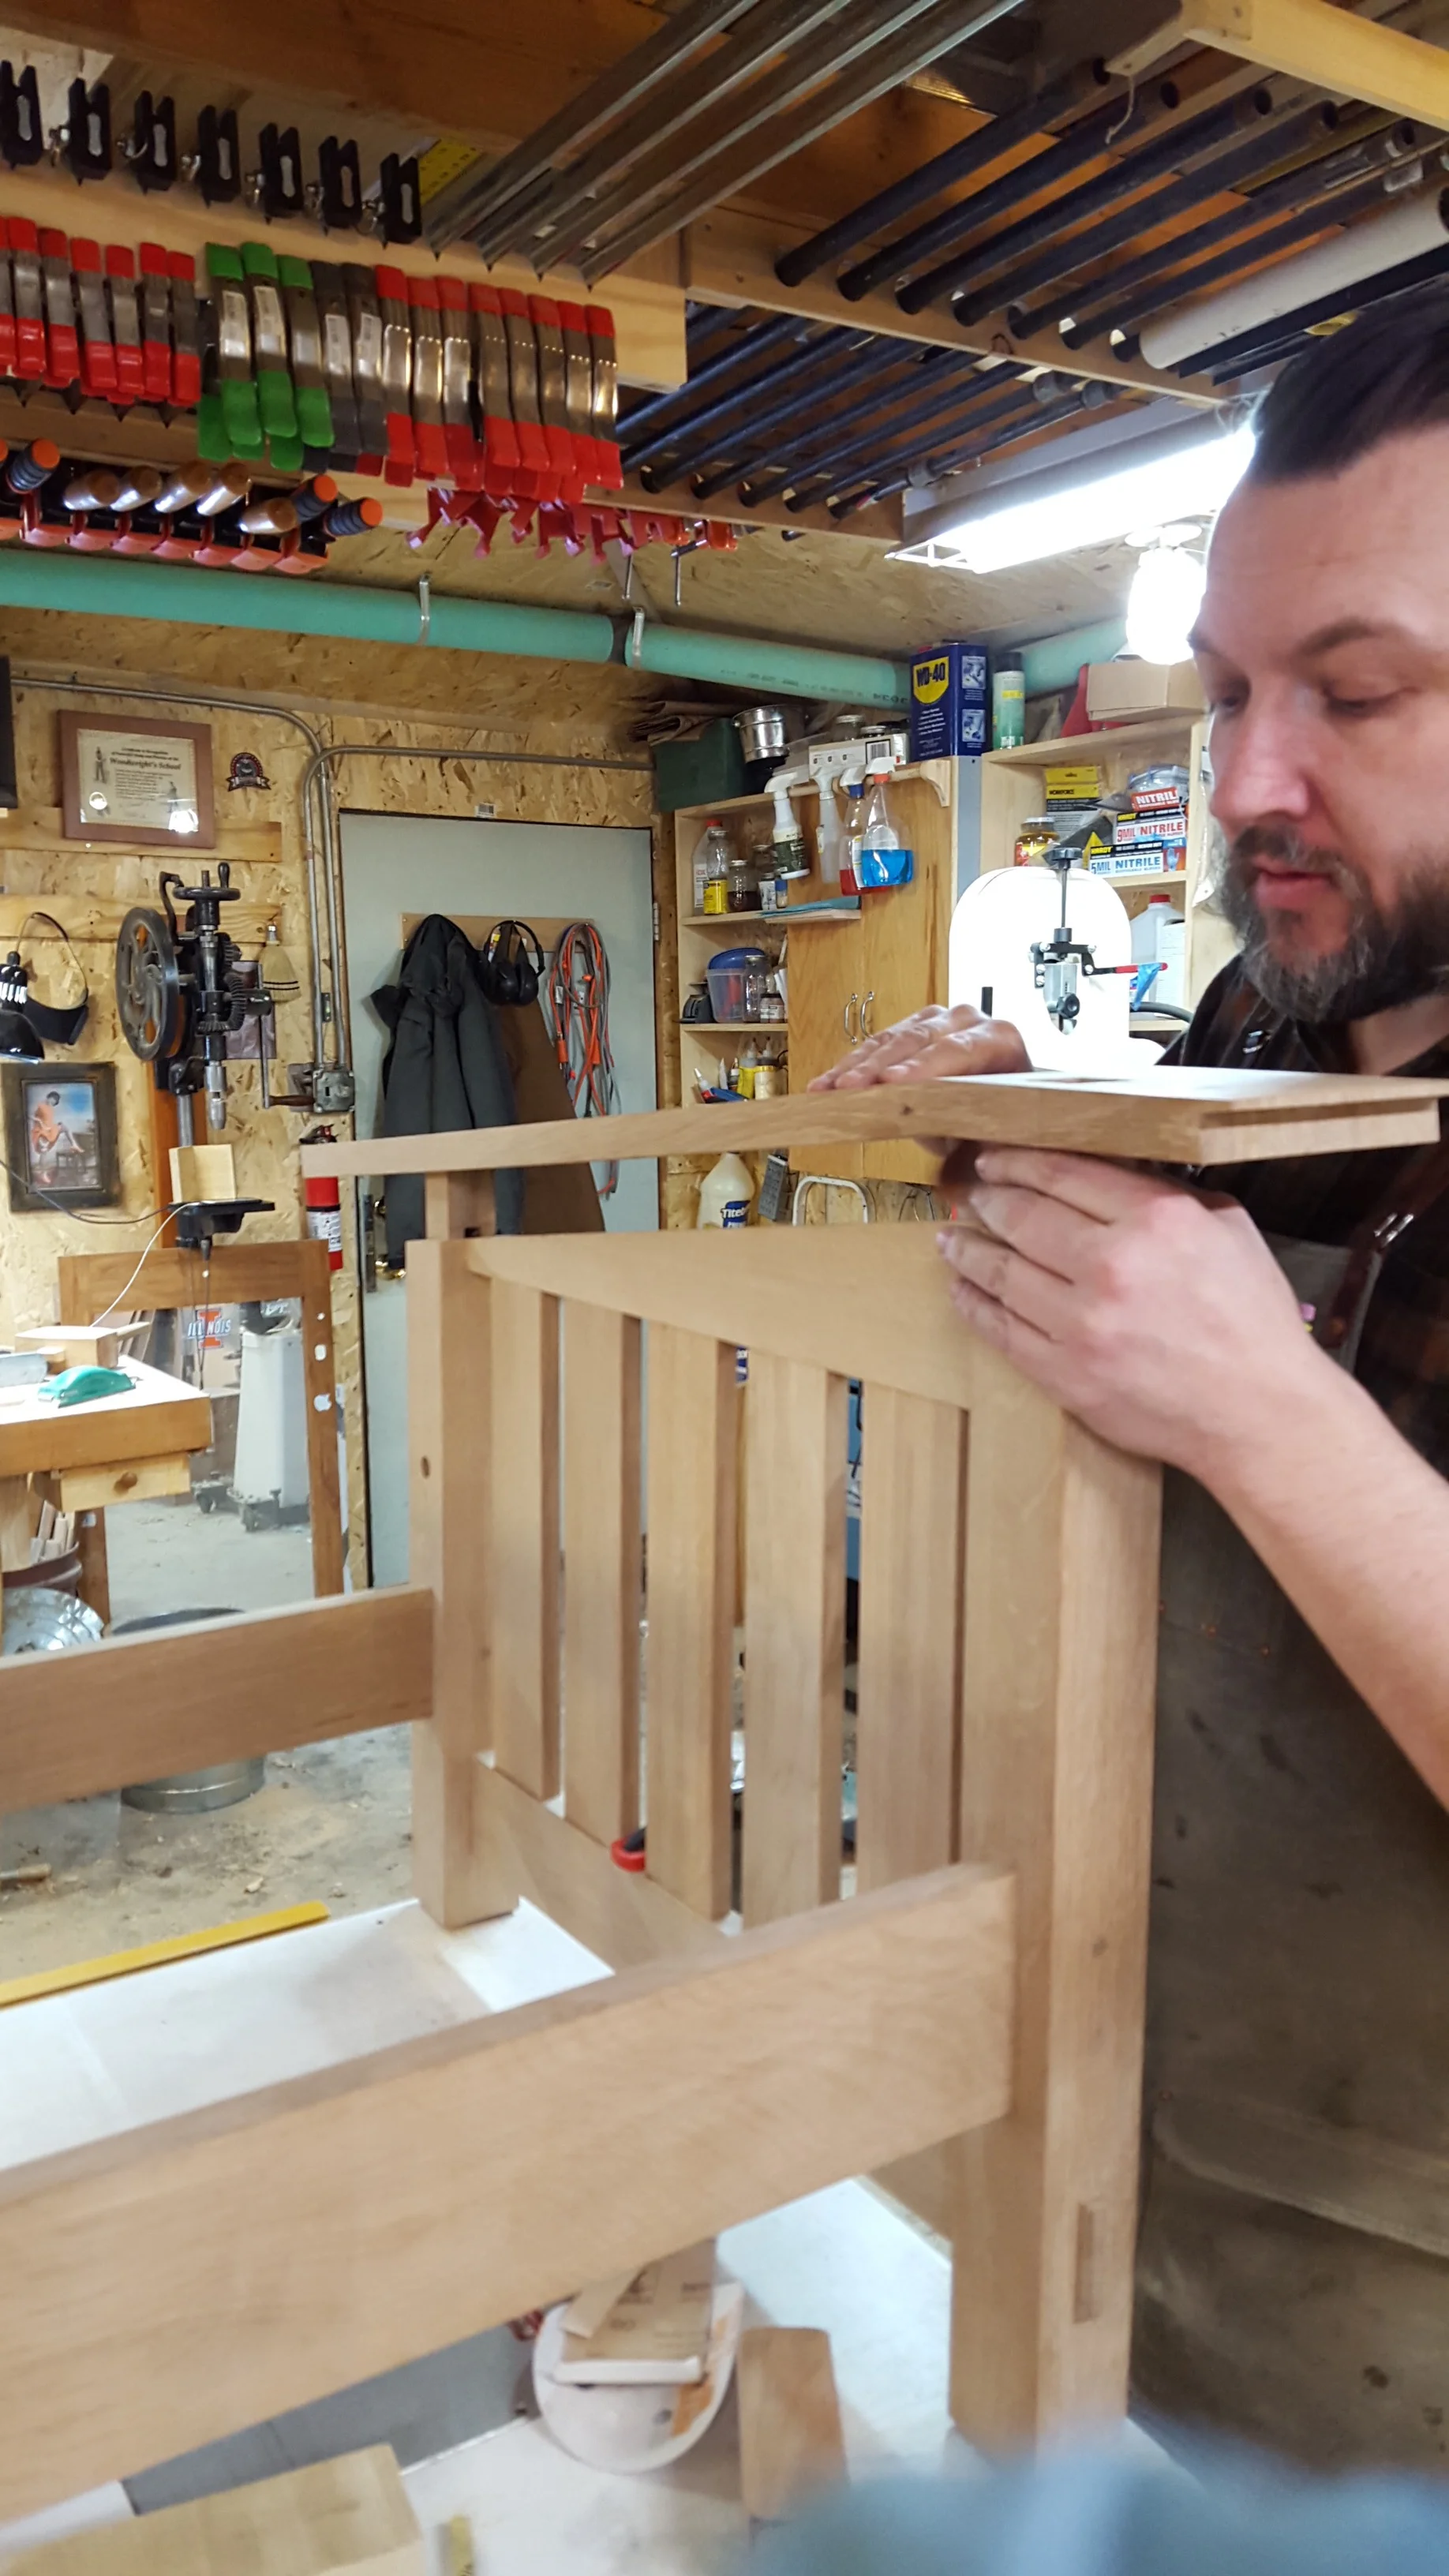
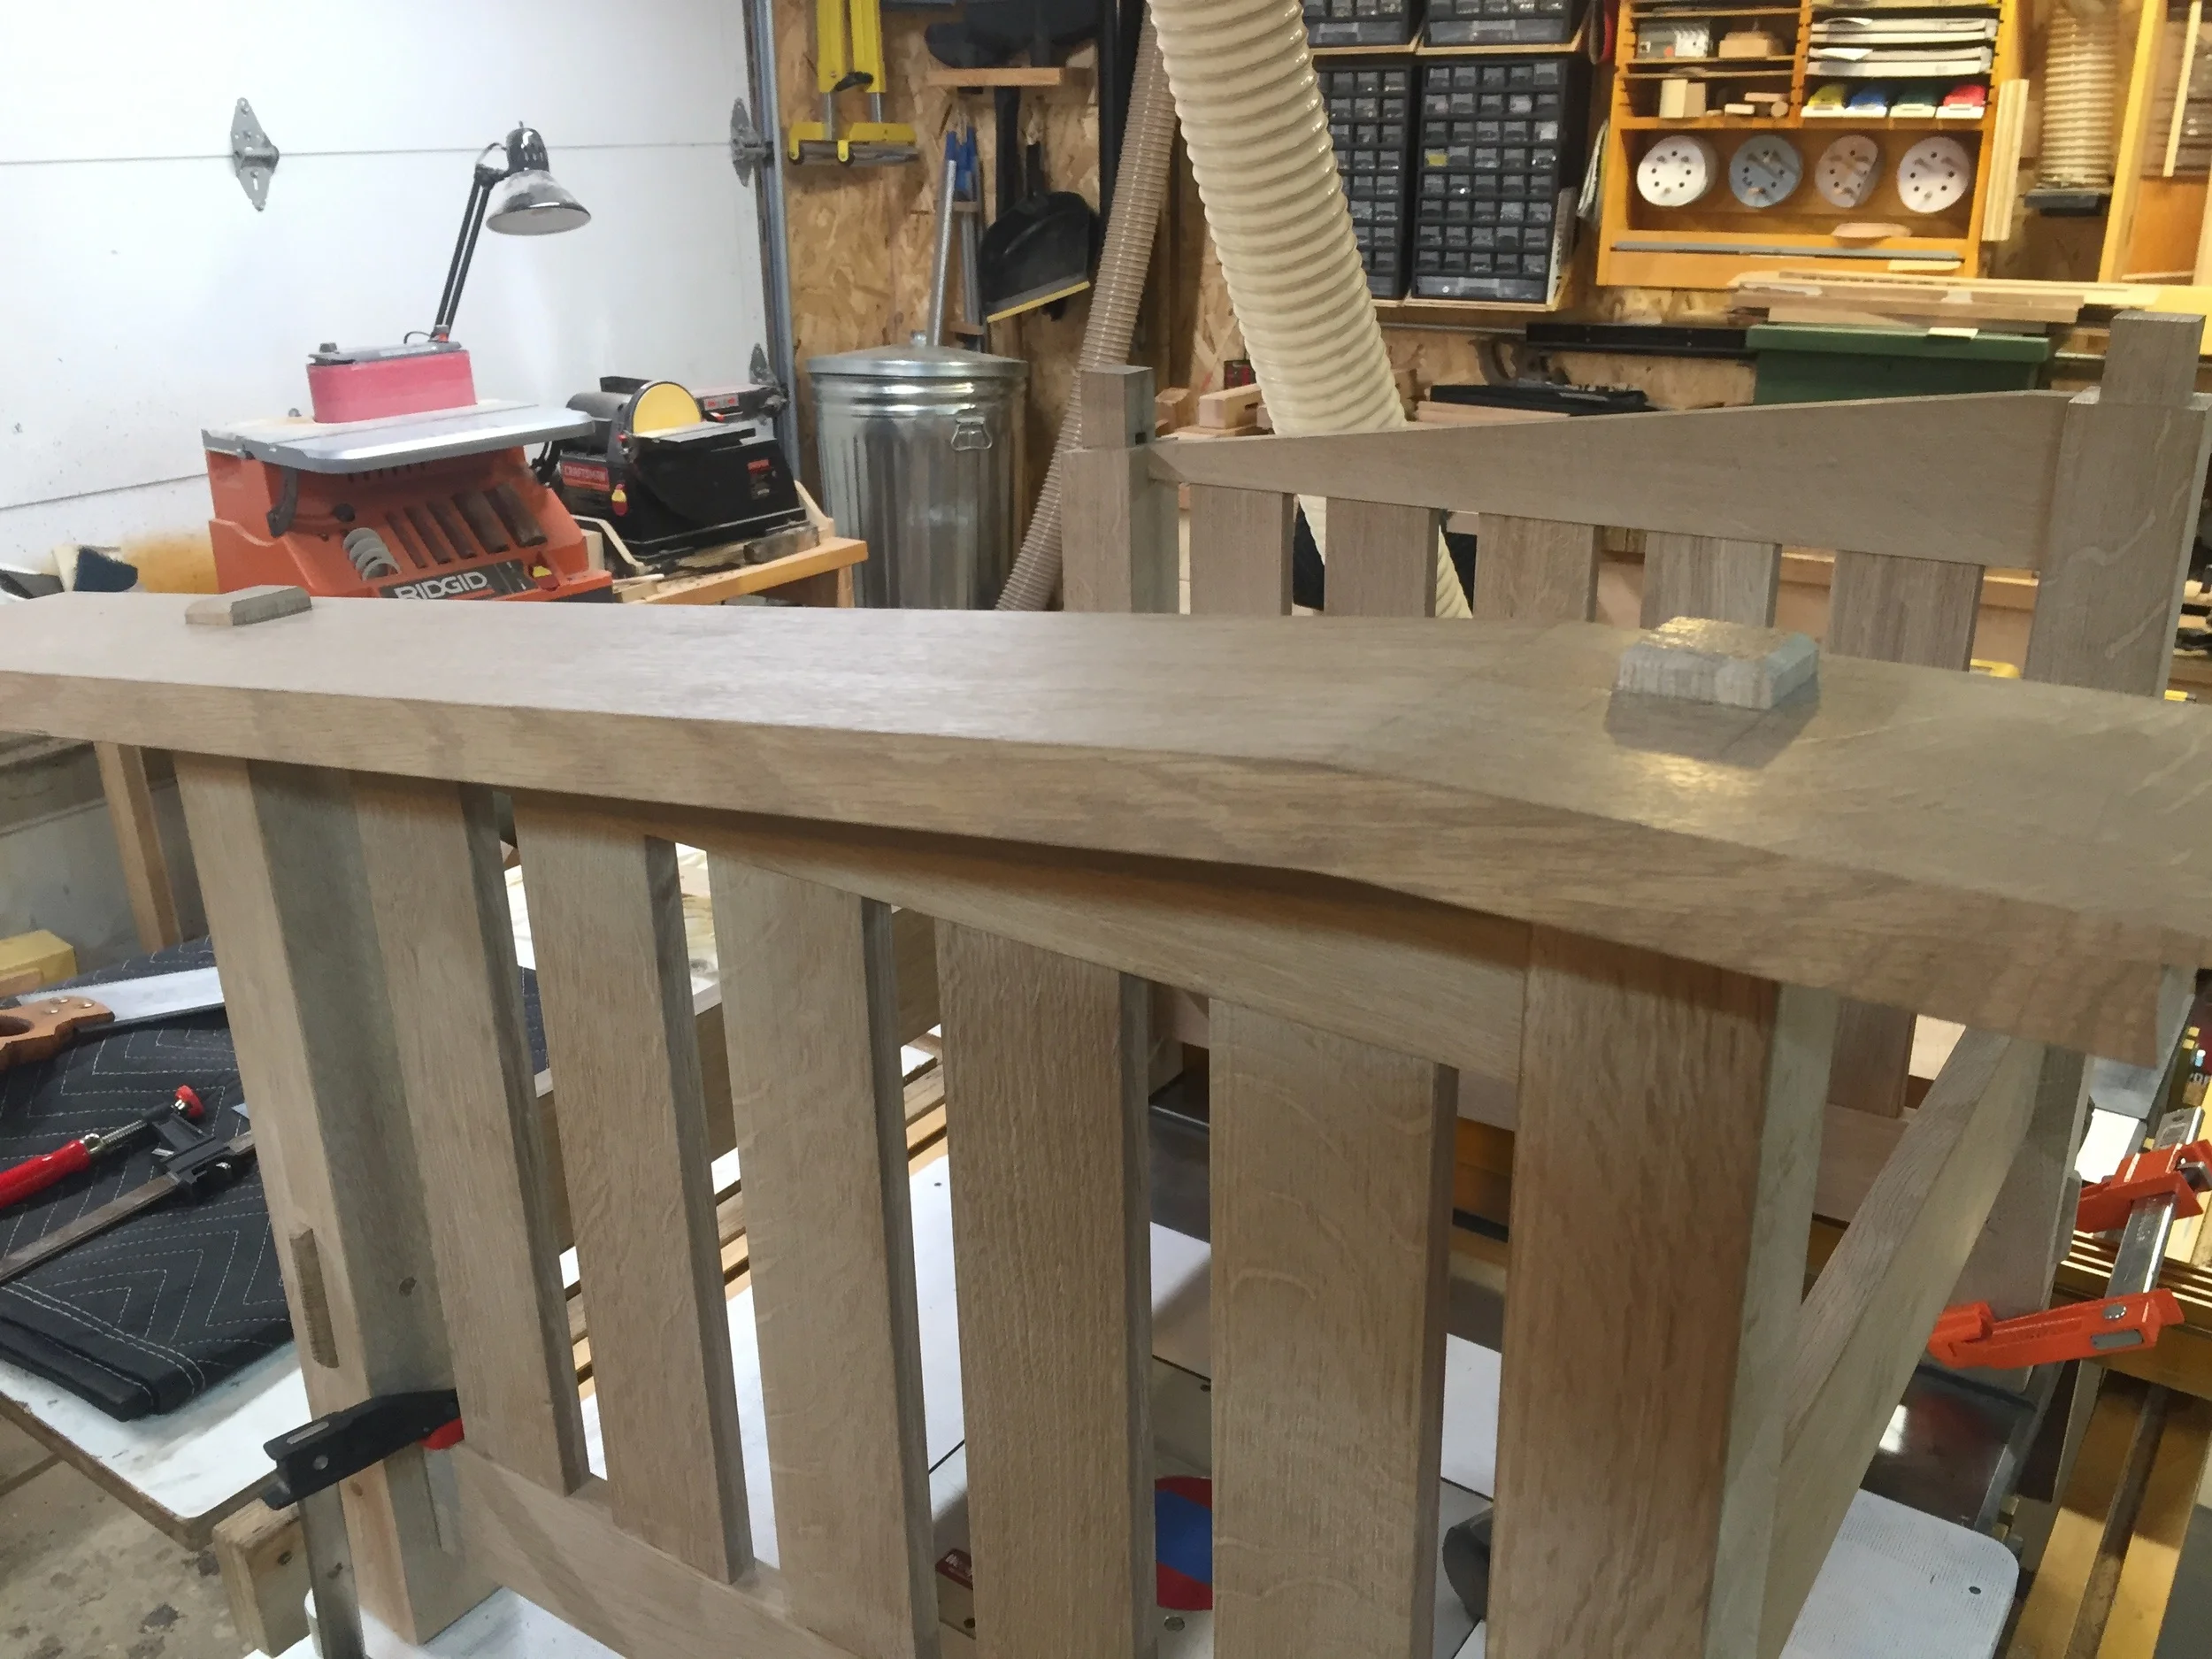
The next challenge are the slanted arms. They are slightly "hockey stick" like in profile, with a bend near the top of the arm. This was one of coolest details of this build to make. The technique is to take a straight arm, and then cut an end off at the desired angle, then glue the cutoff onto the bottom side of the arm, resulting in a "bend"...

Once you've made that very tricky cut, re-glued the cutoff, and smoothed it out, it looks absolutely seamless, with the glue line disappearing. The grain direction matches perfectly, and the result is very cool.

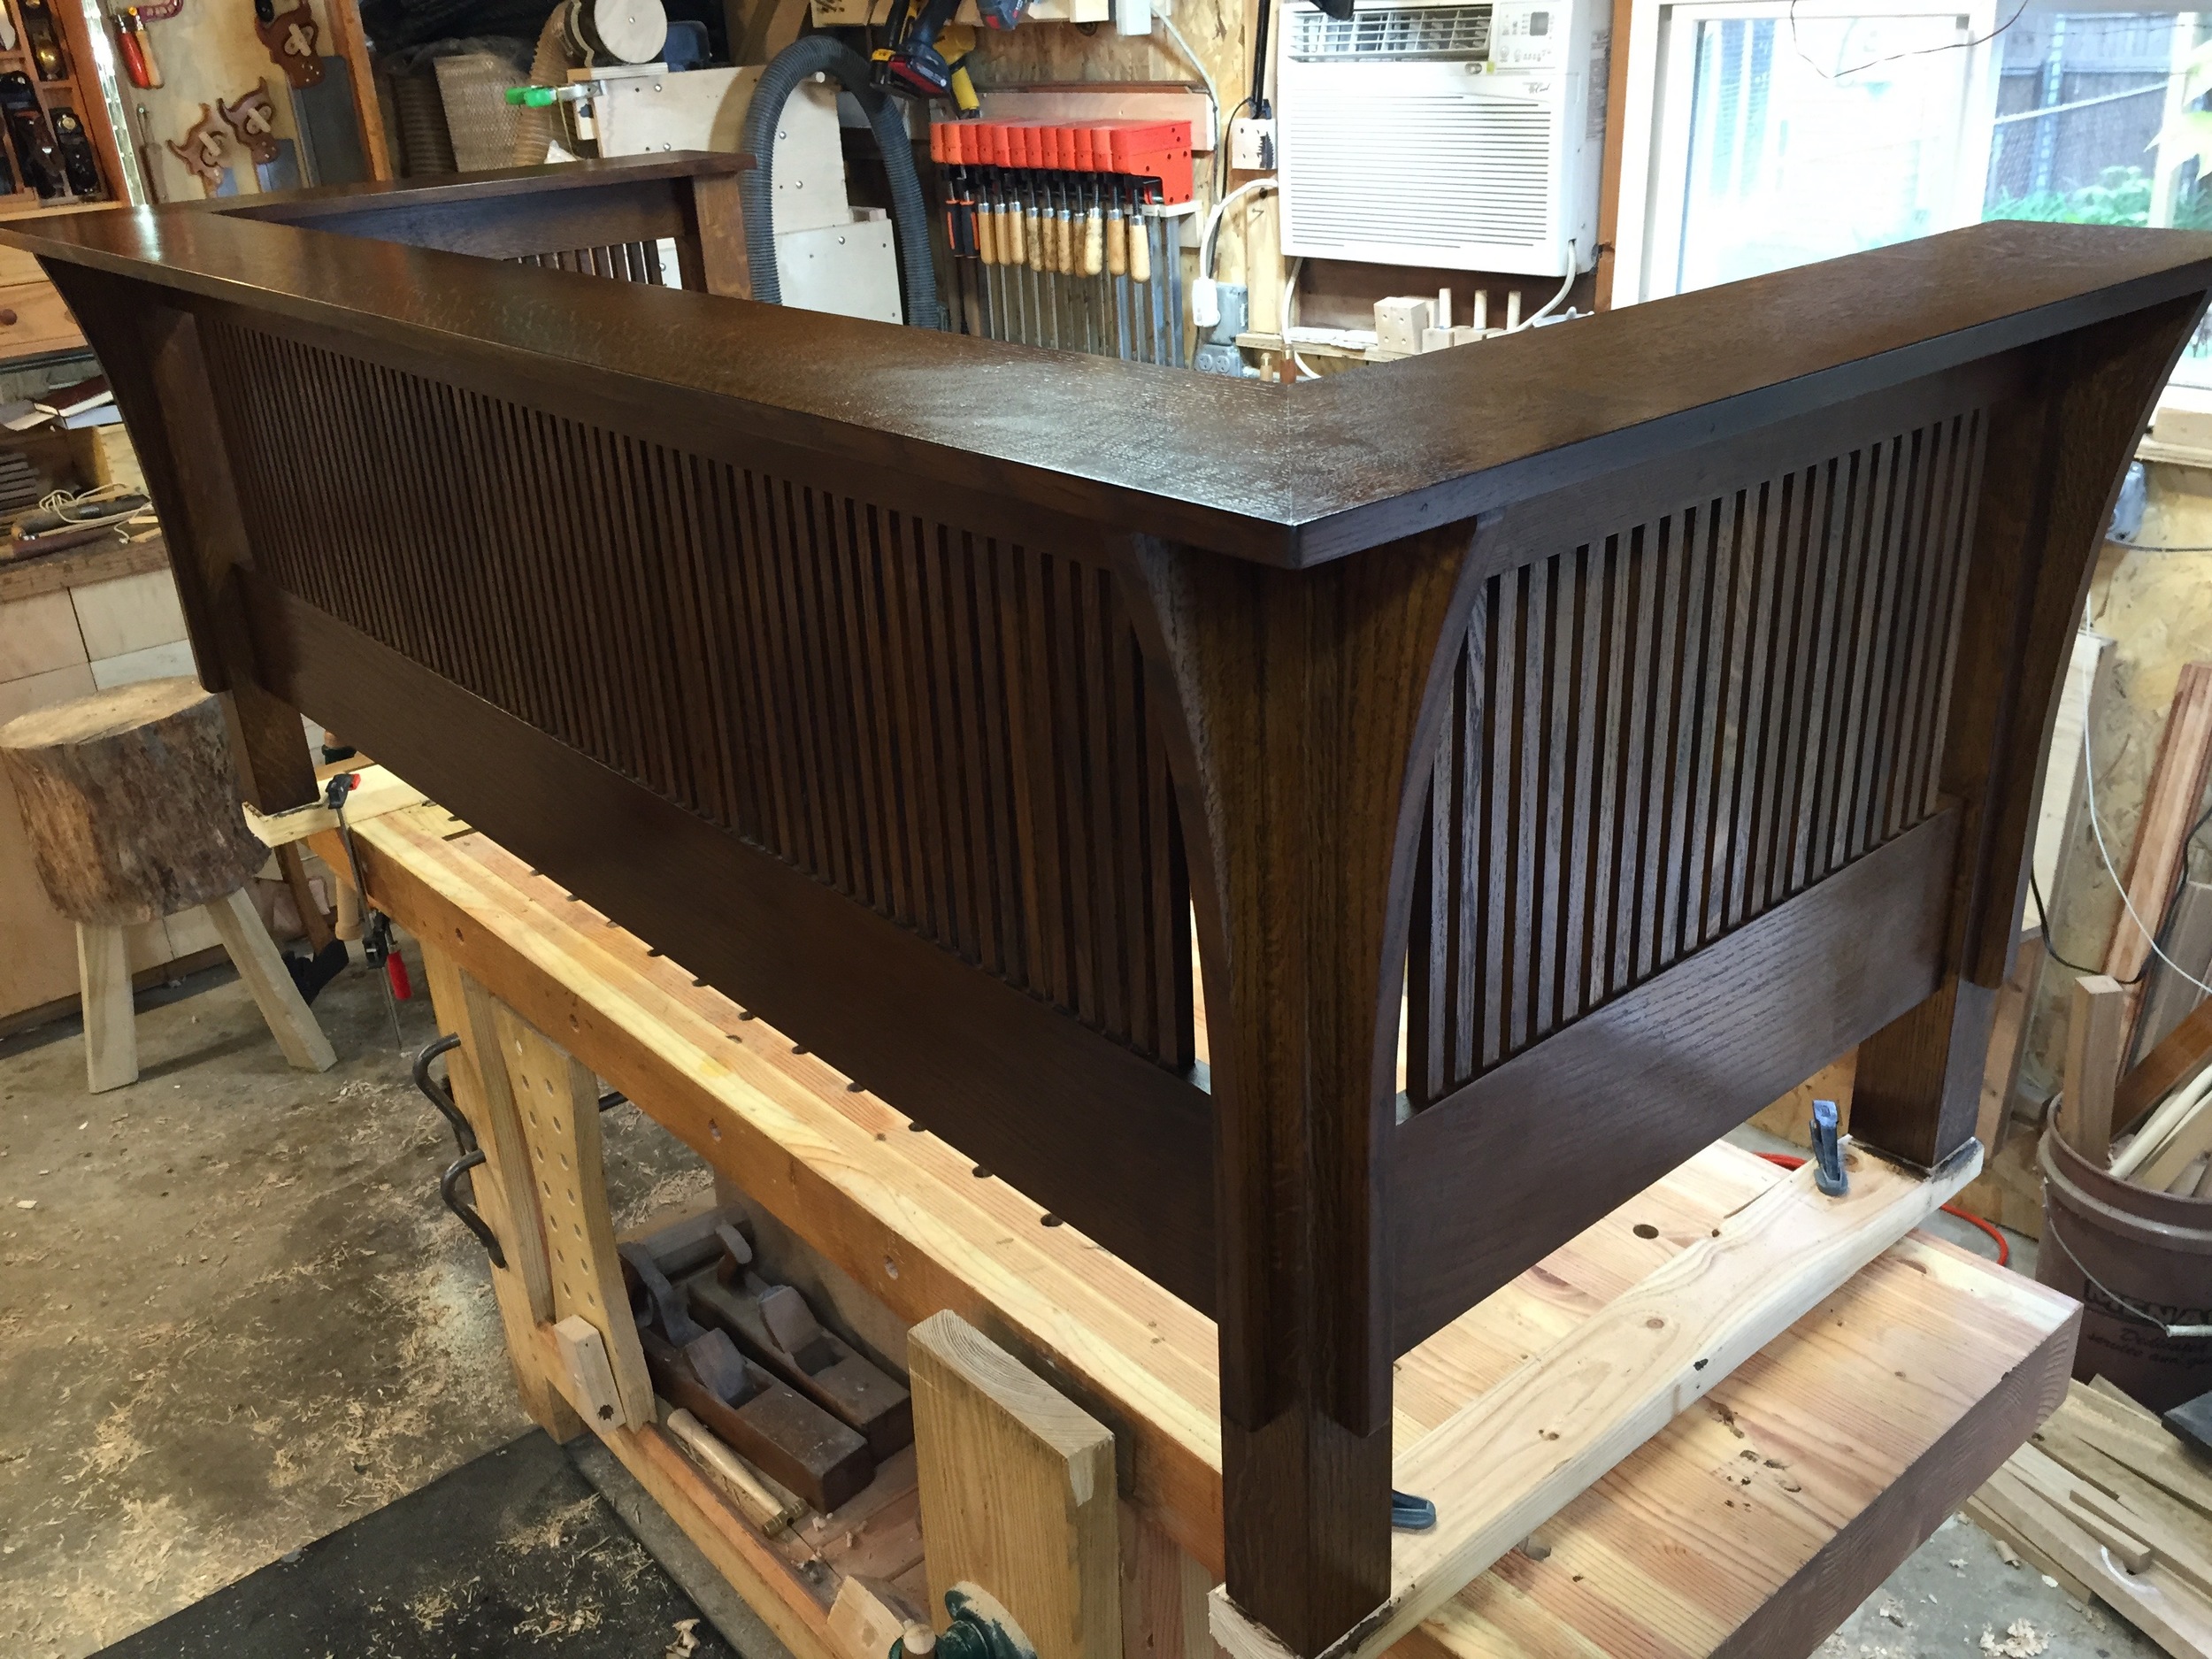
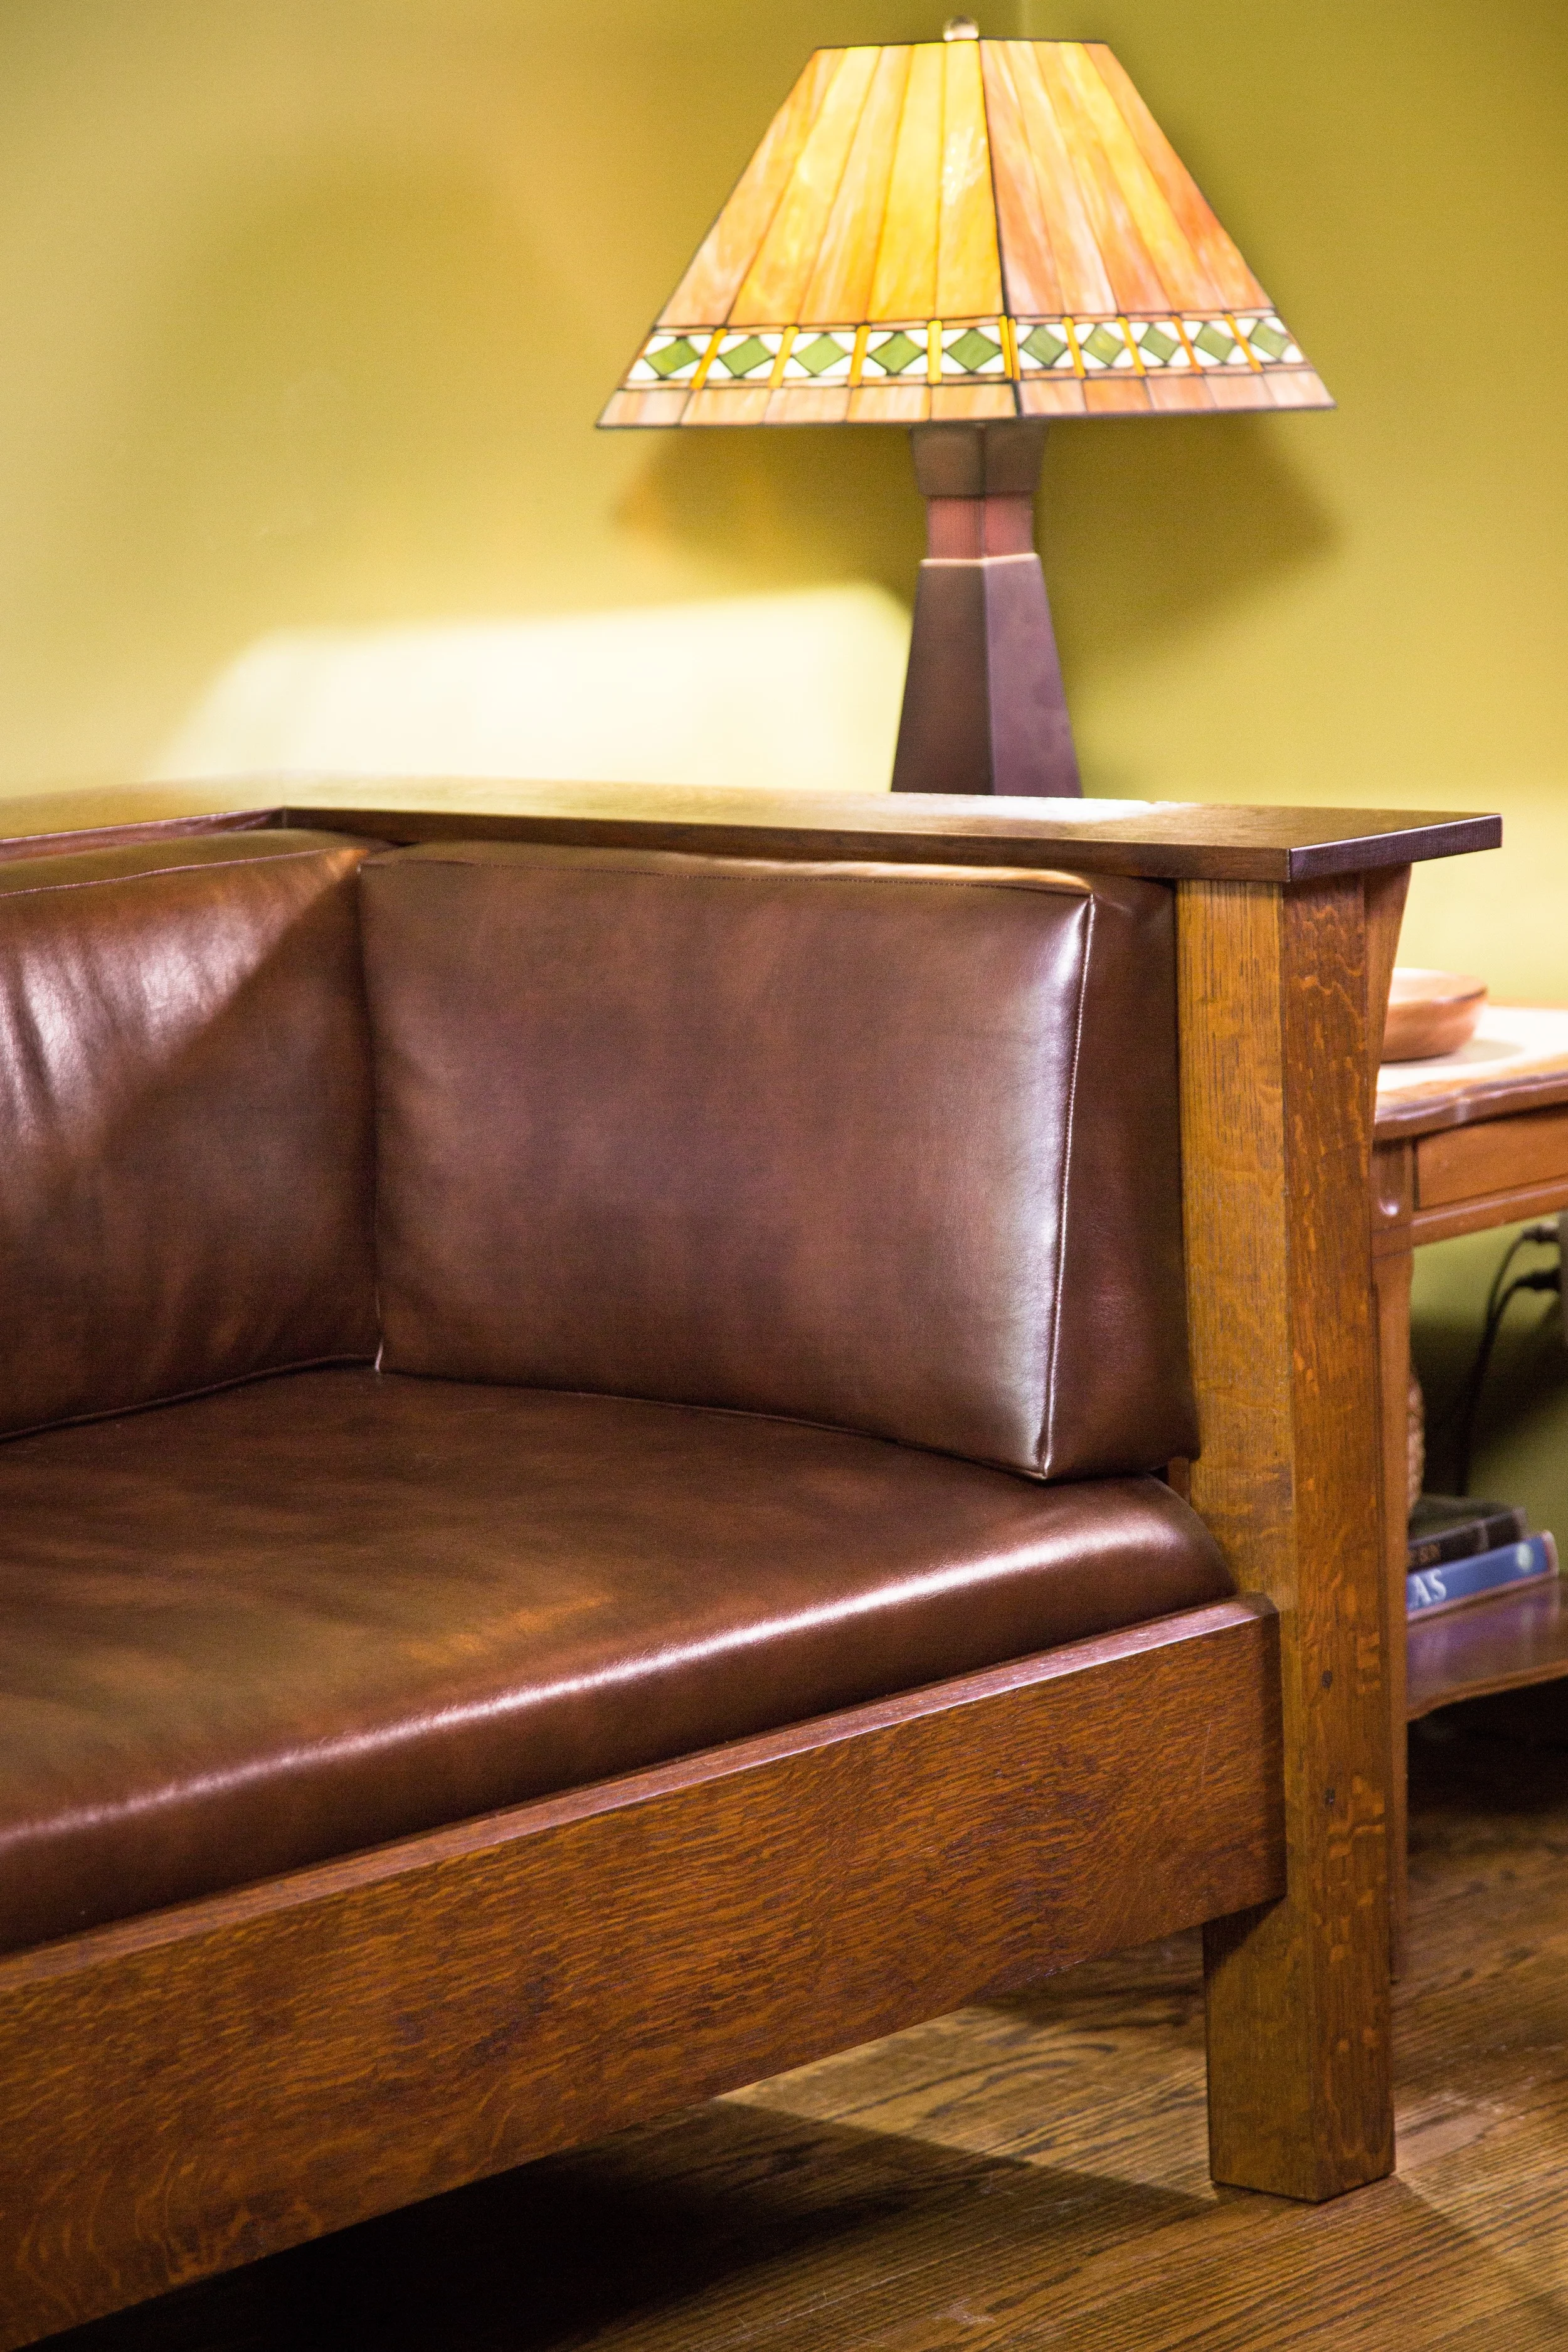
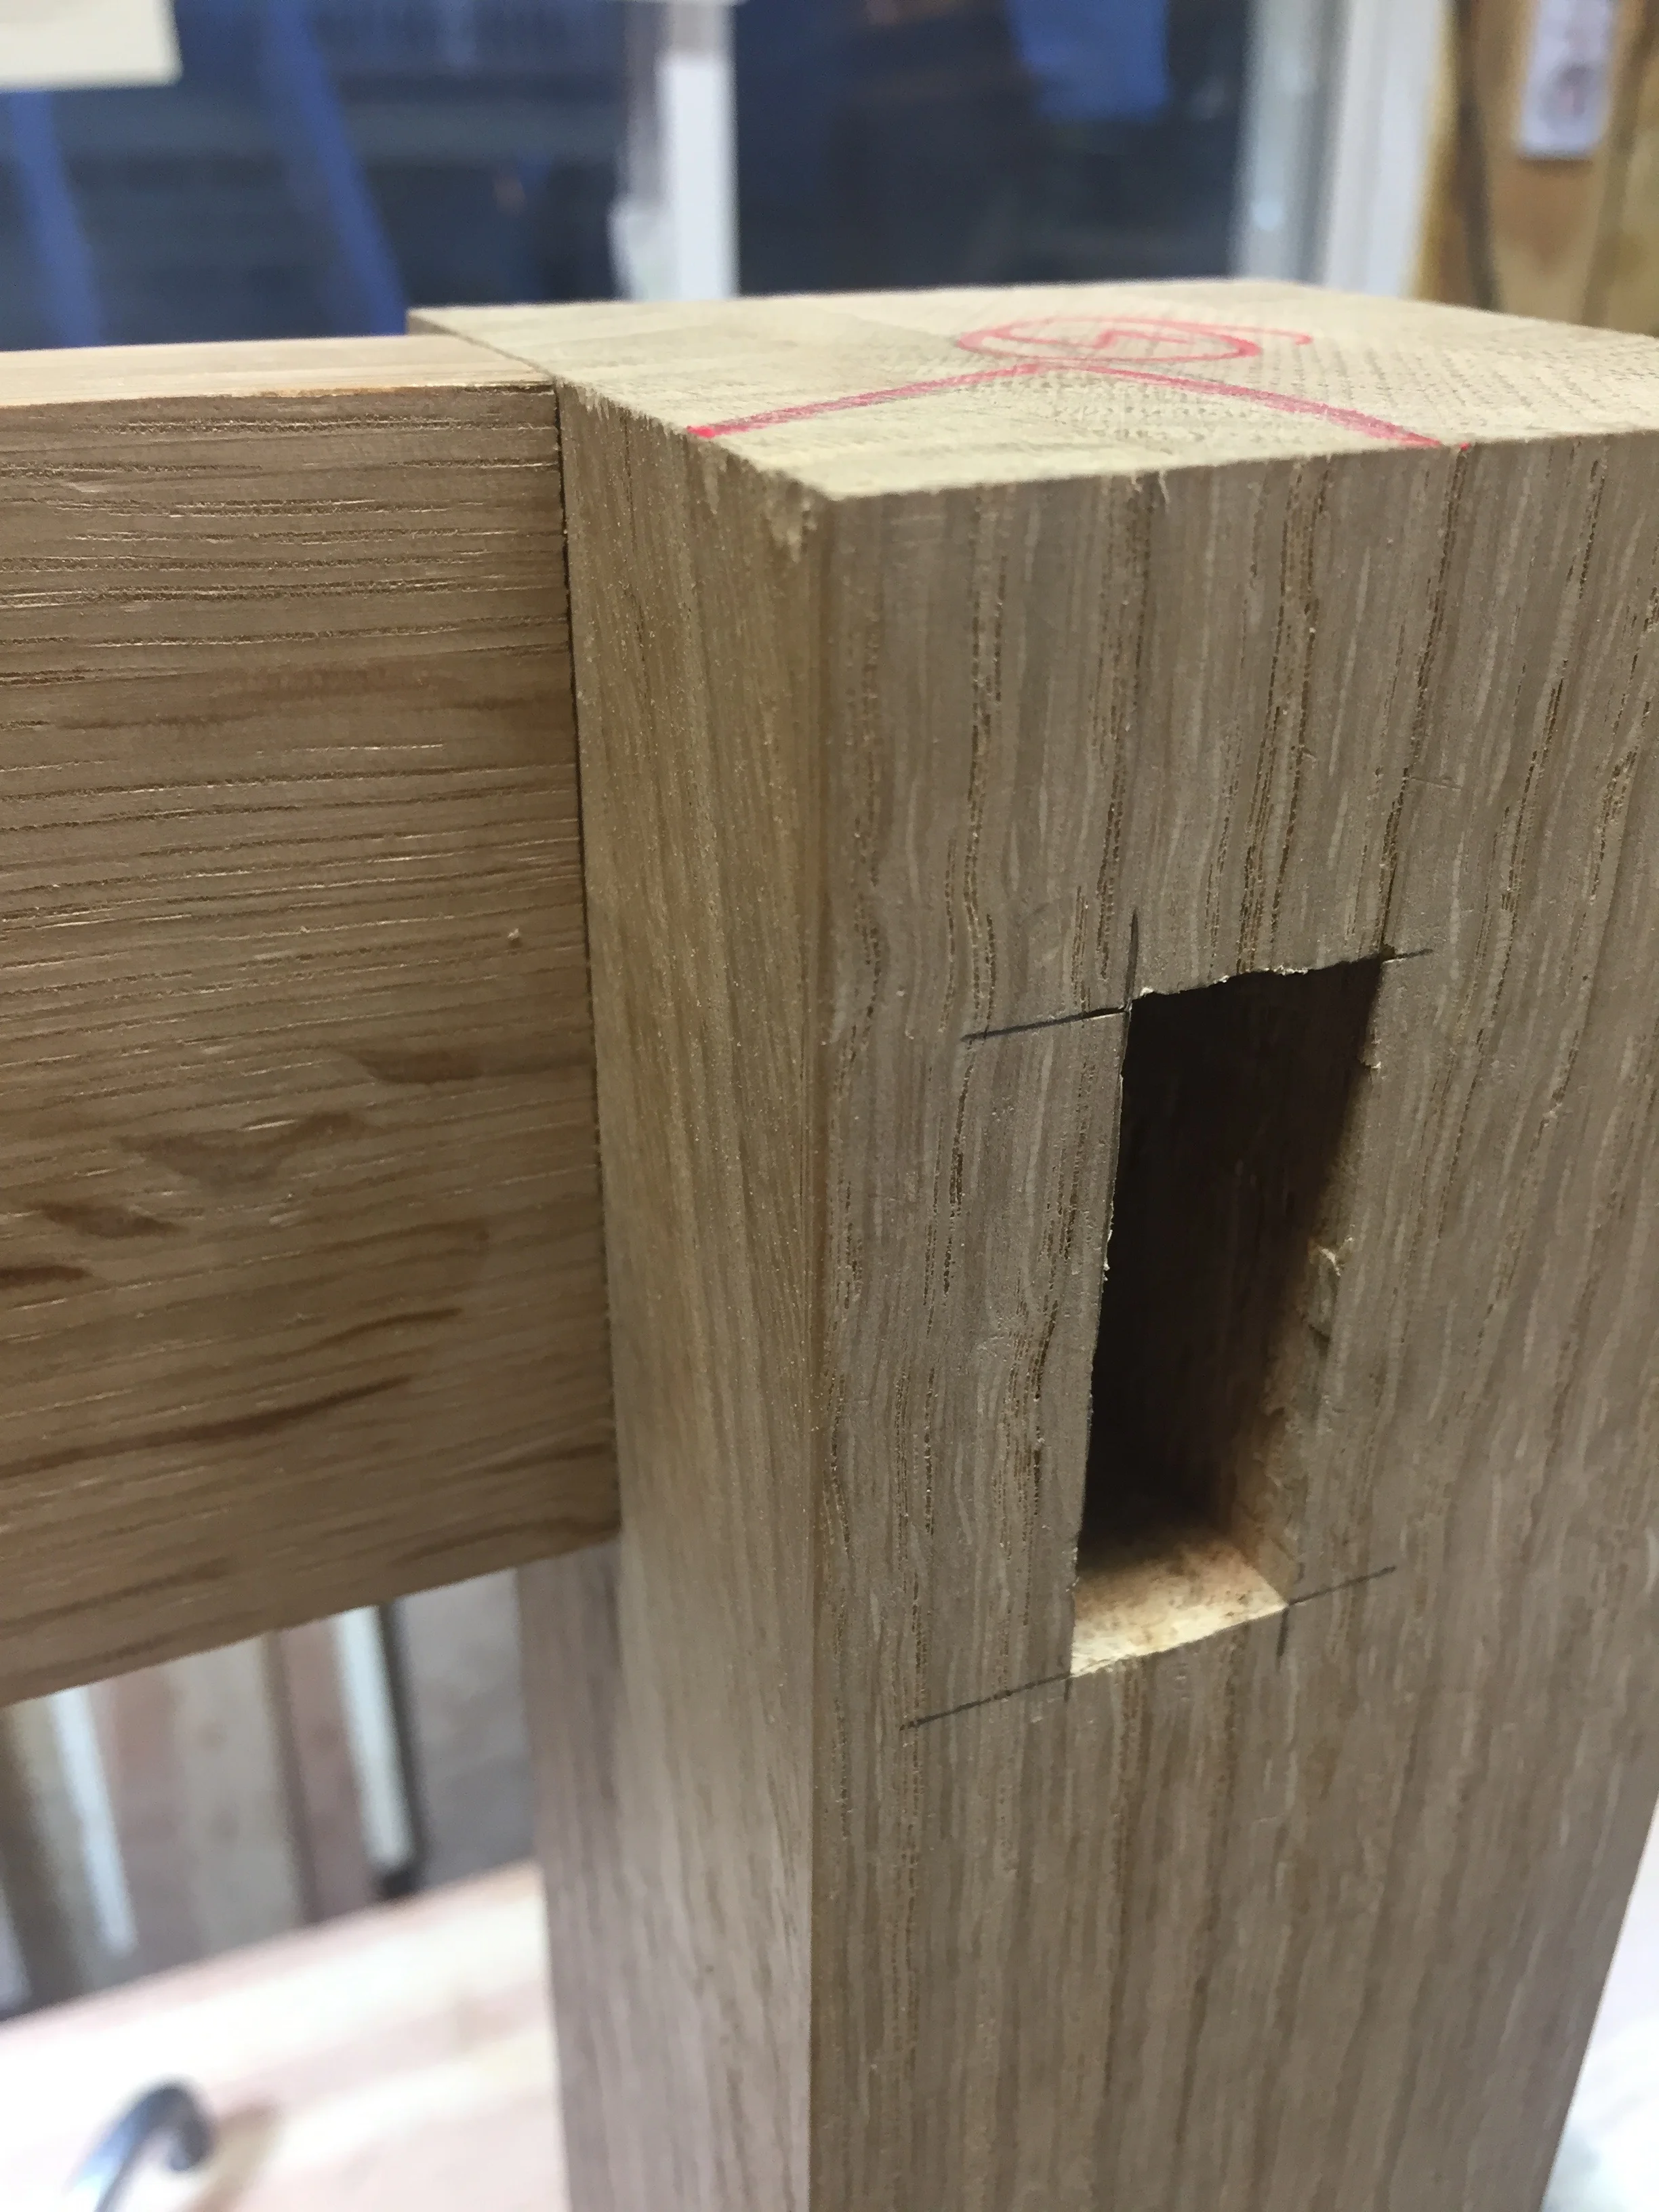
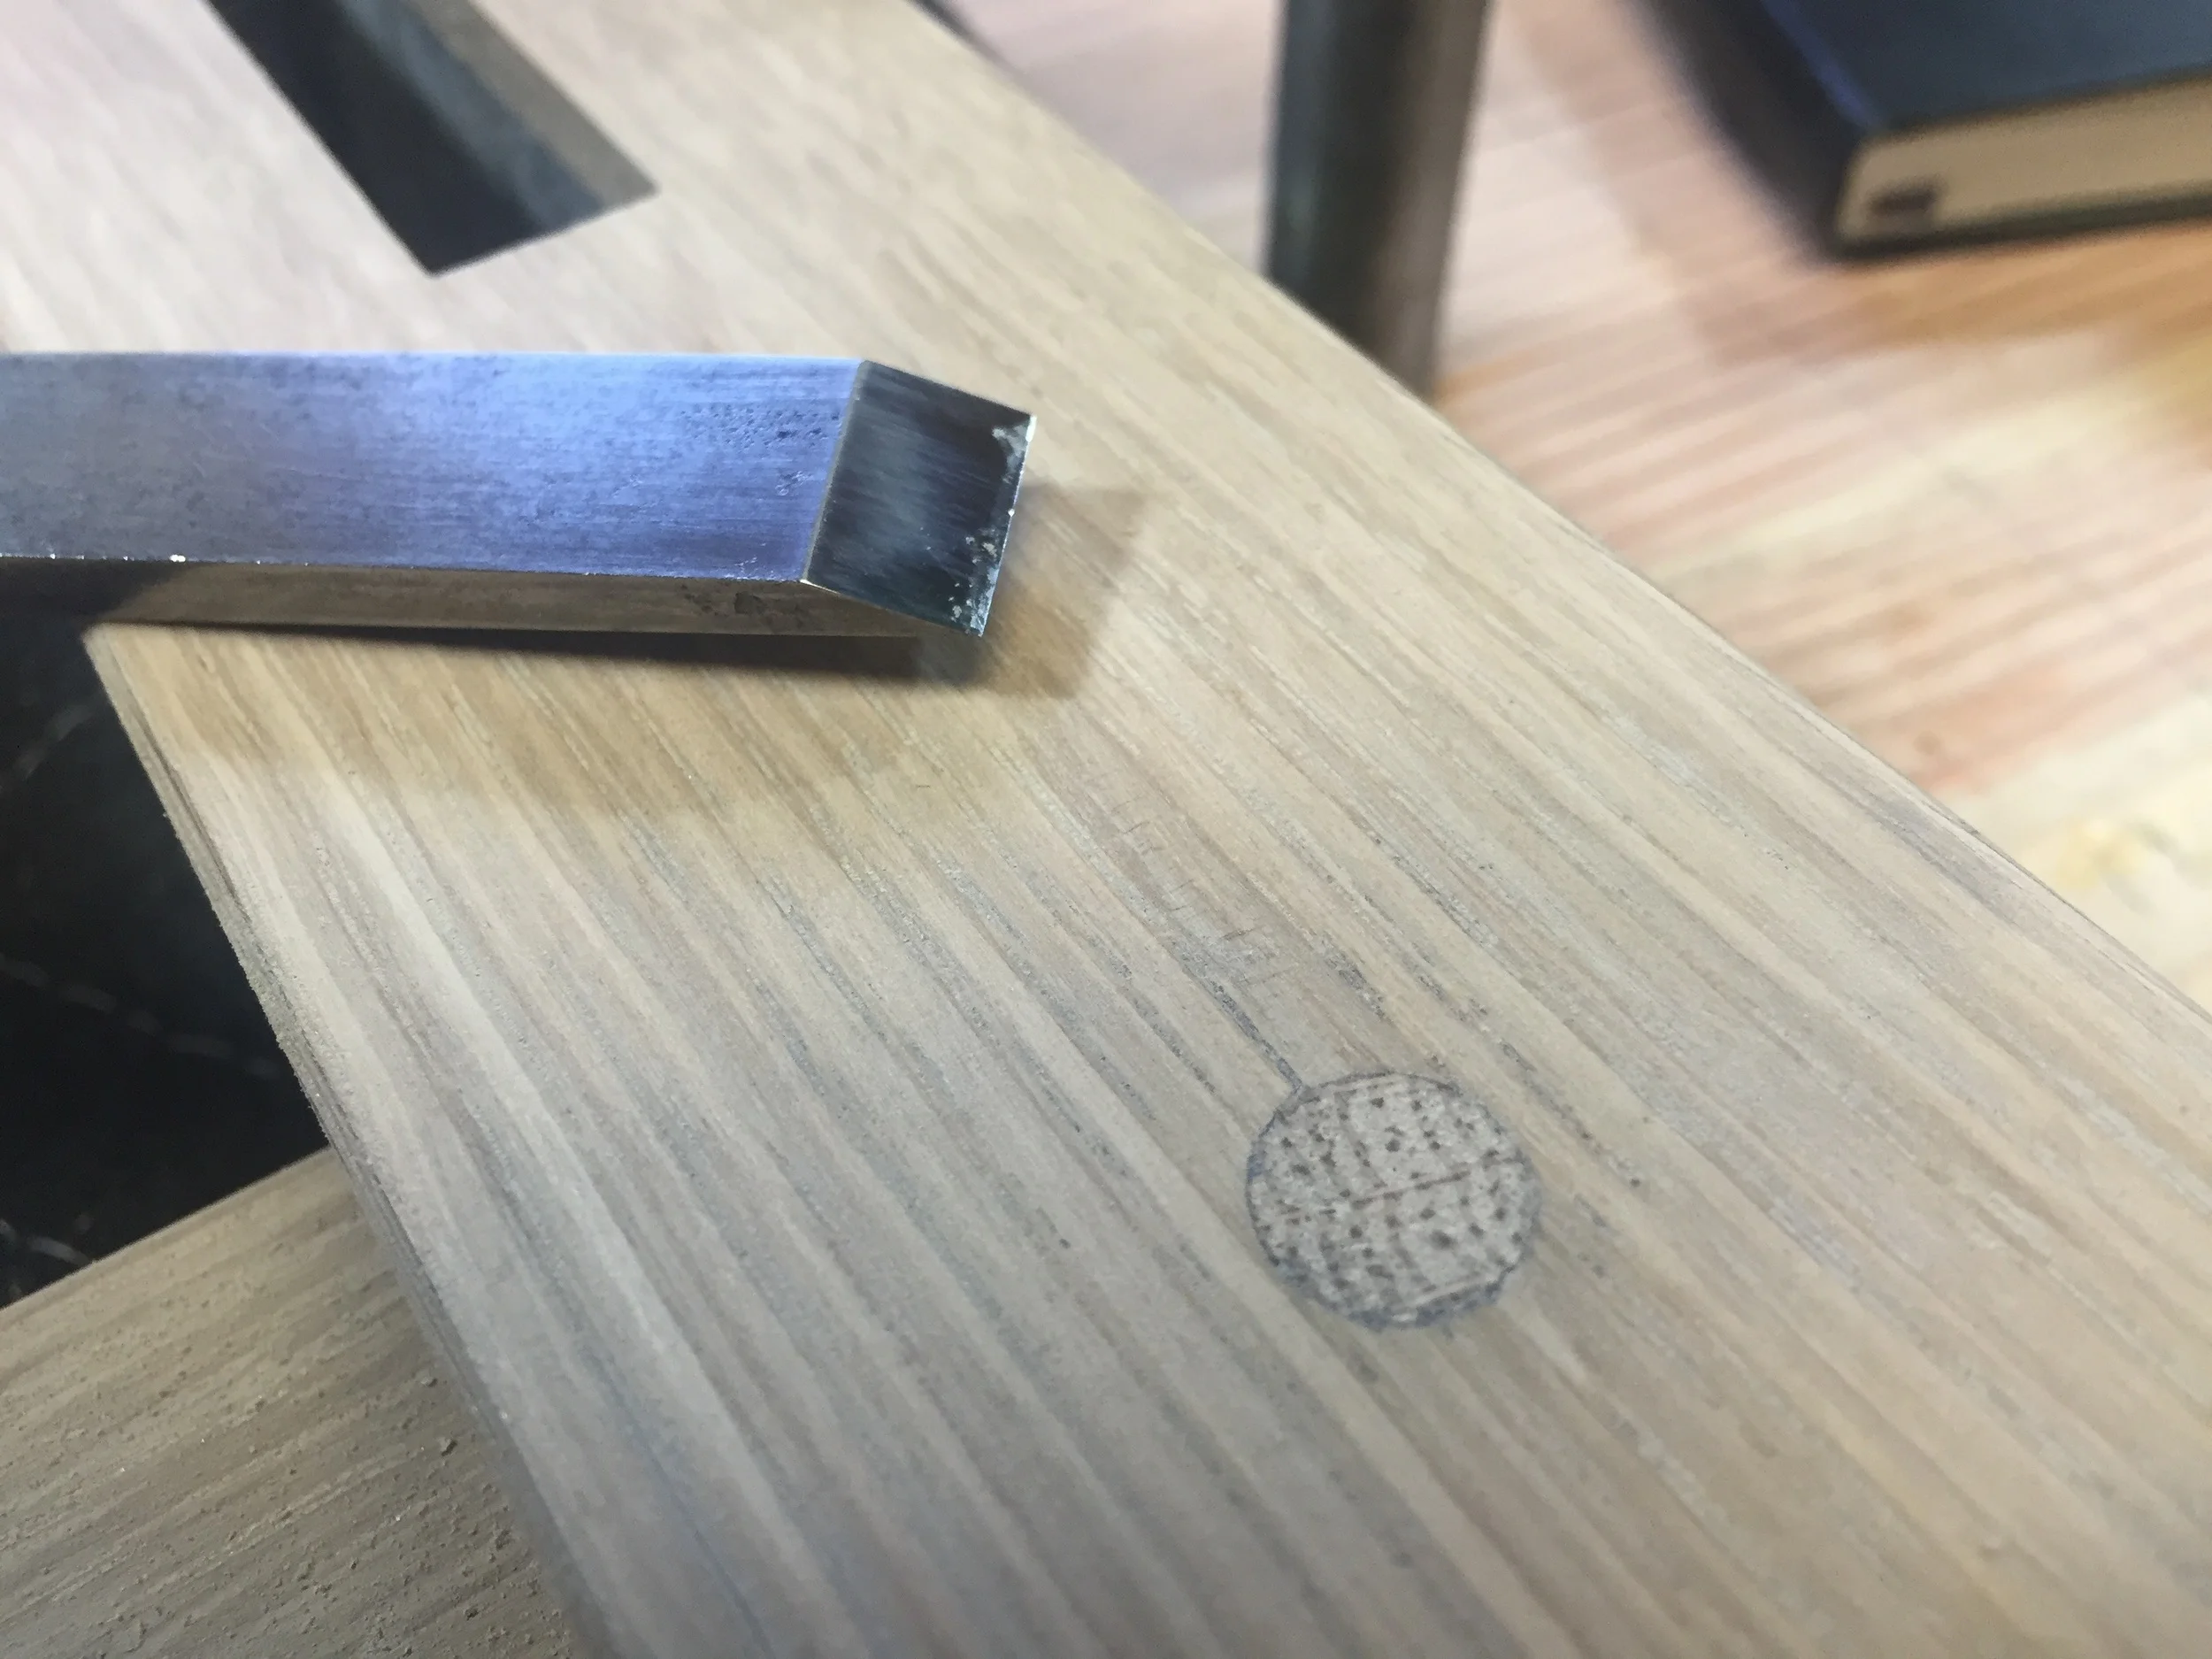
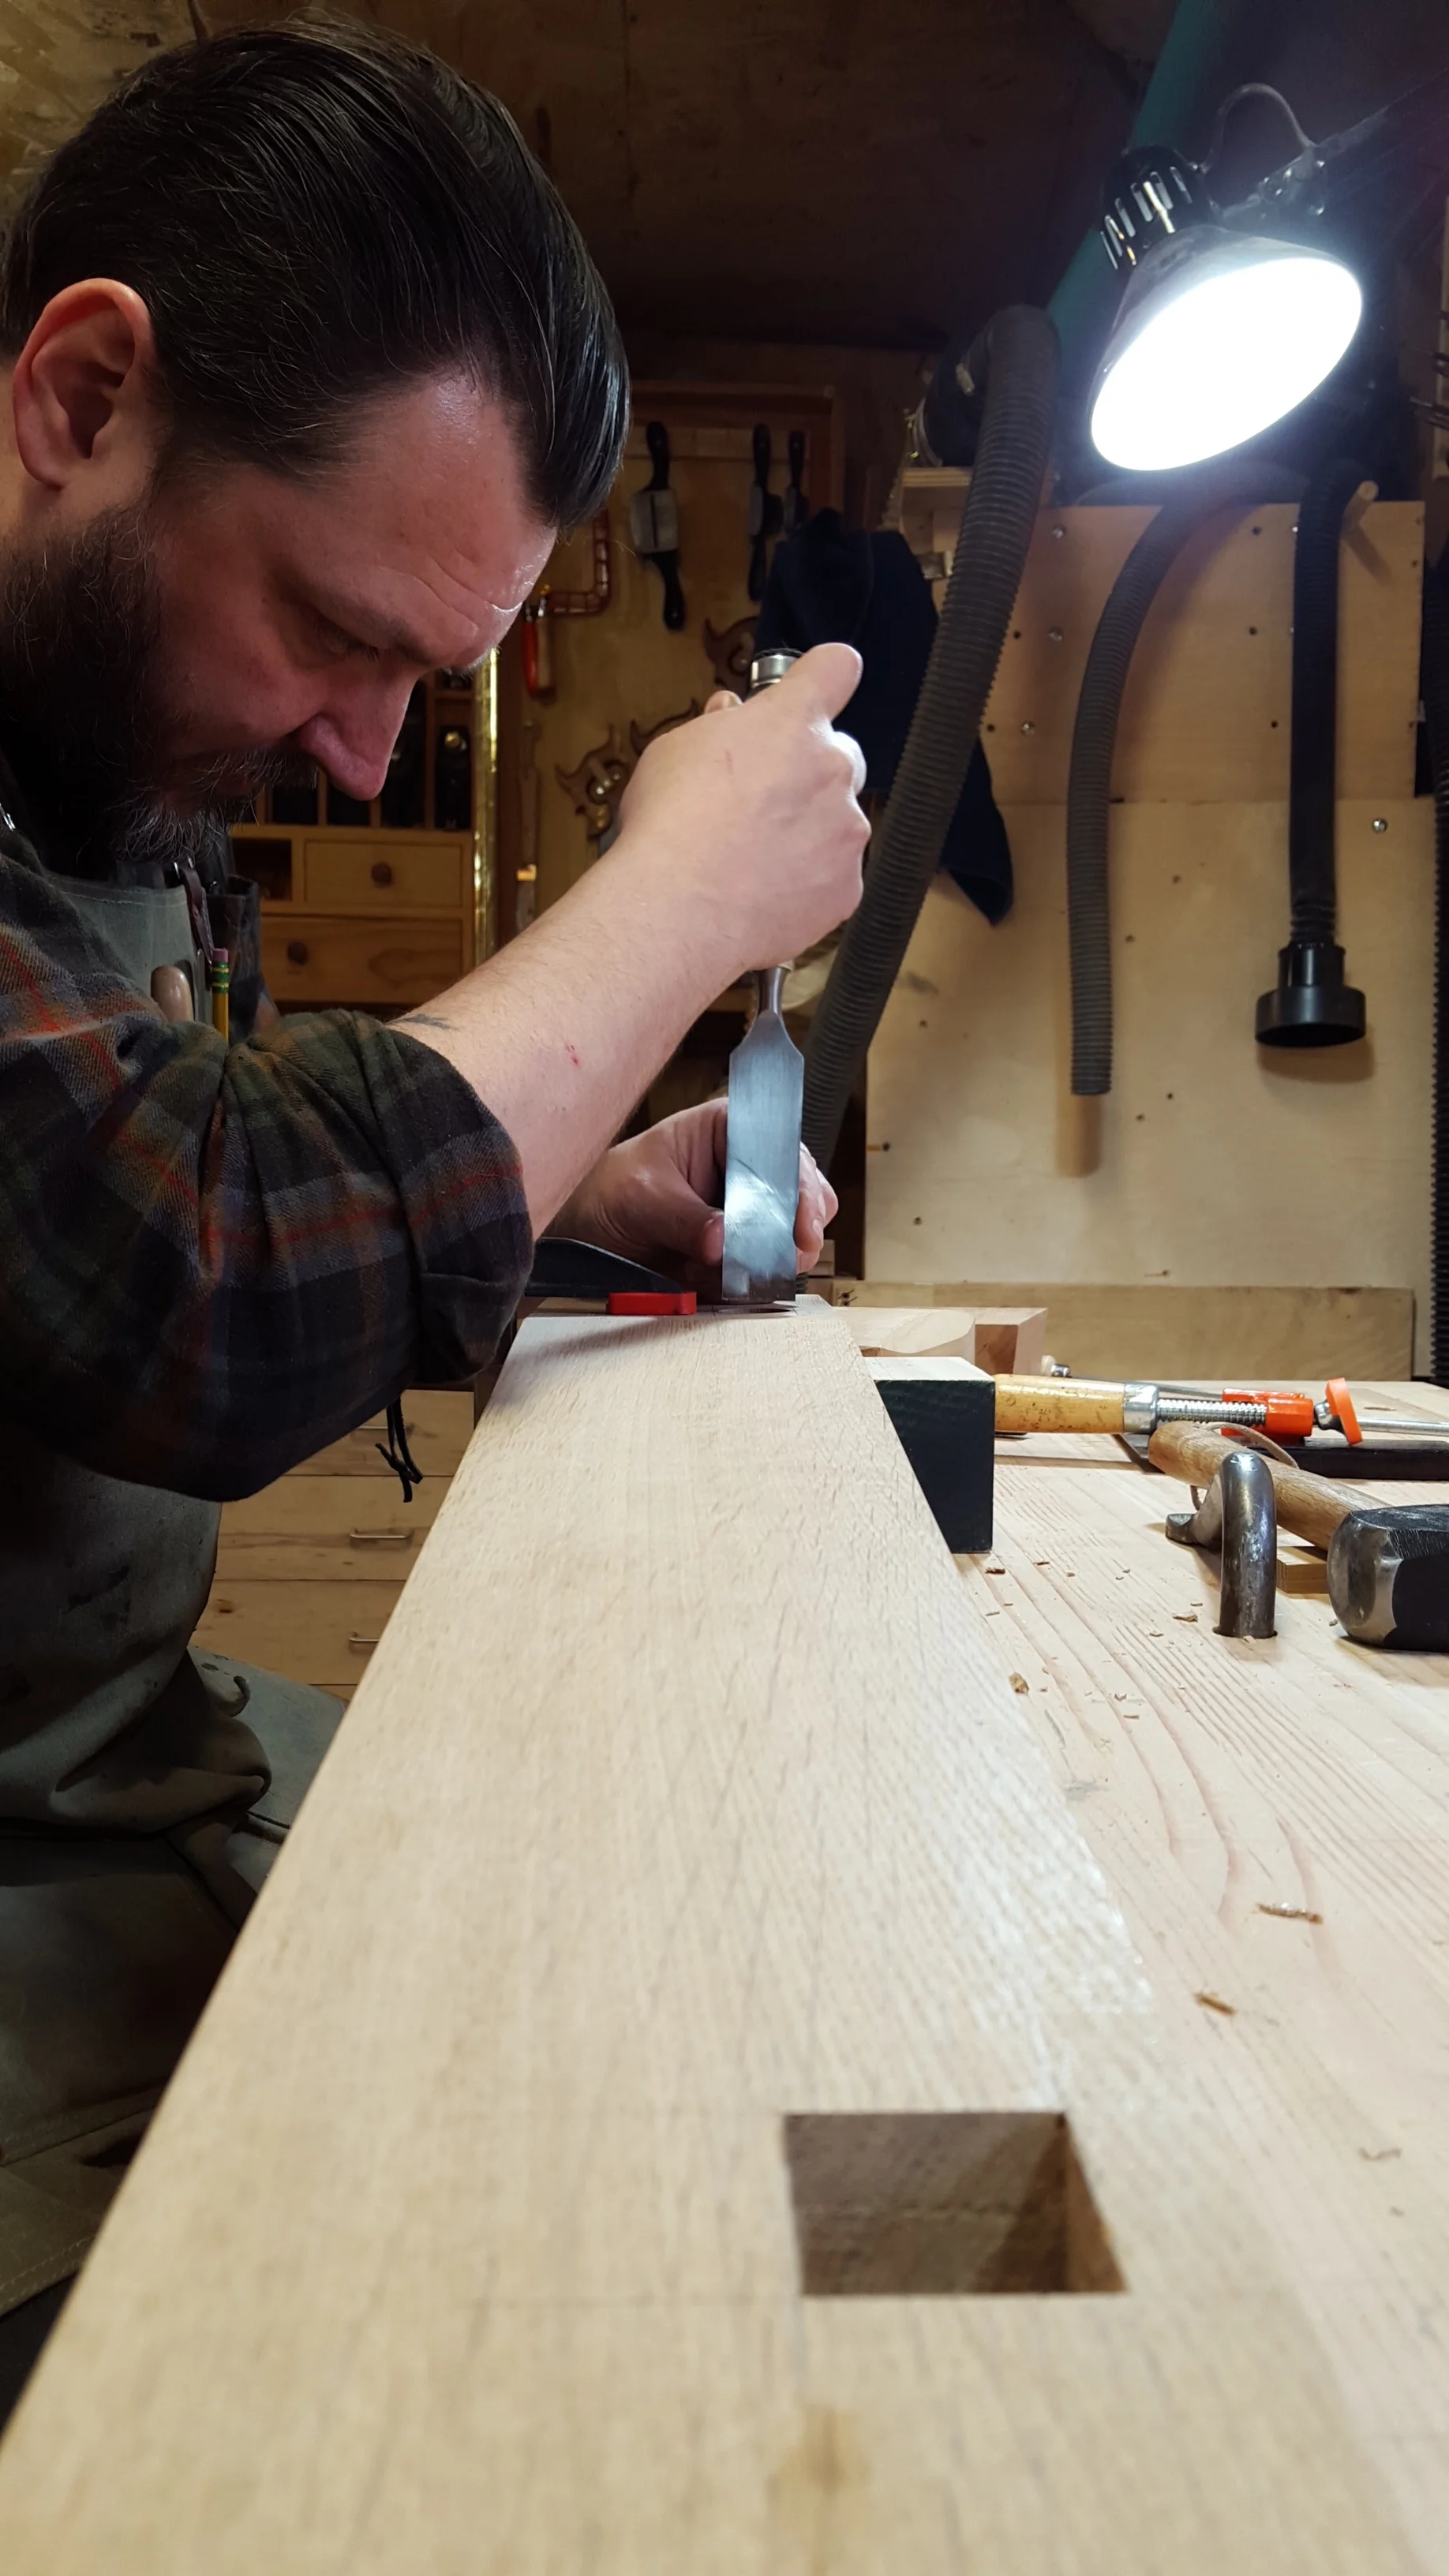
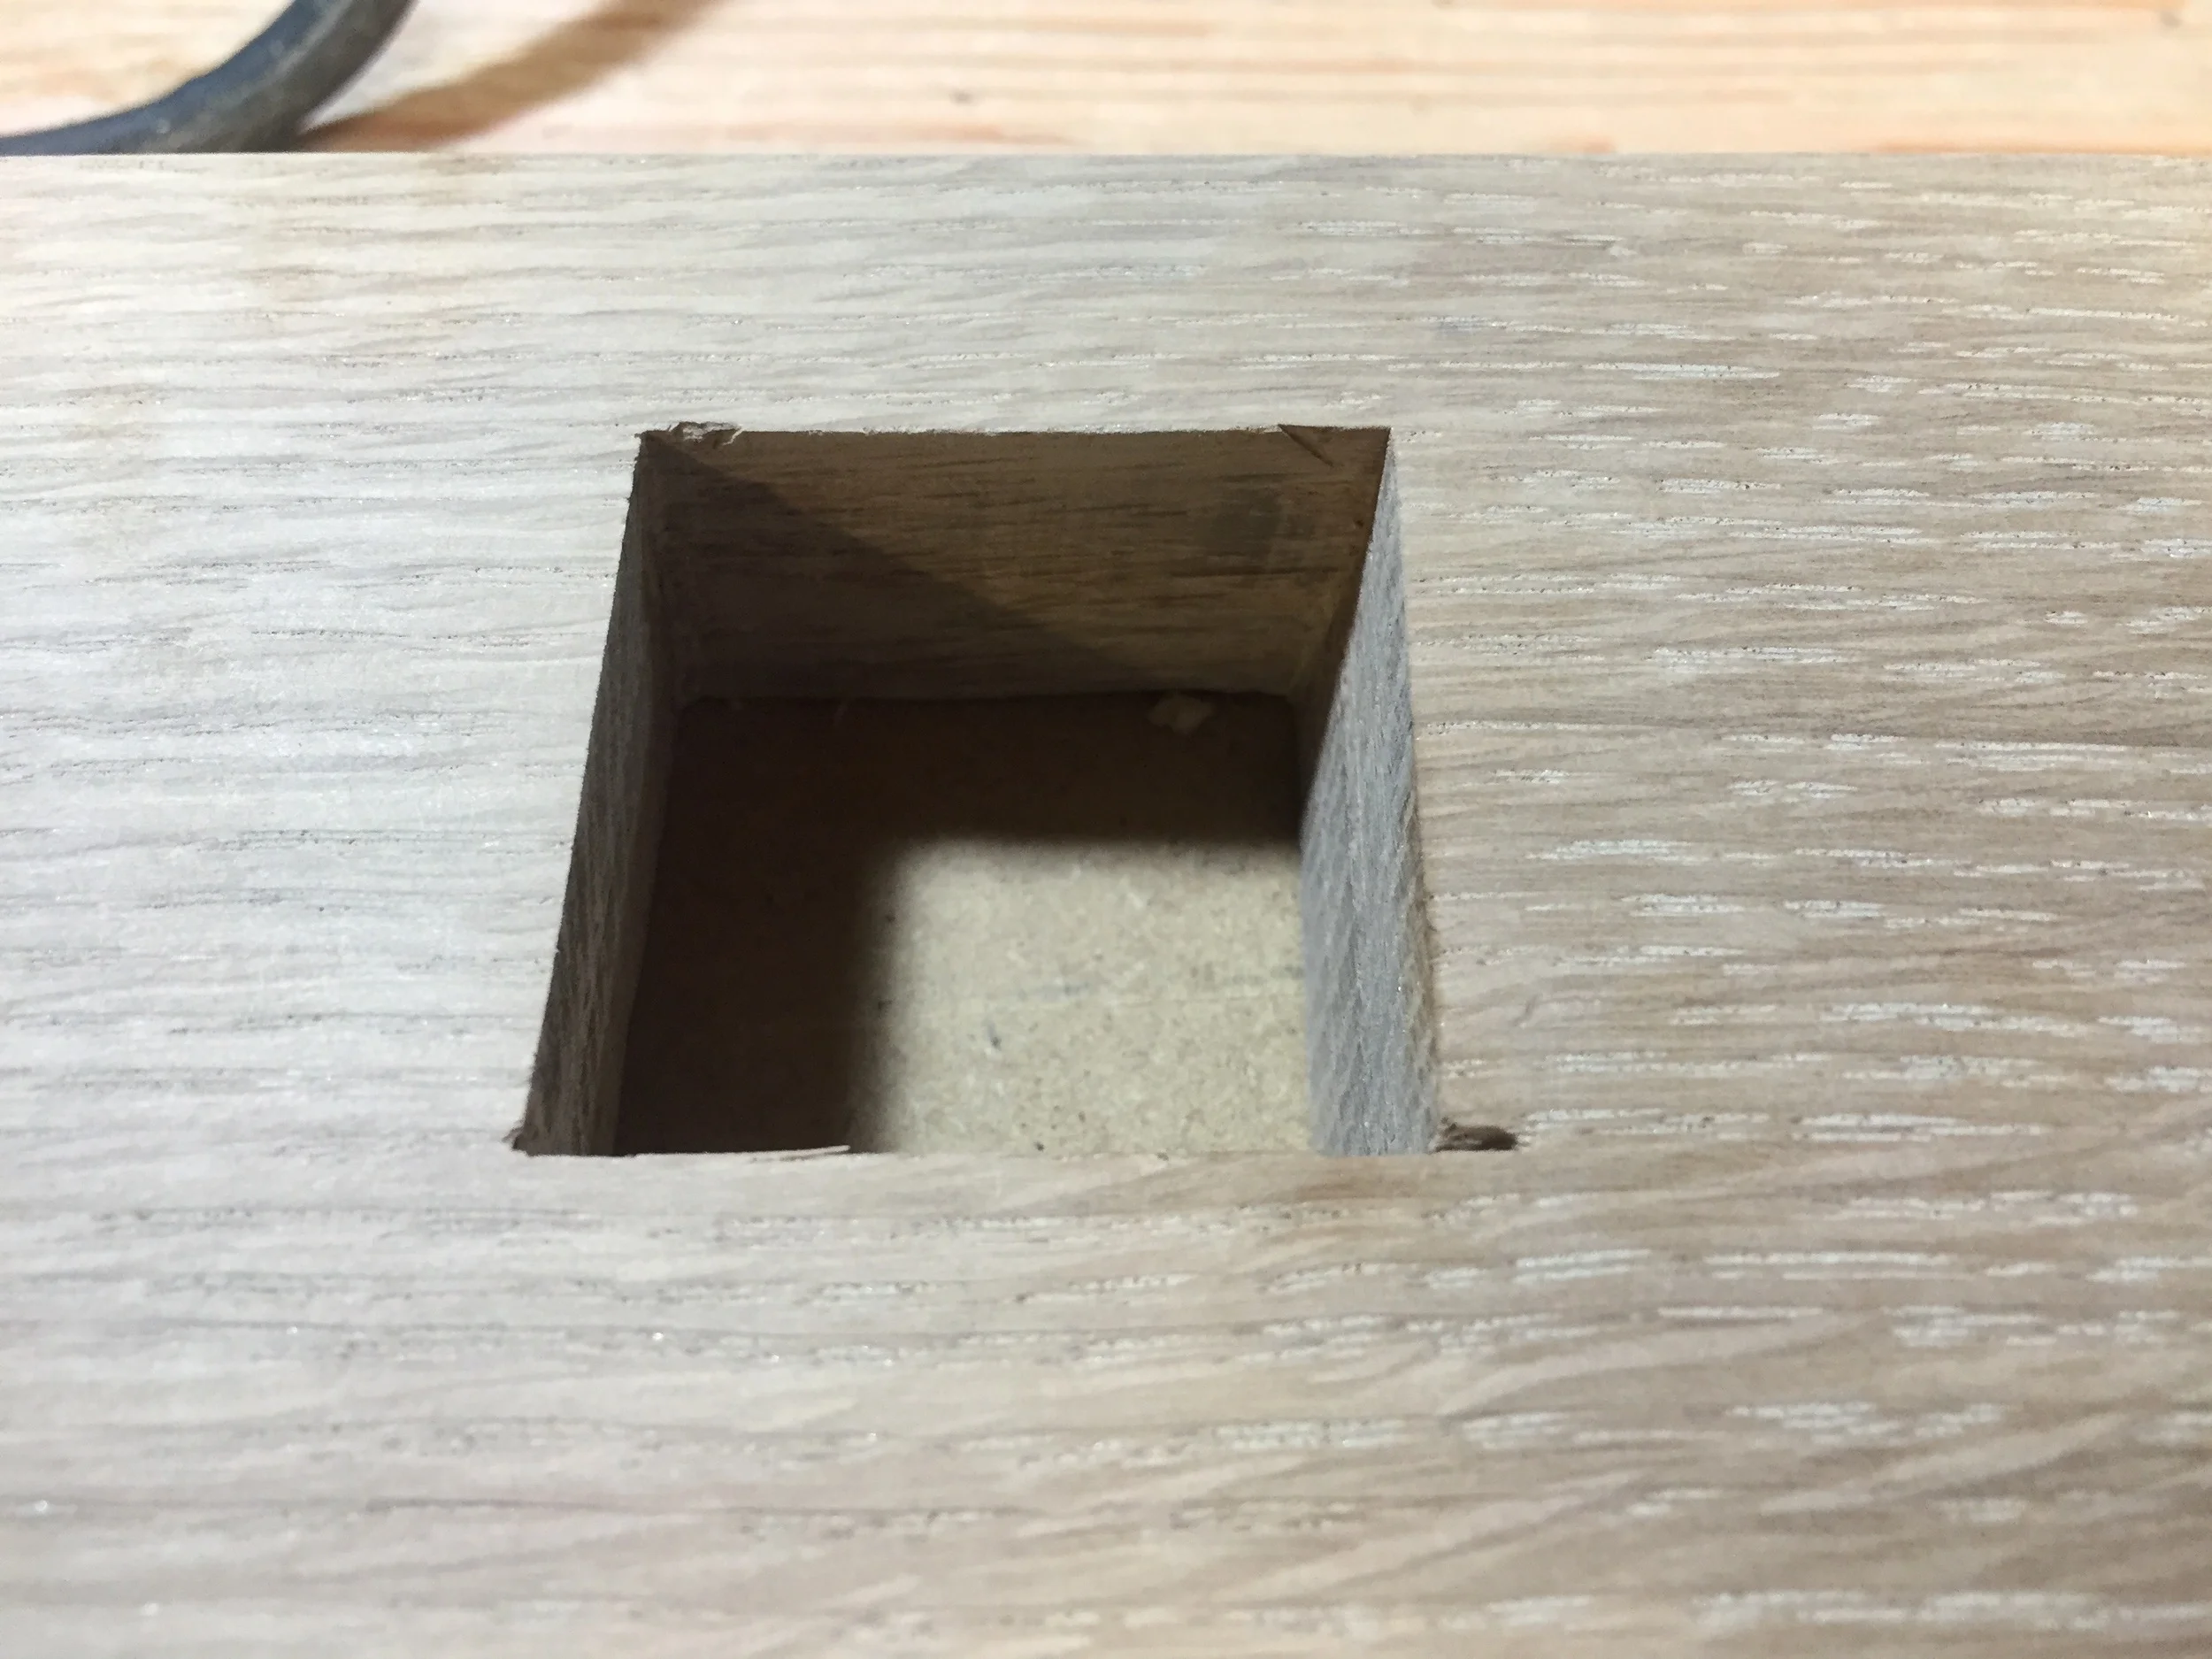
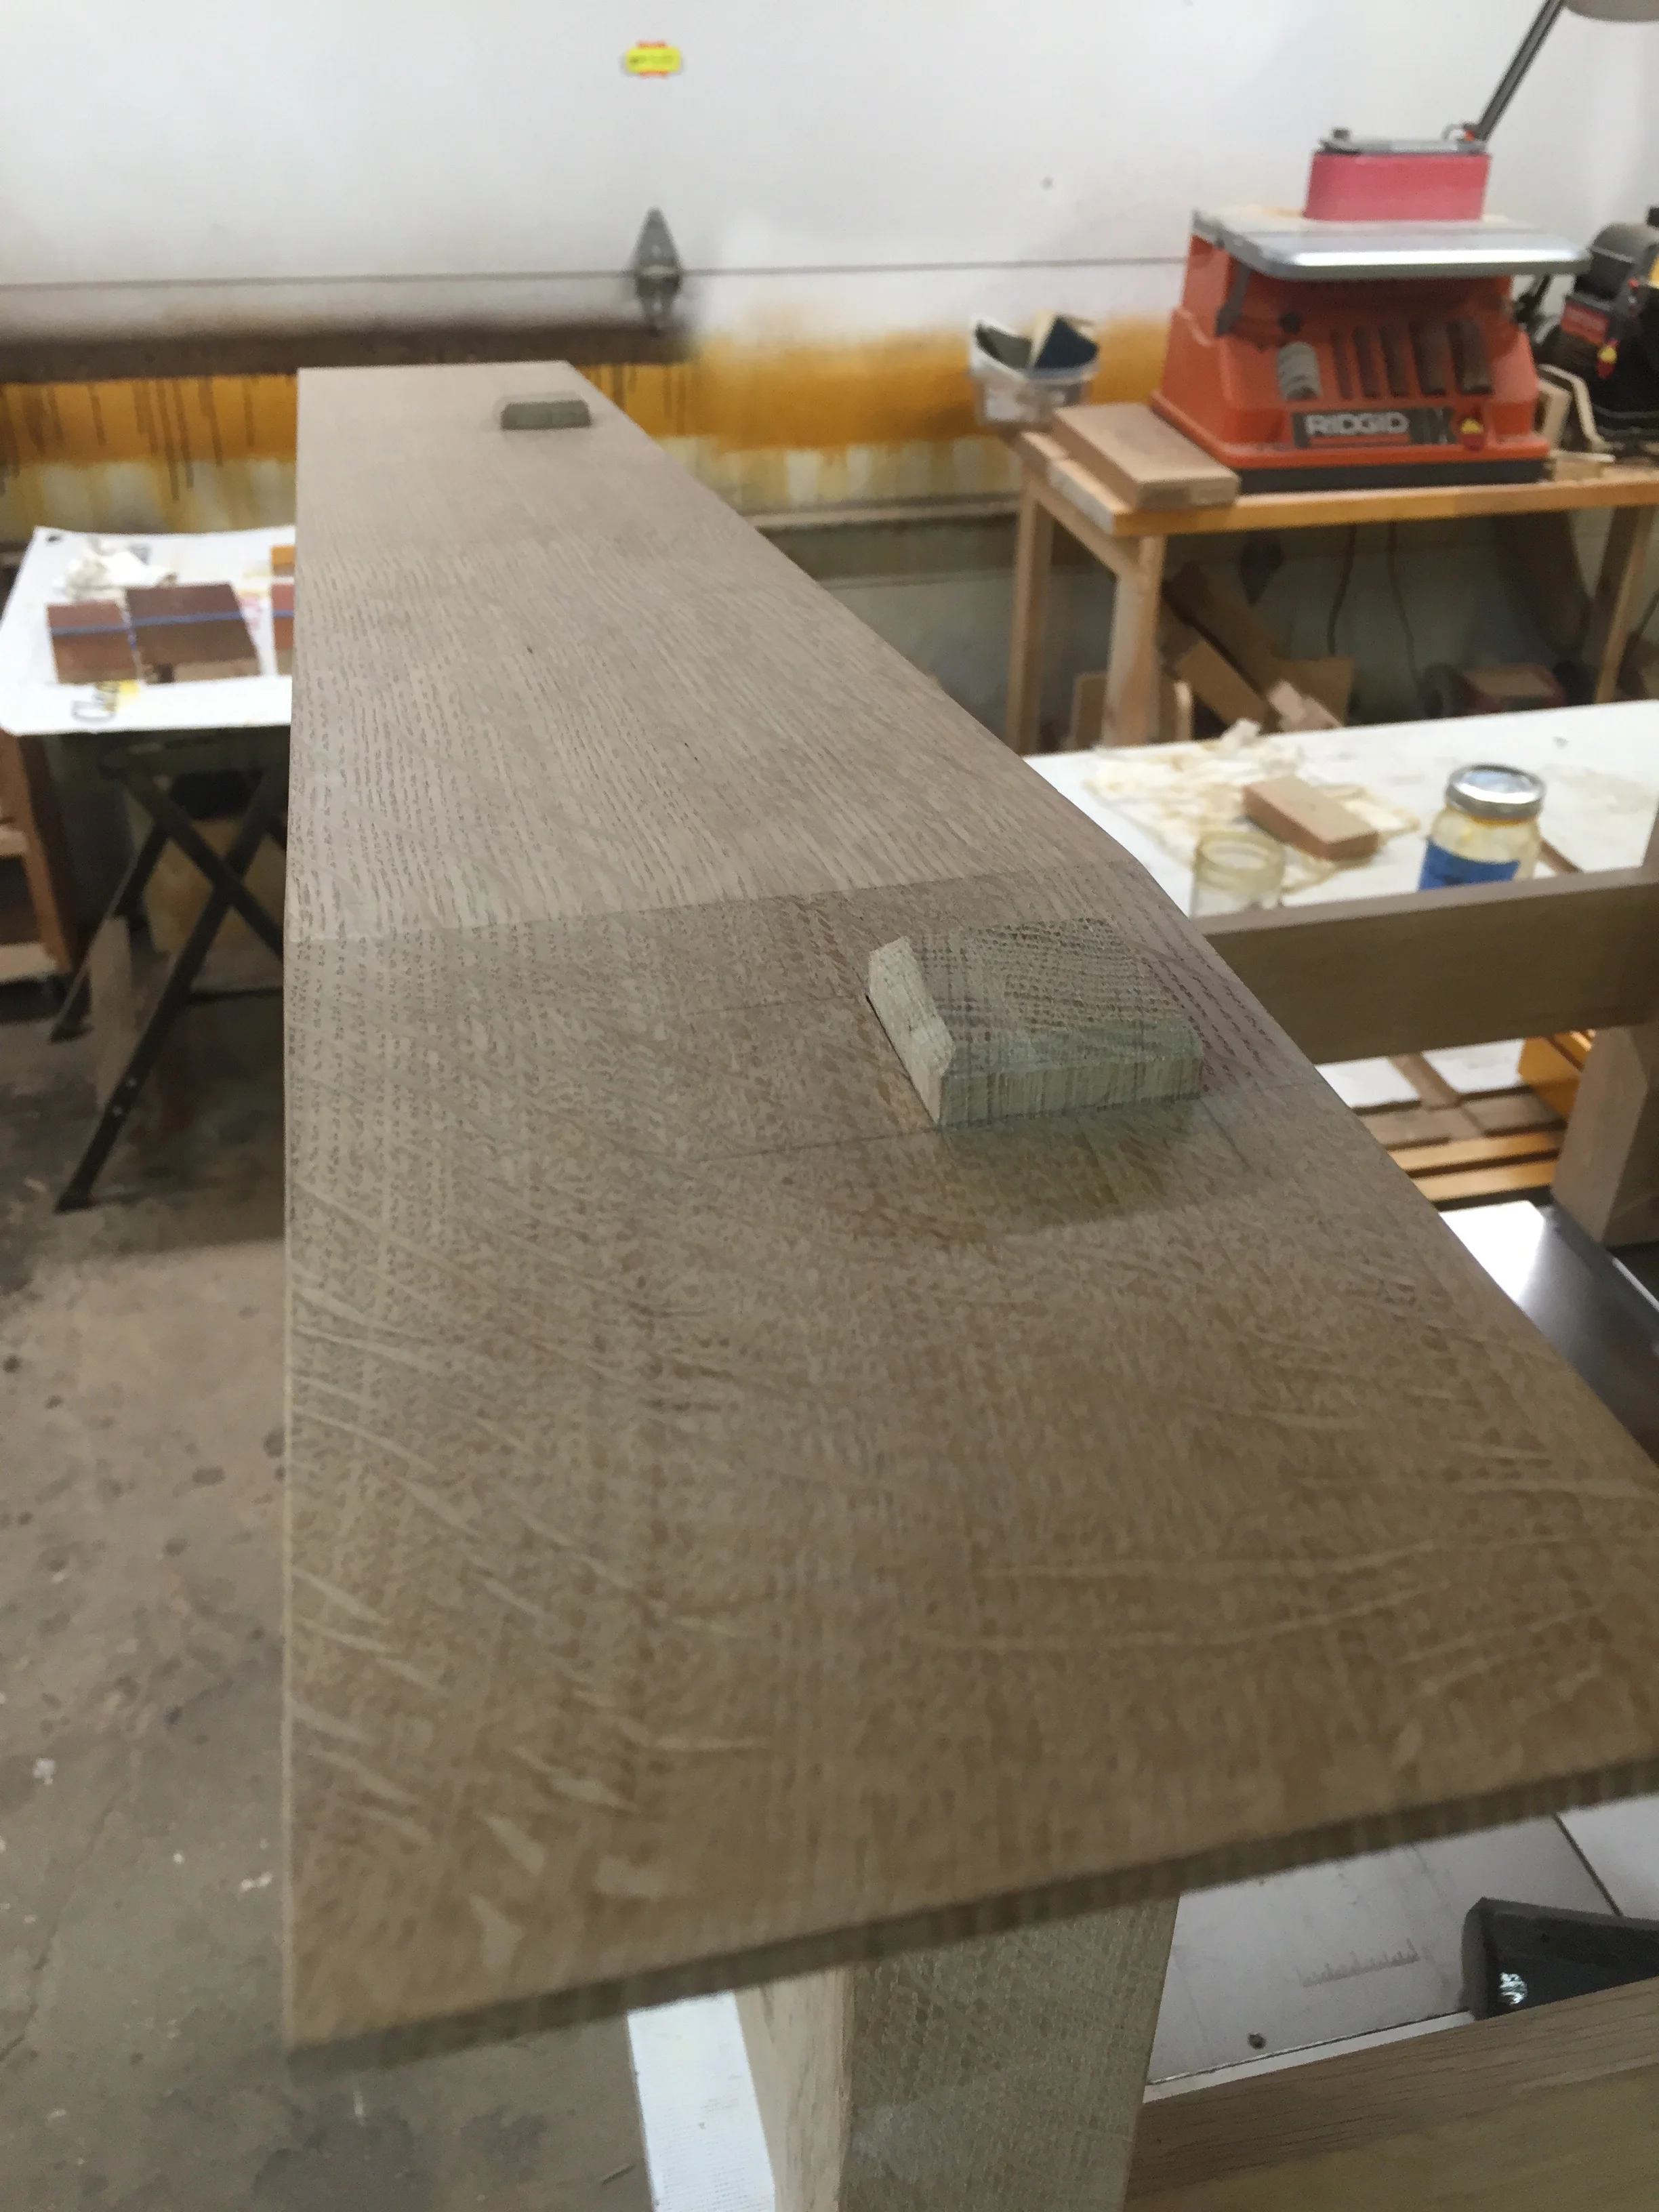
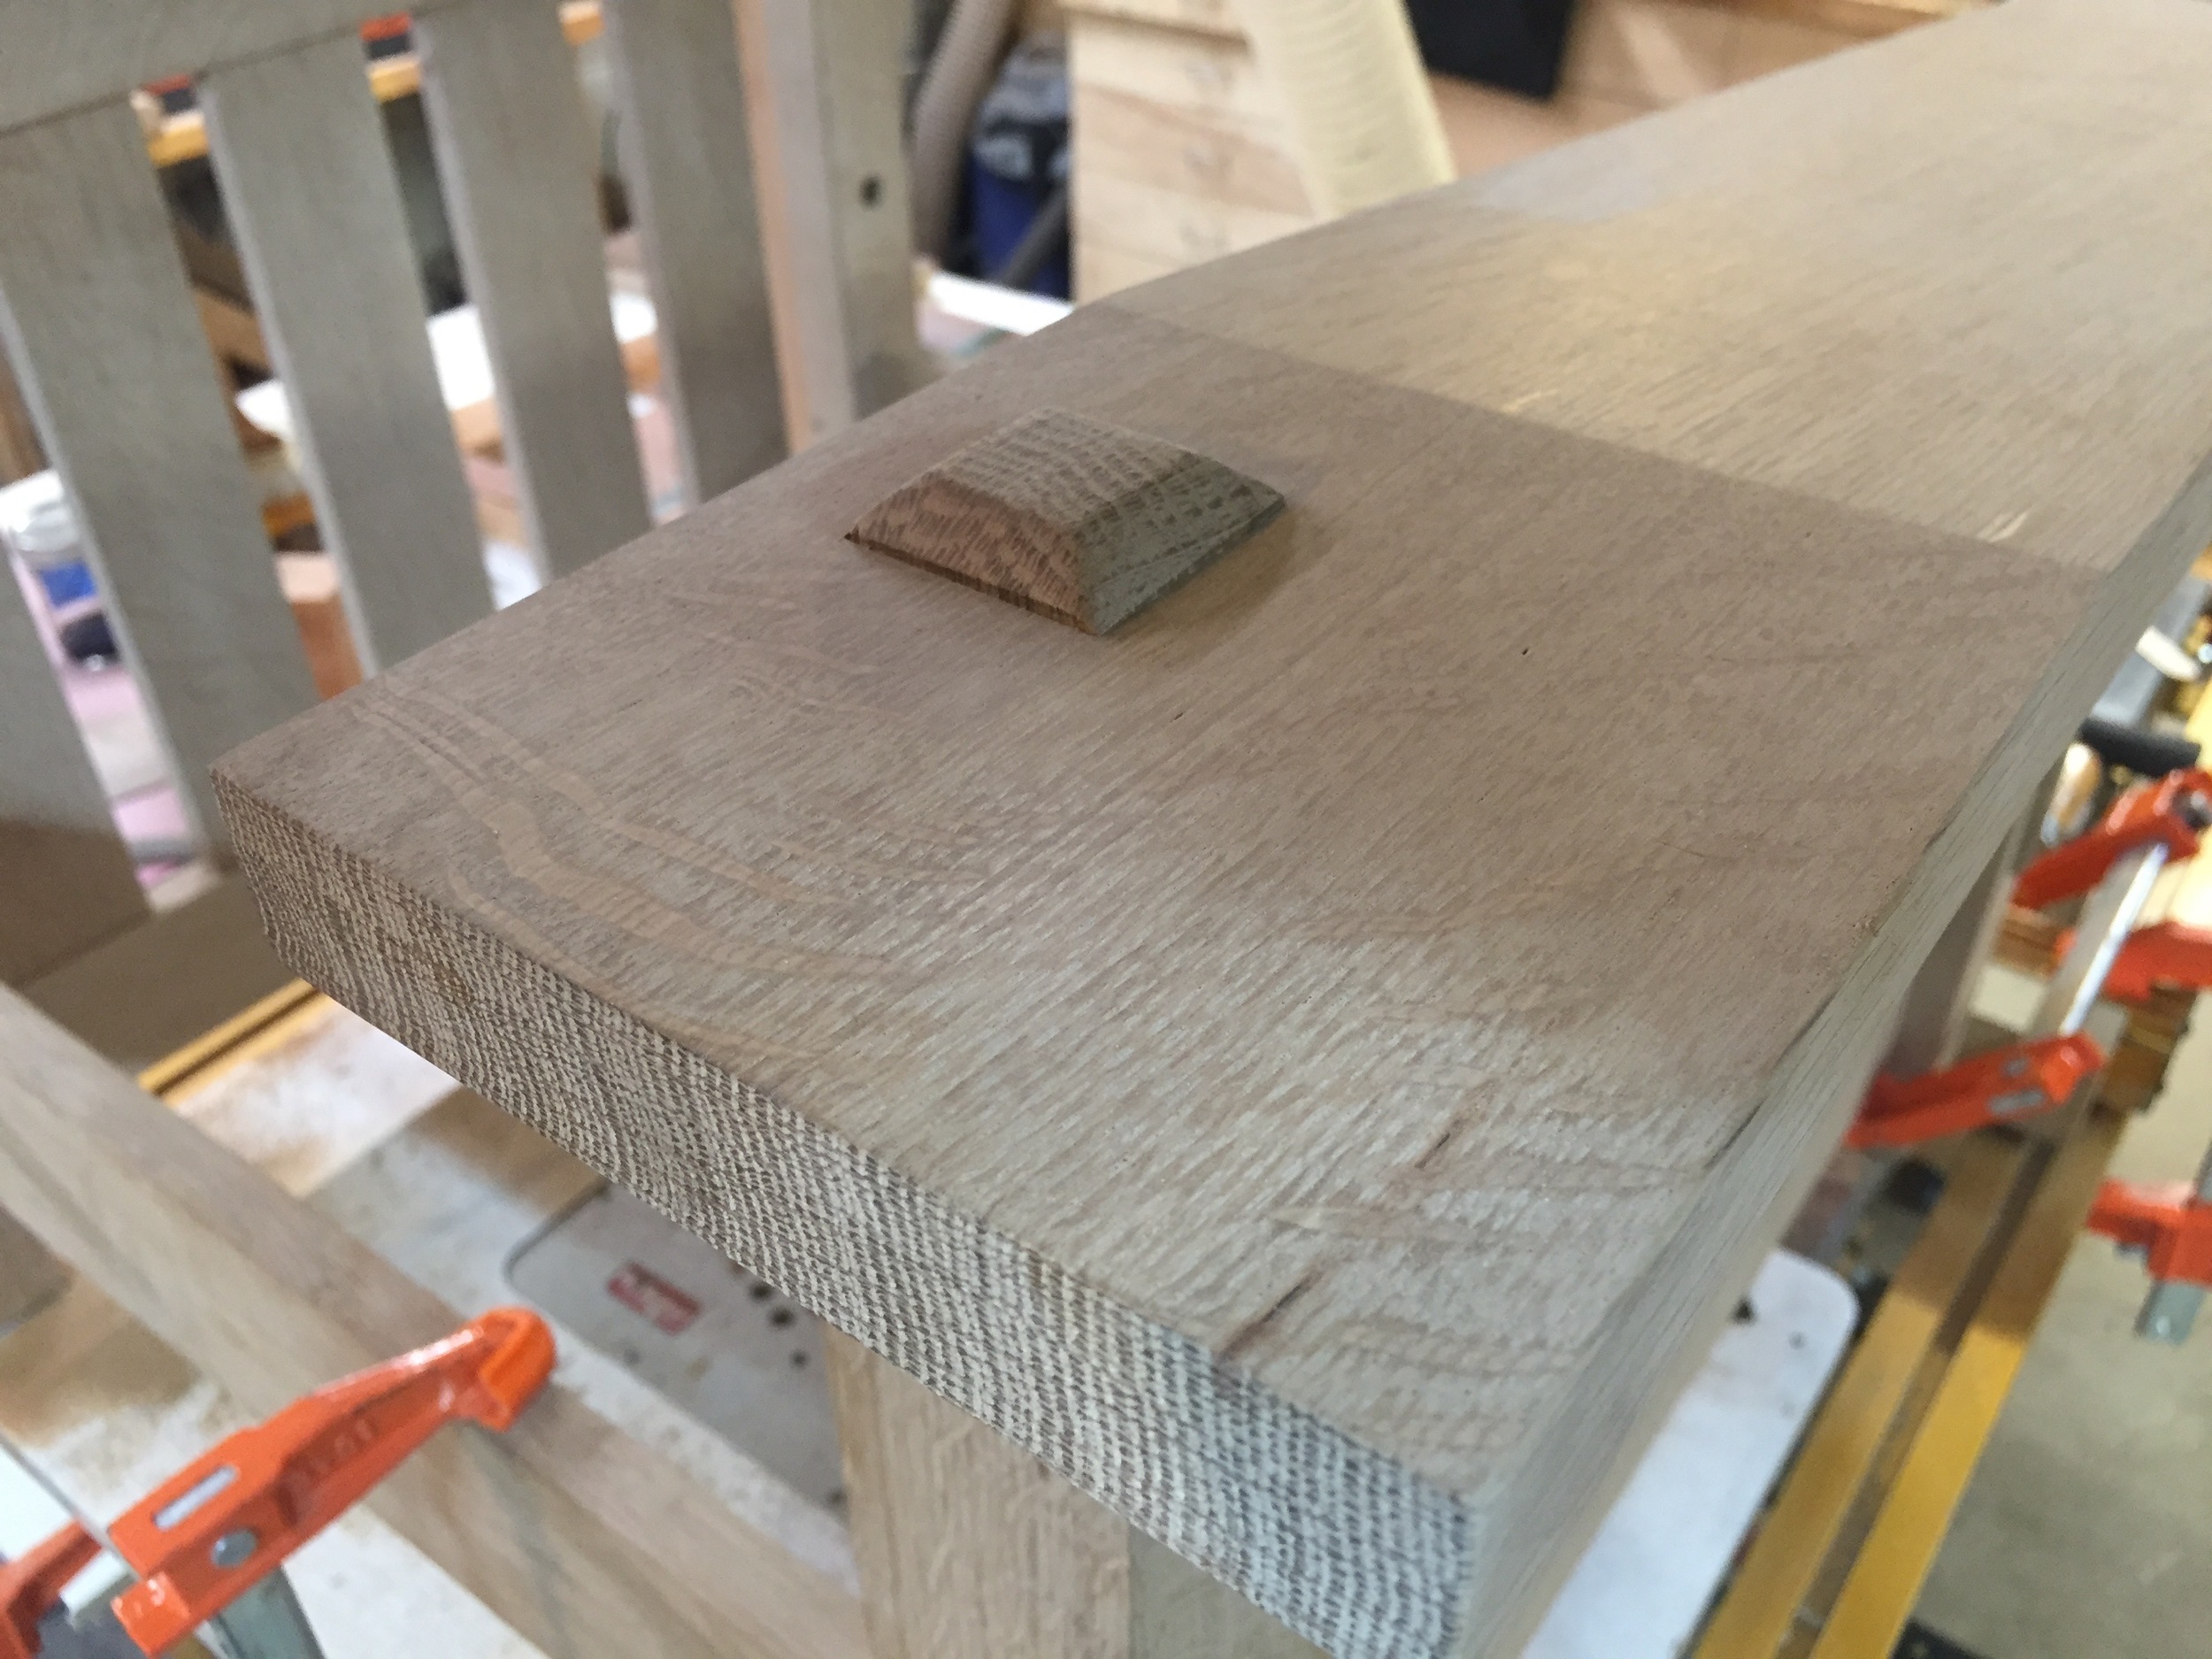
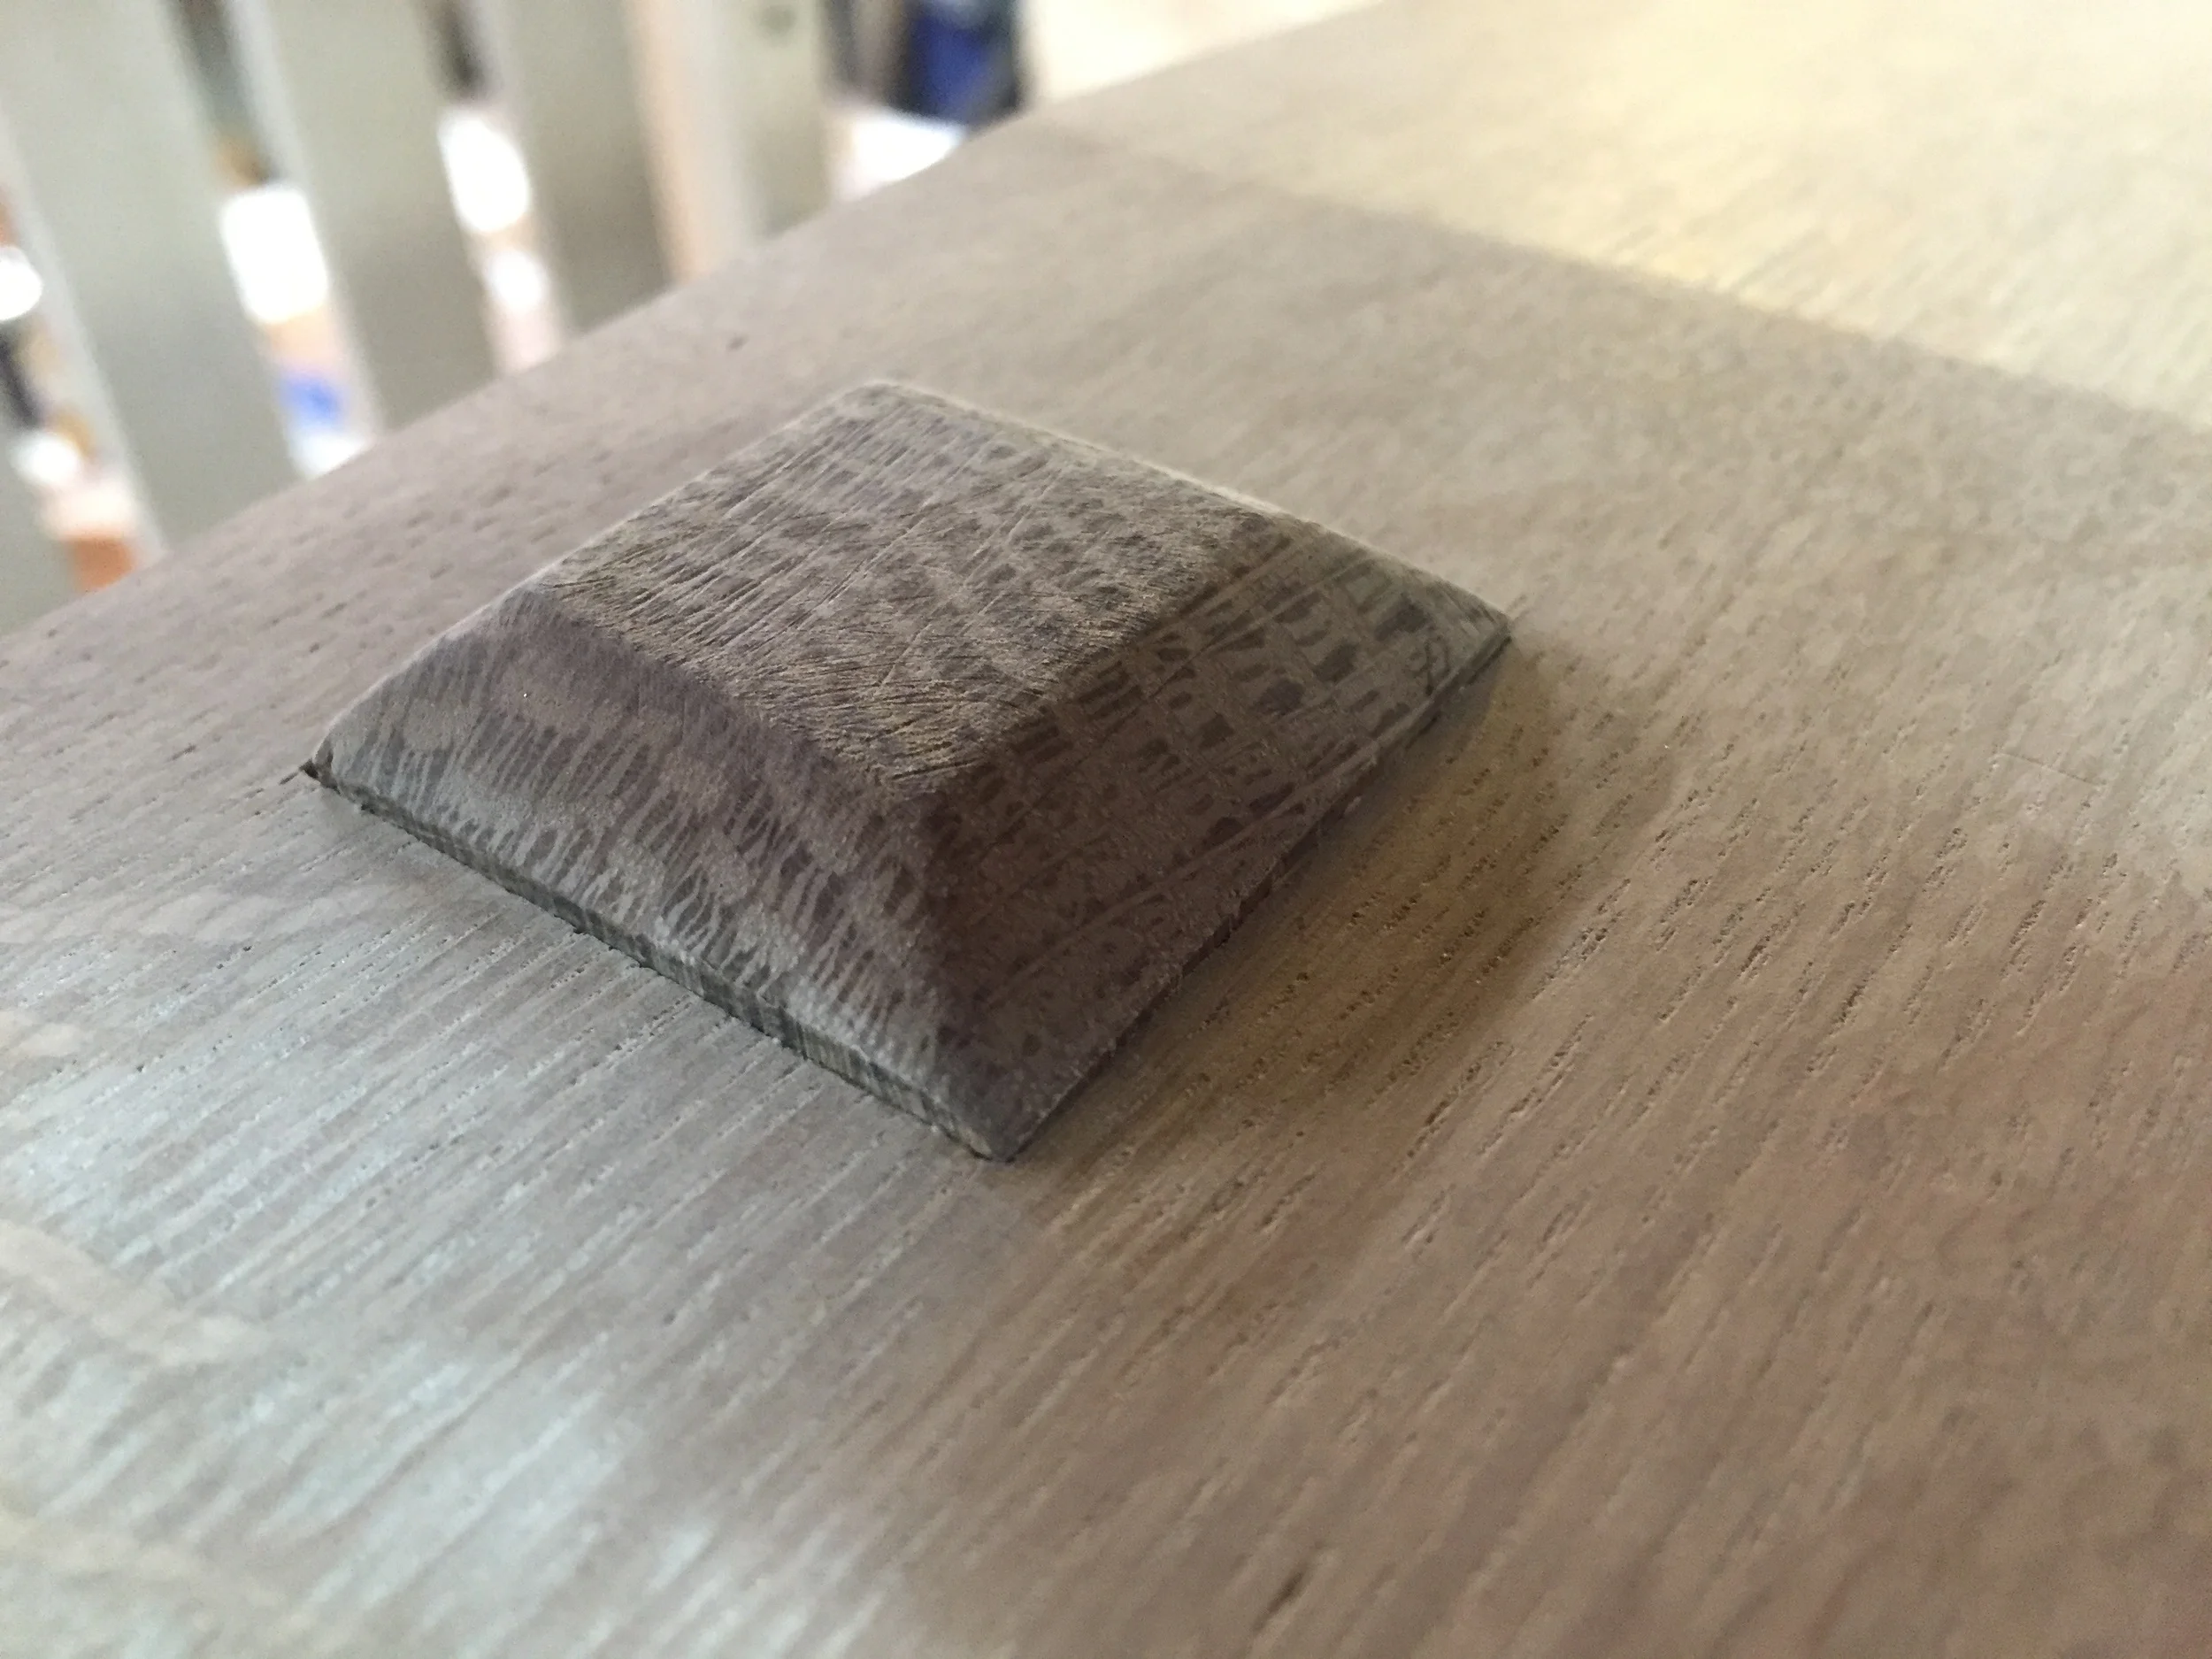
The arms need through mortises cut to fit the tenons on the side assemblies, one is straight, and the other is angled. These have to be snug, and very clean on the top where they are not only visible, but a focus detail. People who sit in the chair look at and feel these through tenons, looking at how they stick up from the arm. This detail says a lot about how the chair is made, and is a great example of how the Craftsman style's exposed joinery really works to communicate the design and feel of the piece. A lot of trial and error is required to sneak up on the fit. In the gallery below, you'll see an image of a mortise where there's a chip taken out of the arm. That was where I had a slip of the chisel. I fixed it by glueing in a sliver of matching material and blending it in. Once fit, the arms are glues to the side assemblies, and the build is two thirds done.

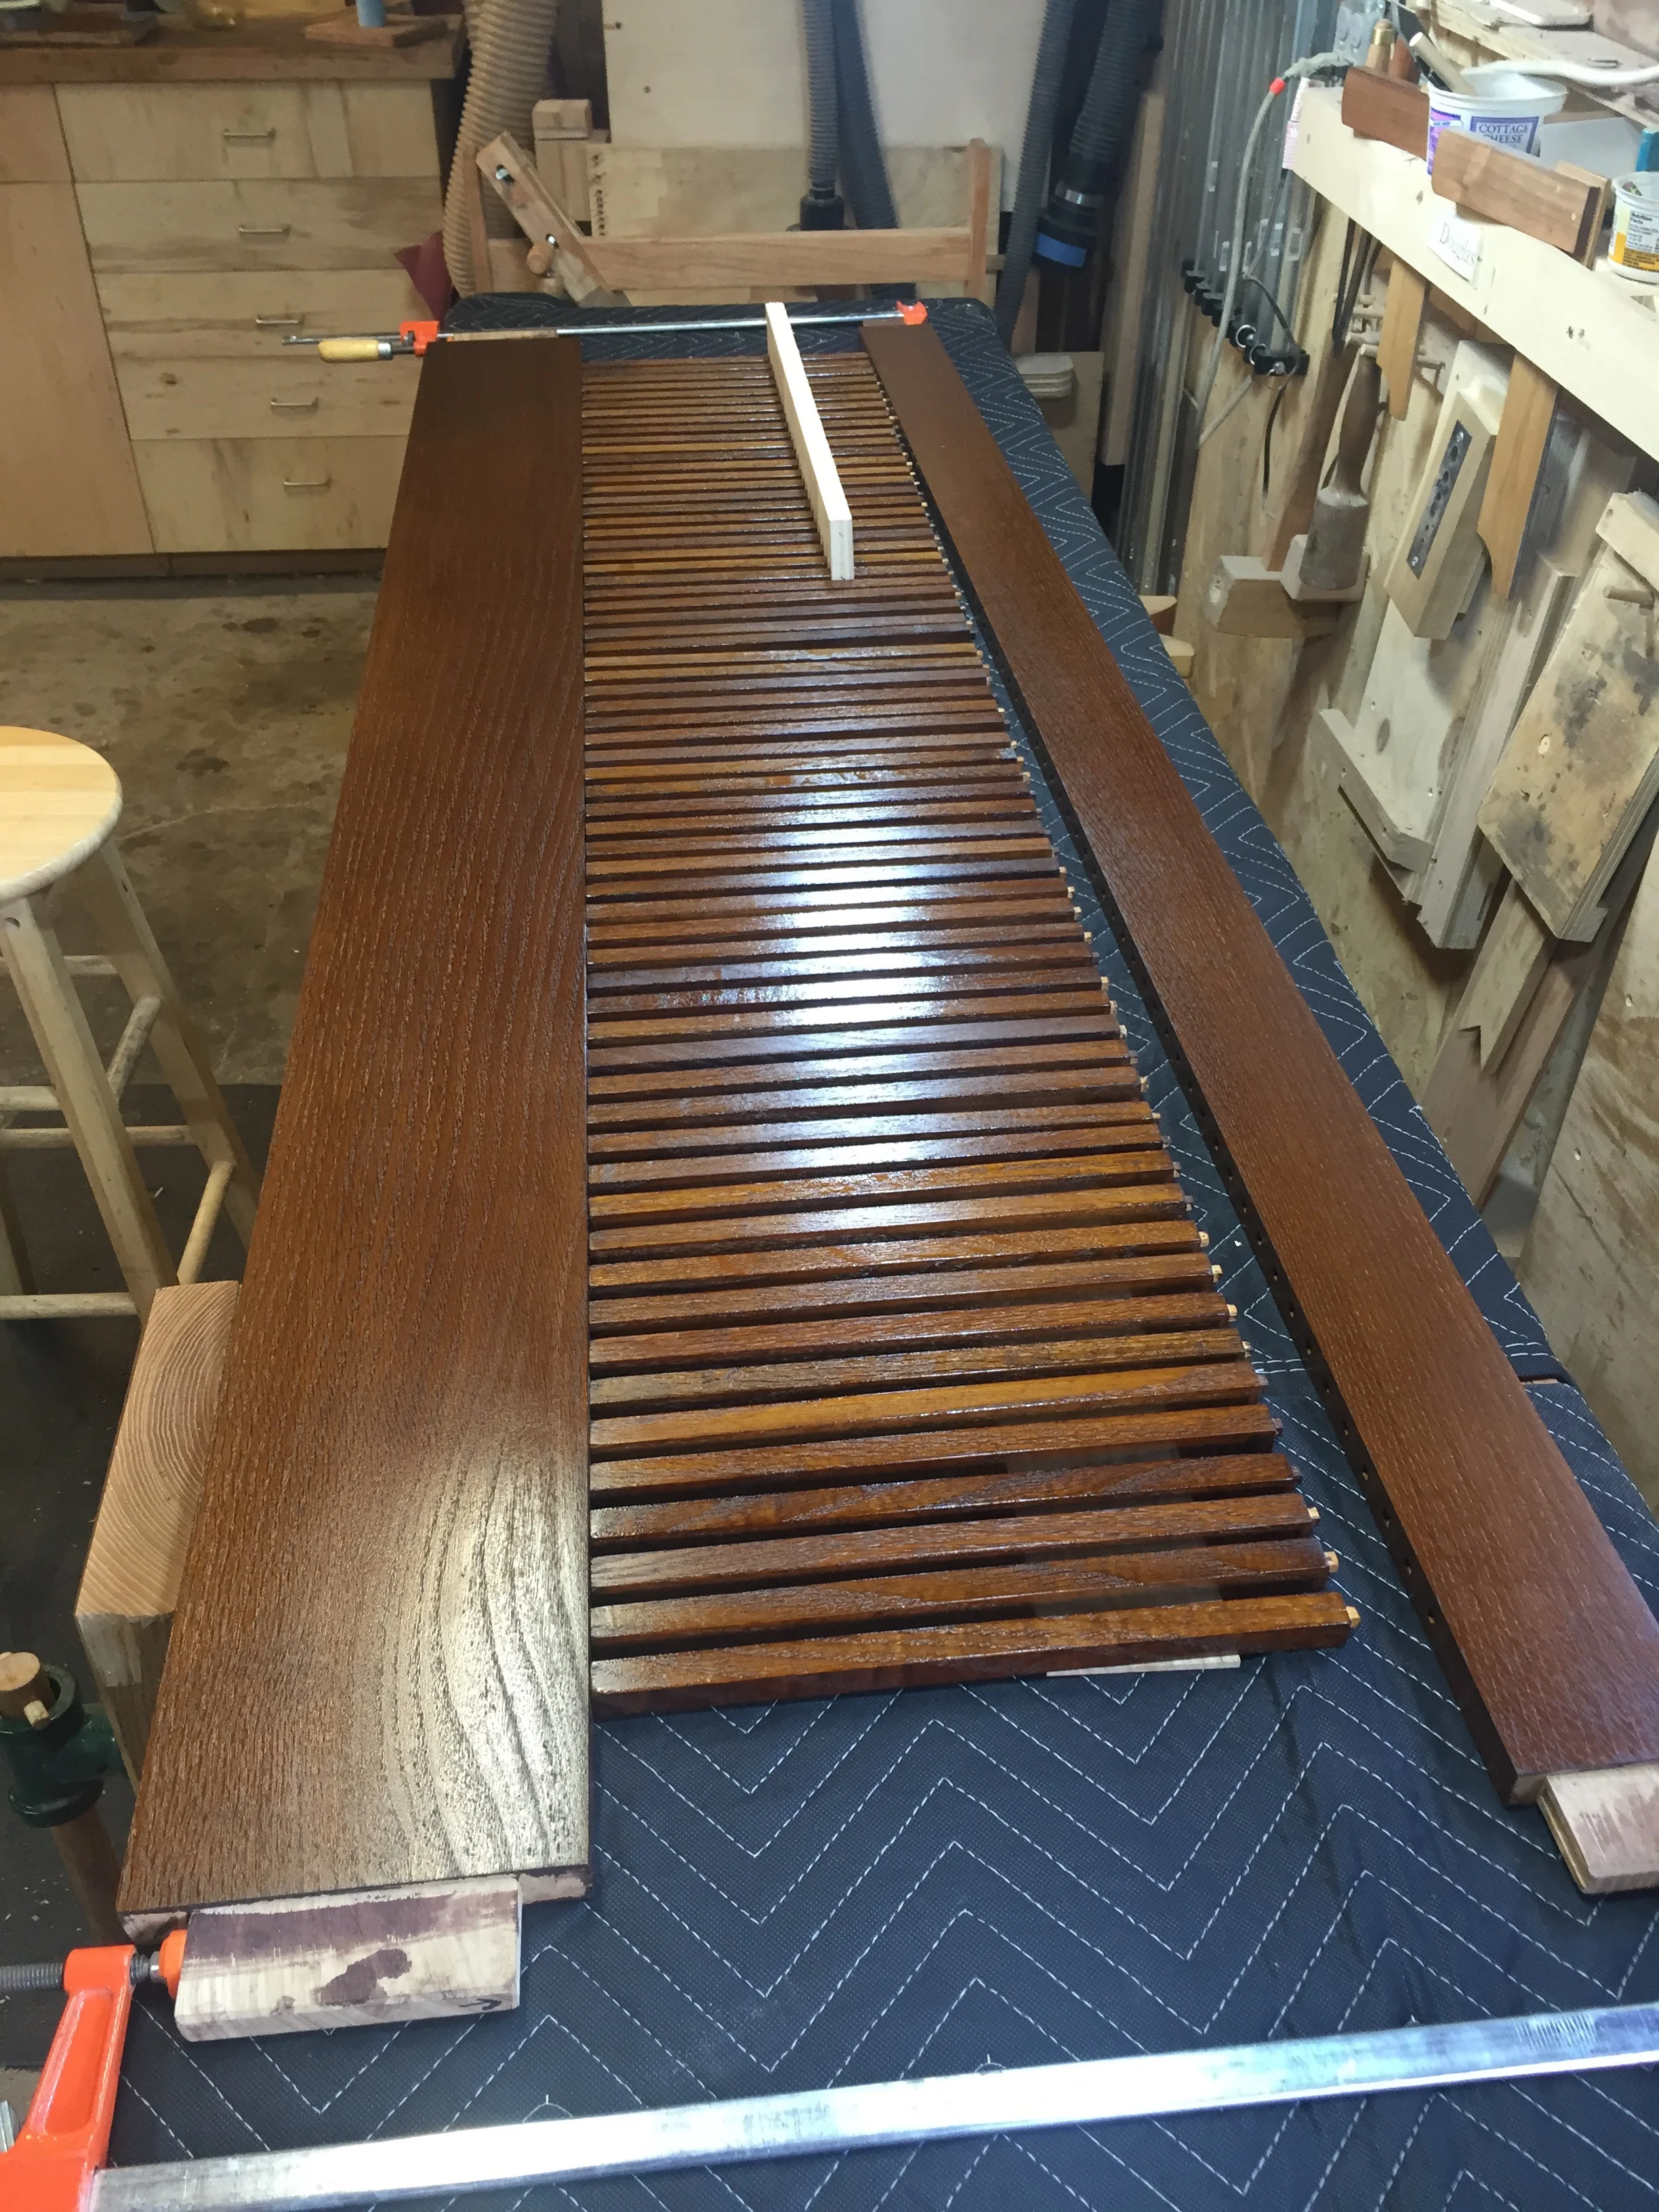
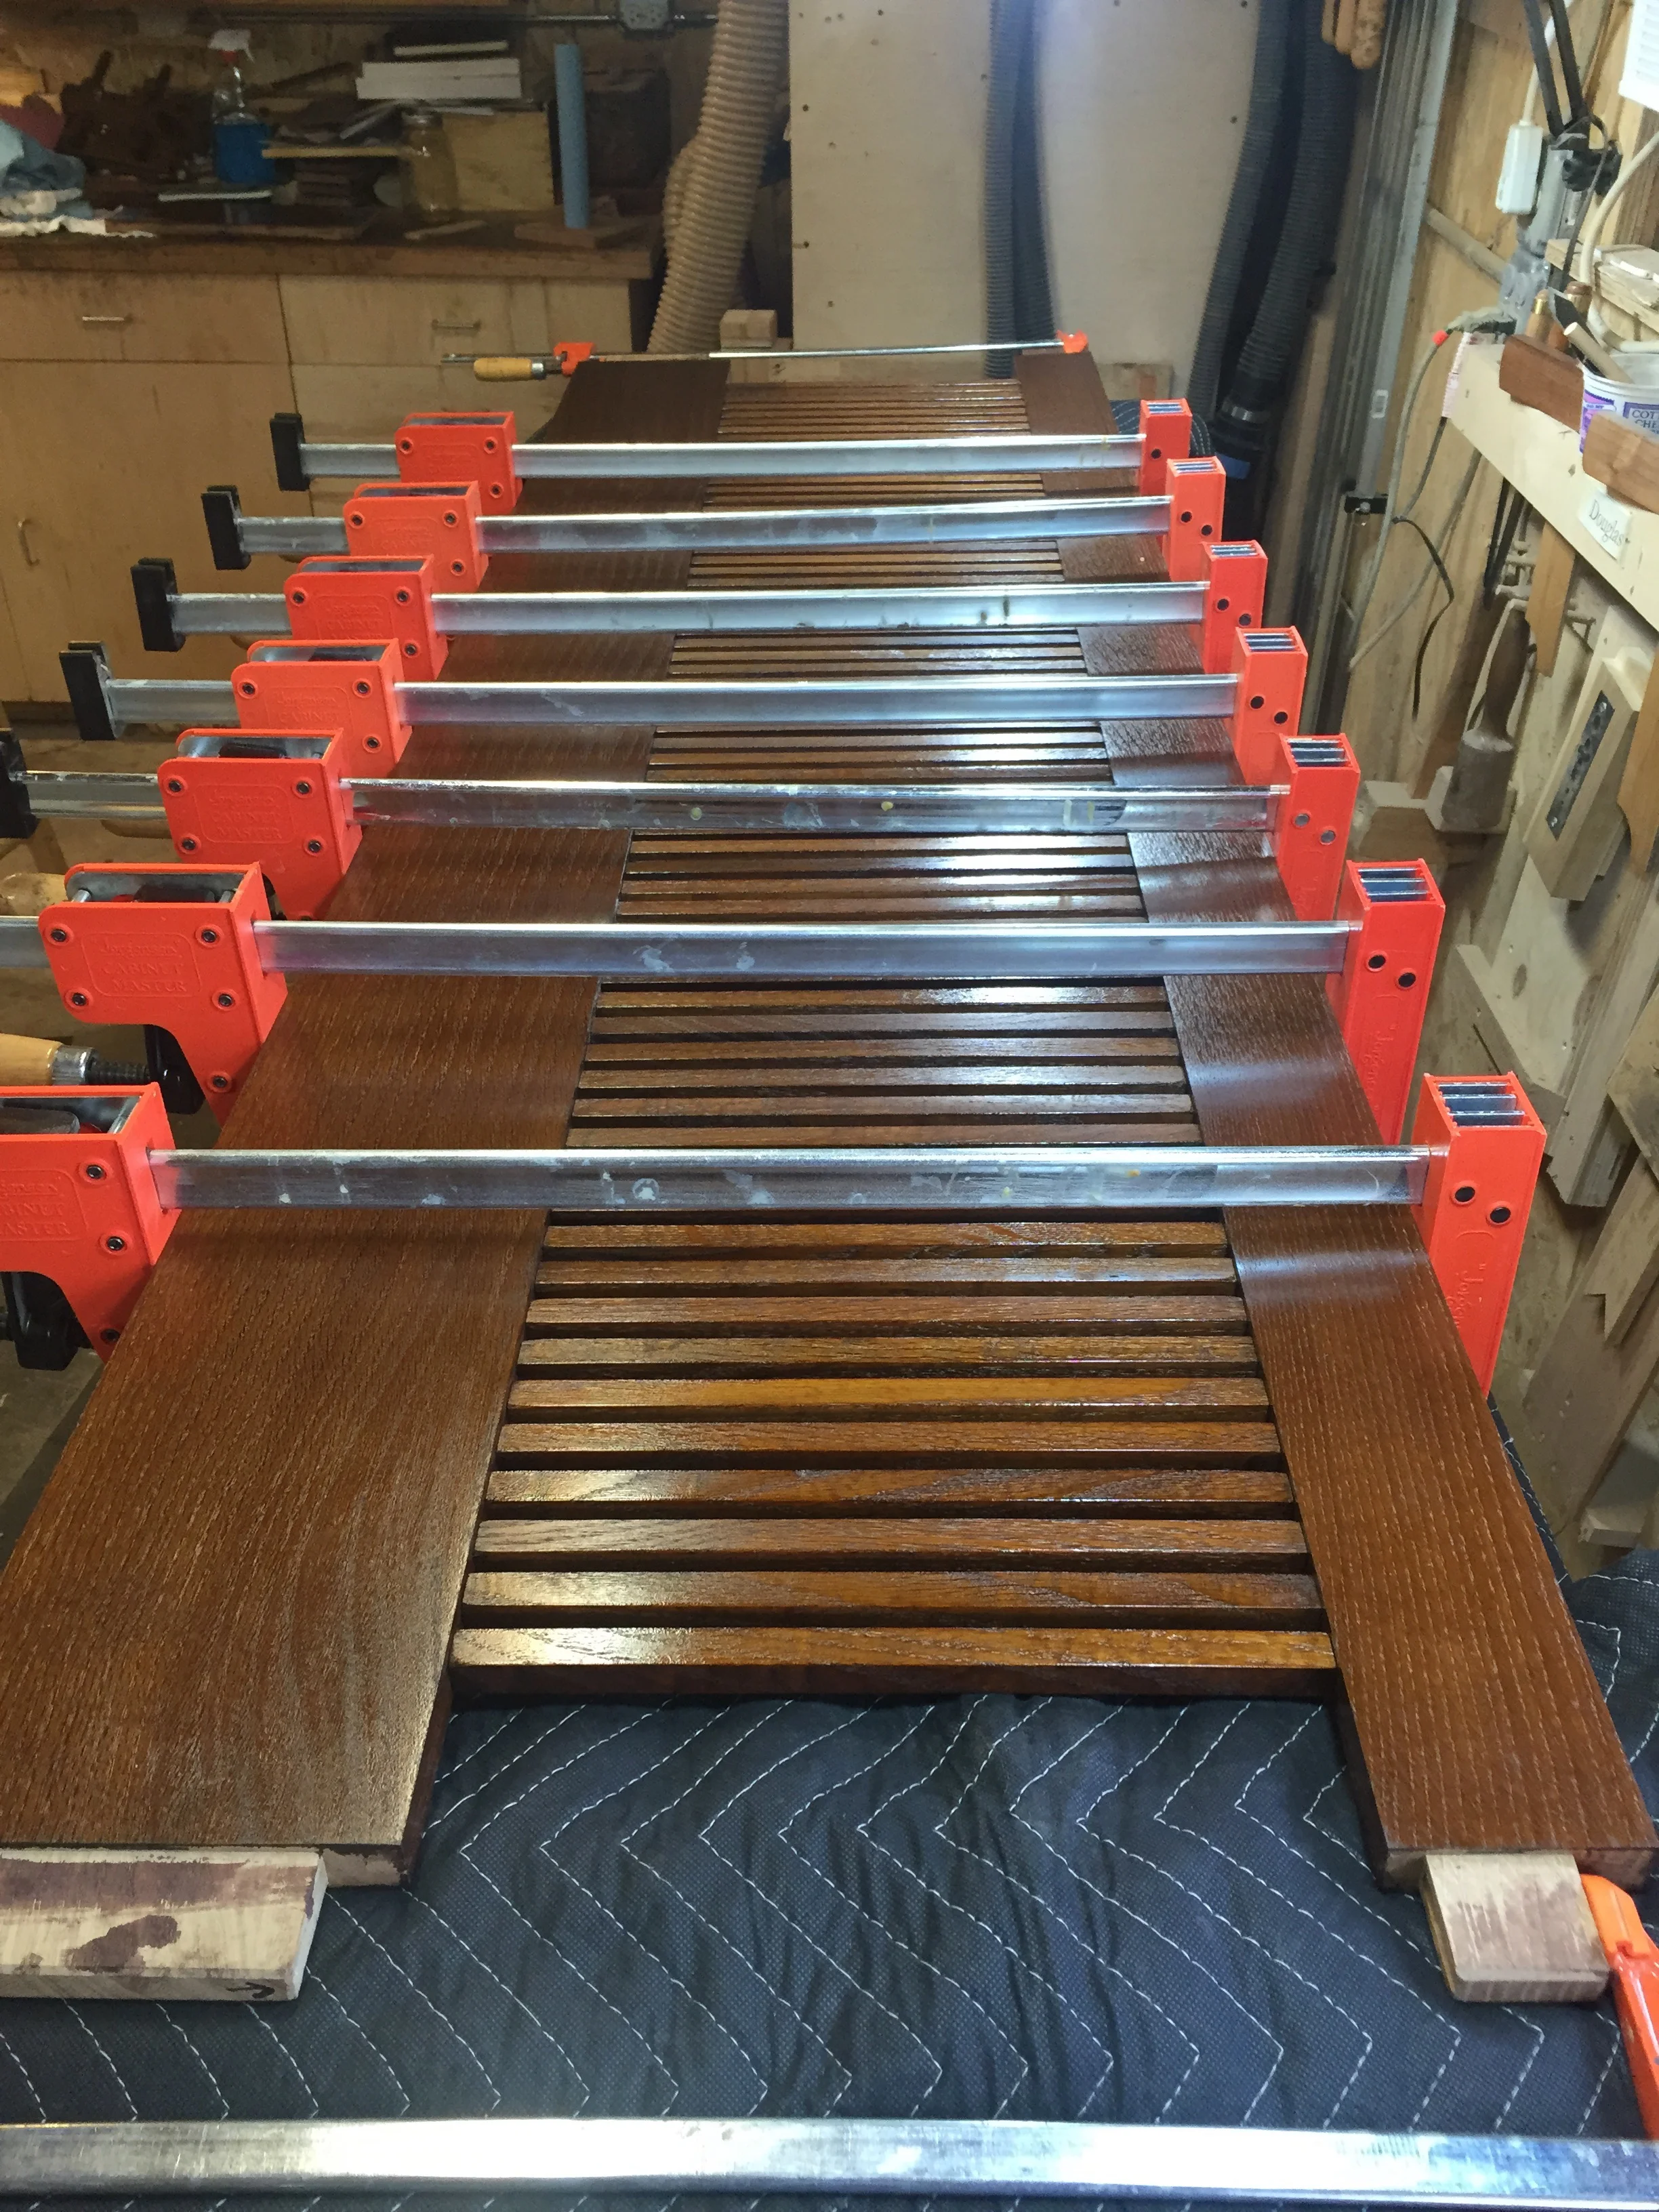
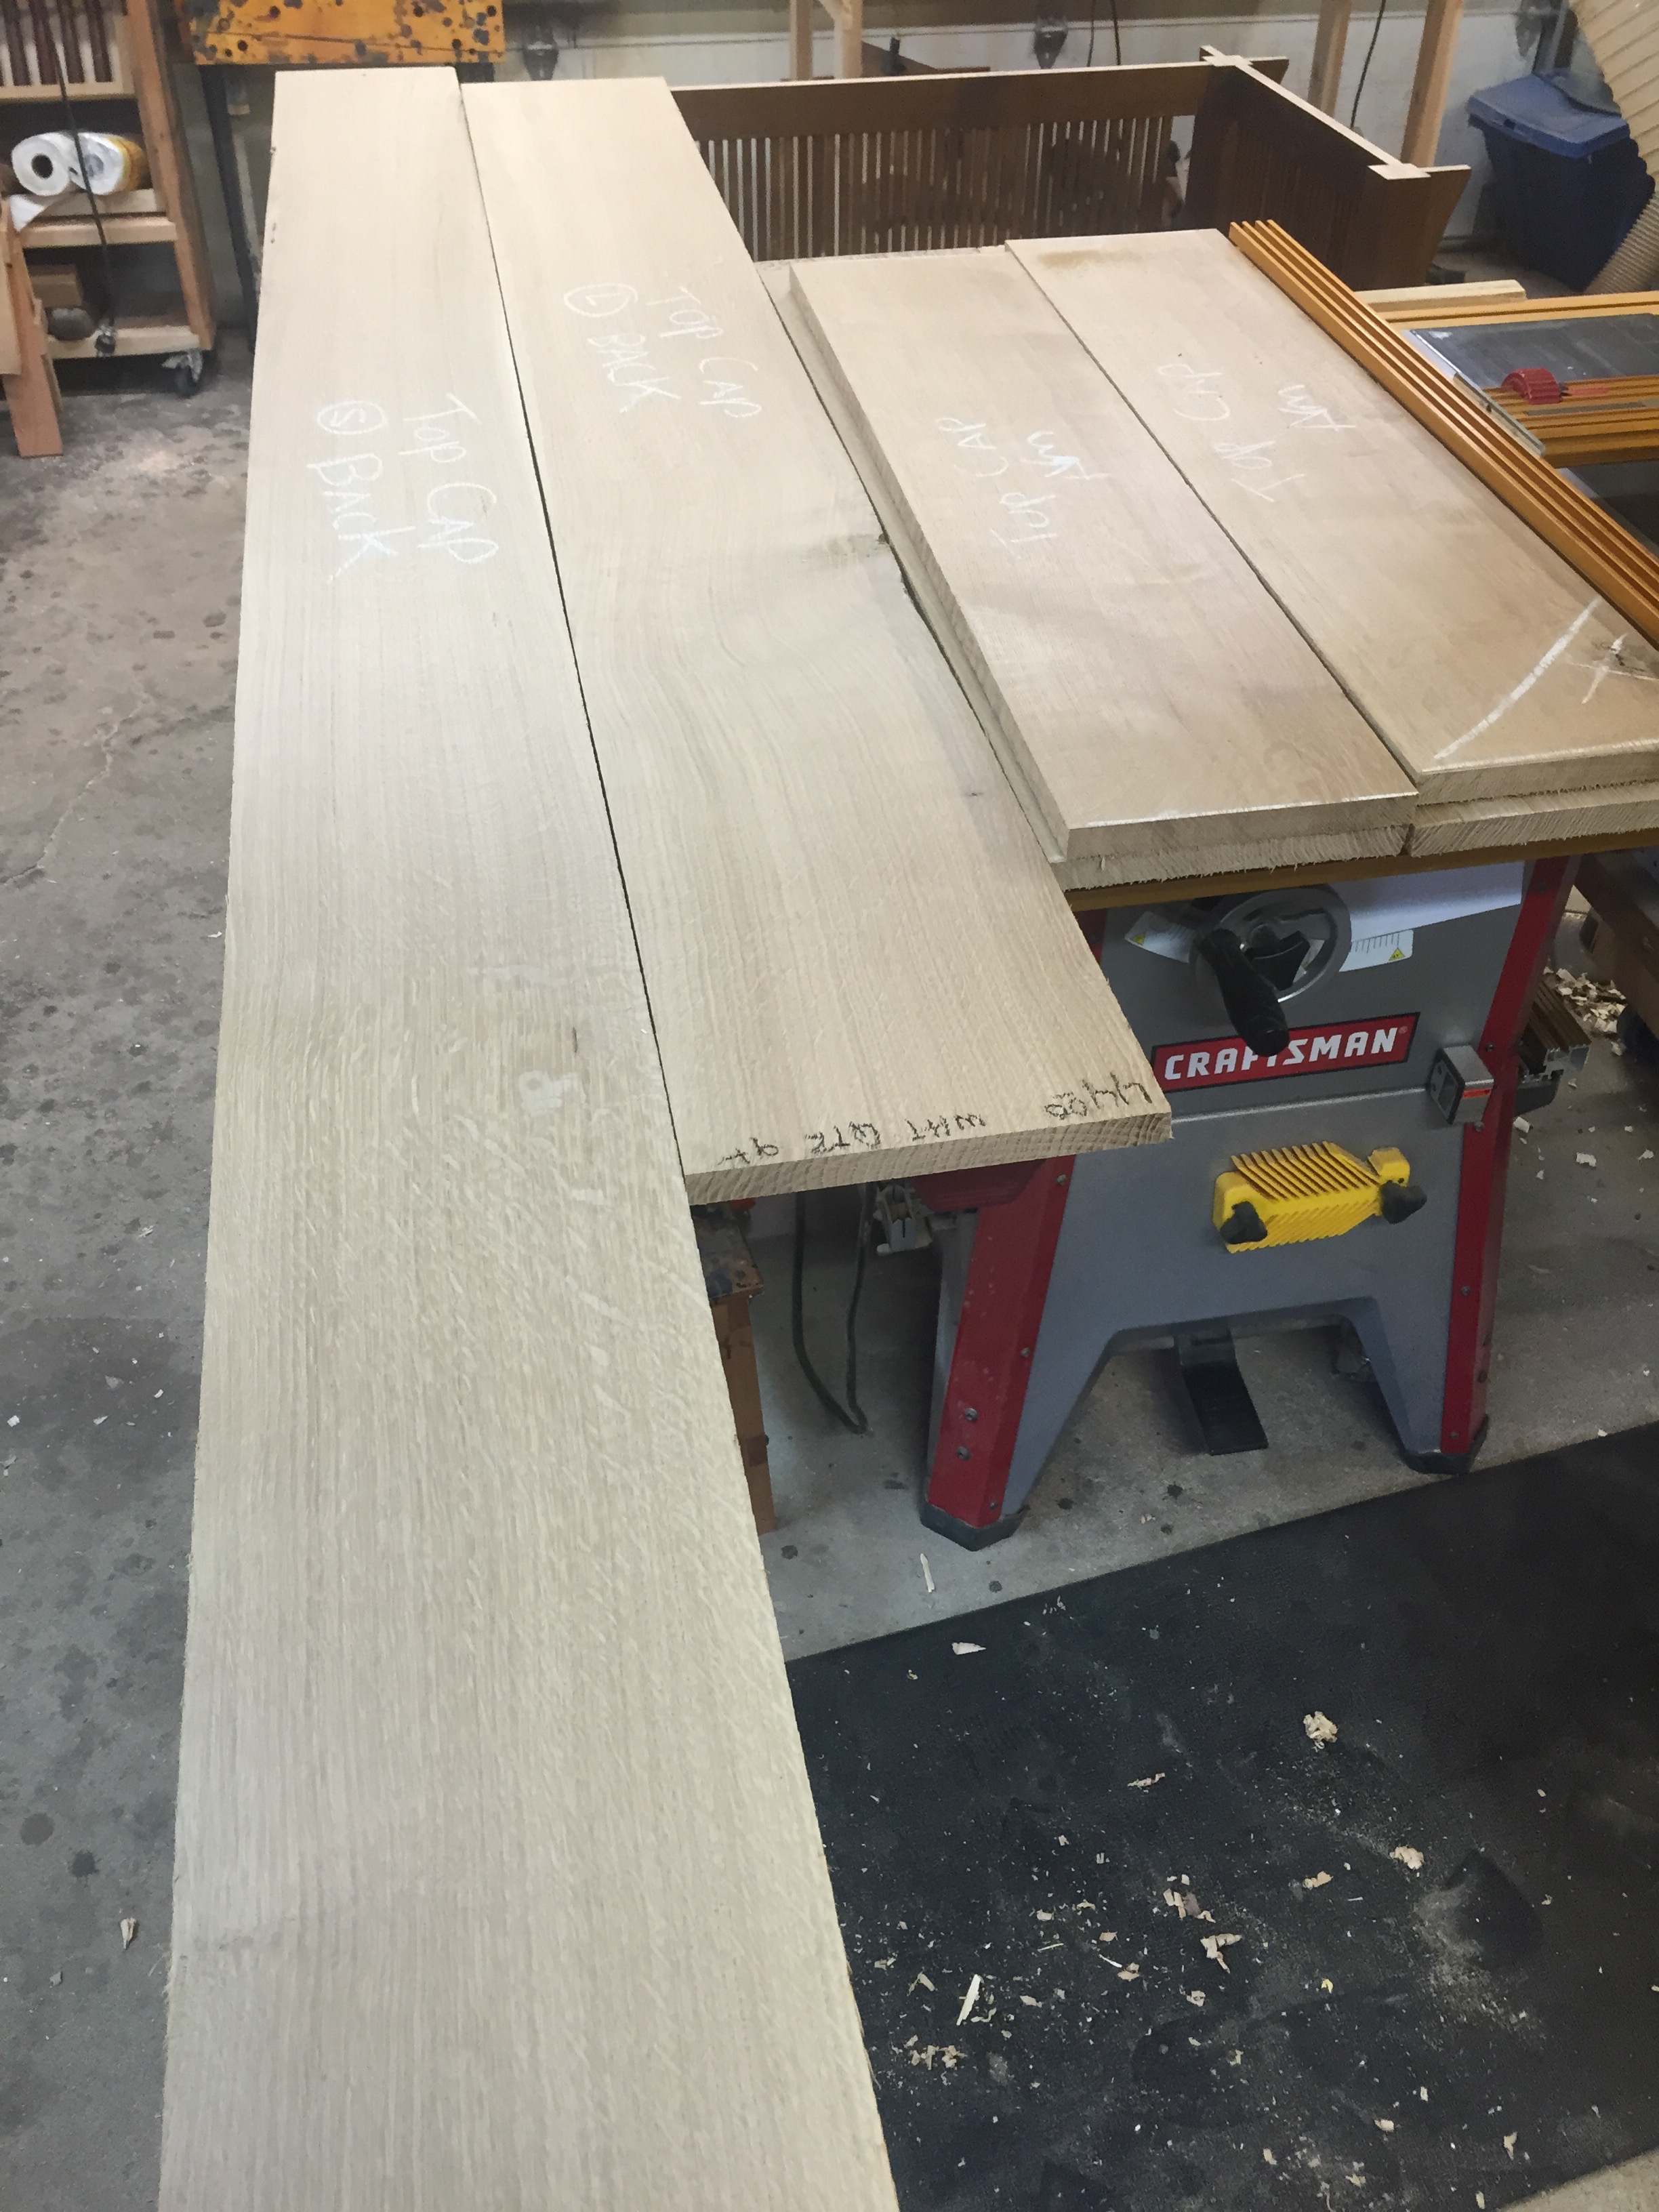
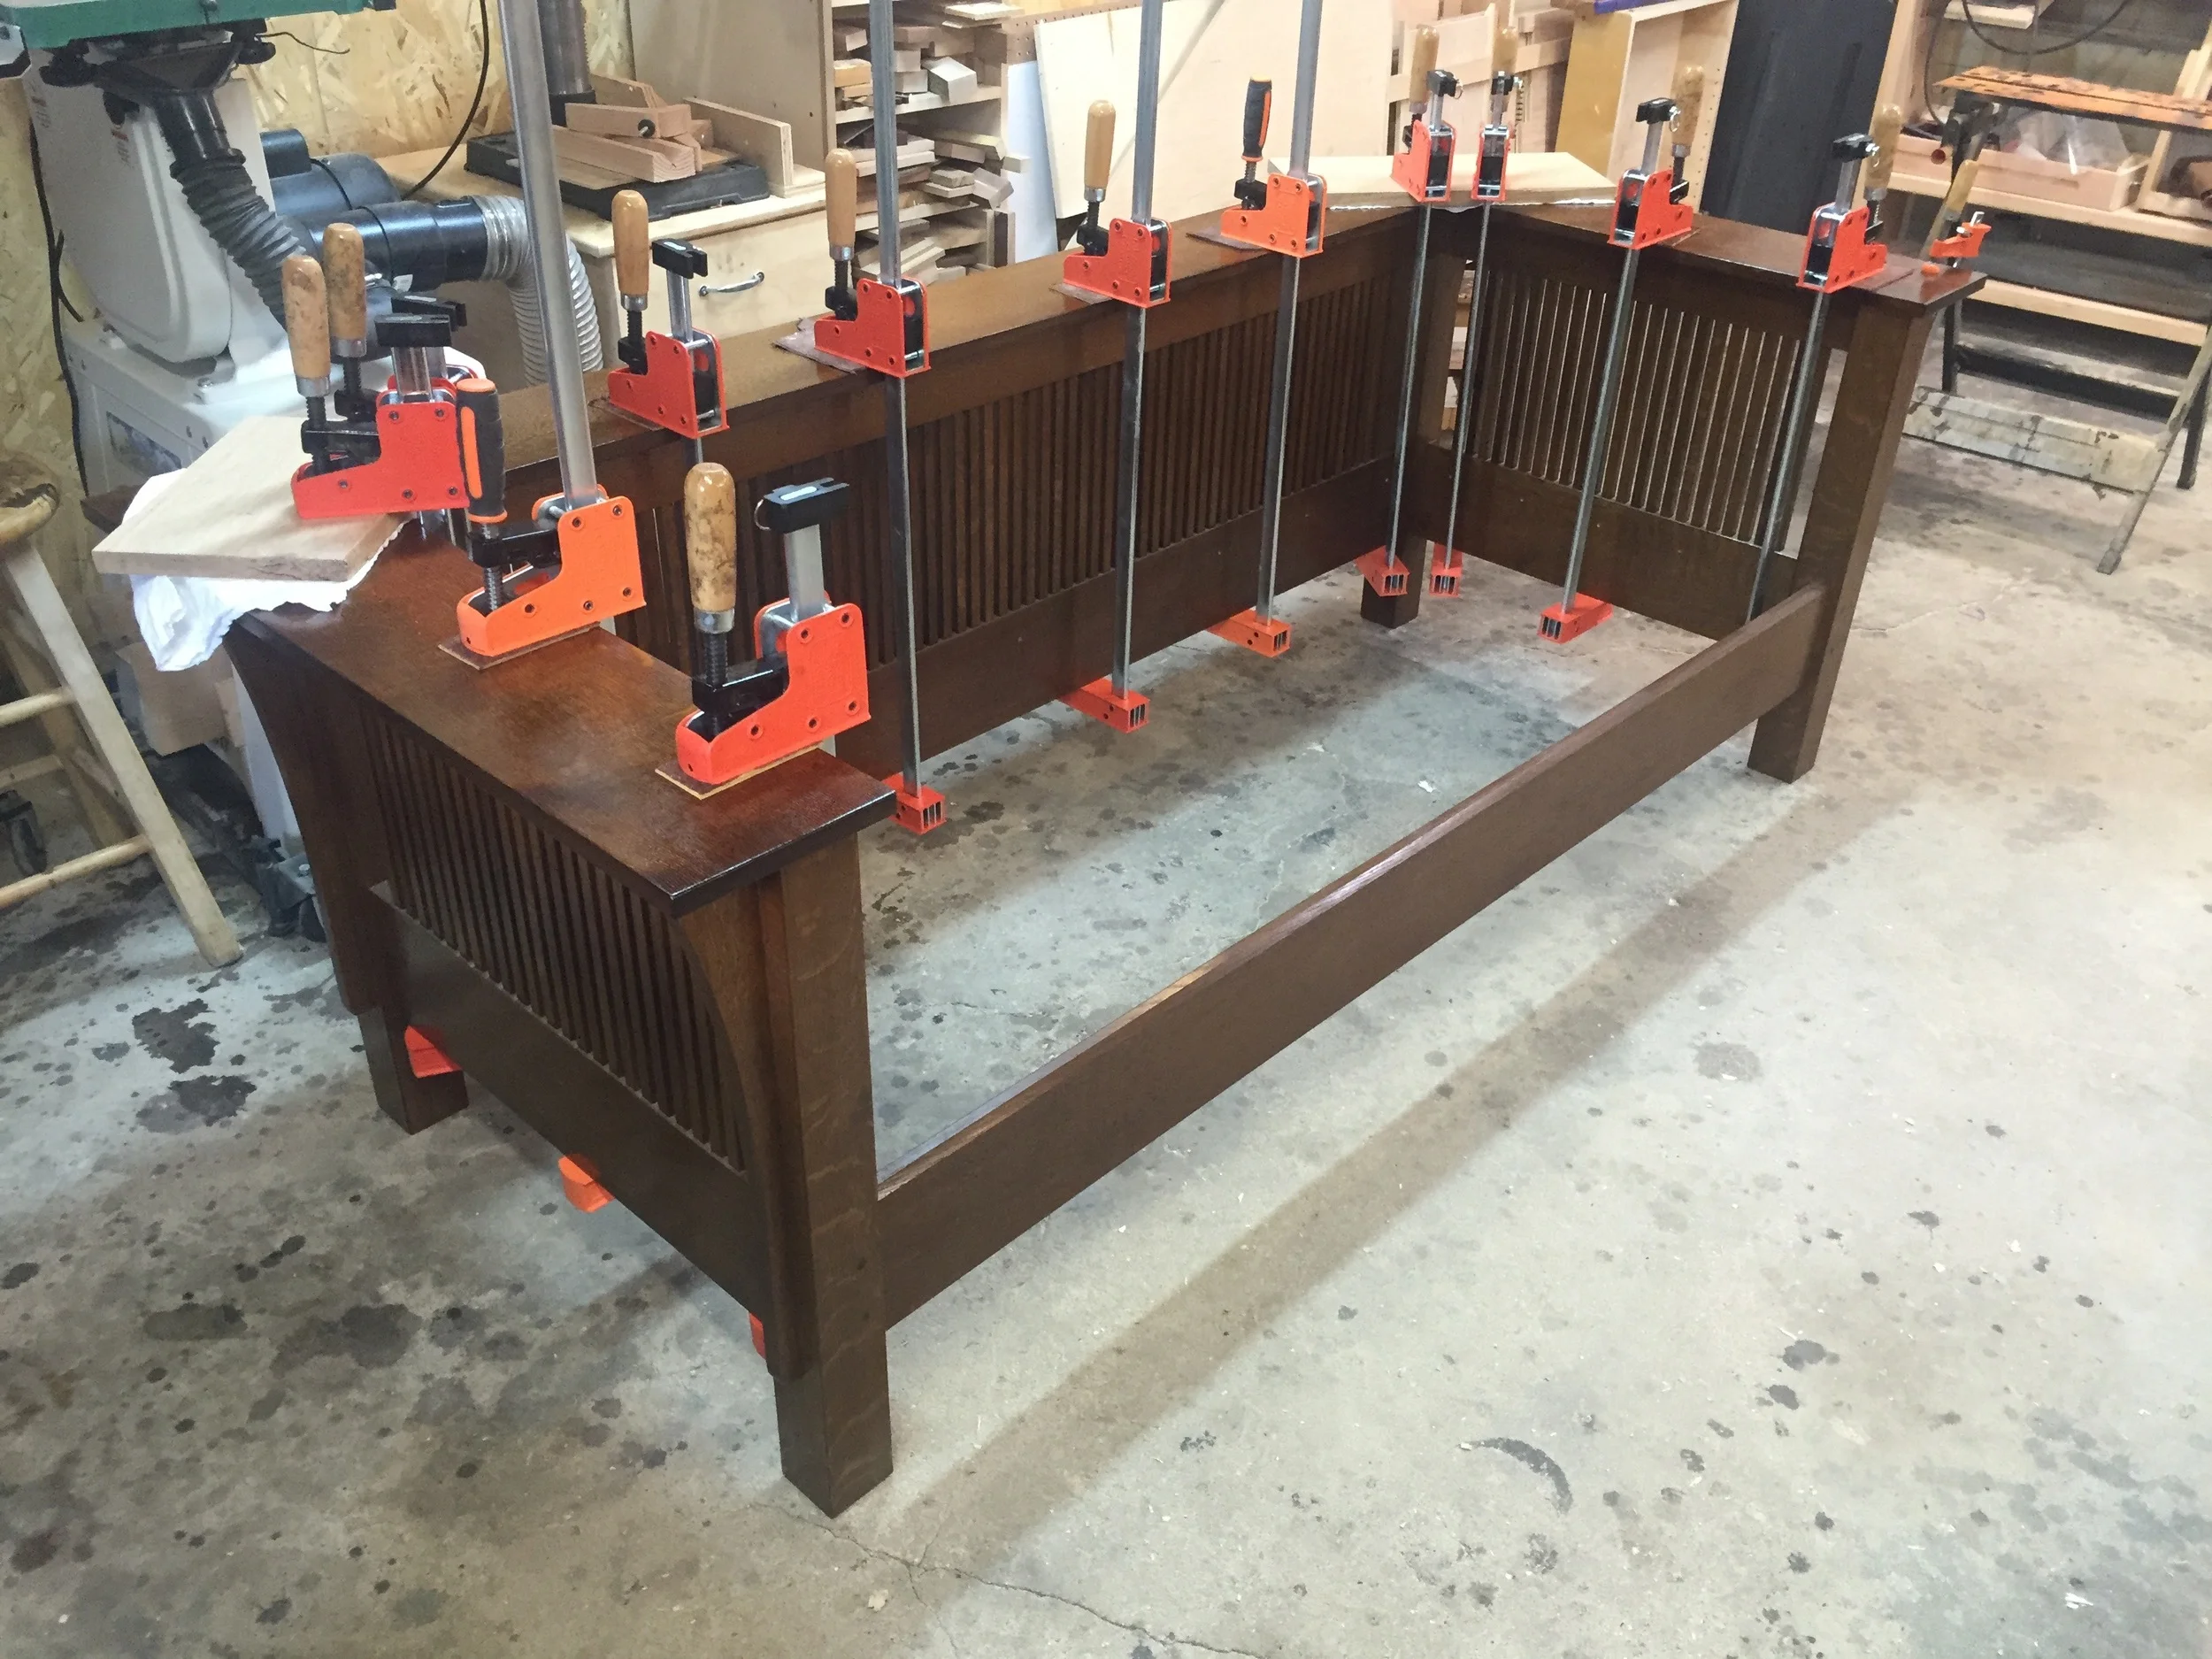
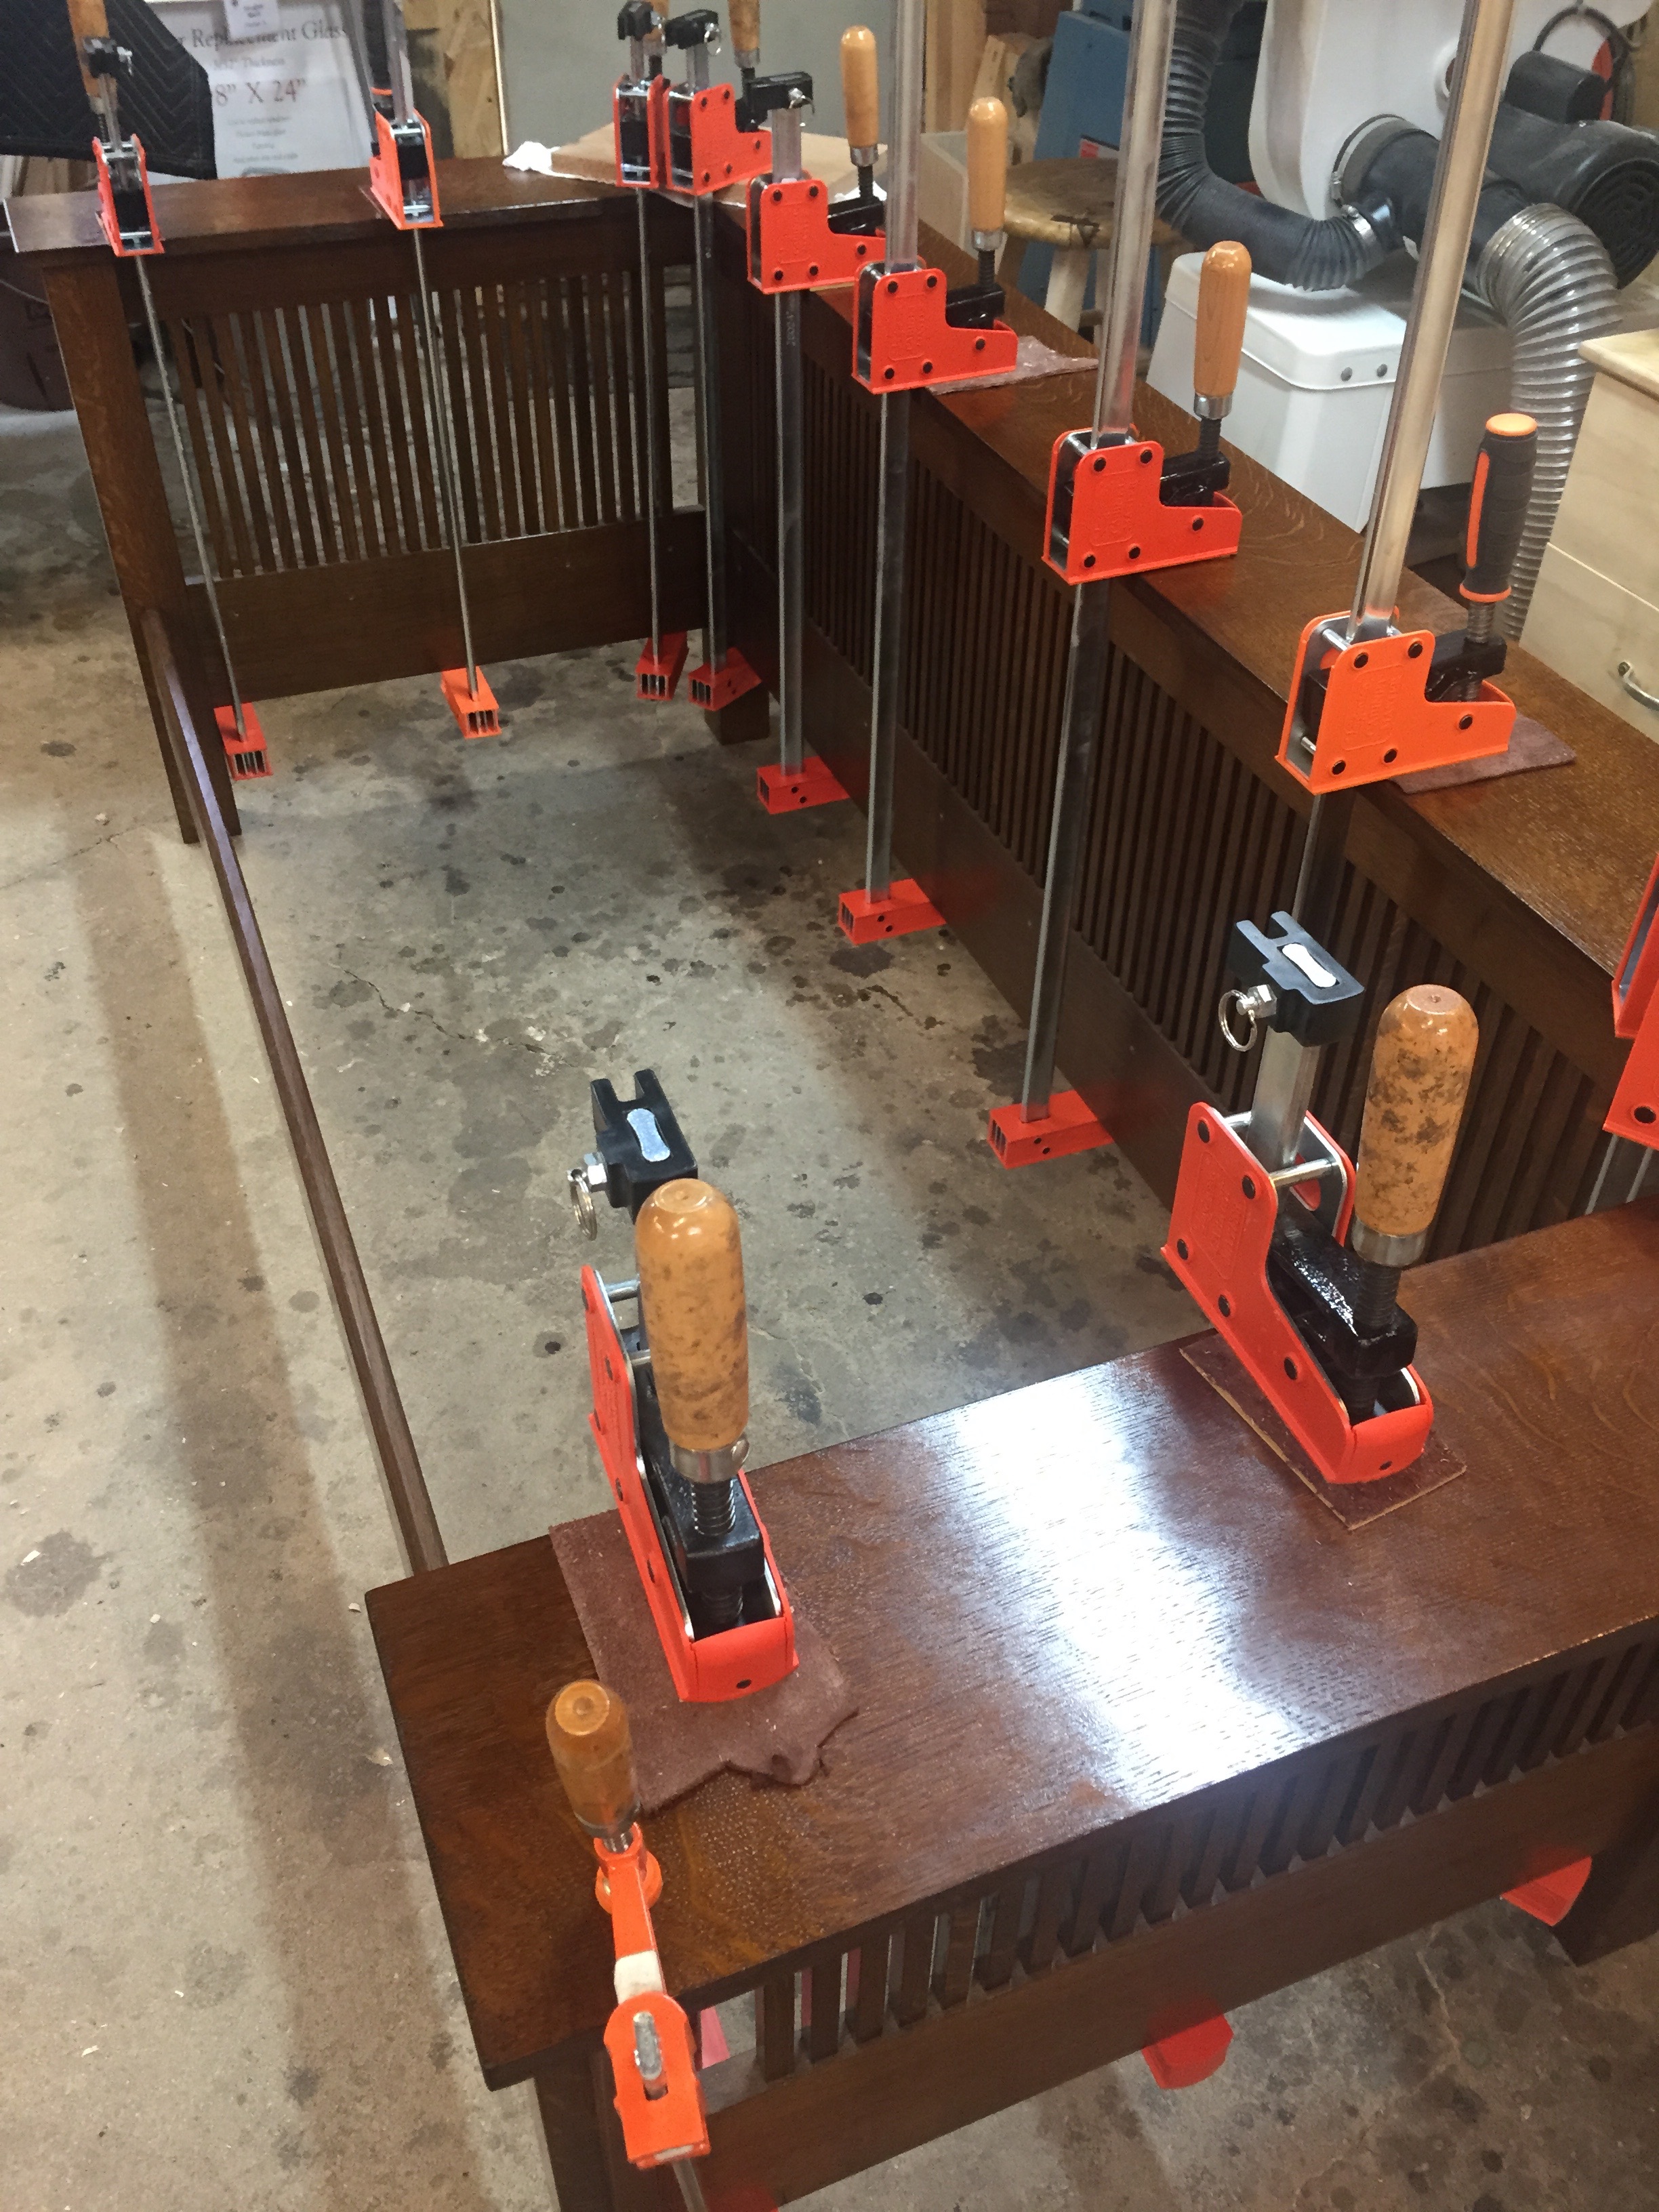
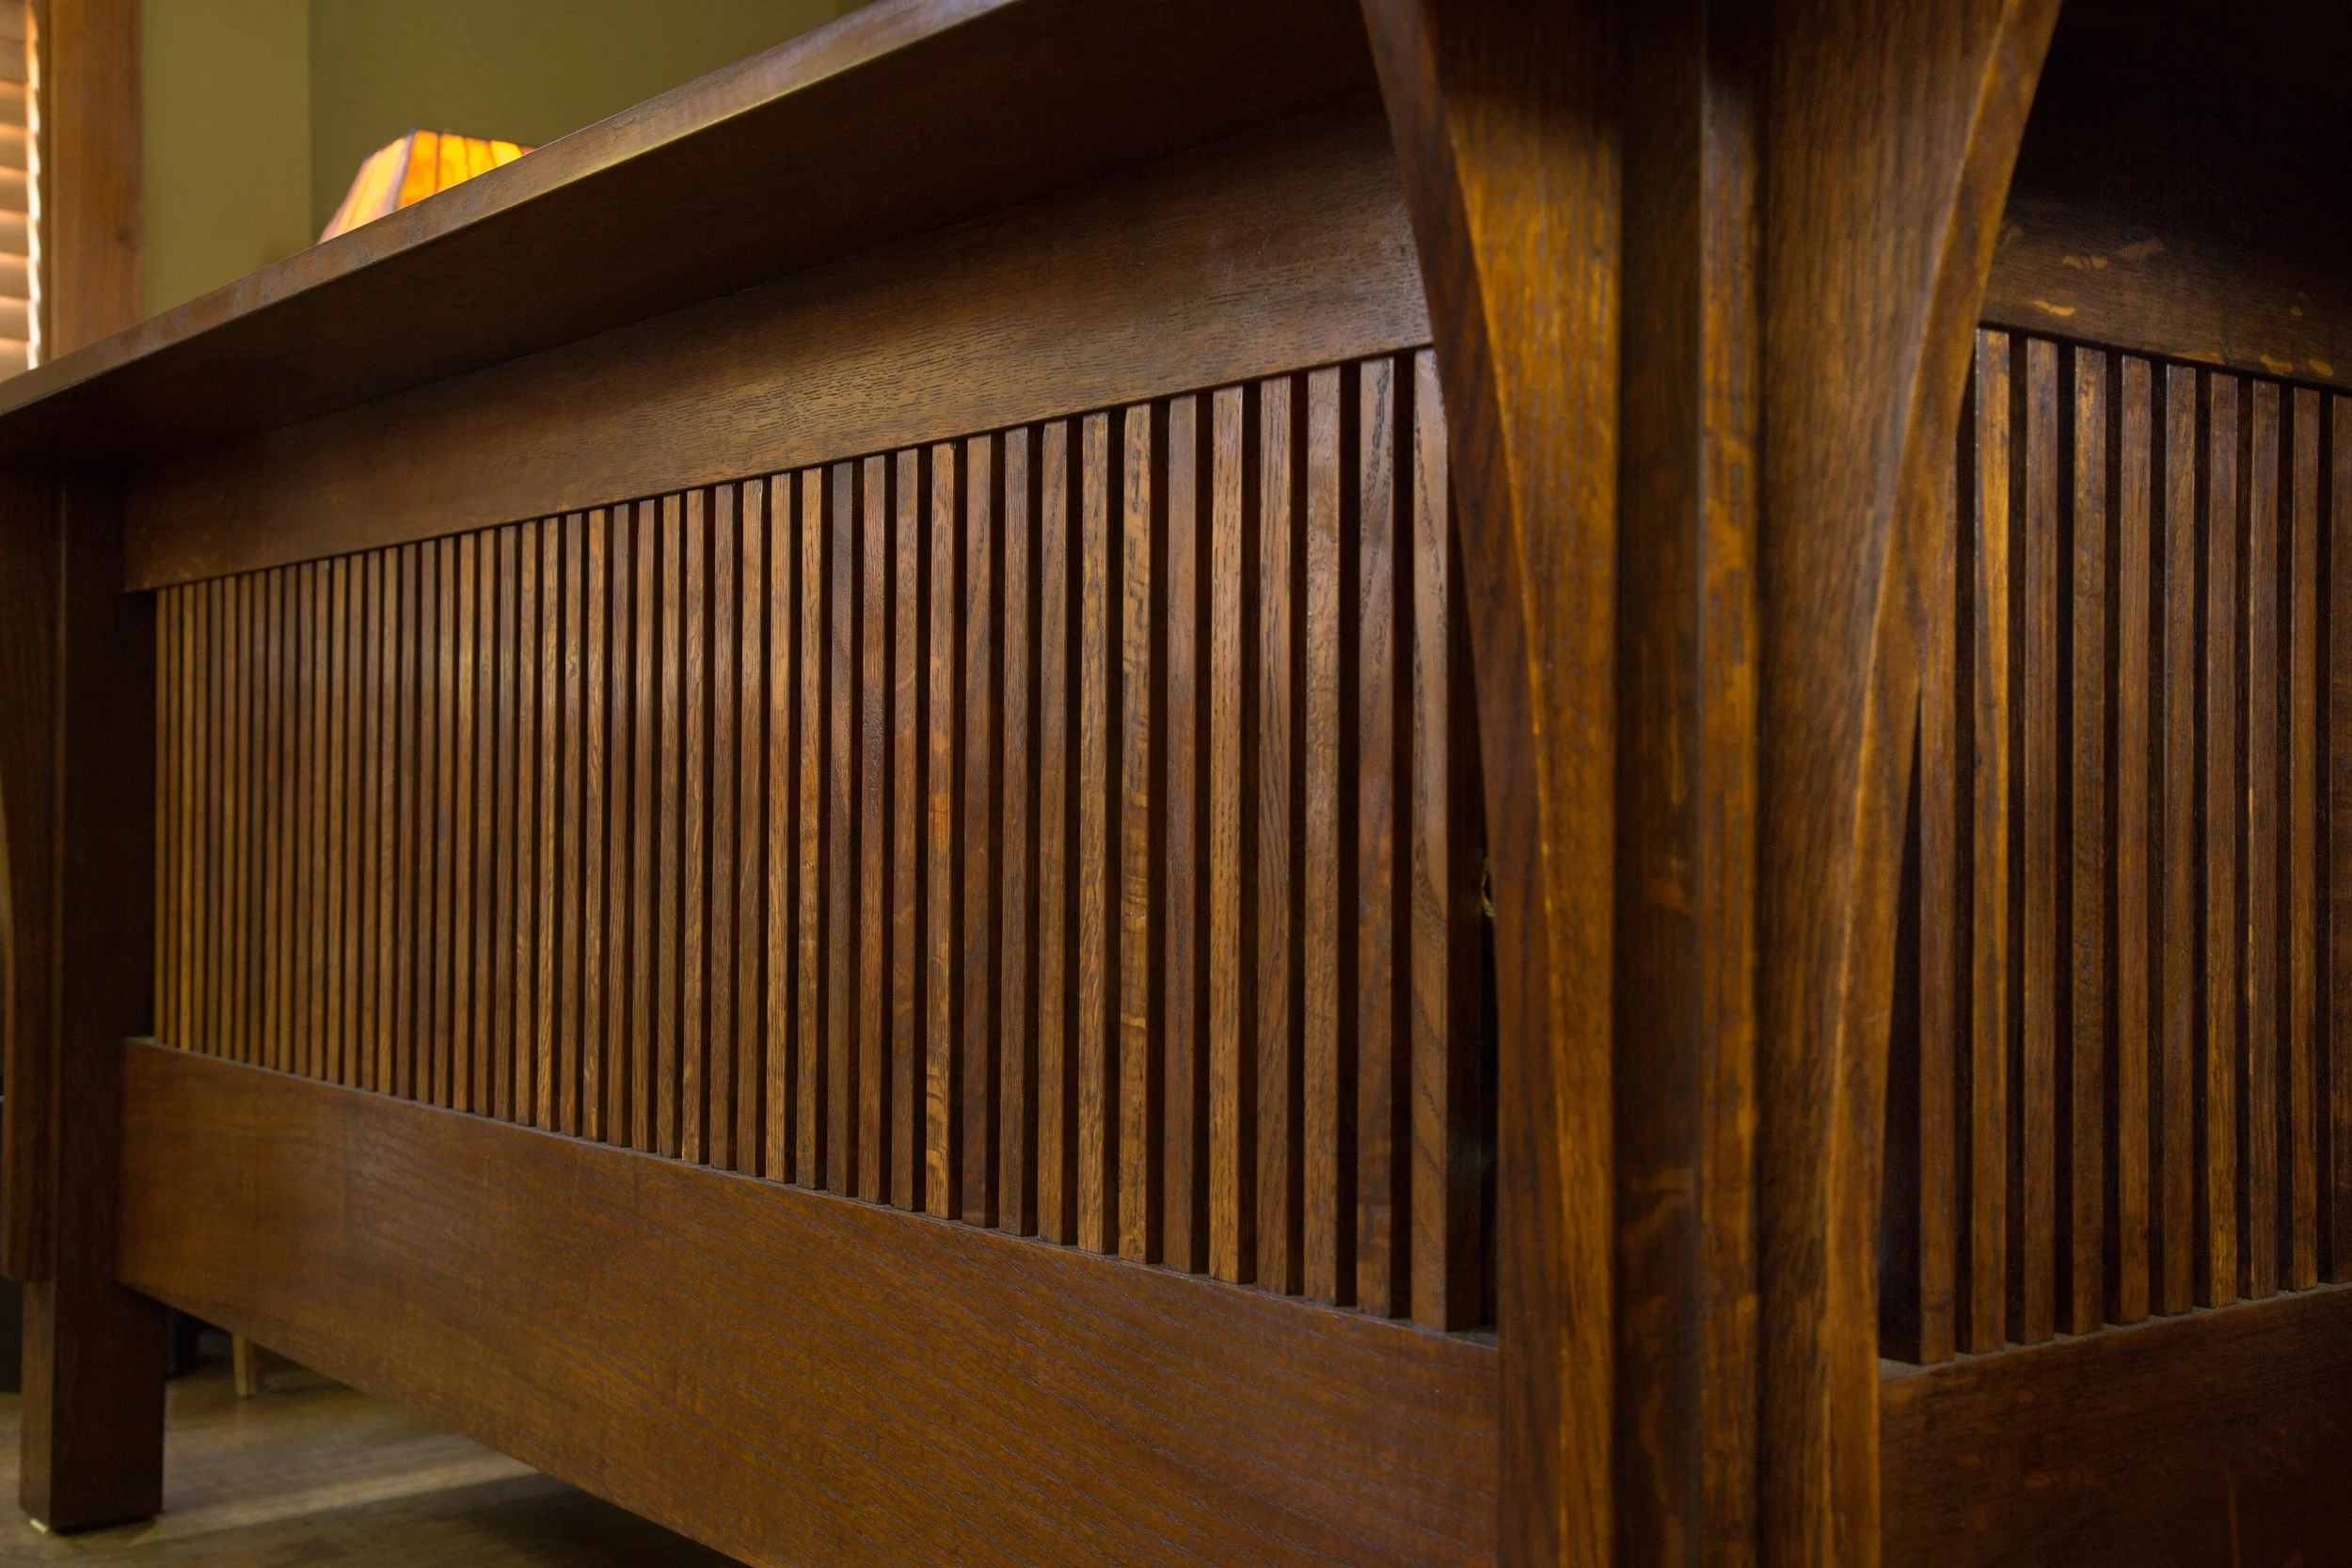
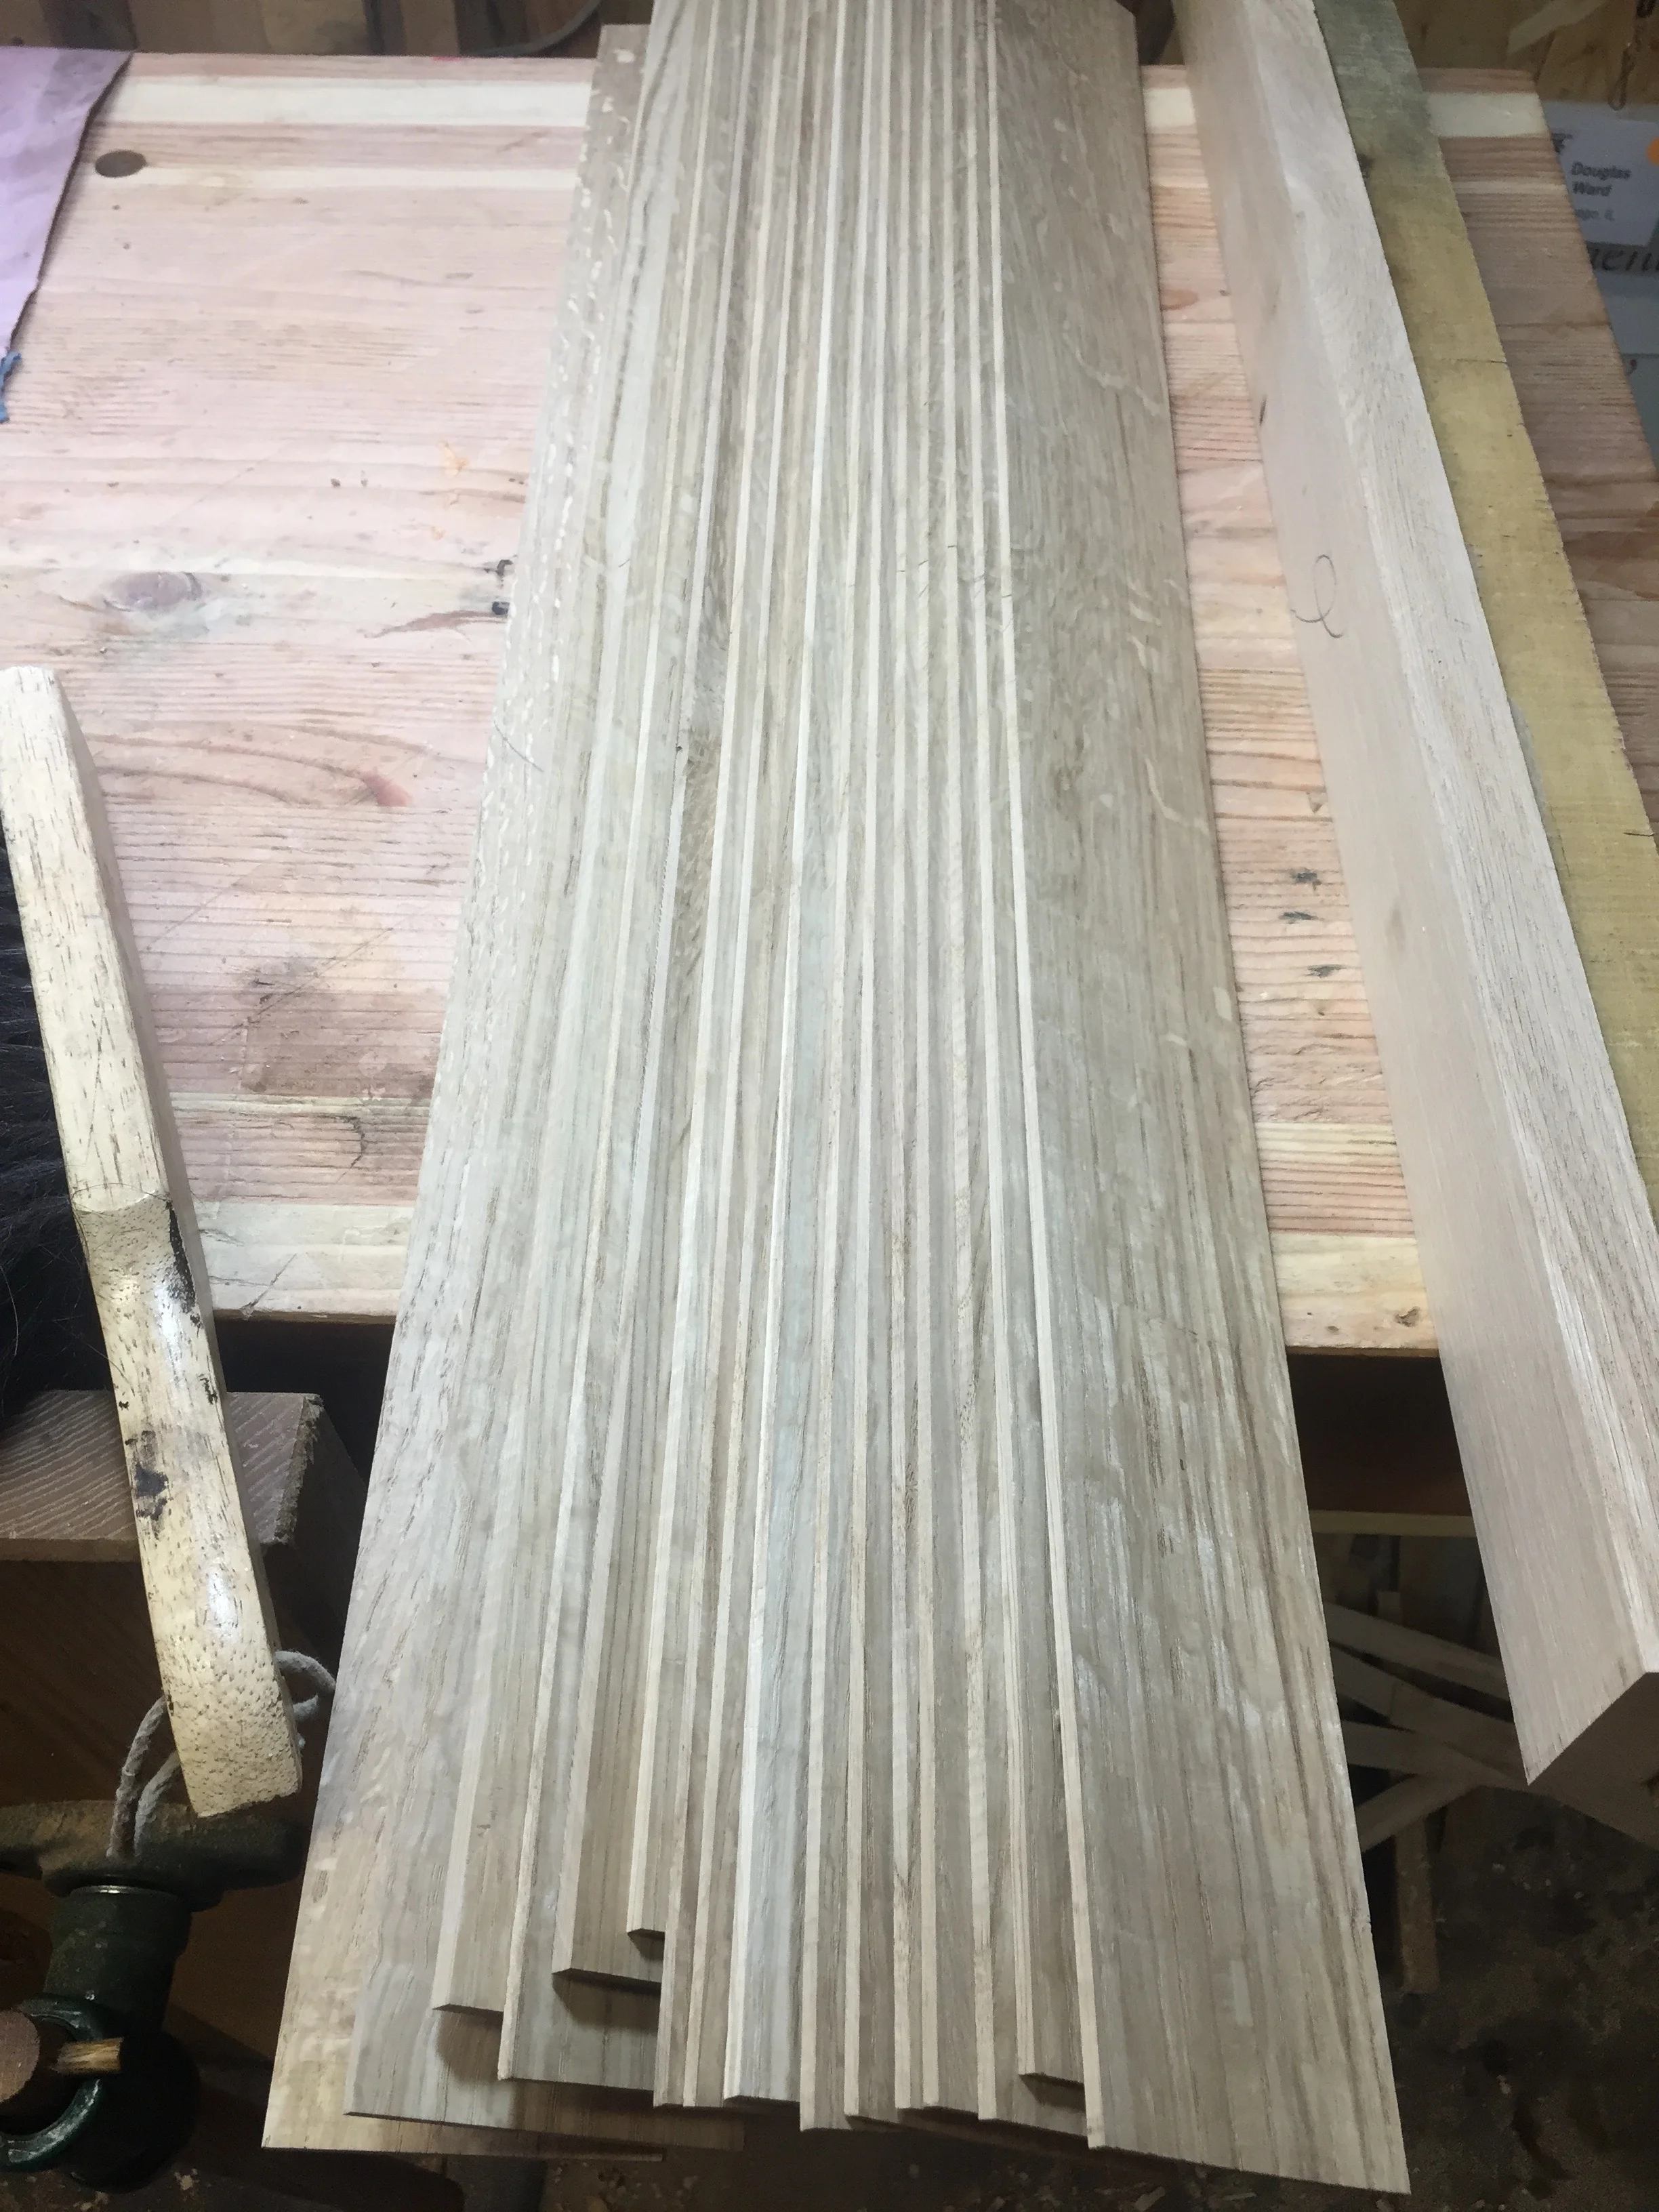
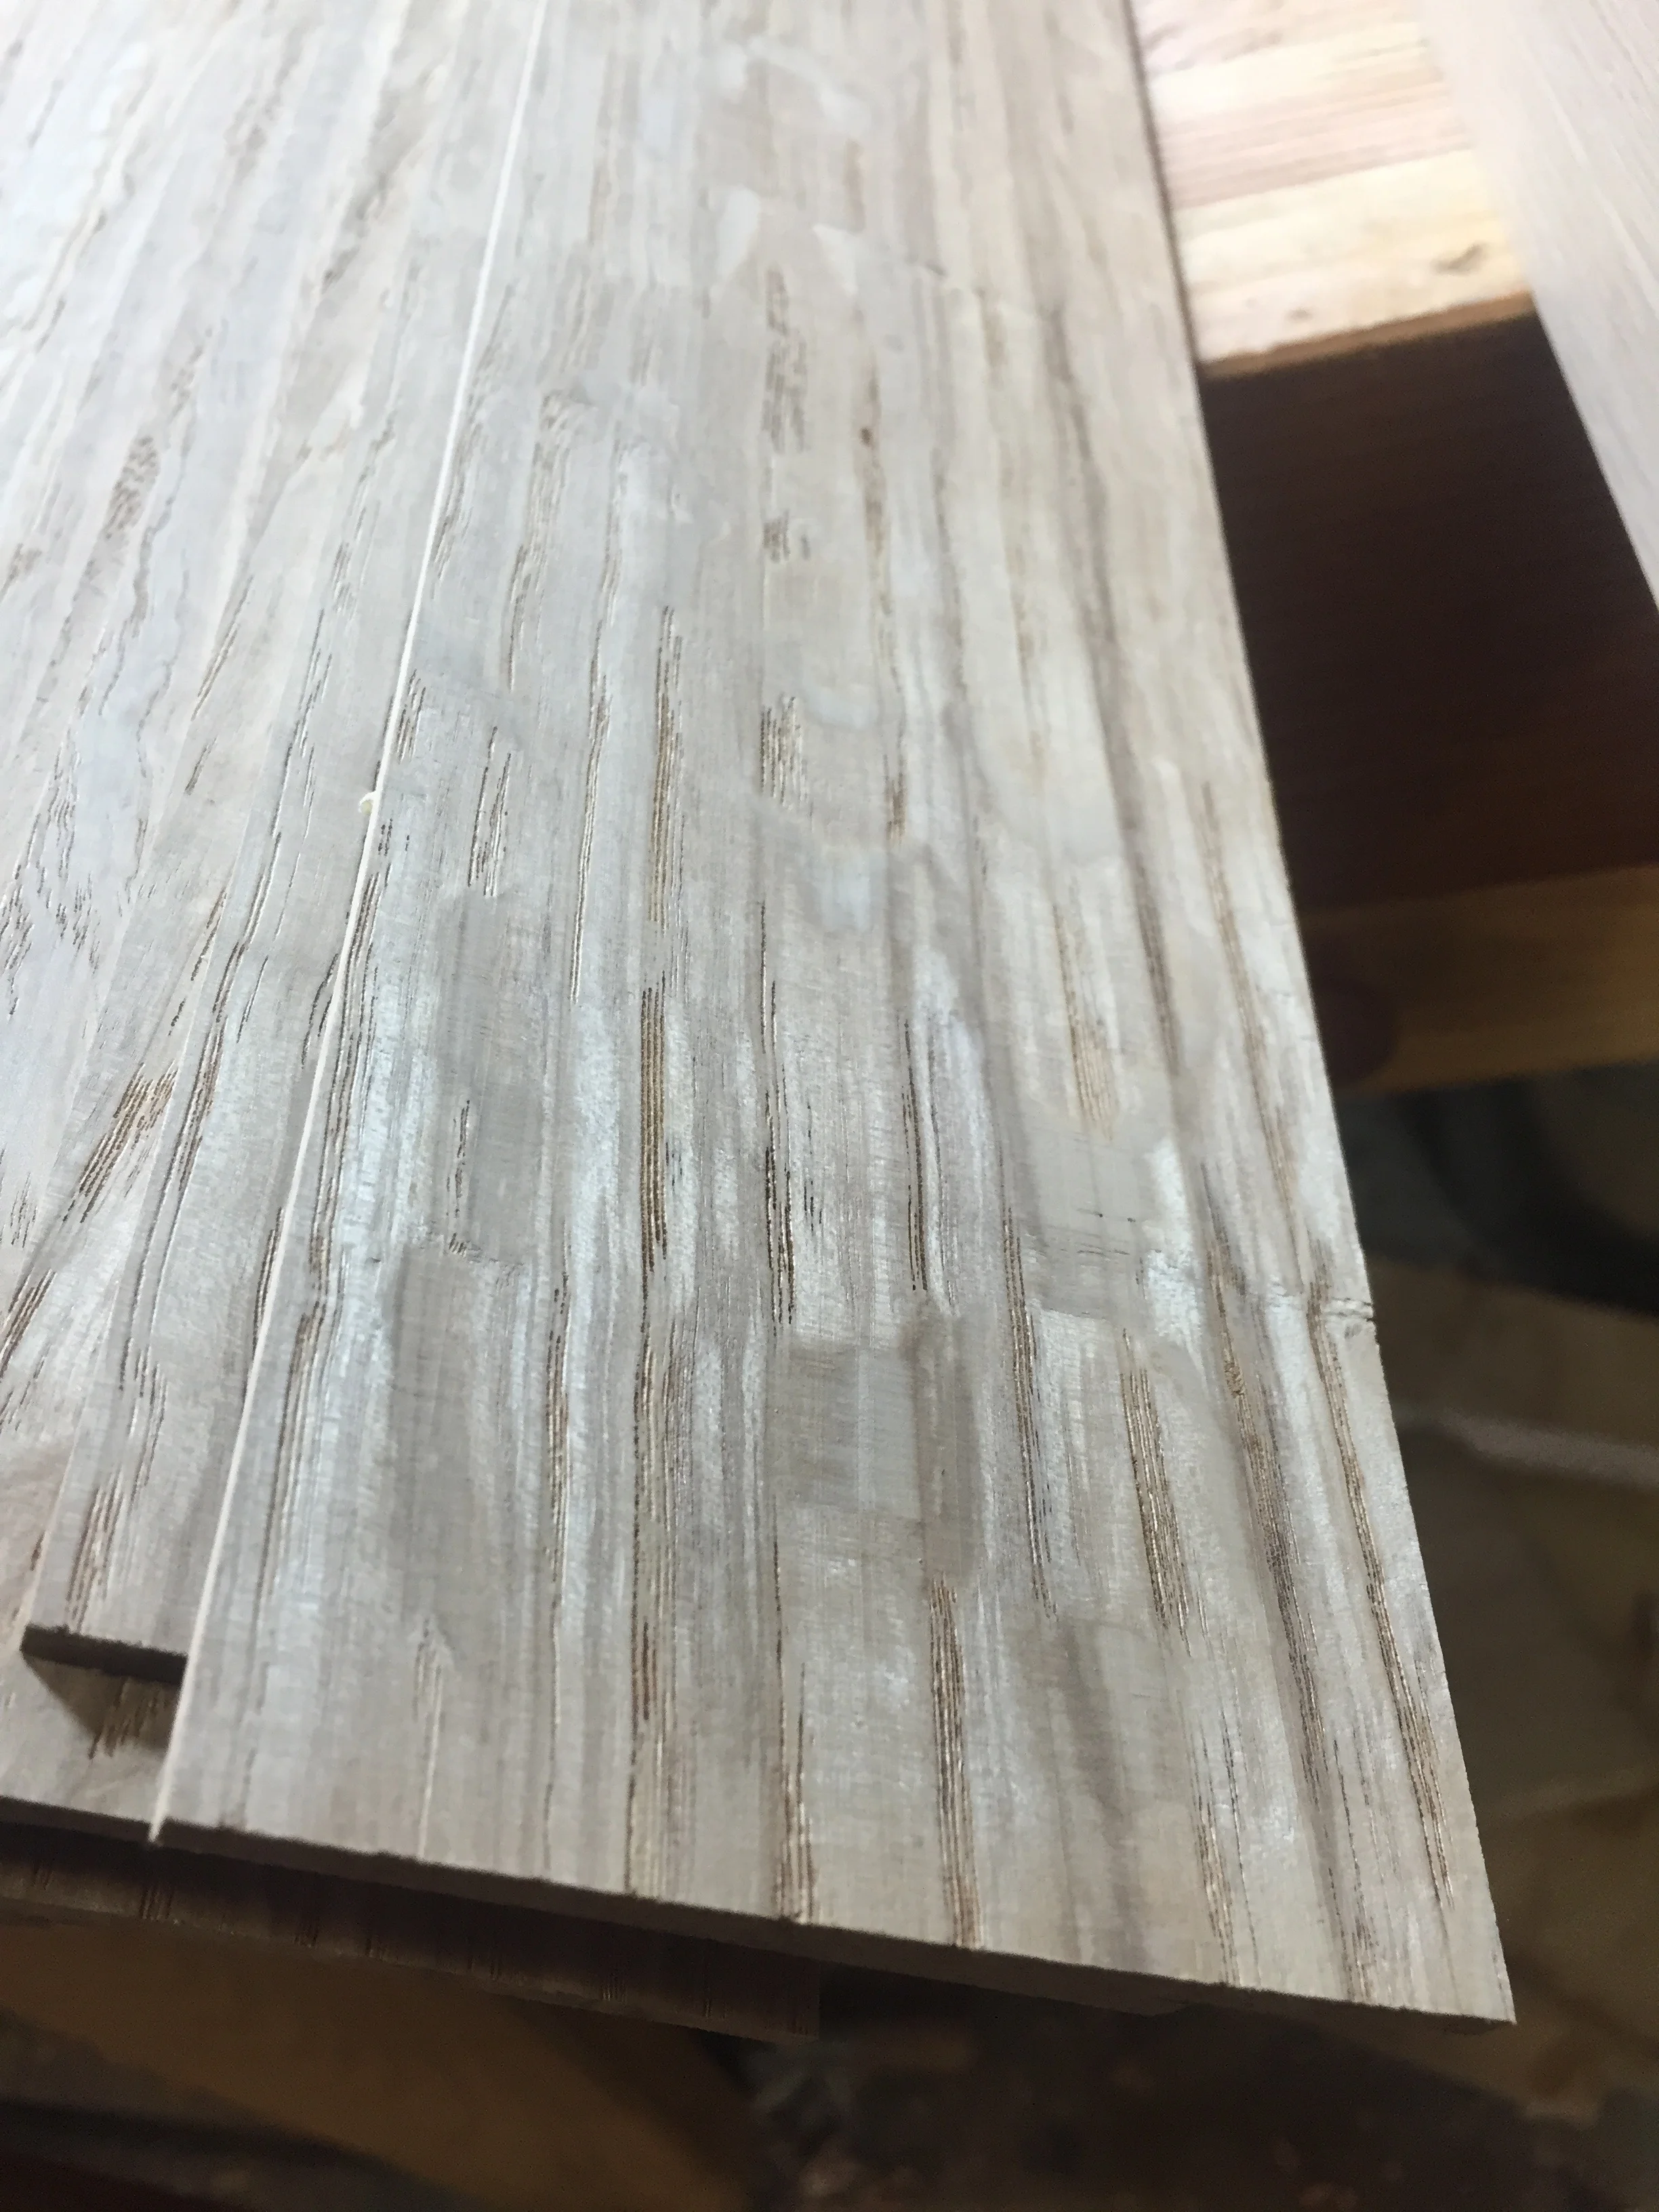
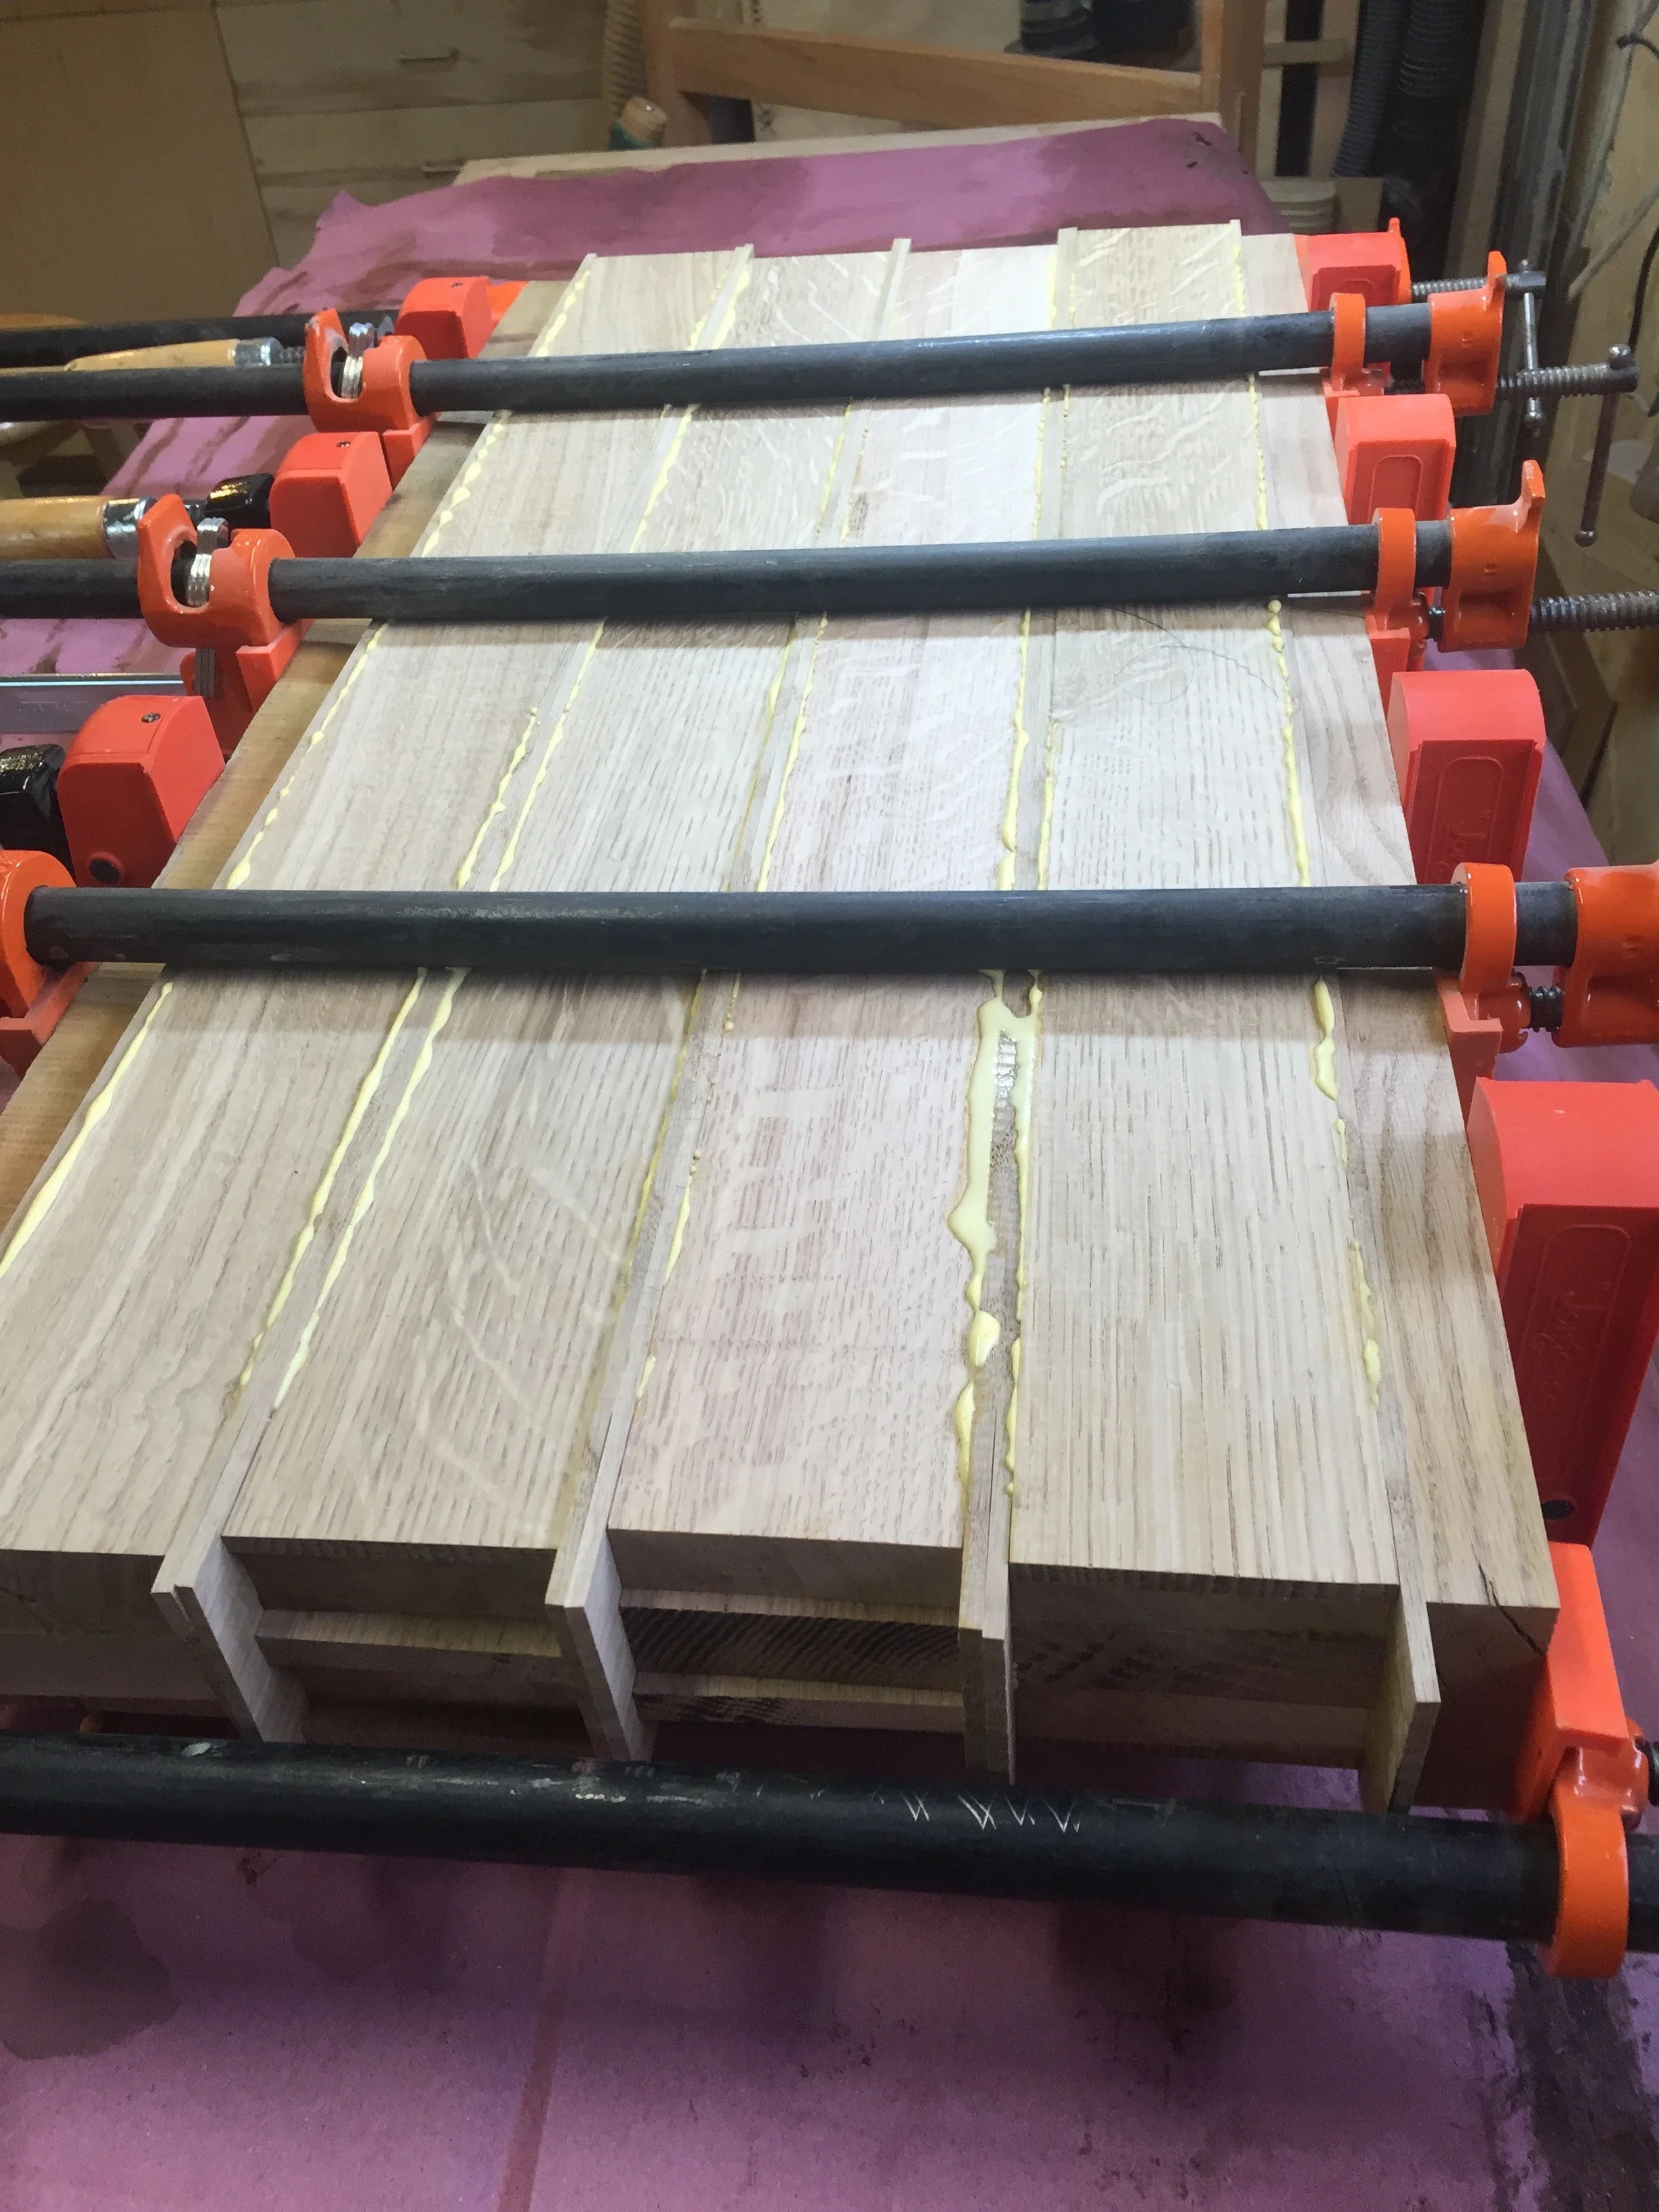
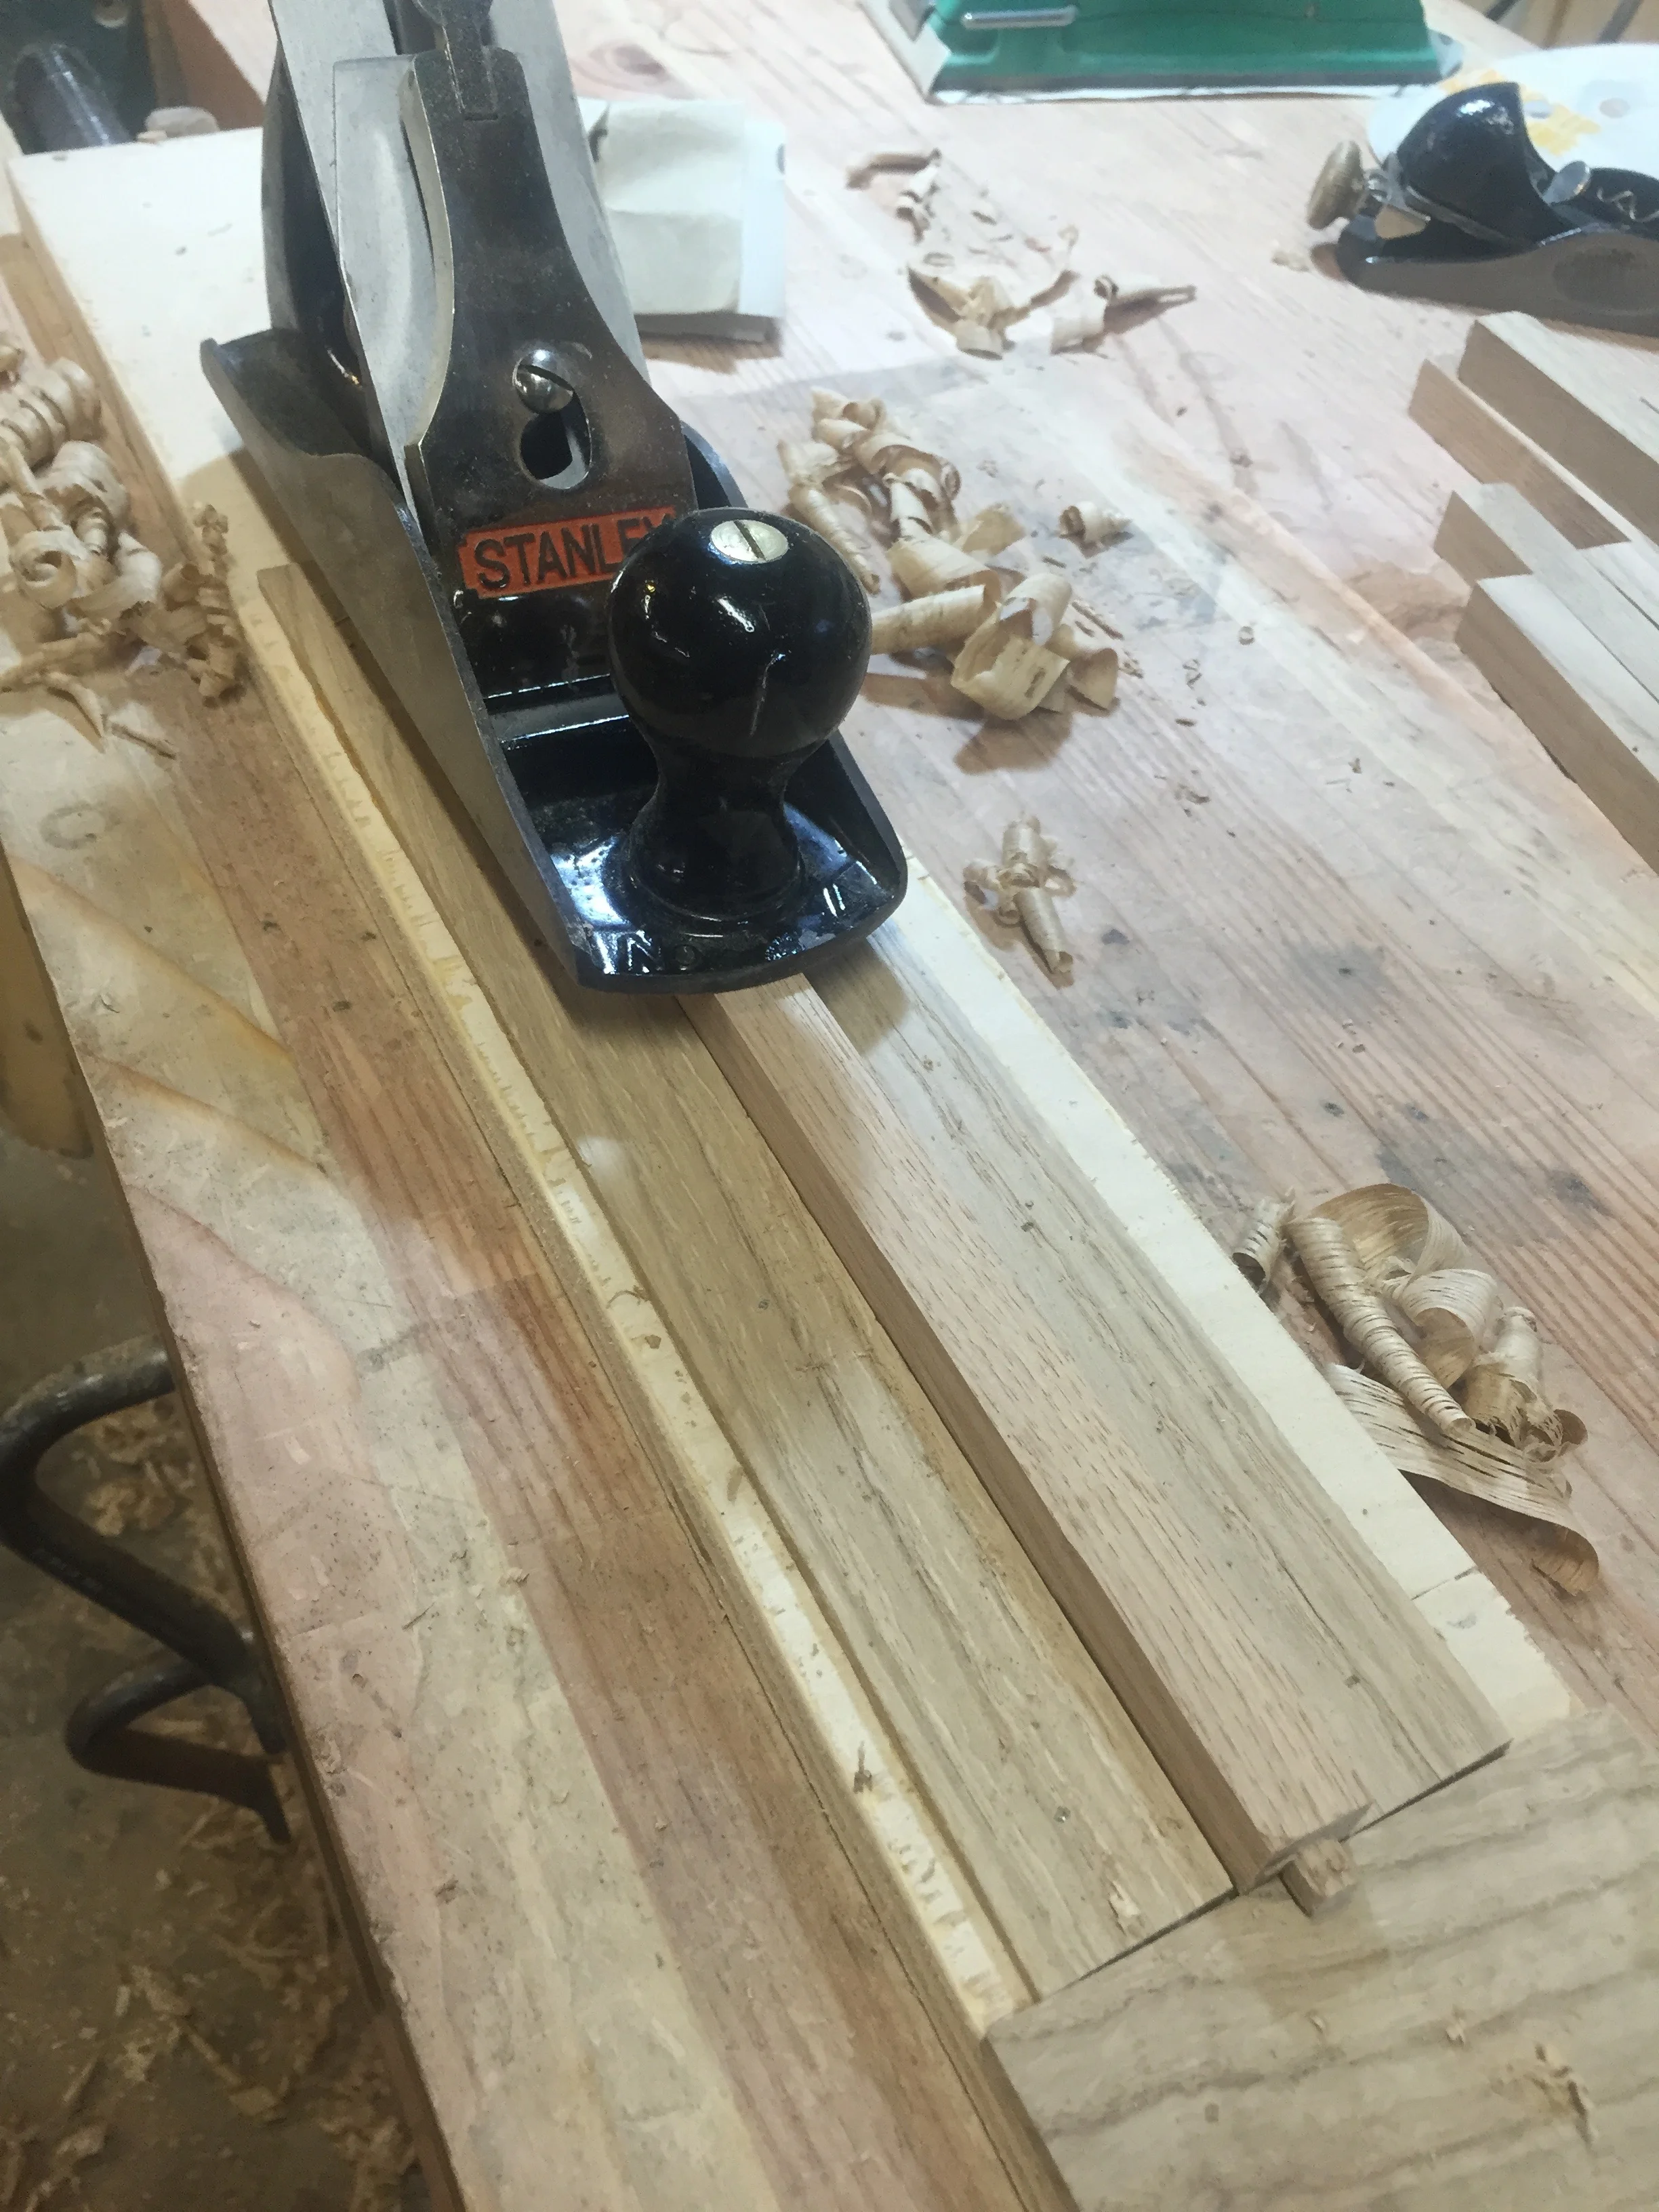
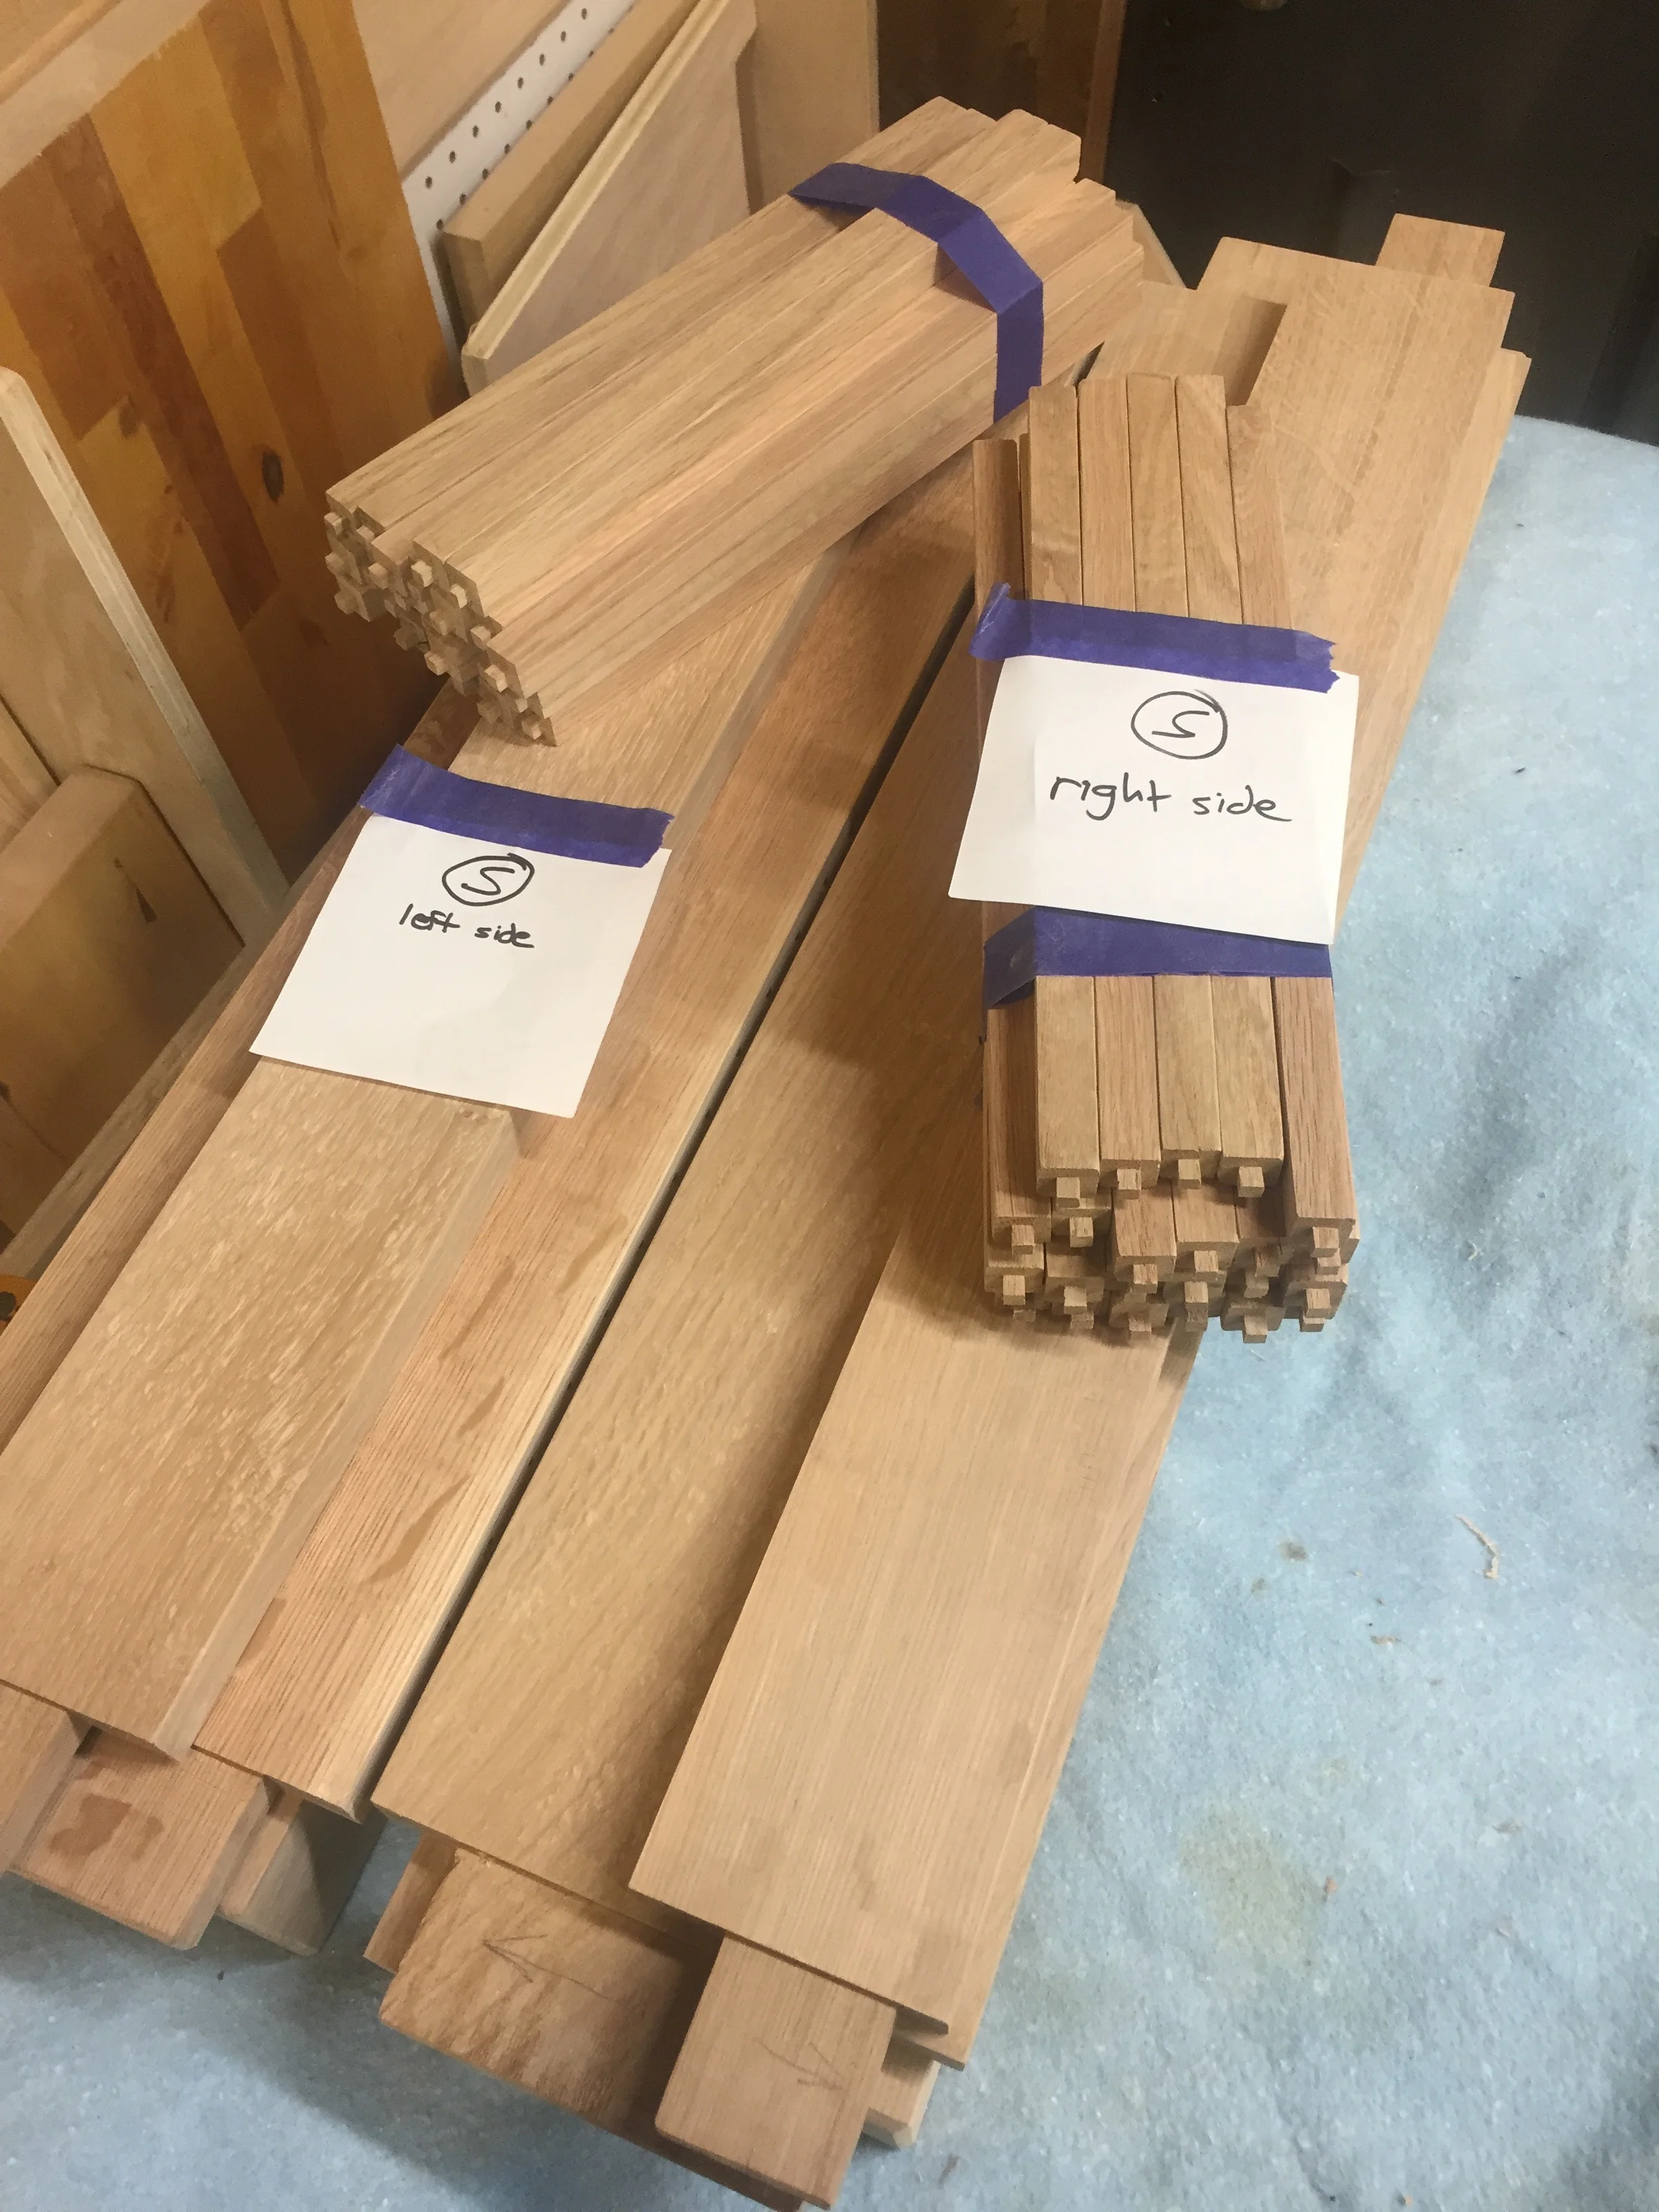
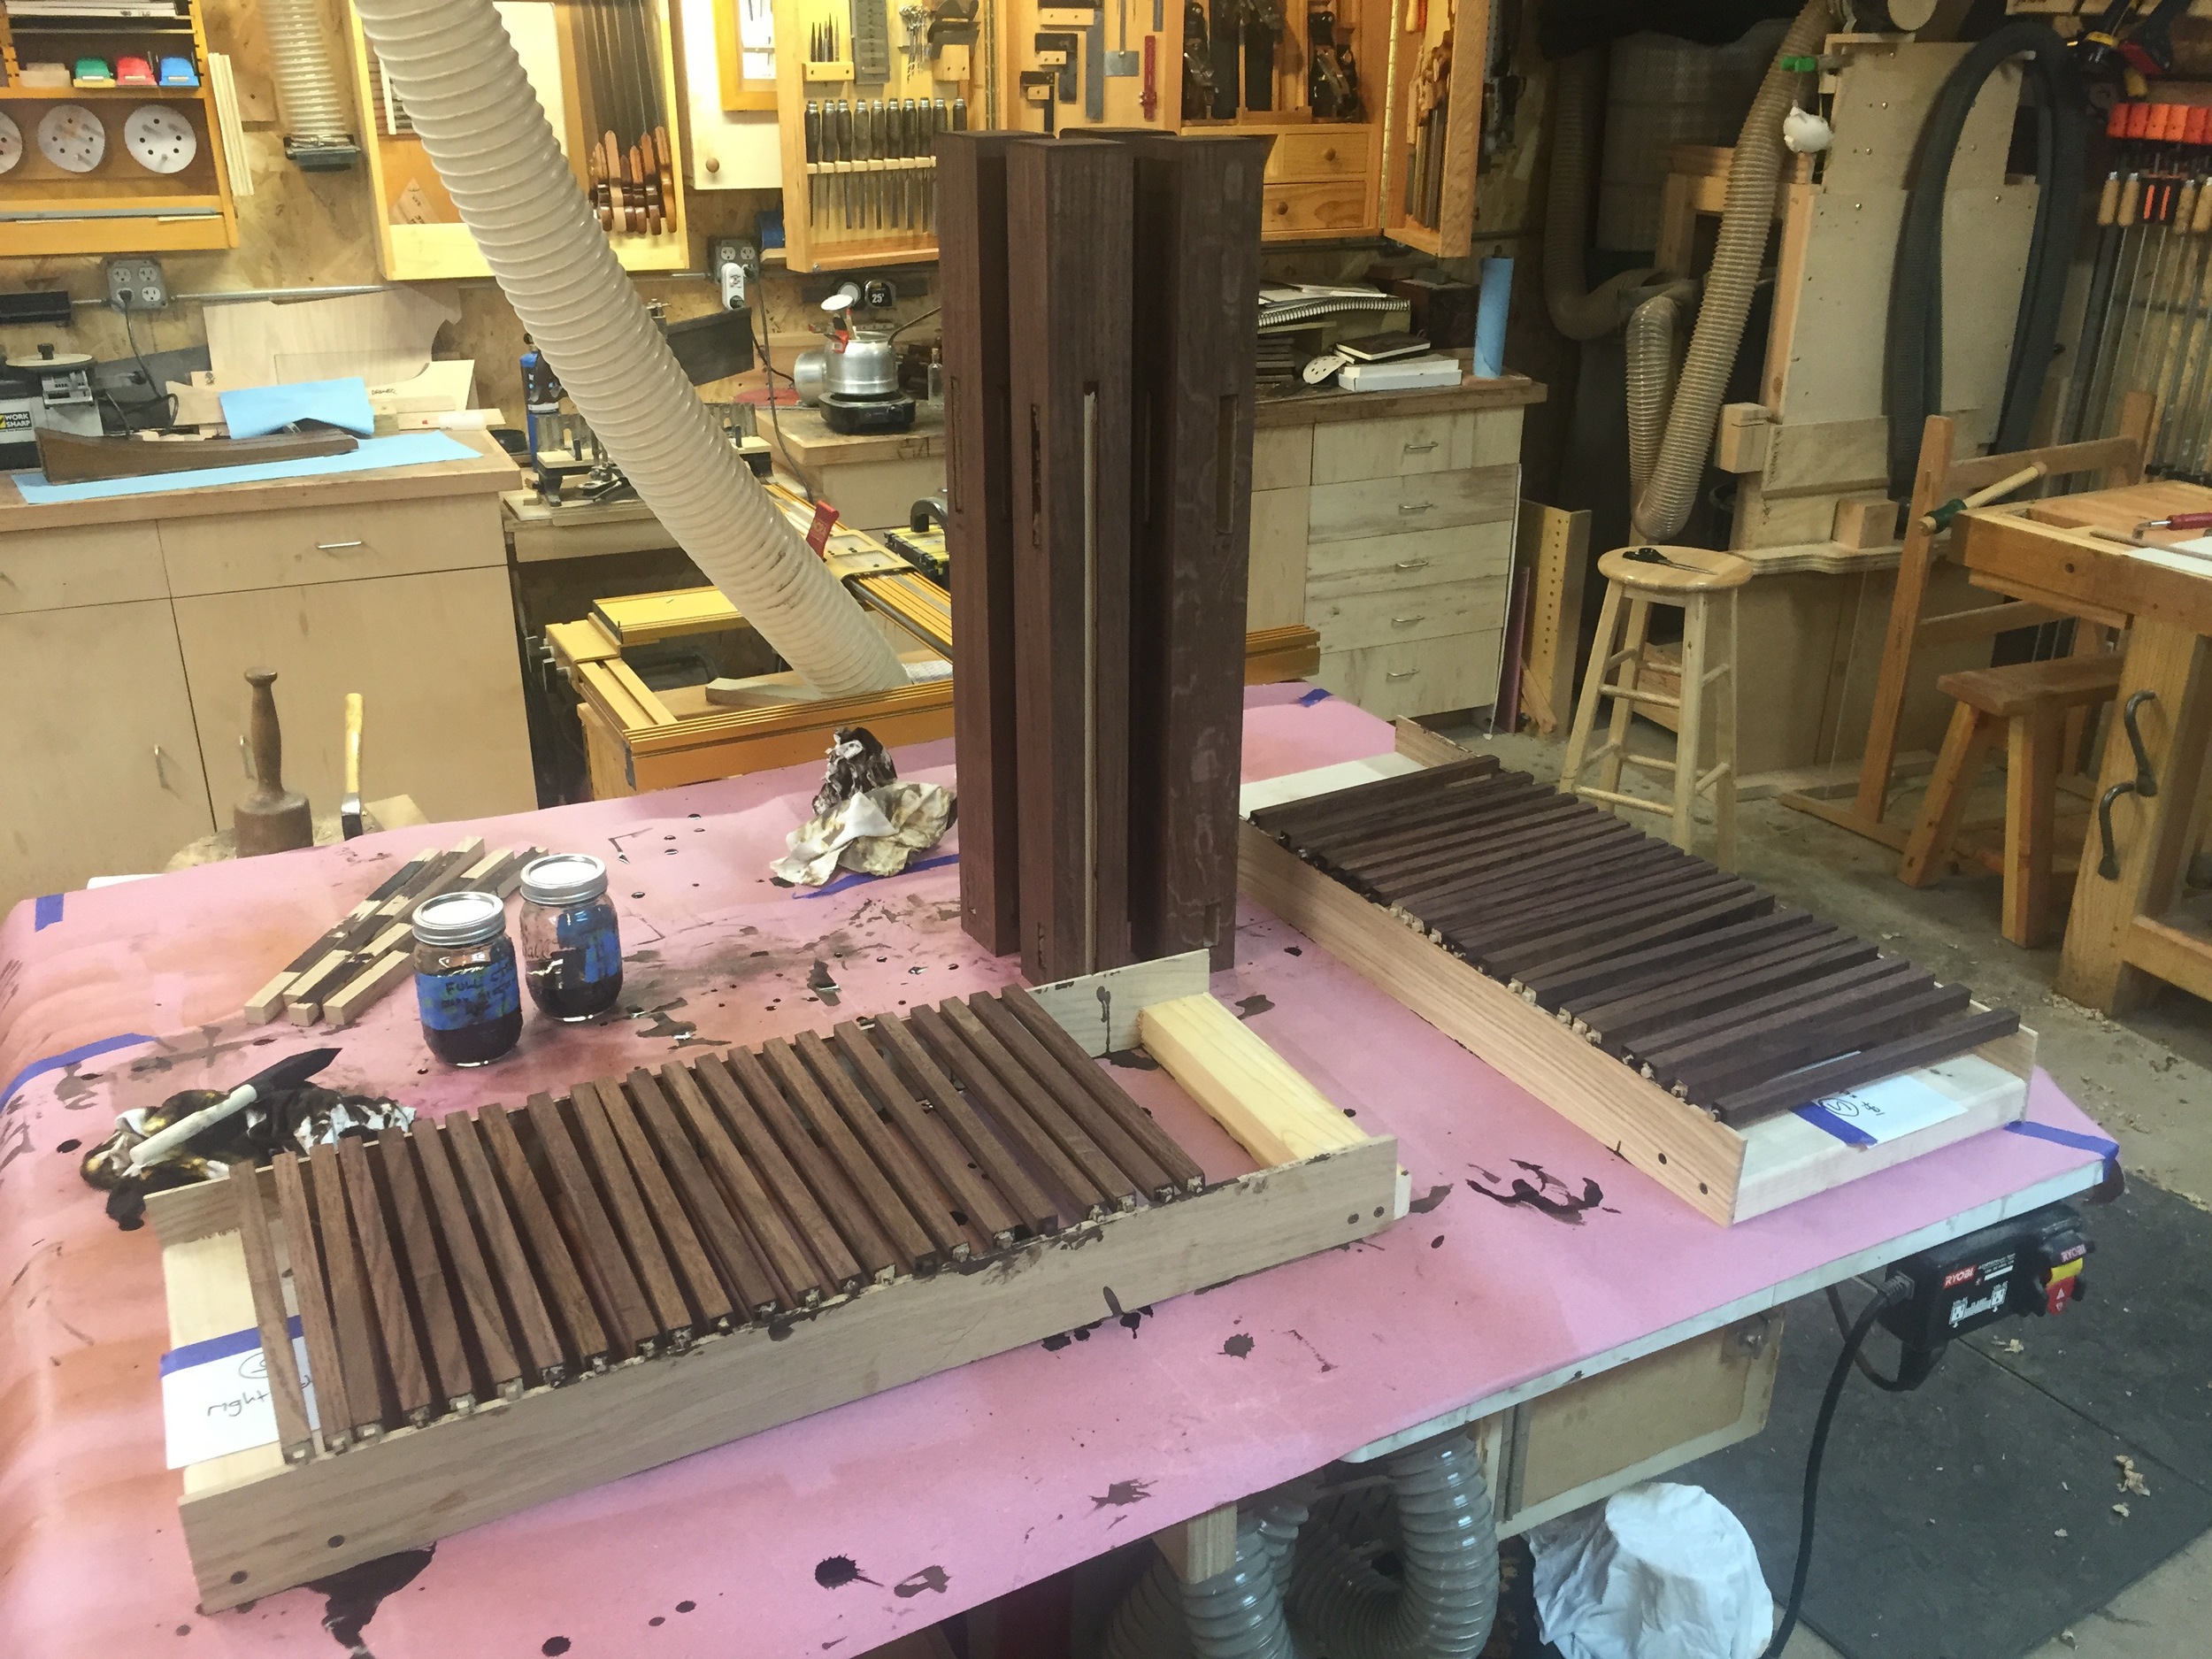
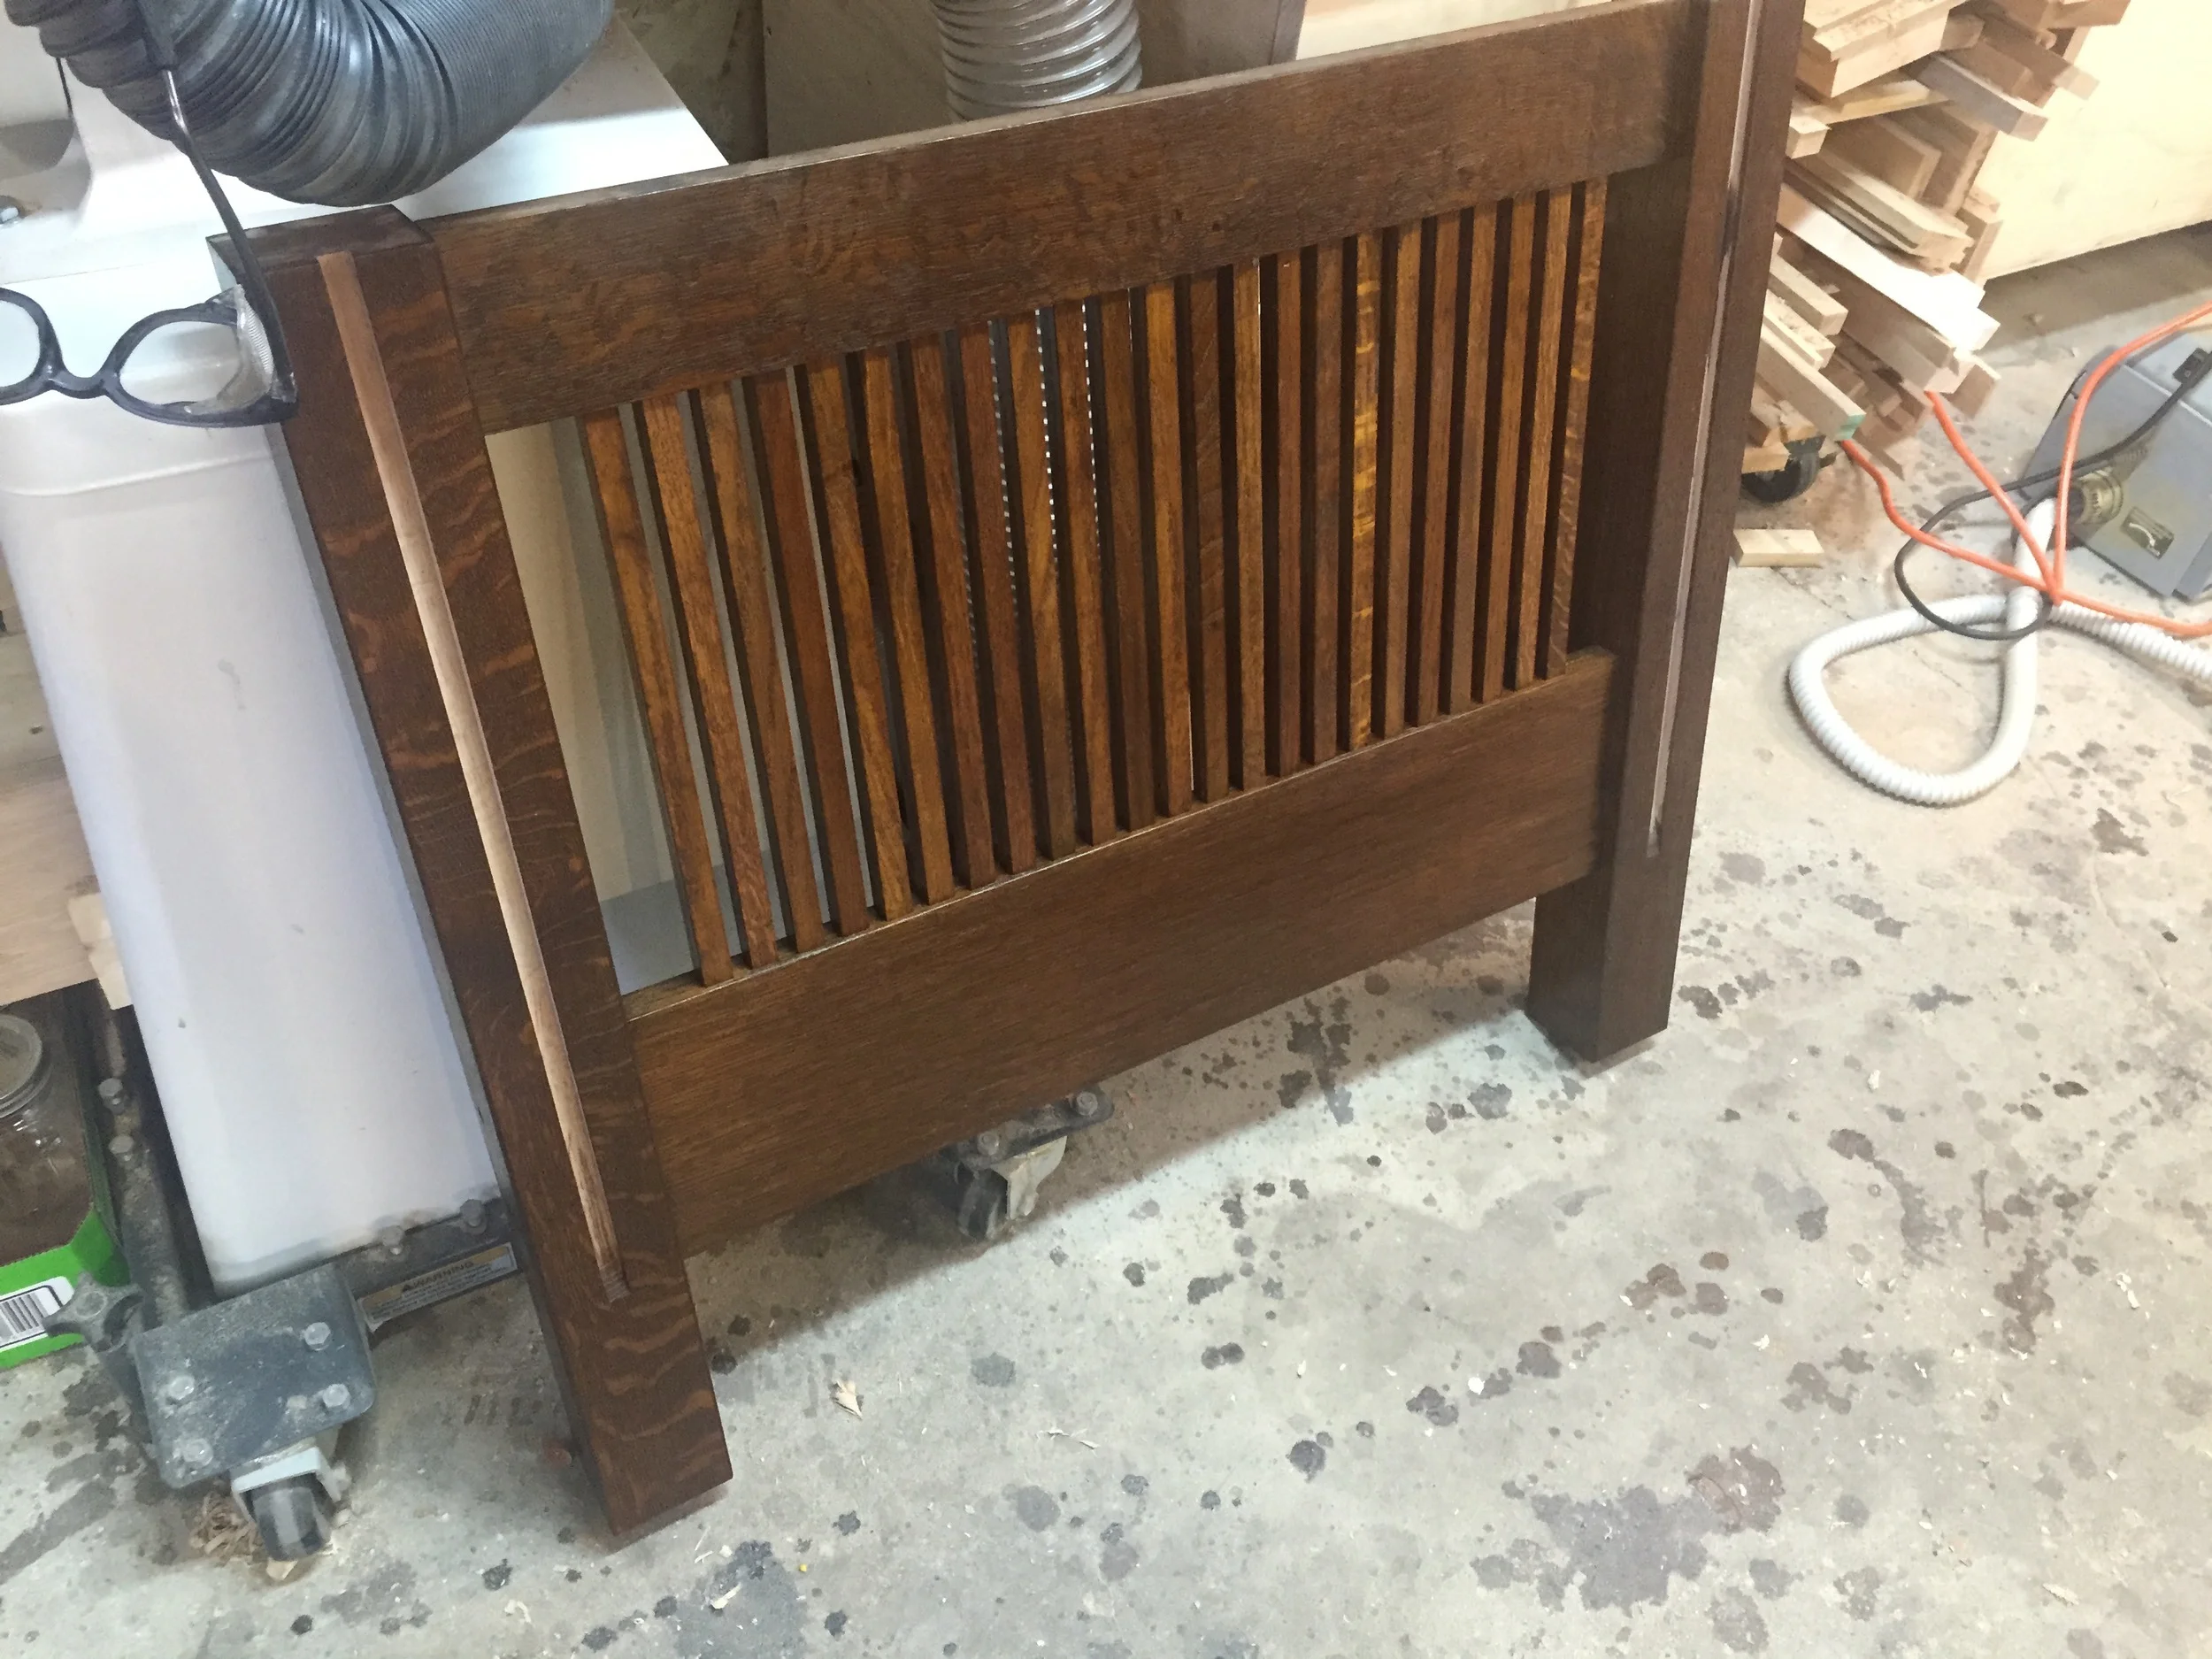
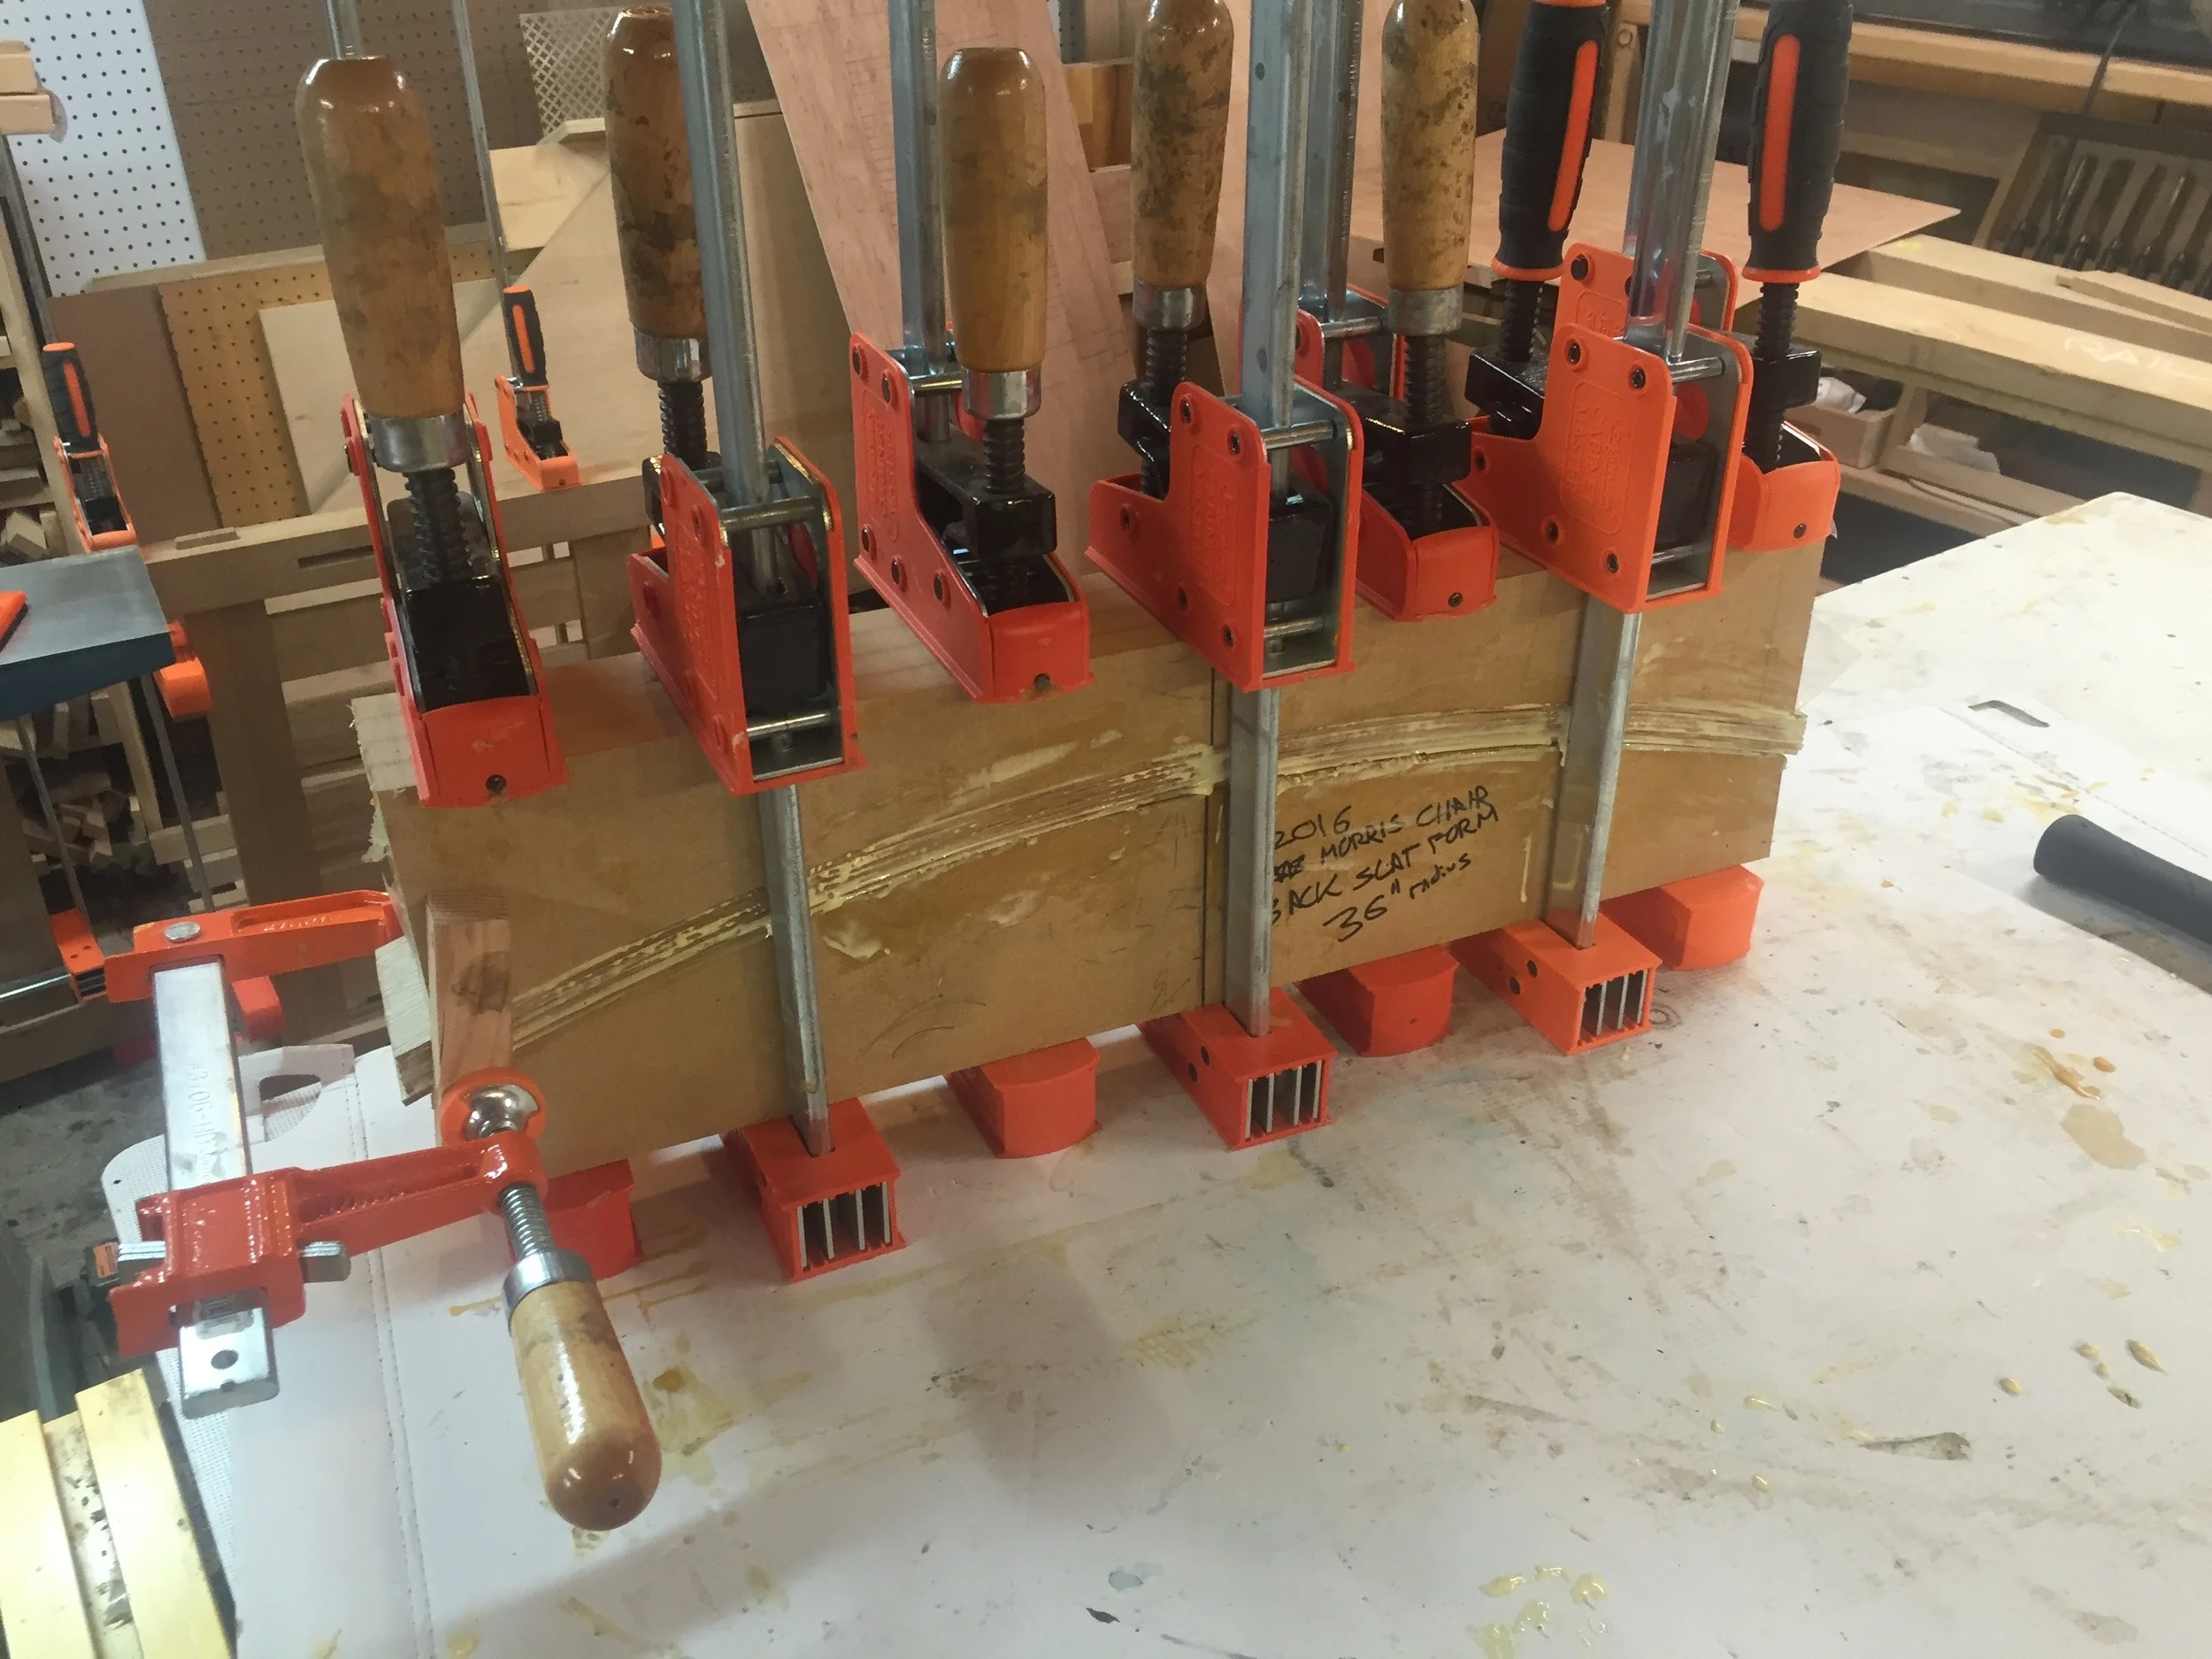
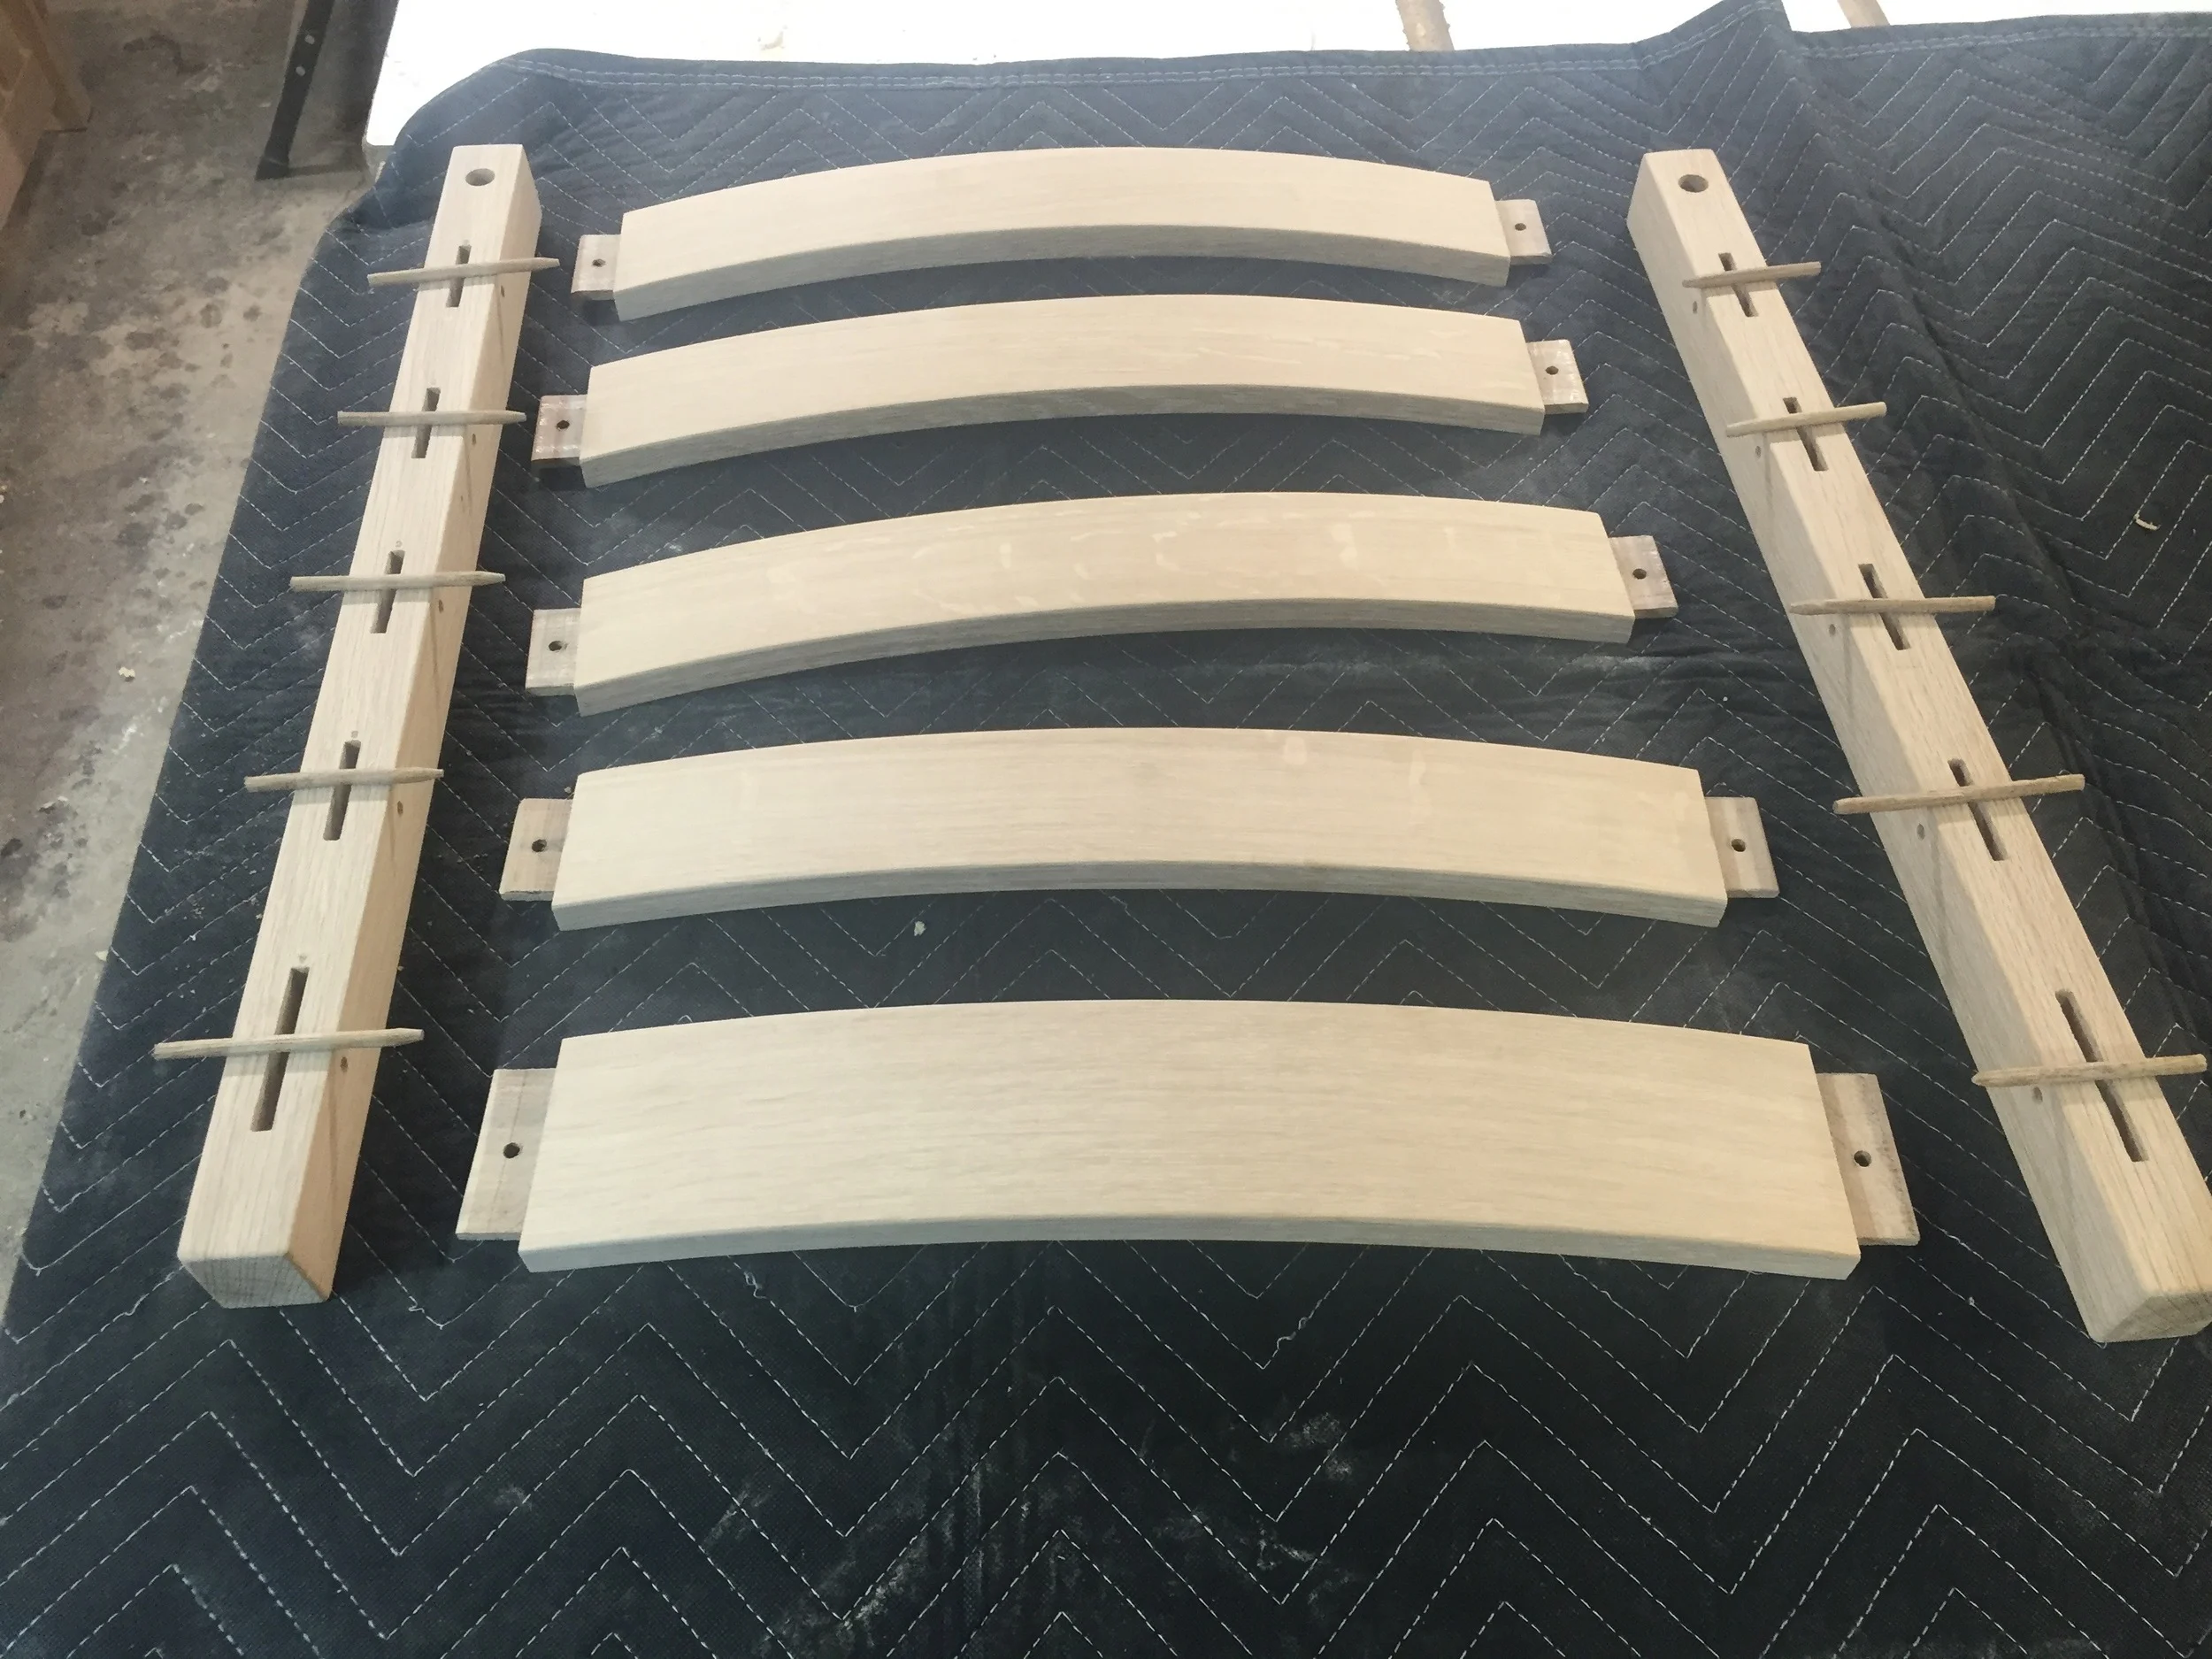
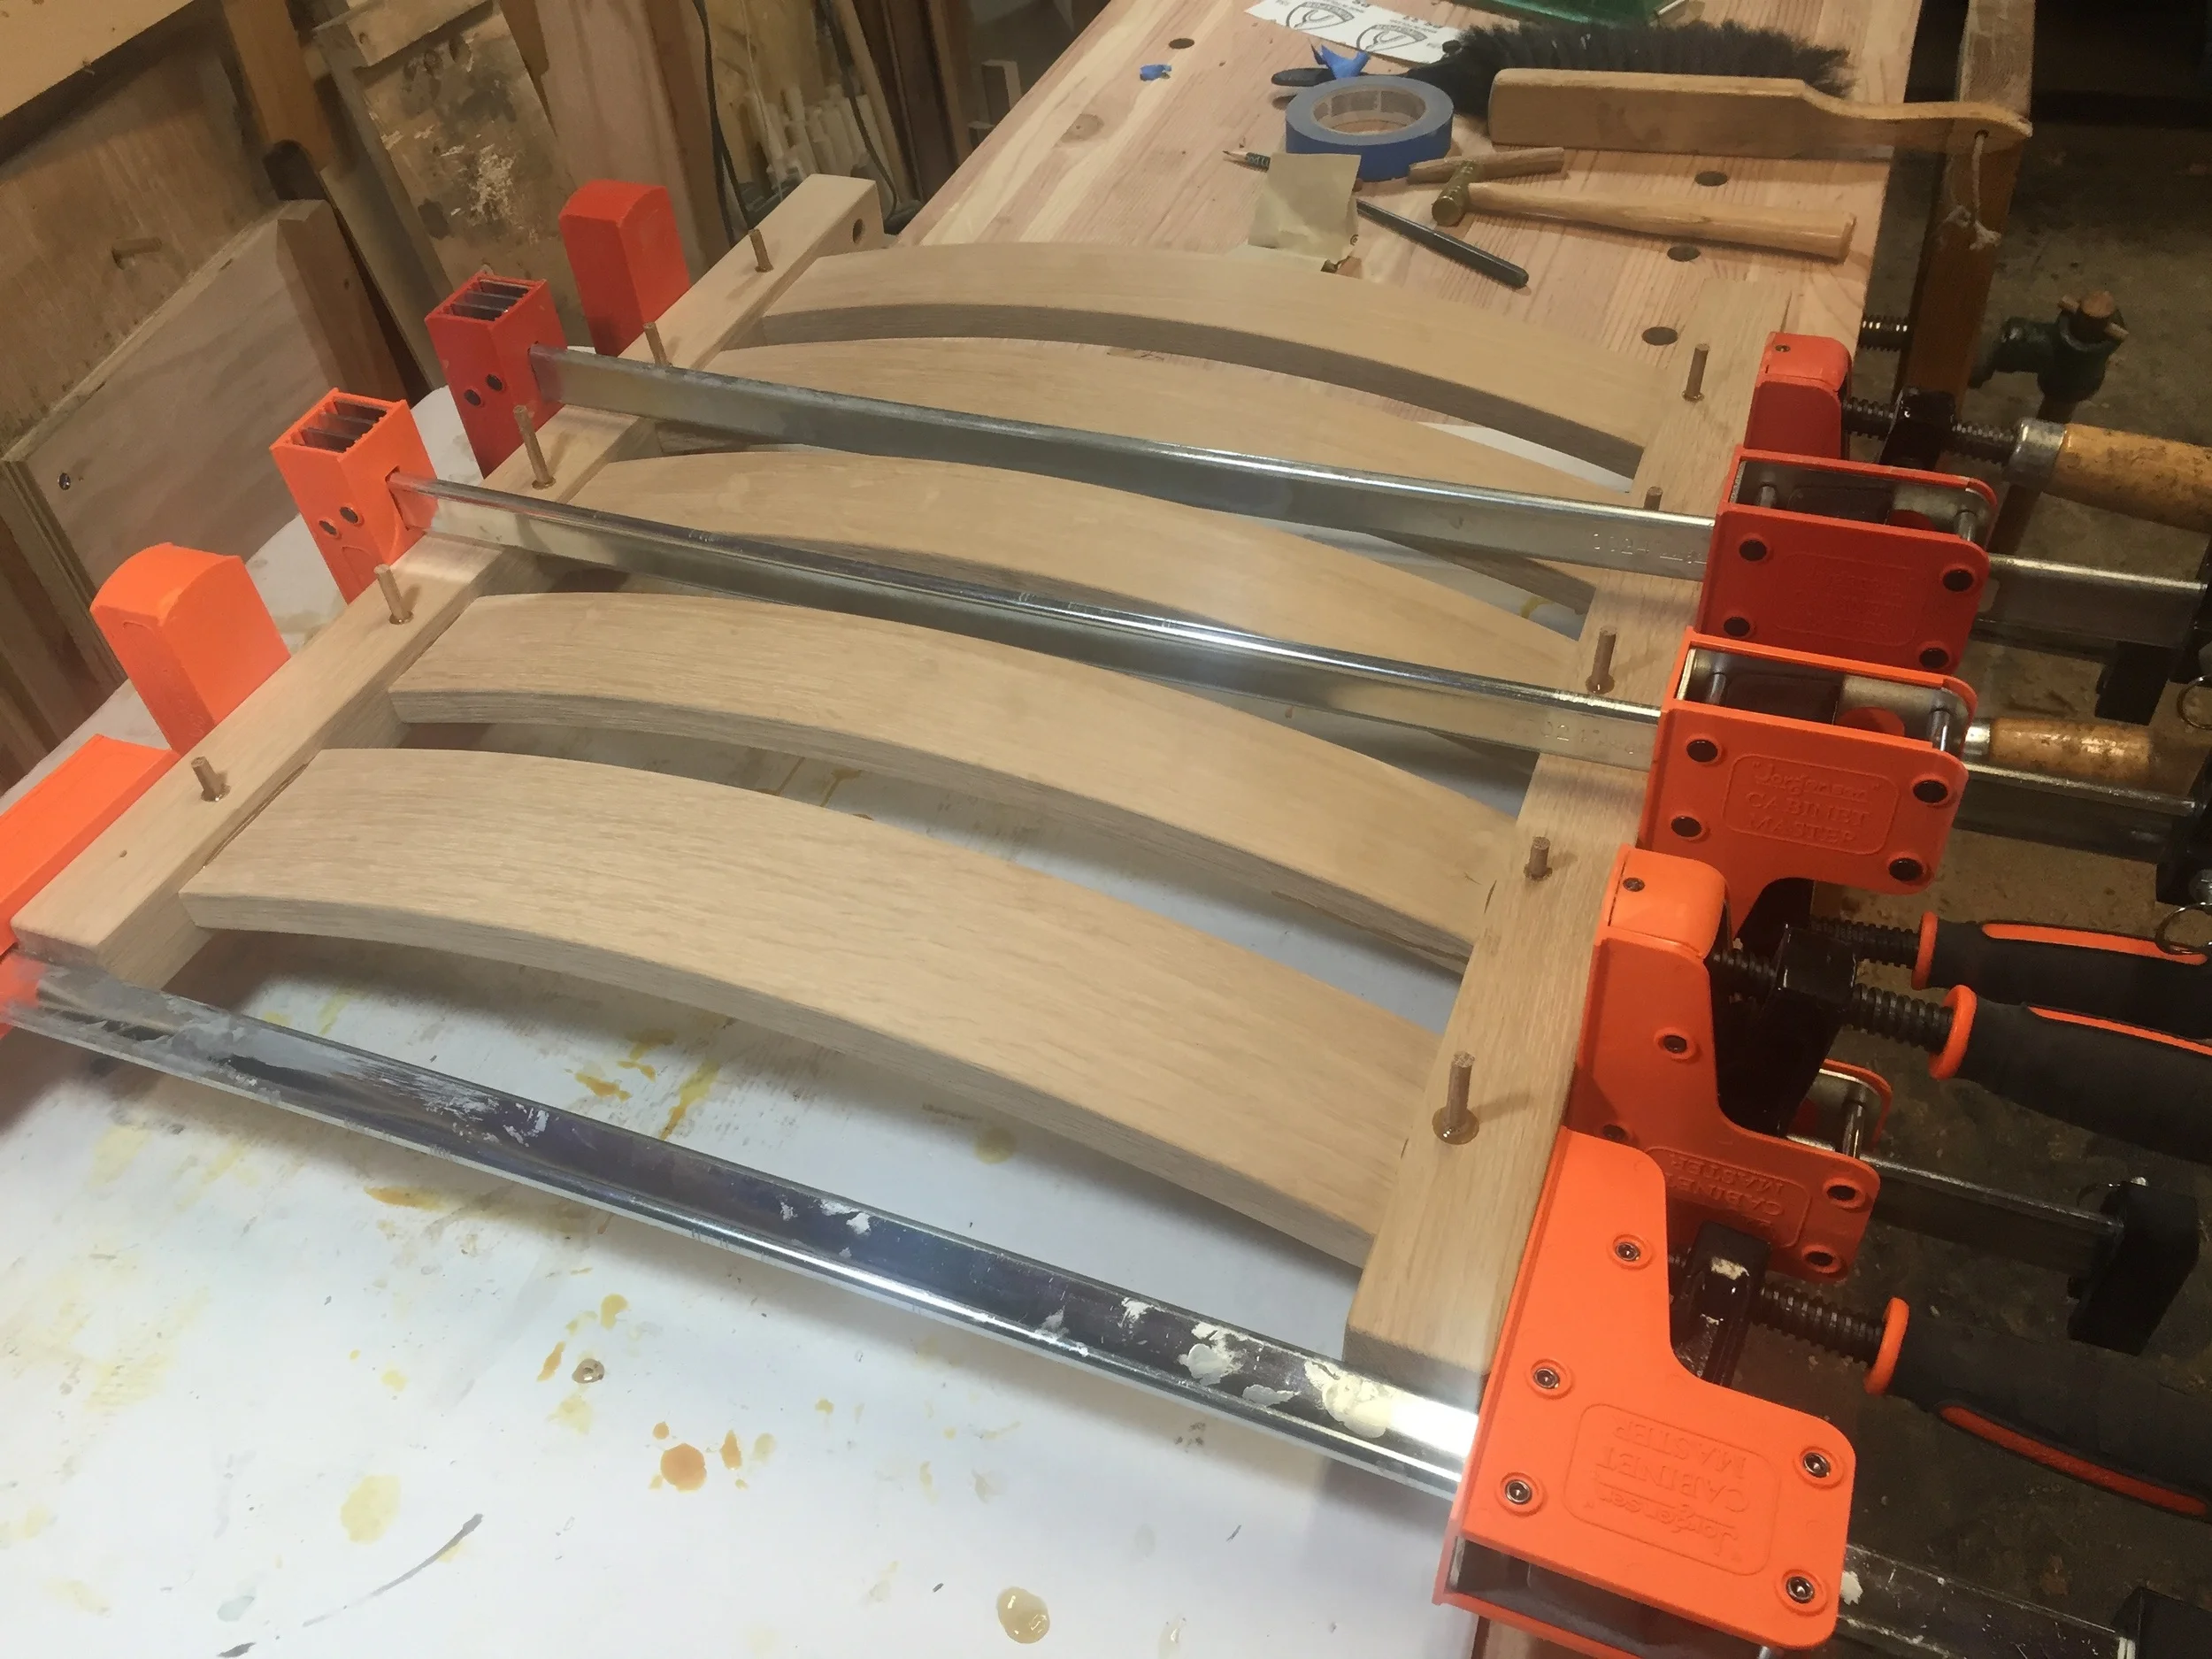
The last part to be built is the back assembly. This consists of a series of curved slats mortised into two stiles. The curved back slats are made by making bent laminations, dried on a bending form. First, thin 1/8" strips are made, then they are glued together again, while clamping them to a form that makes the desired shape. Brett and I tried a few different methods to get there, but we found a good methods and applied it to the rest of the build. This required lots of clamps, lots of glue, and we could only do one or two a day. So we started making these parts at the beginning of the build, and kept at it as we worked on other parts.

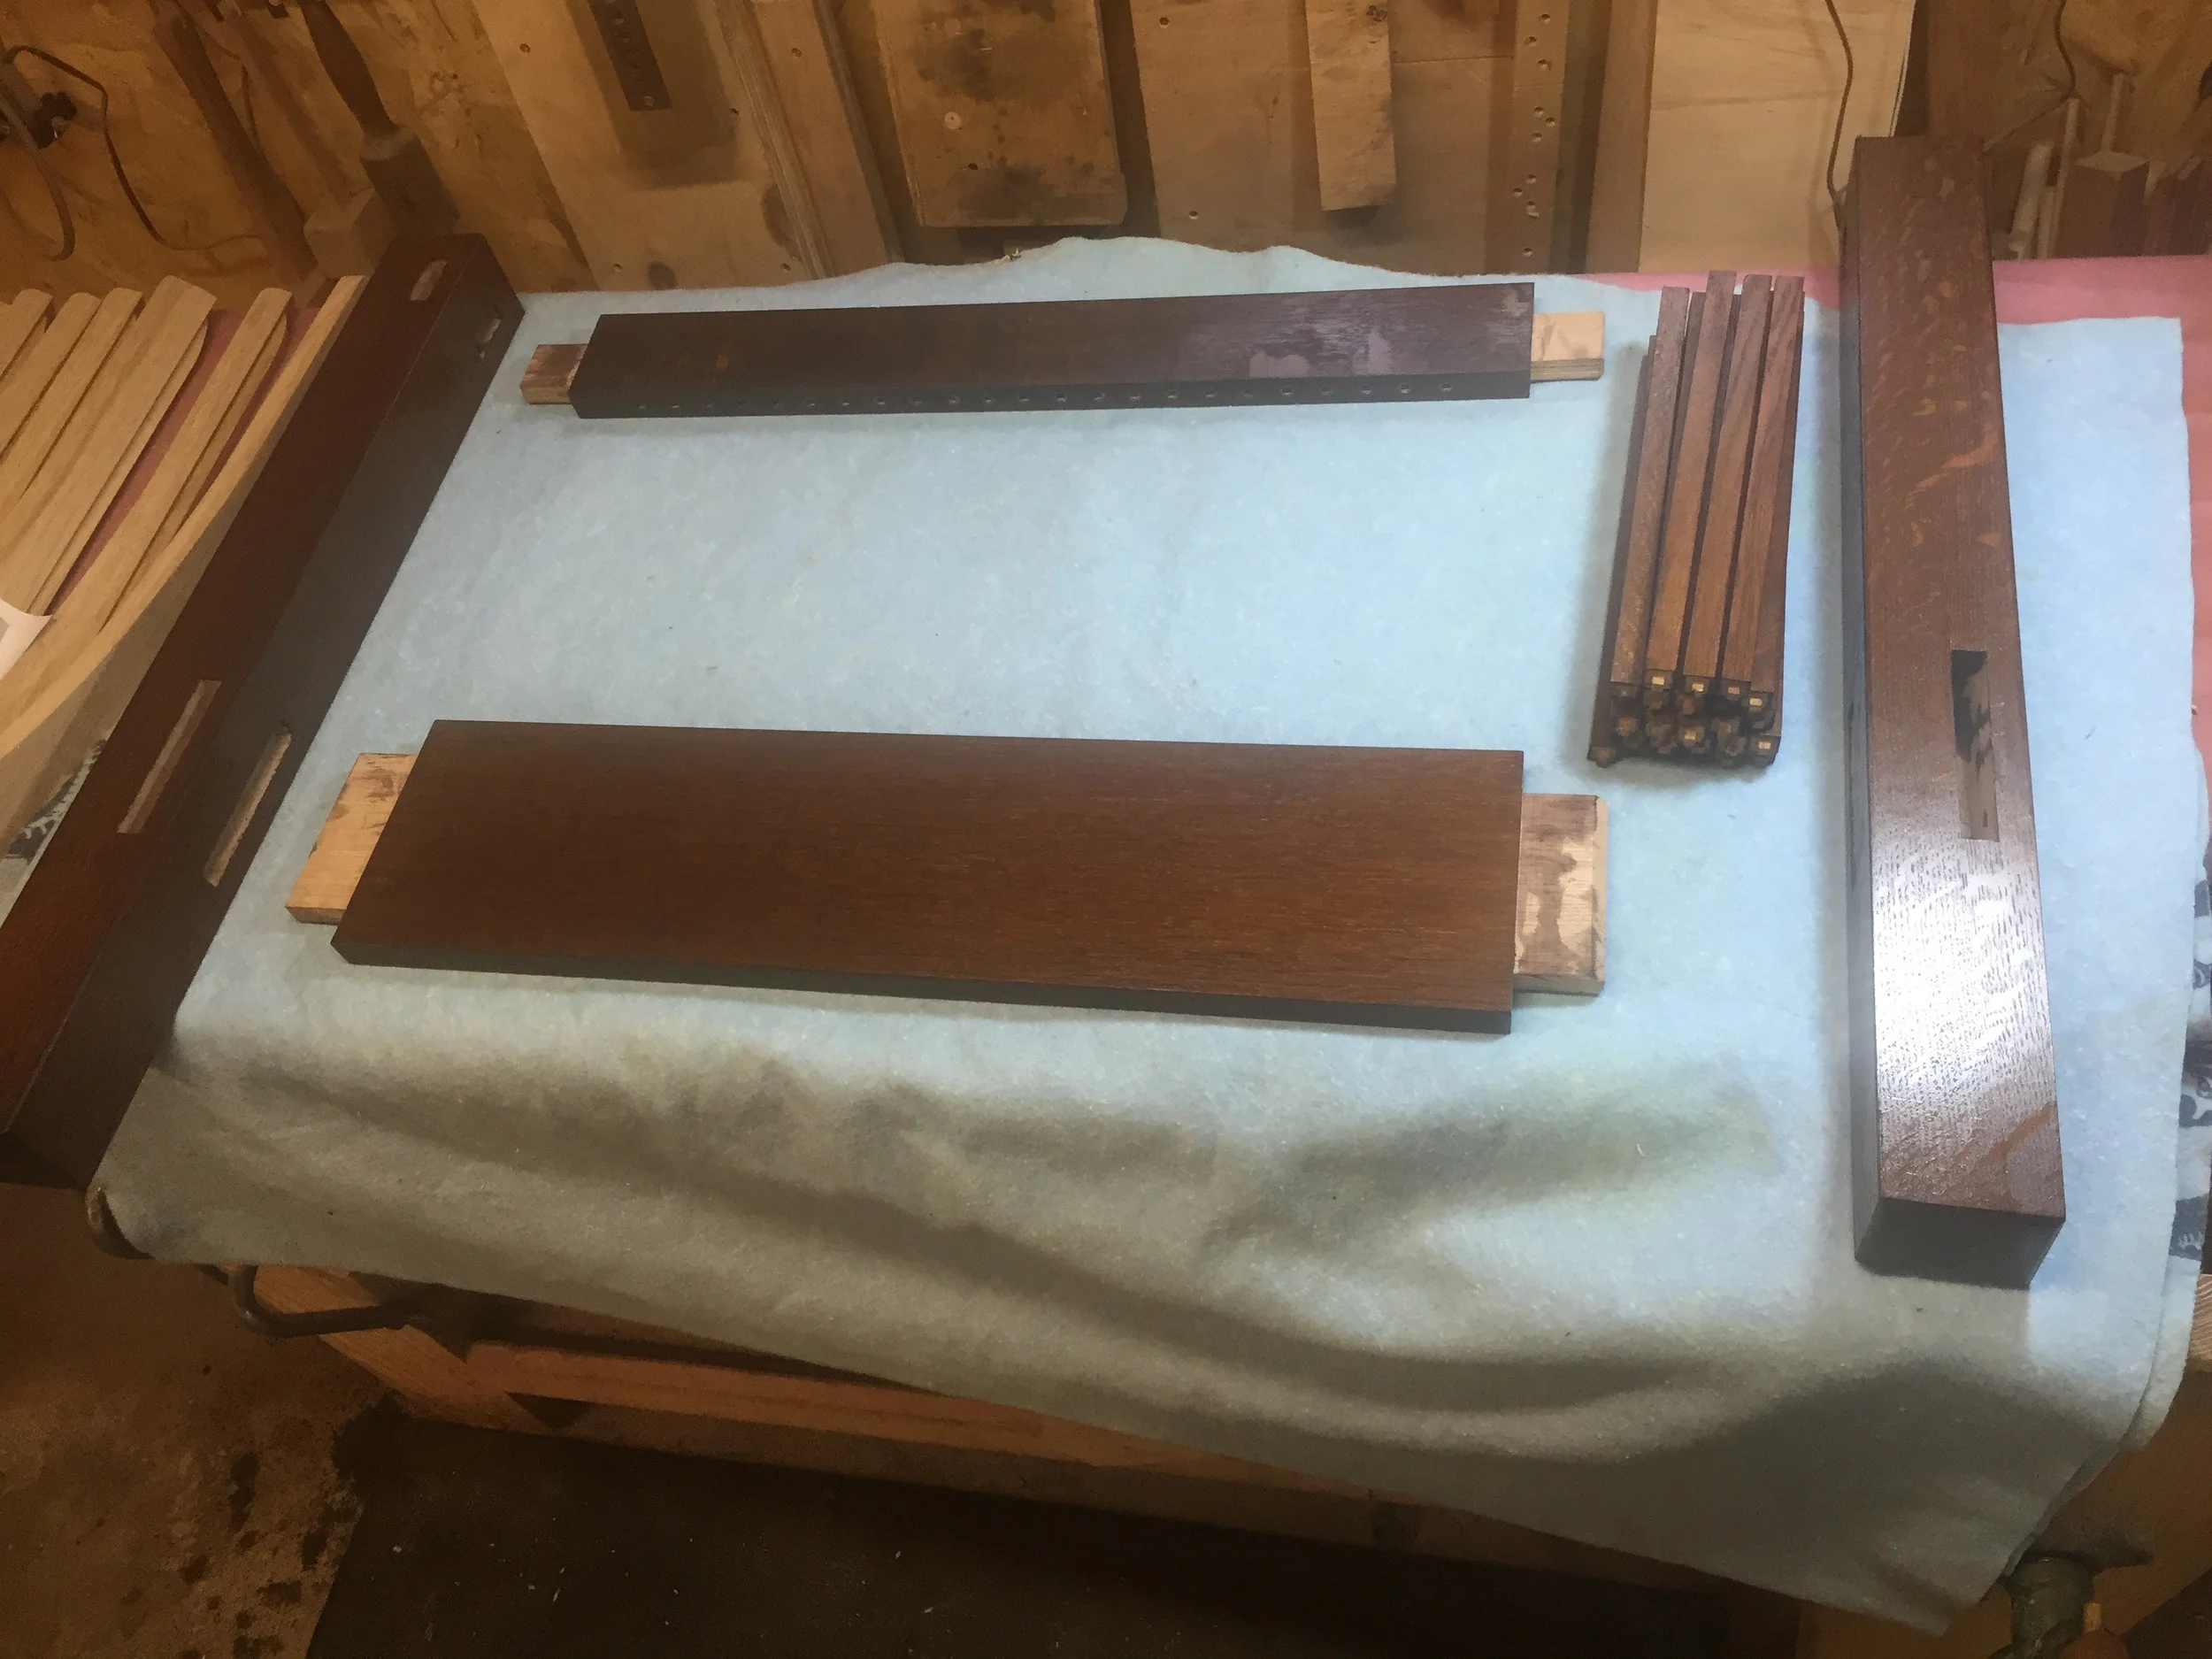
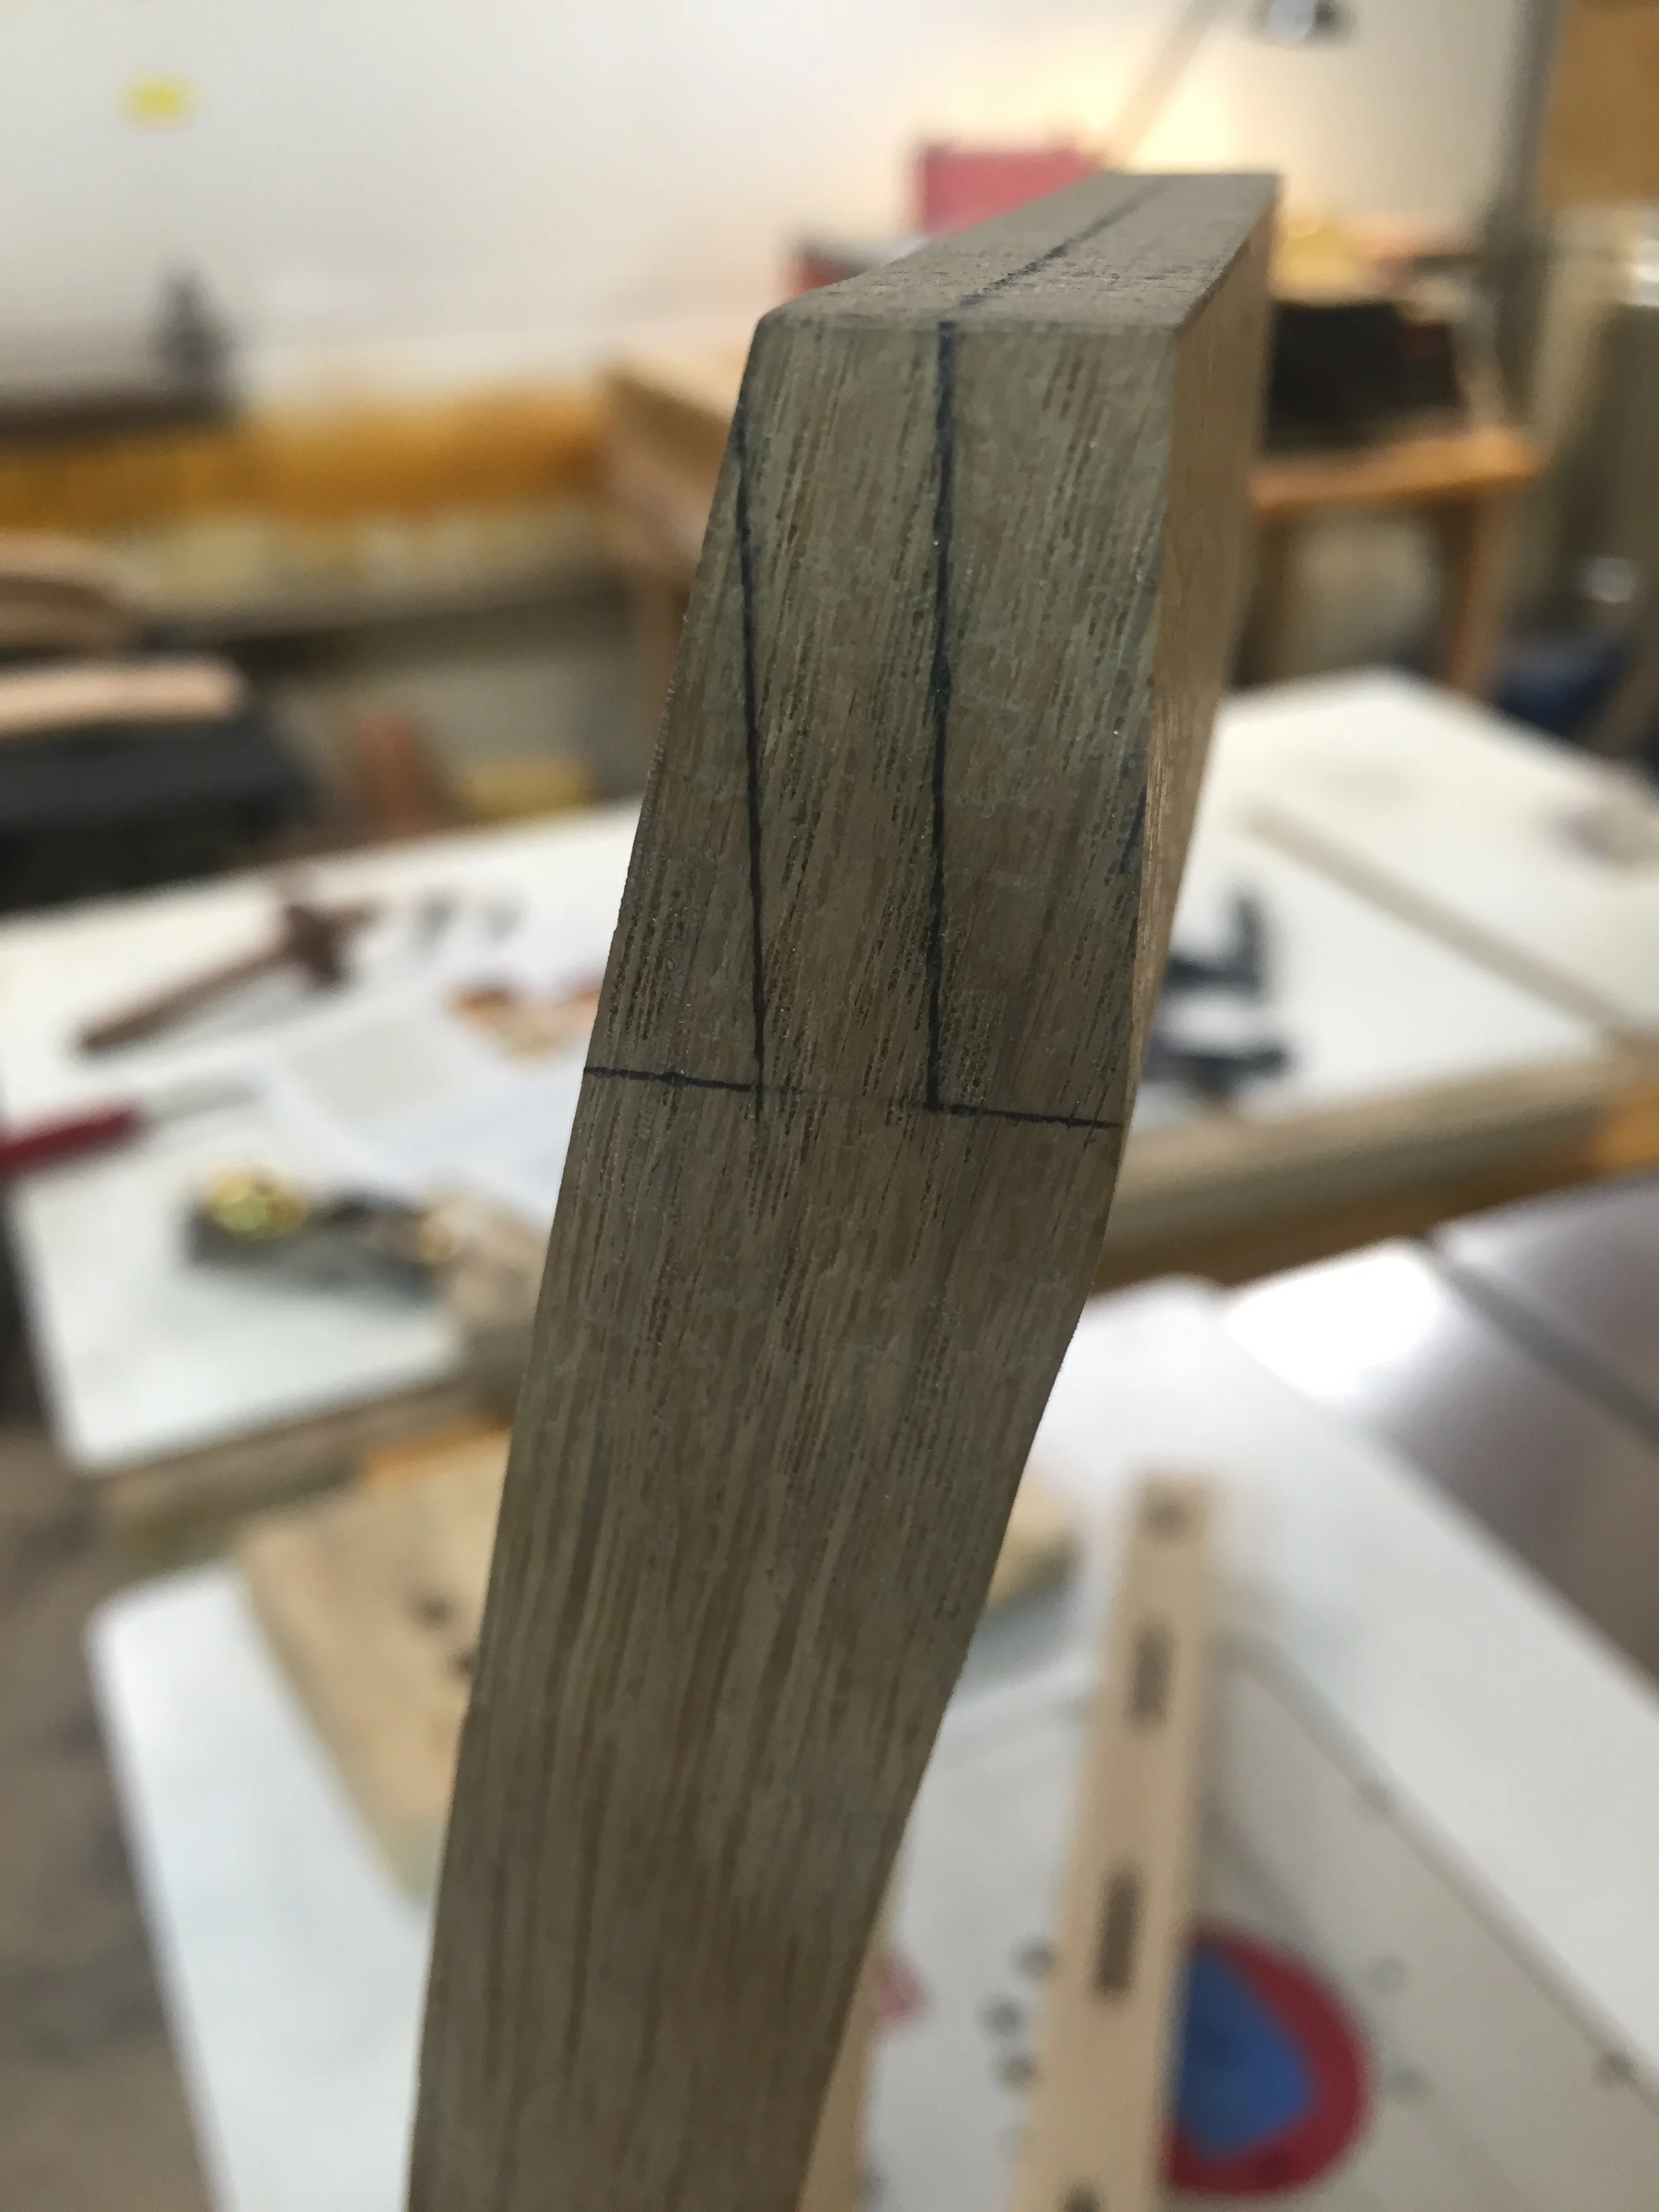
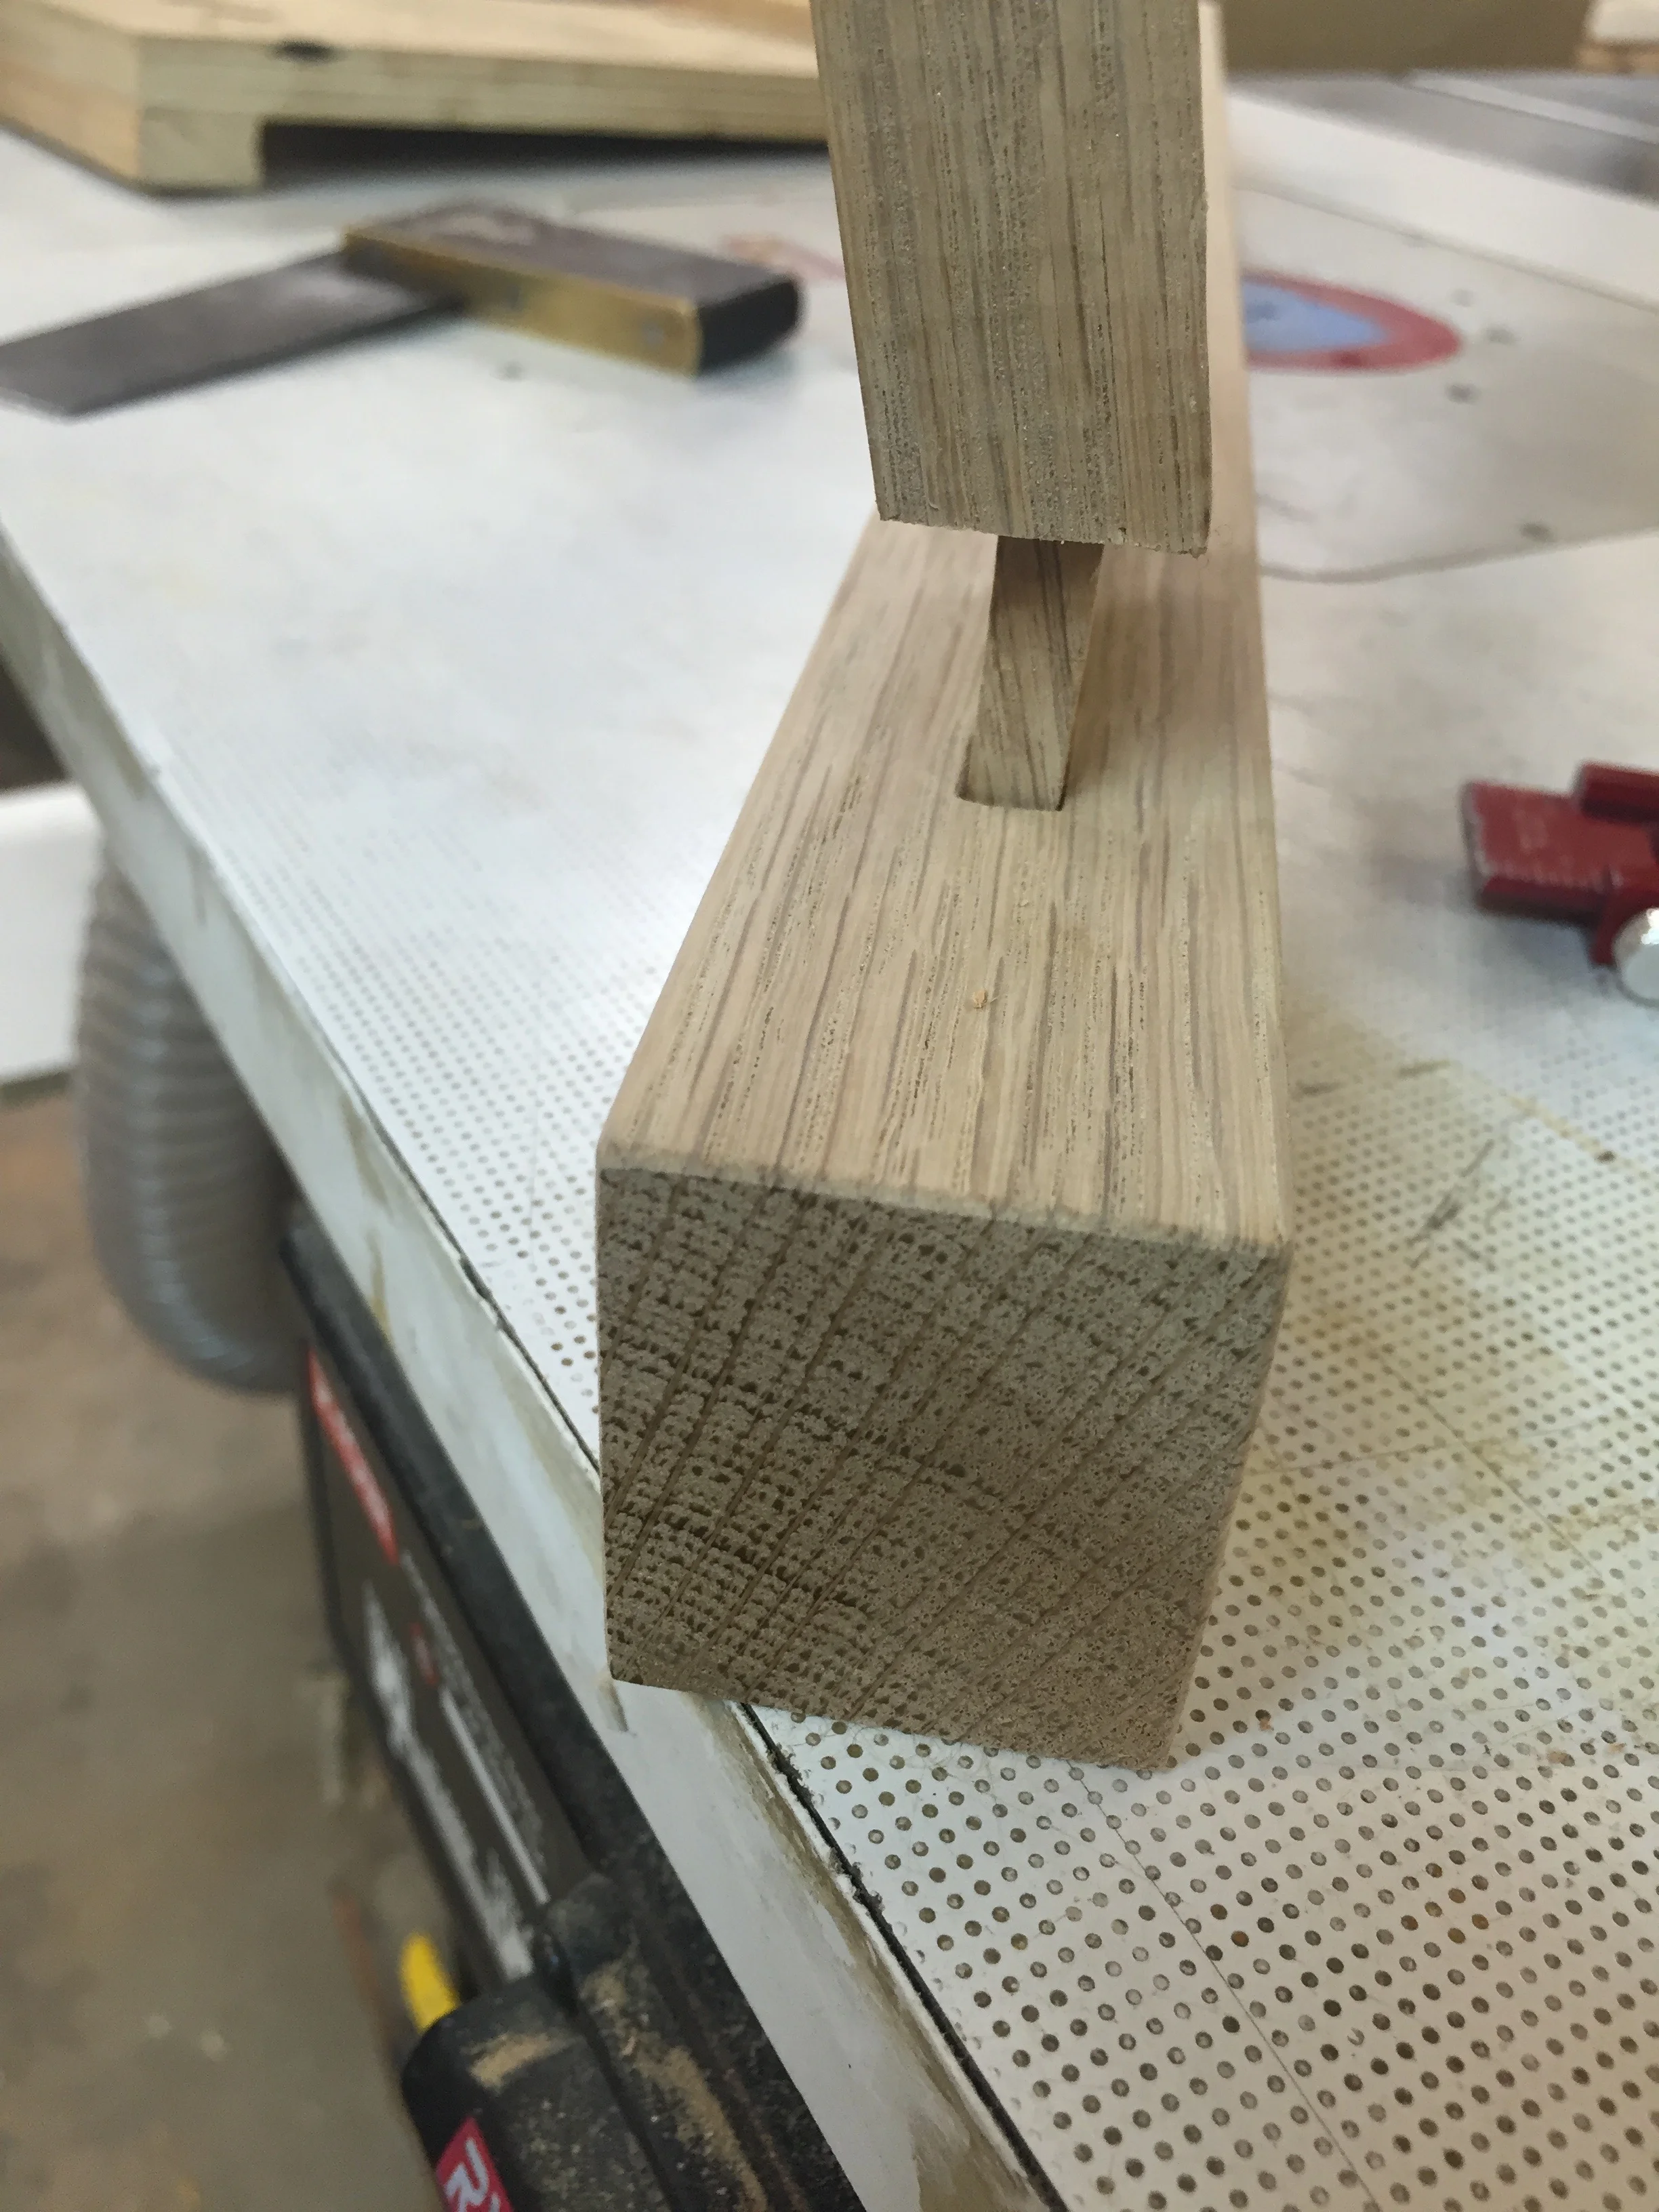
With the slats made, the last tricky bit was to cut square tenons on each of the slats. This took some careful layout, but in the end, all it took was laying it out, and cutting to the line. Then the slats were glued and draw bore pegged in place.

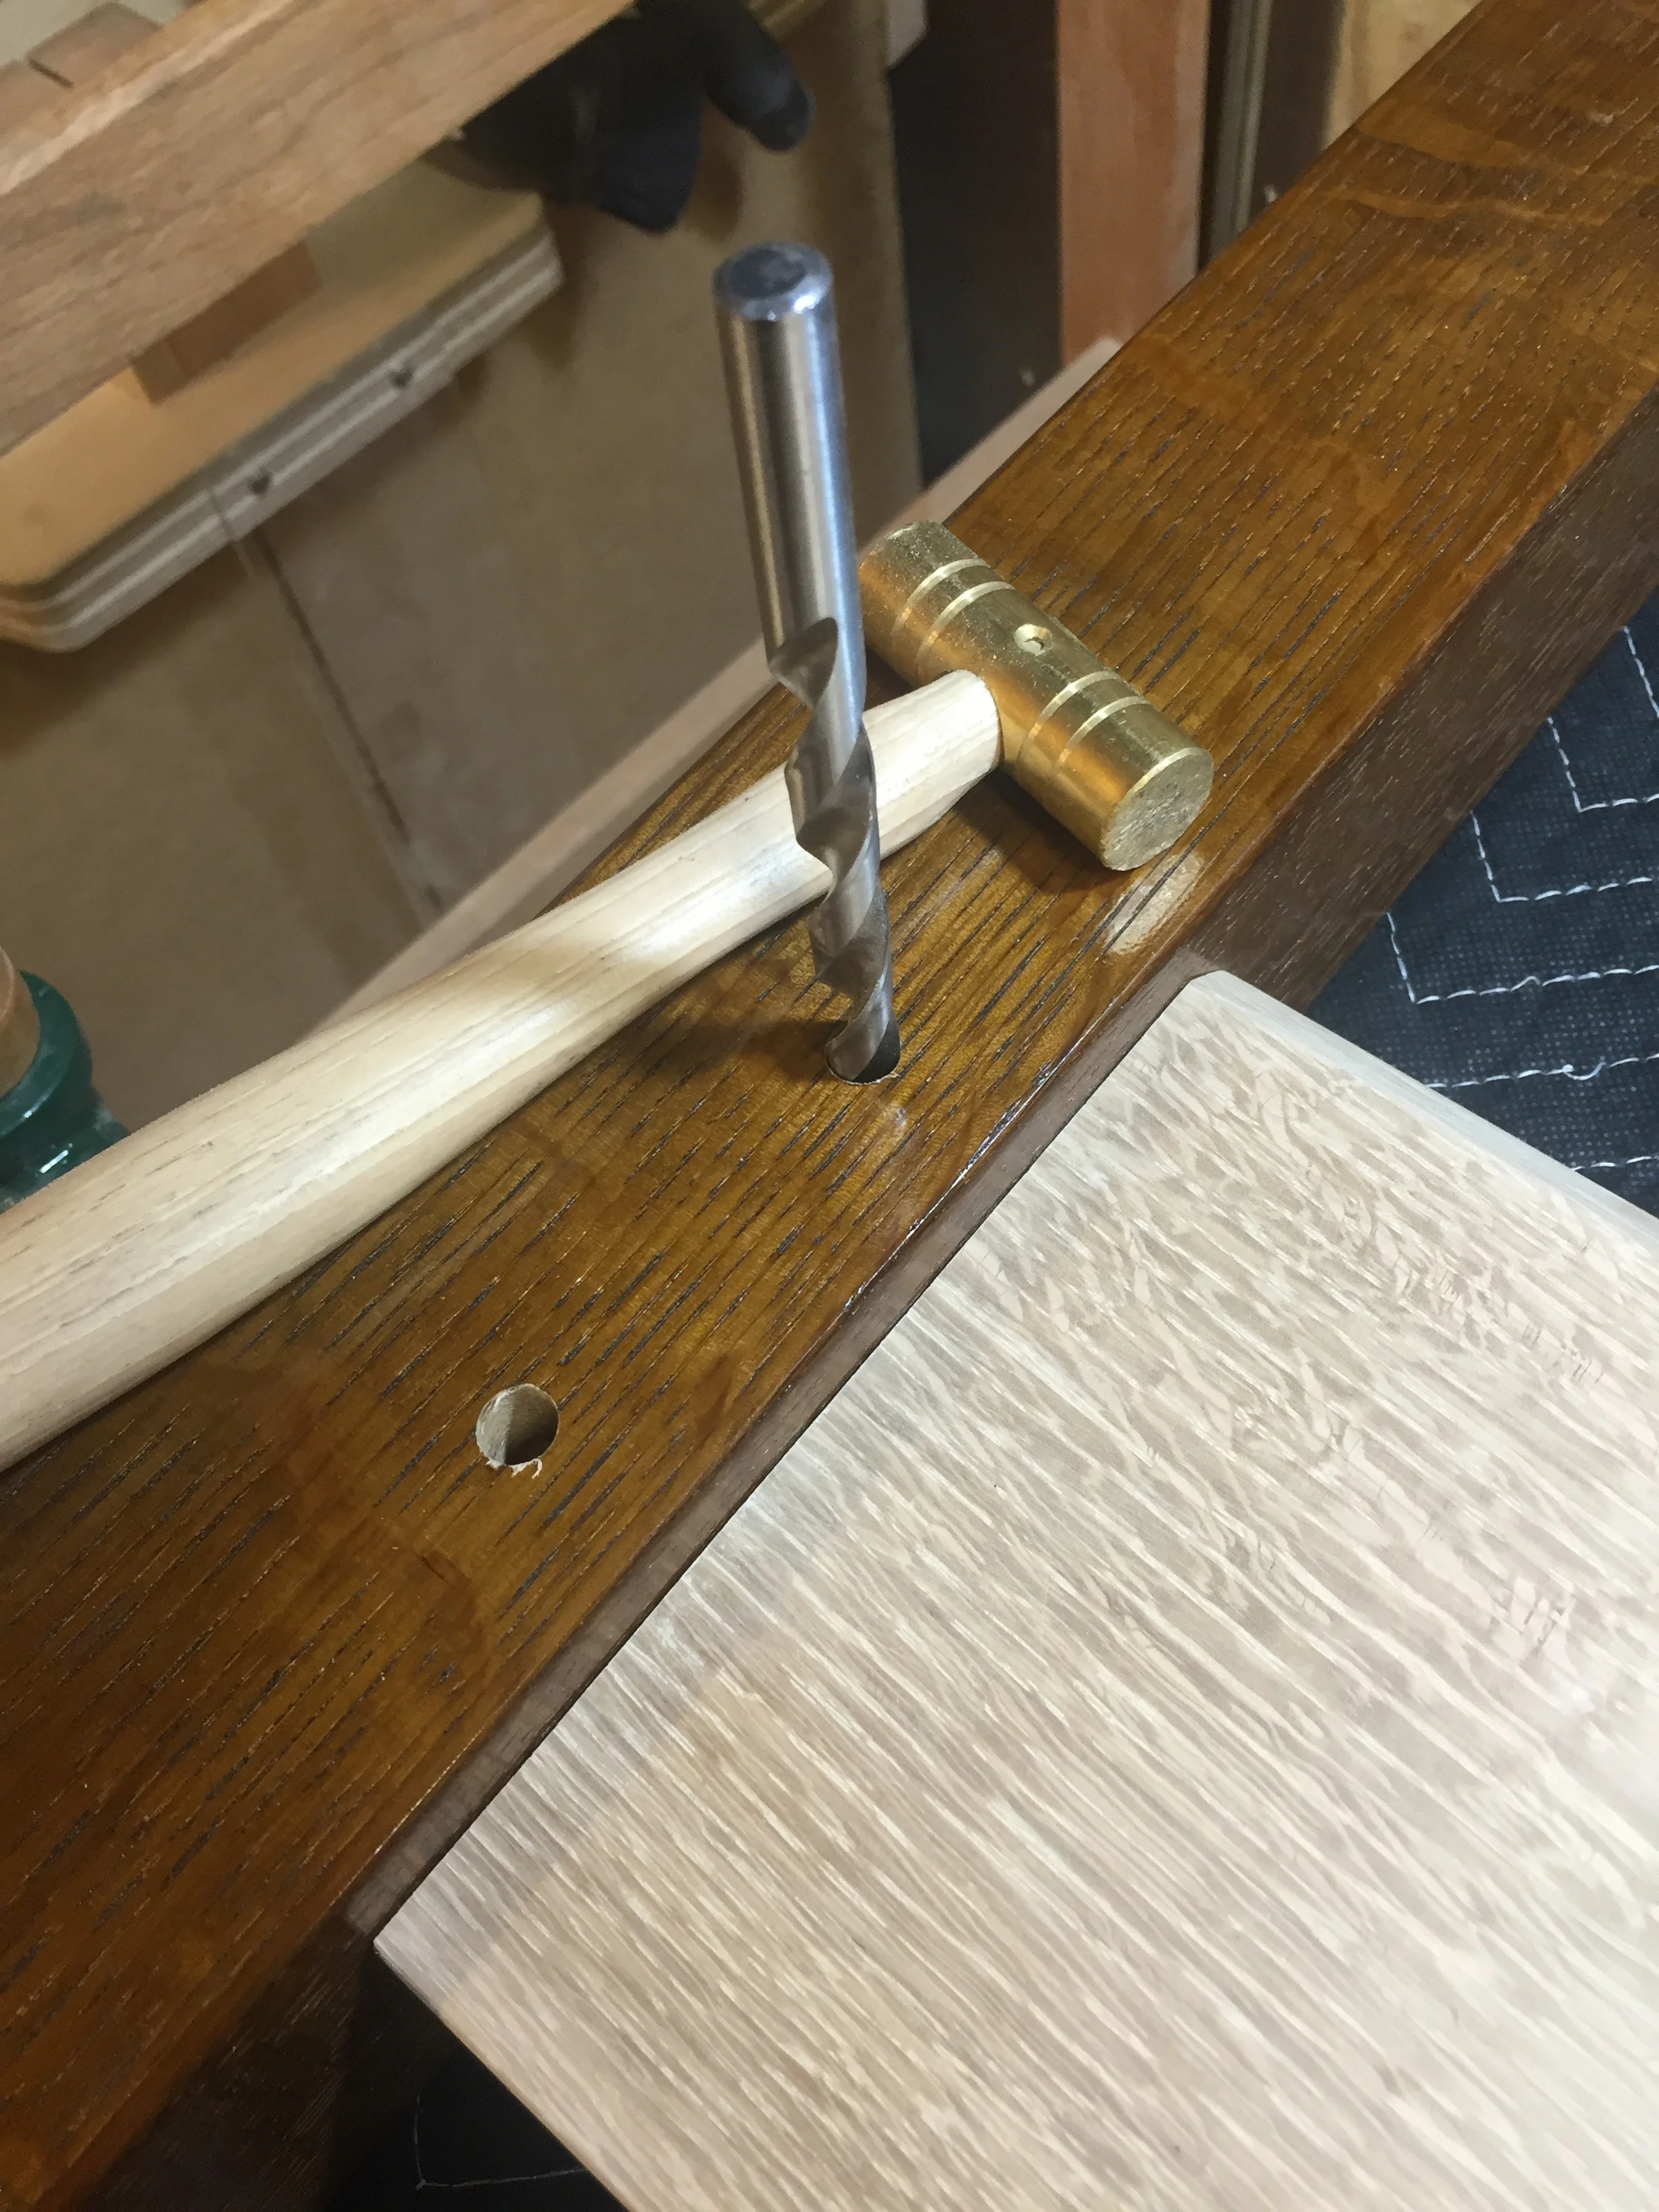
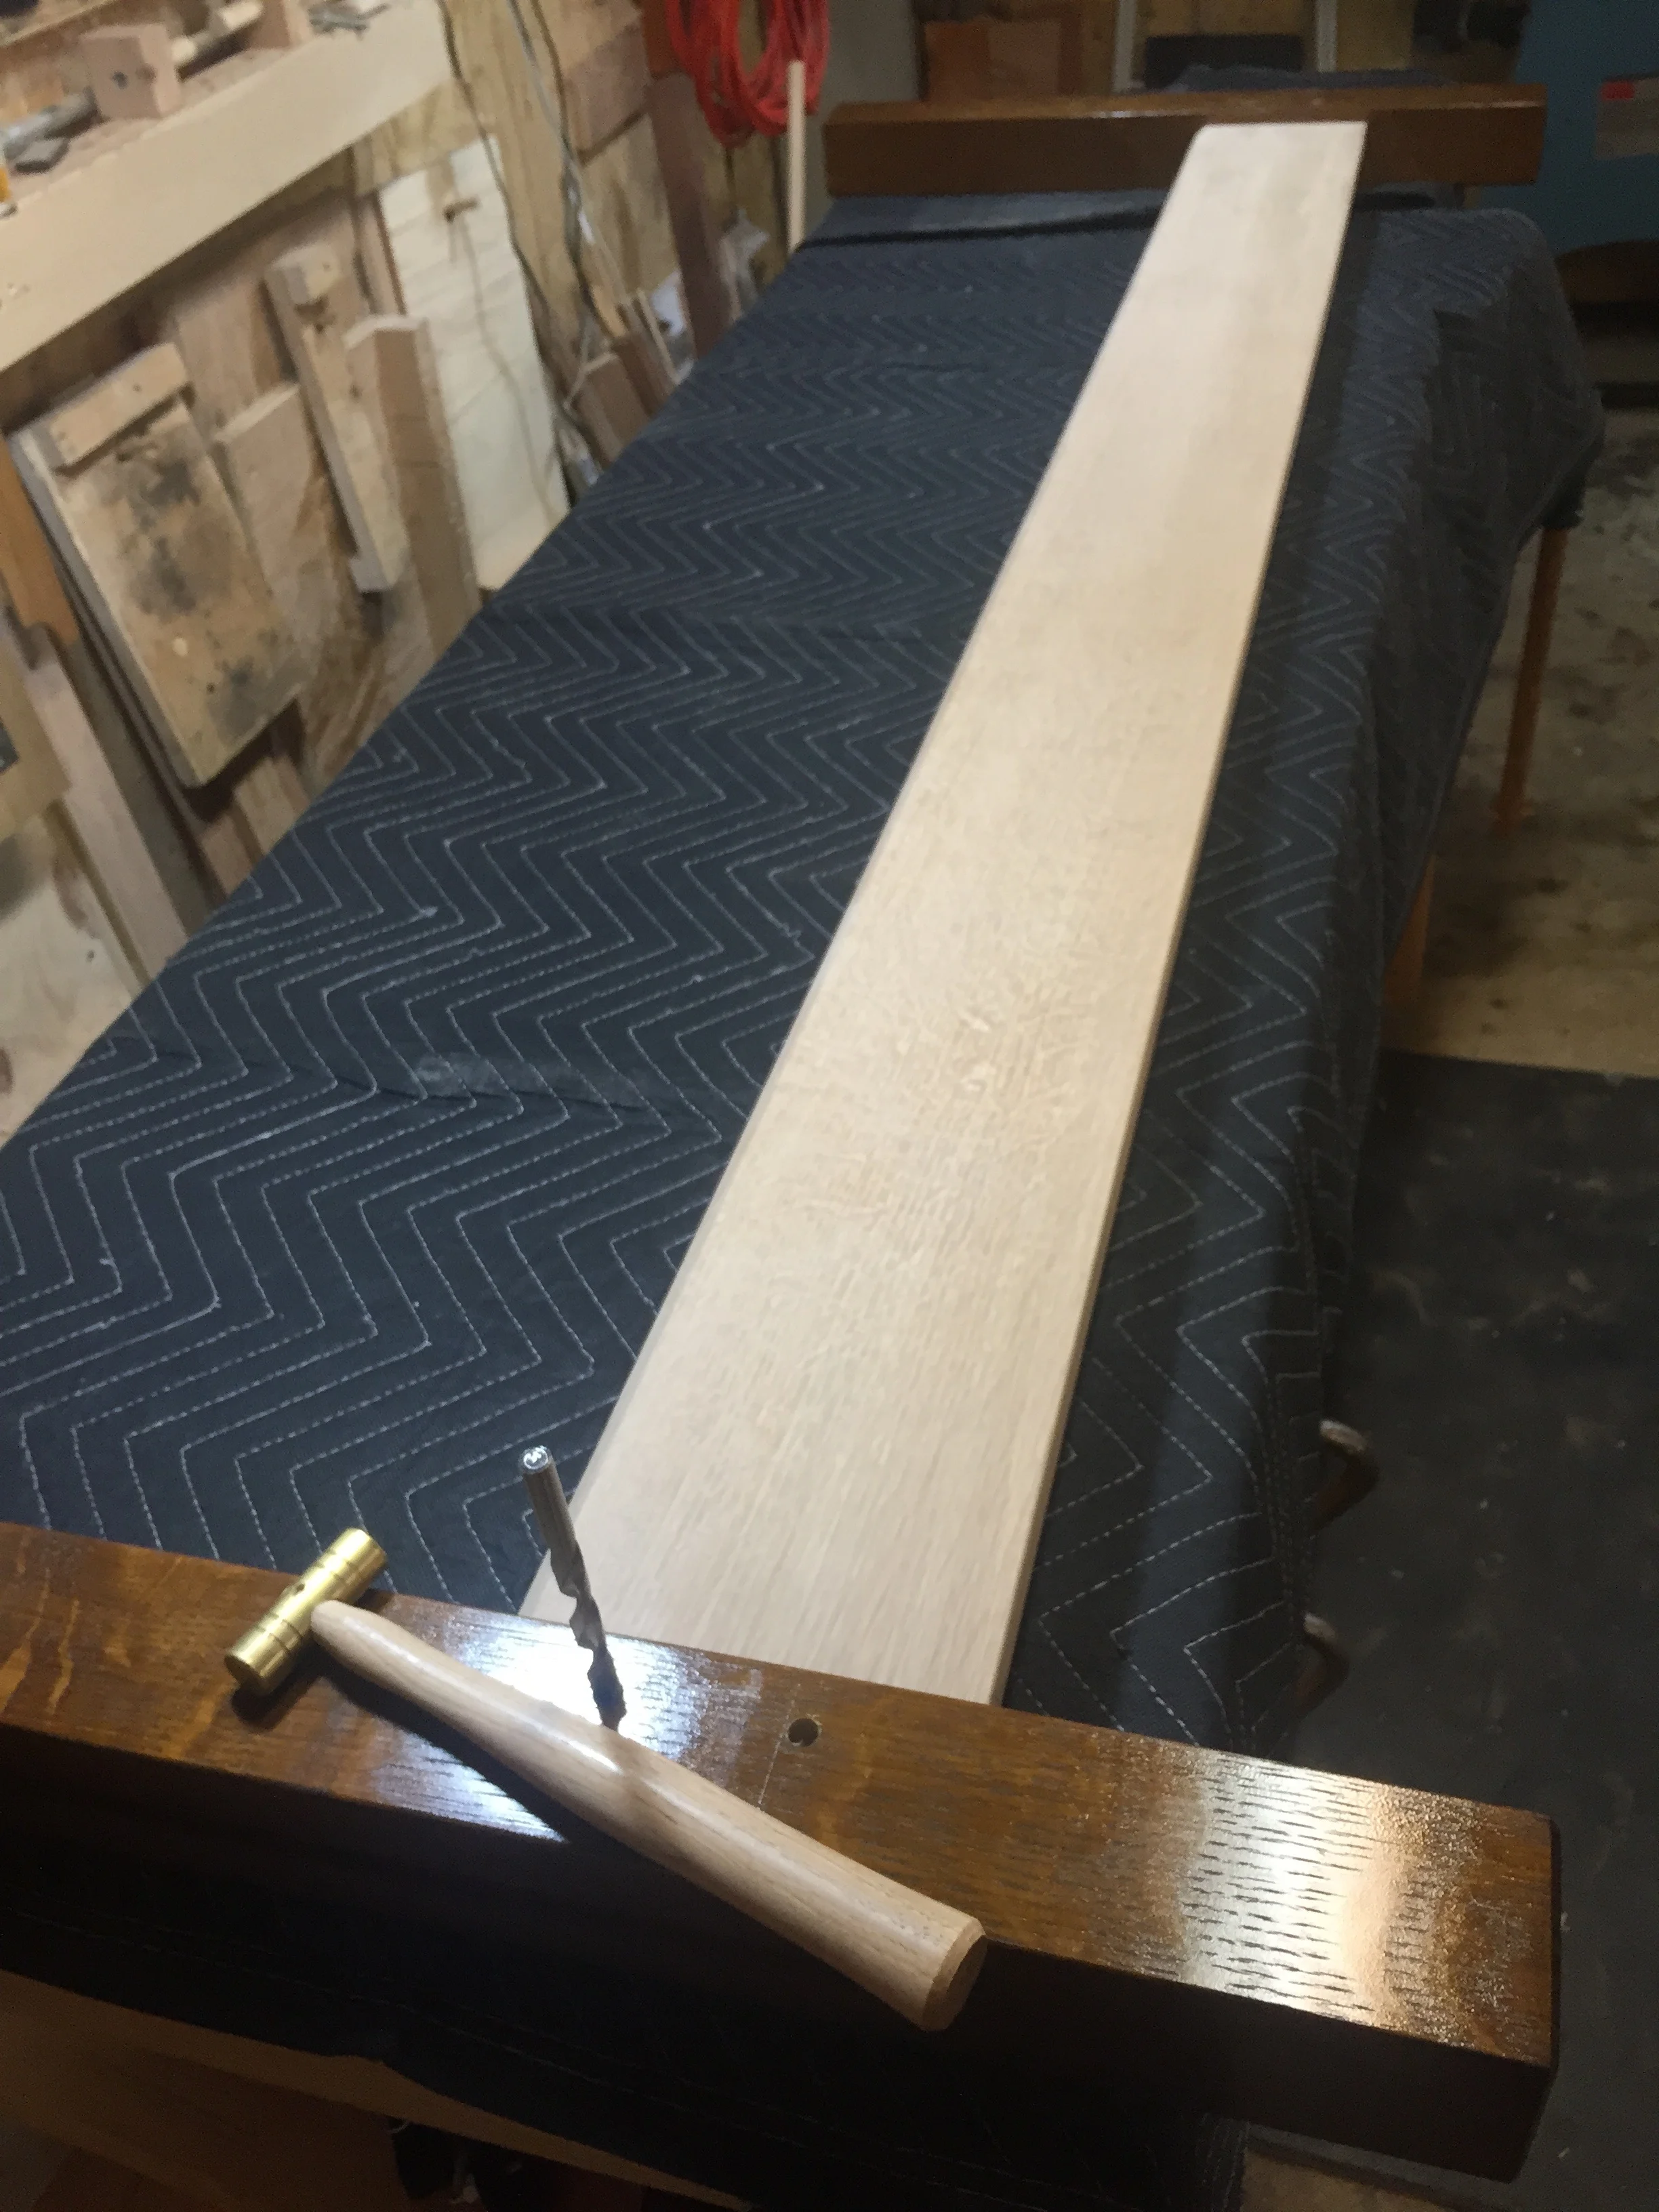
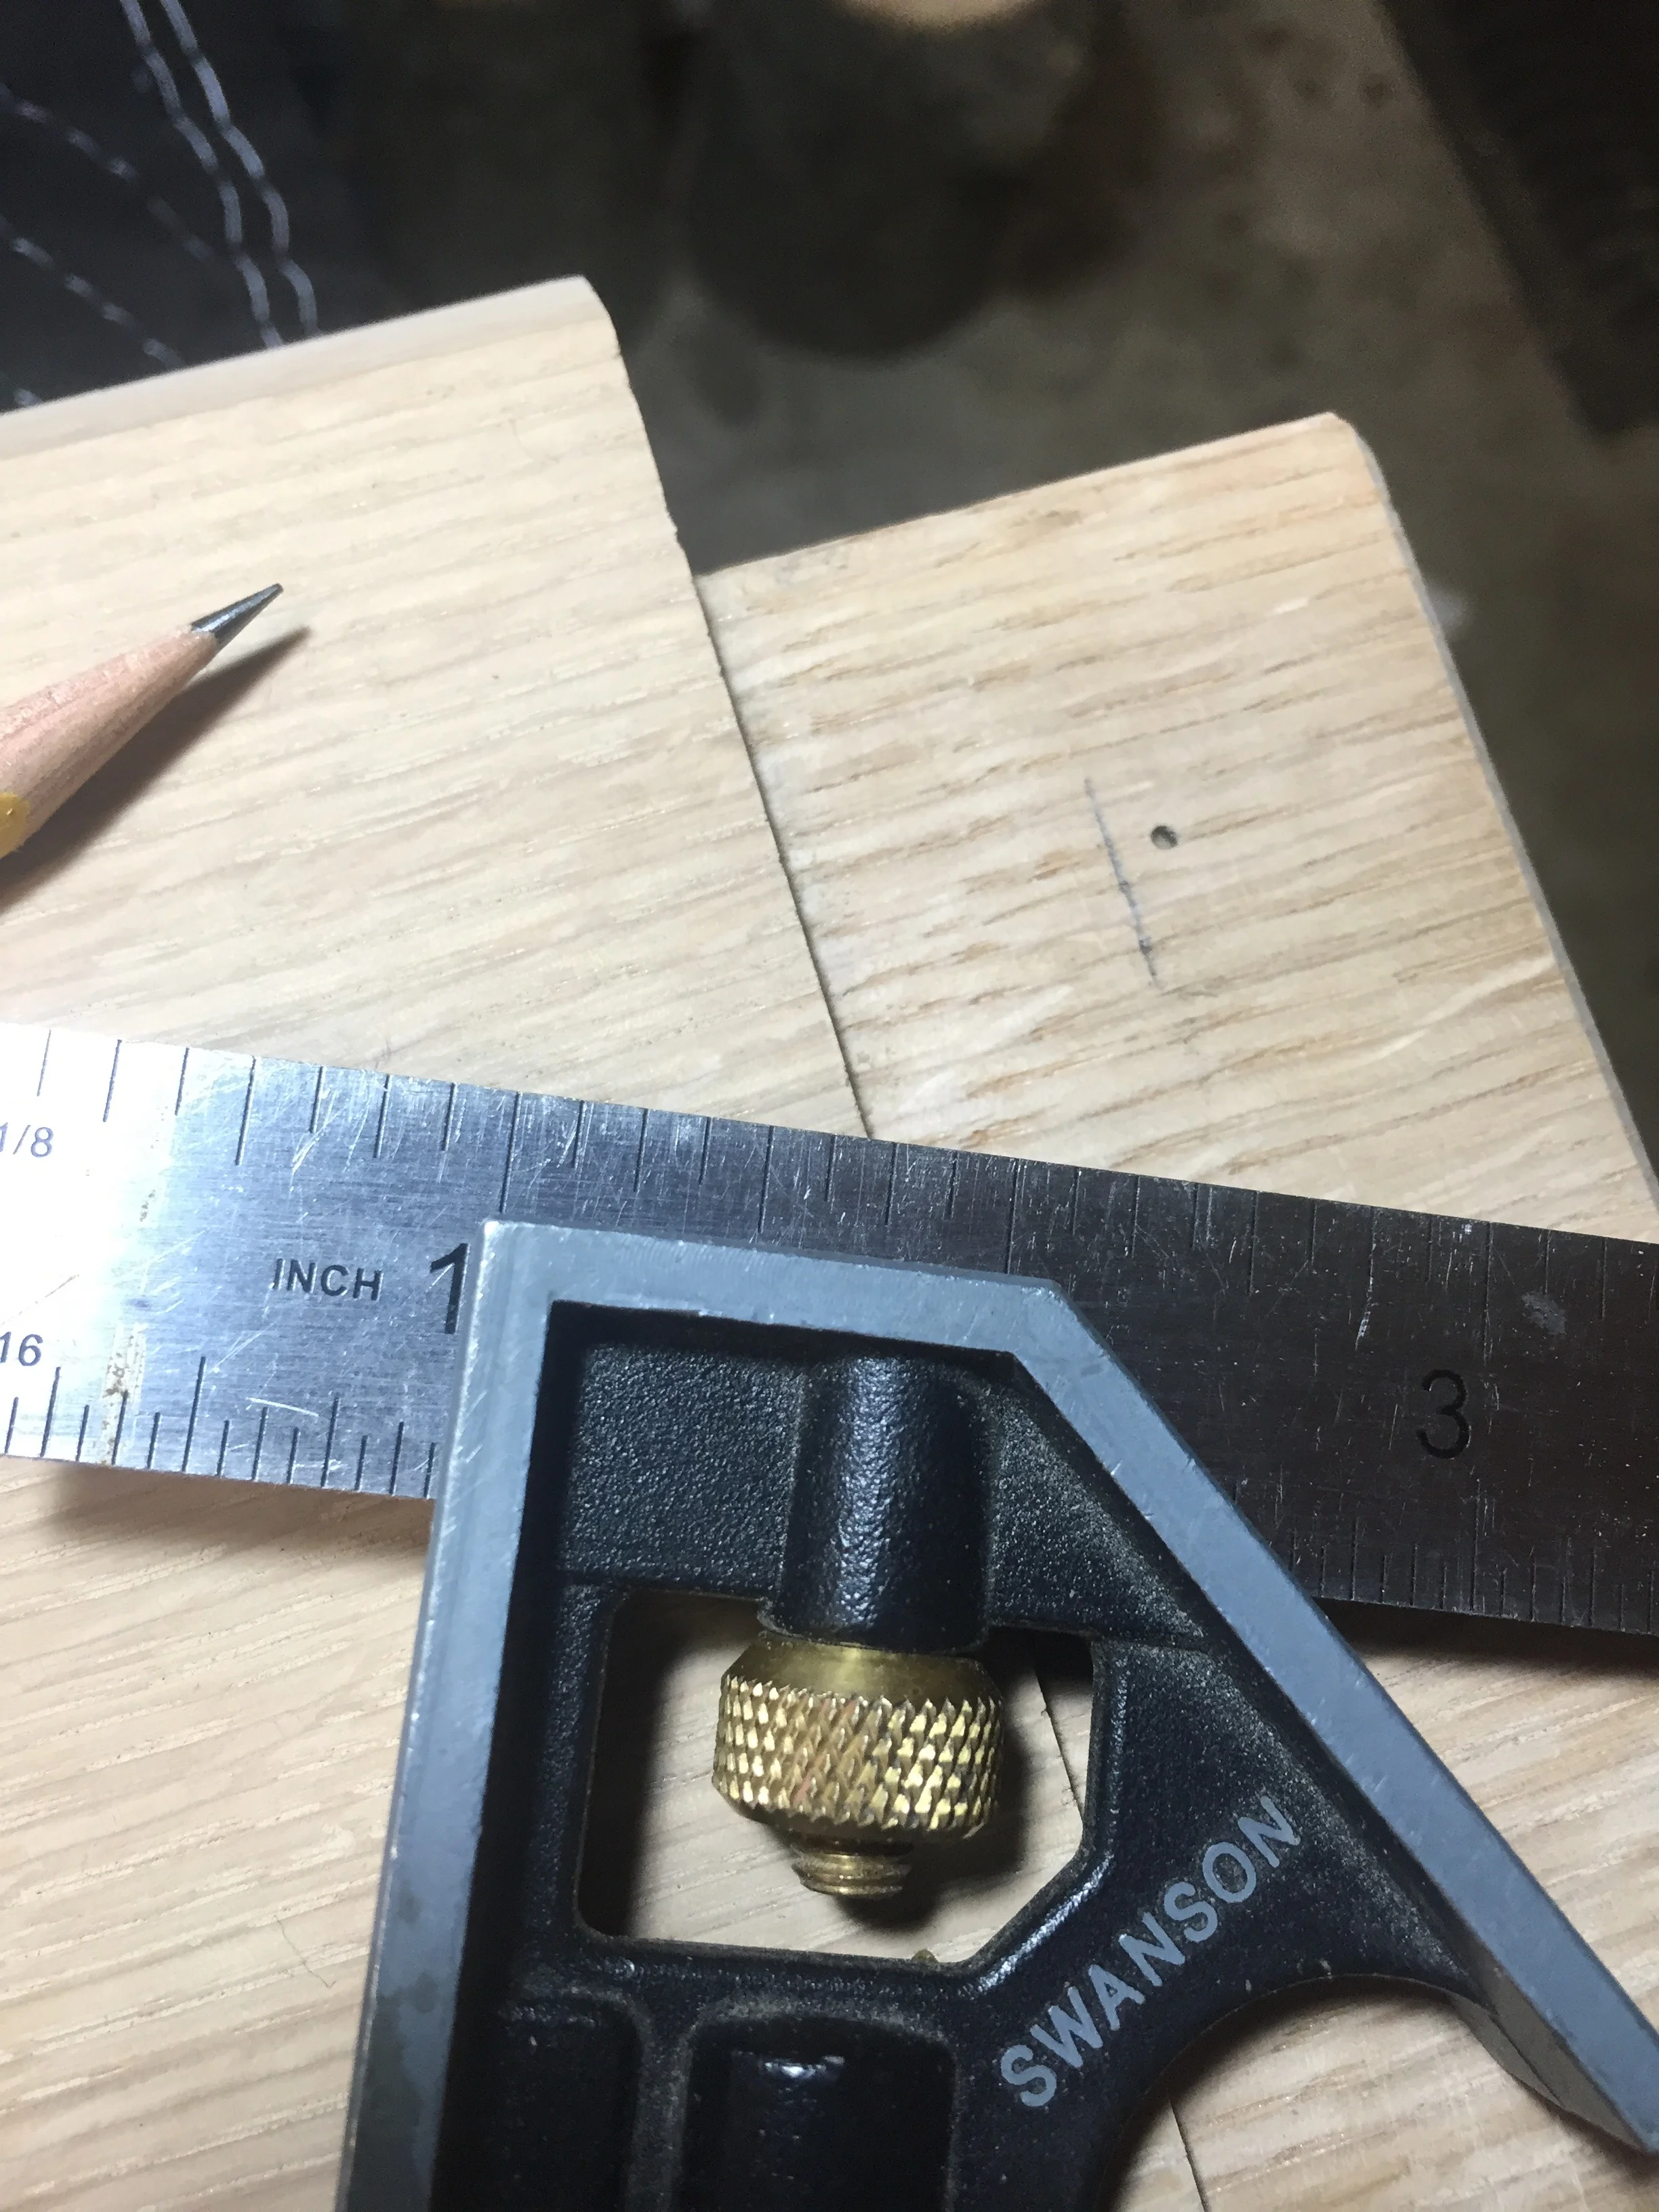
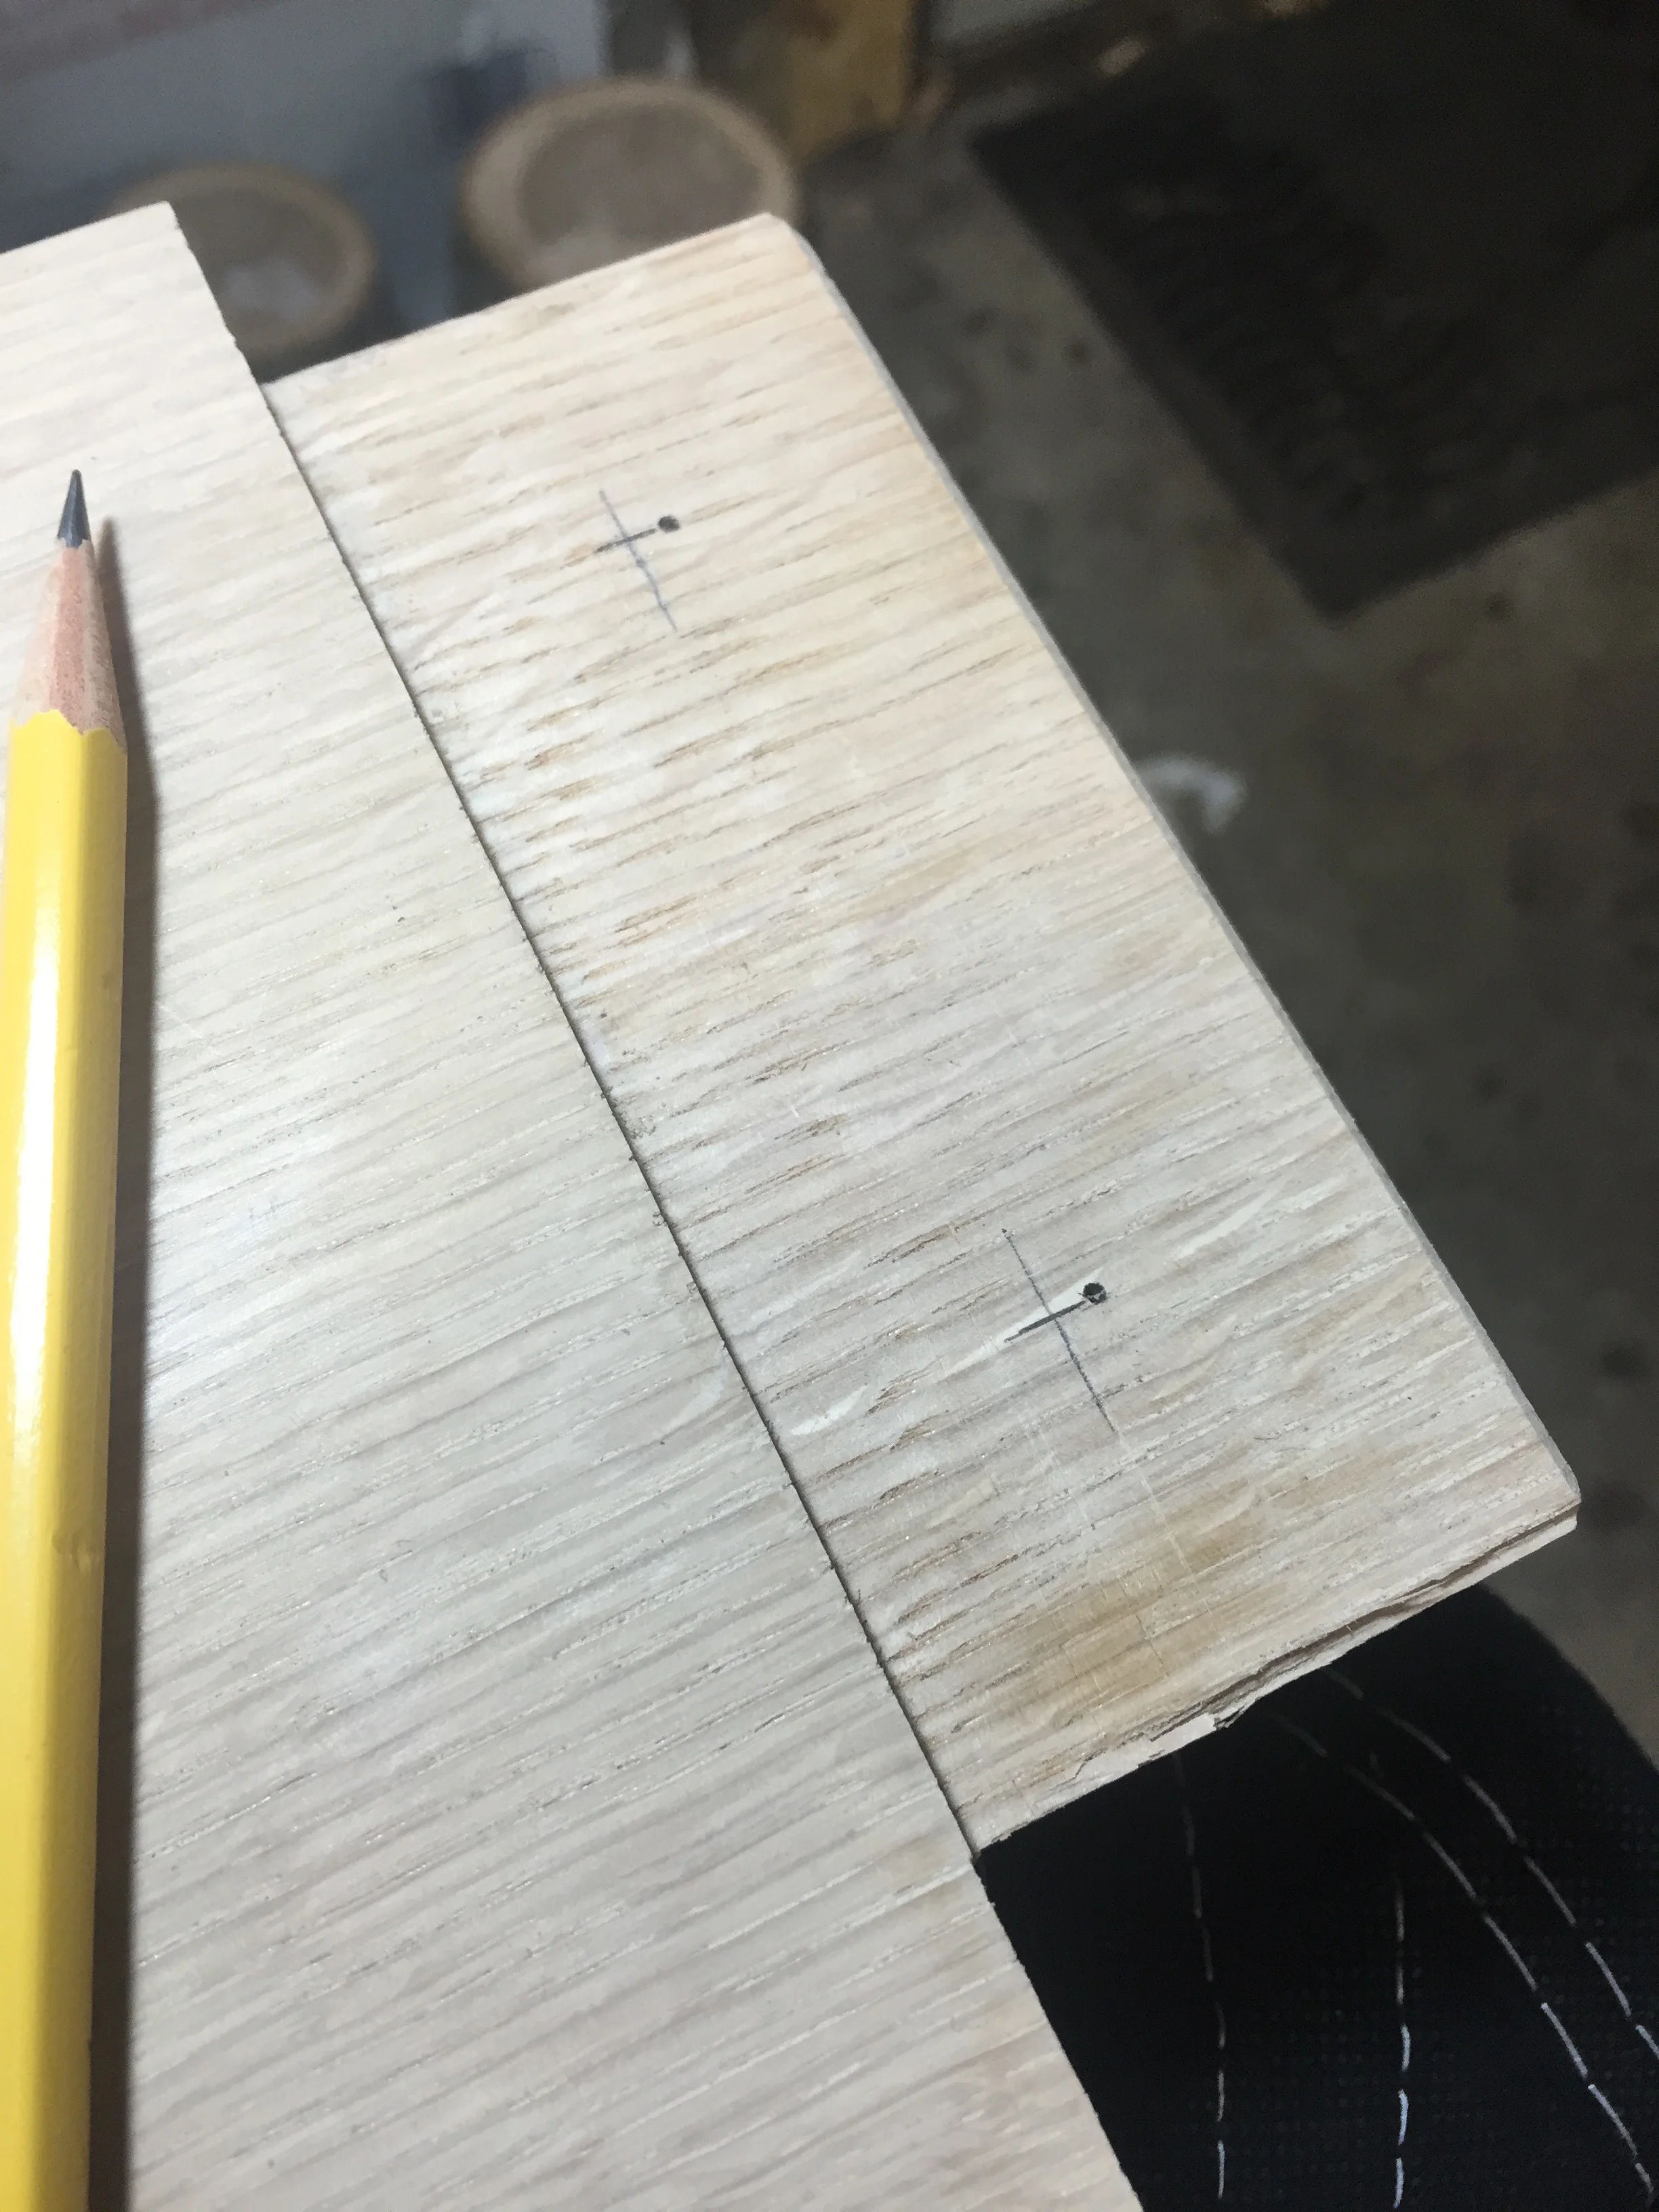
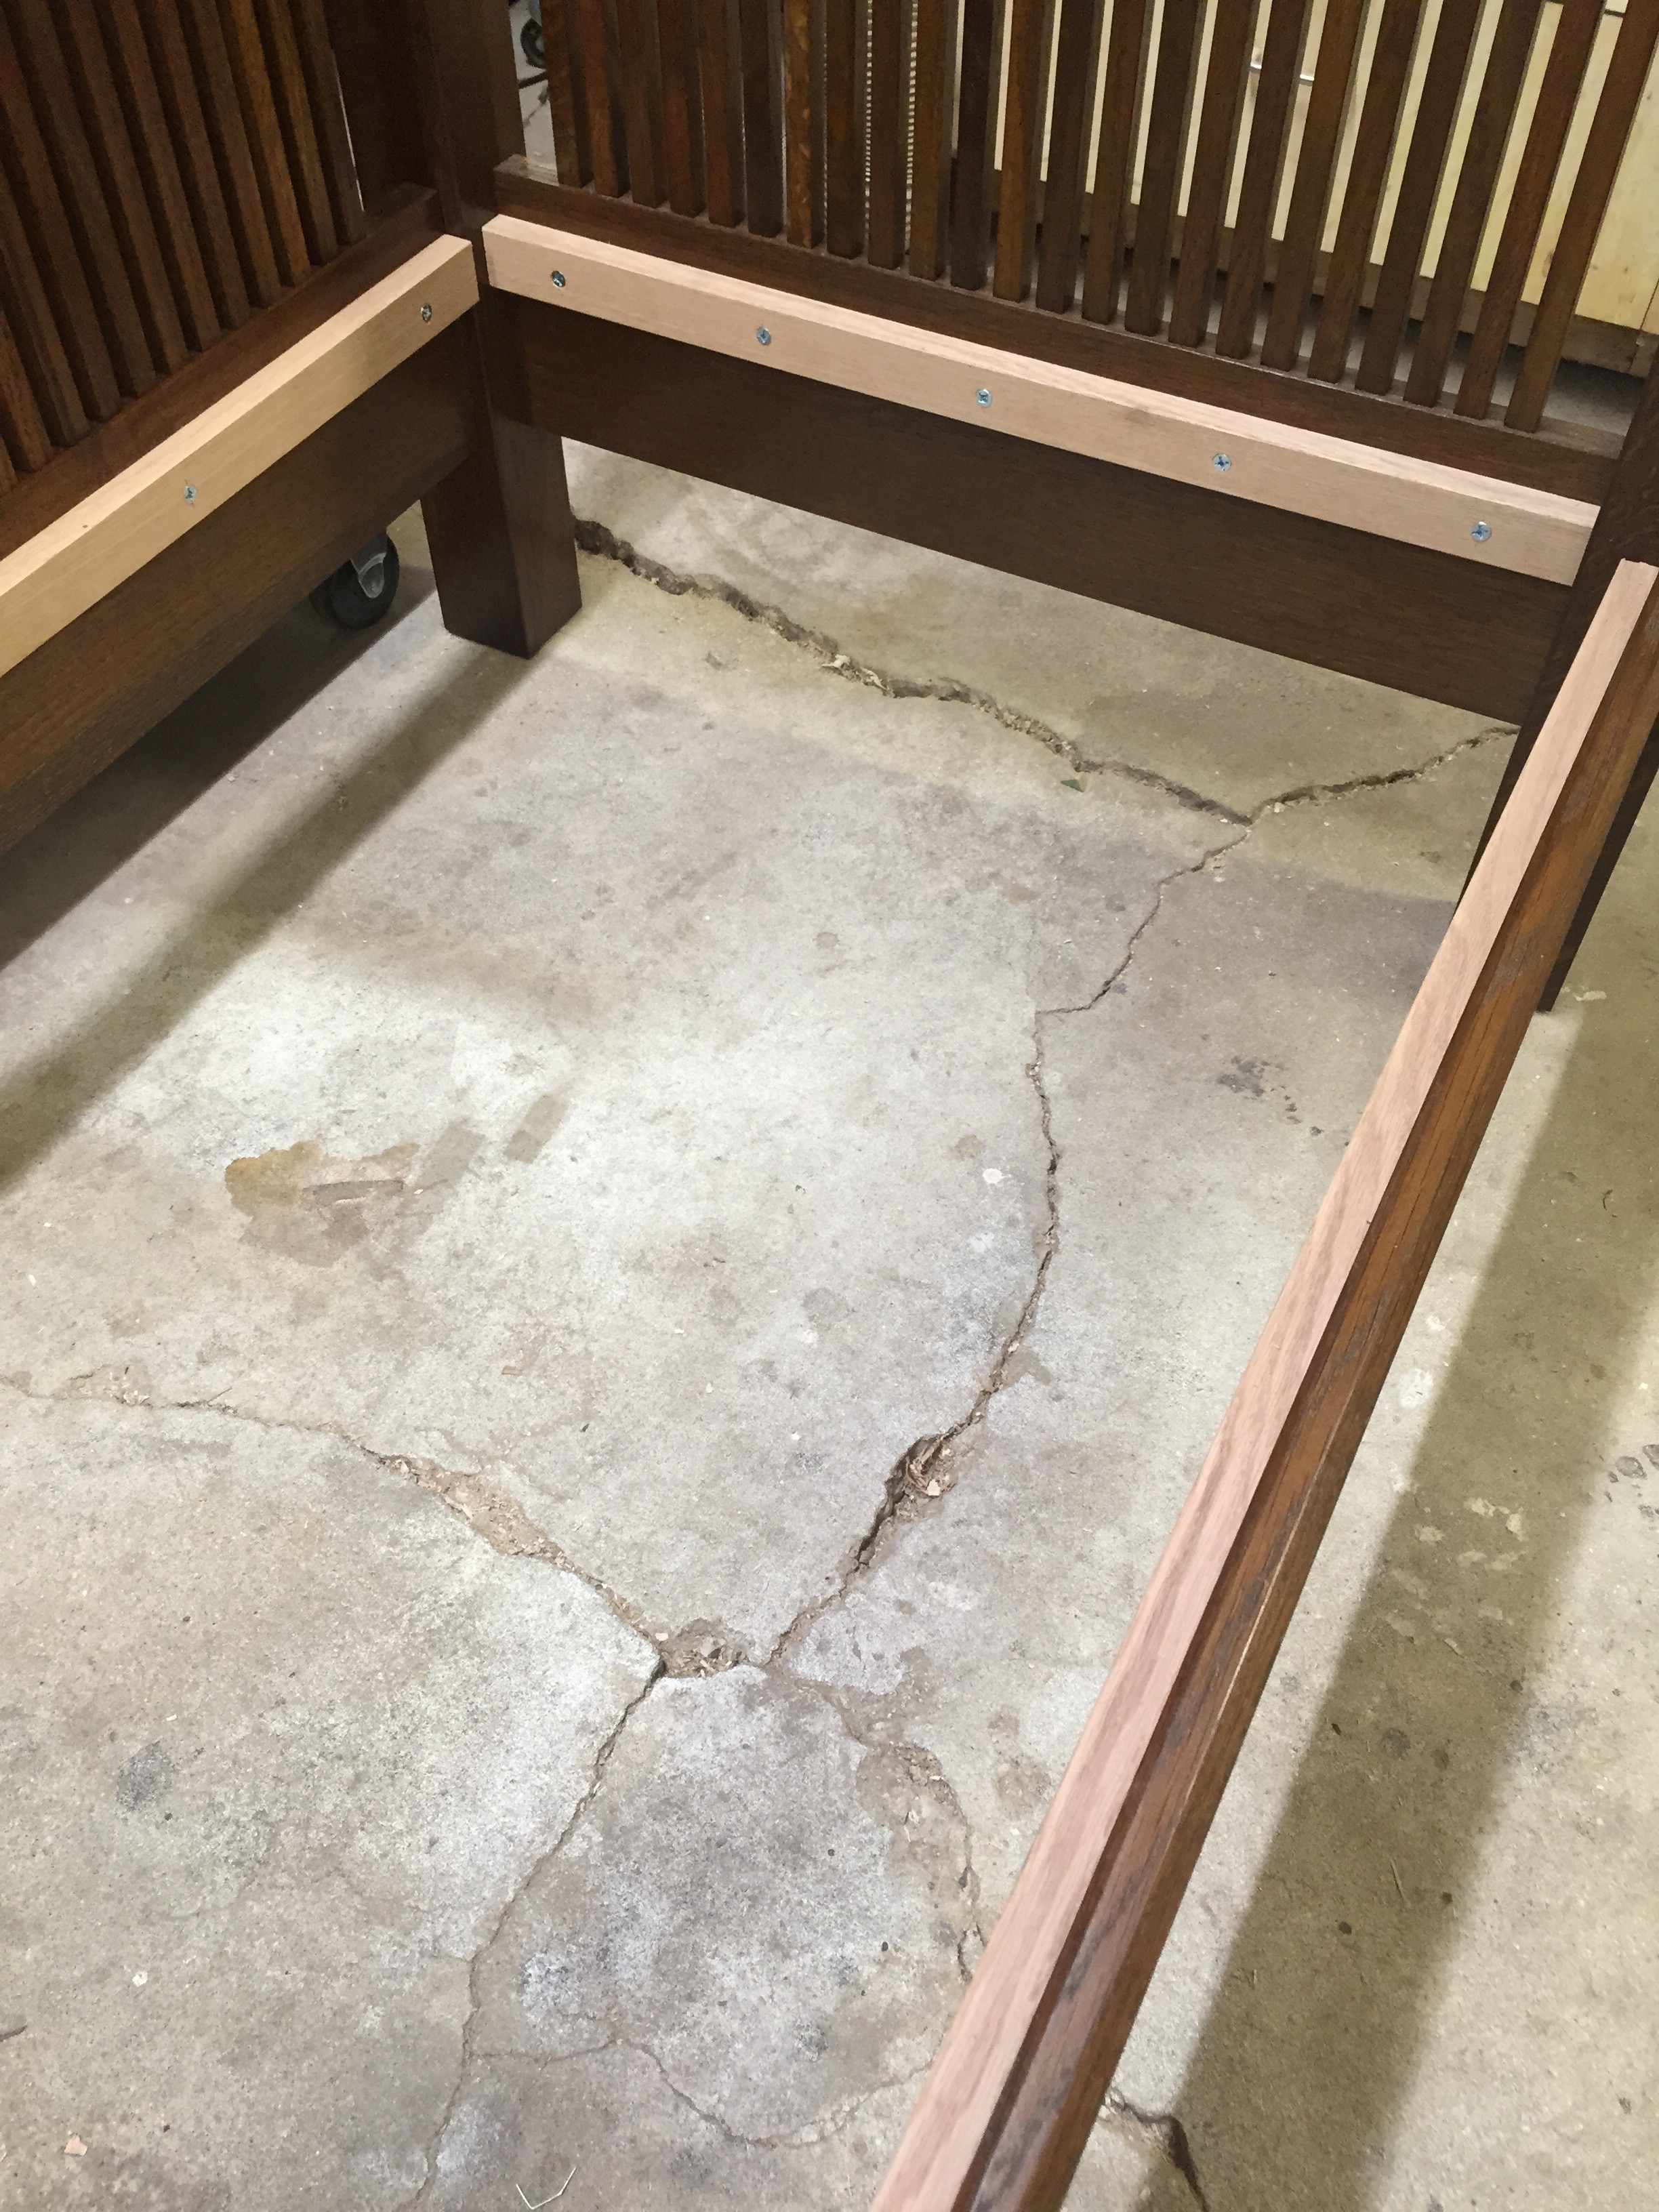
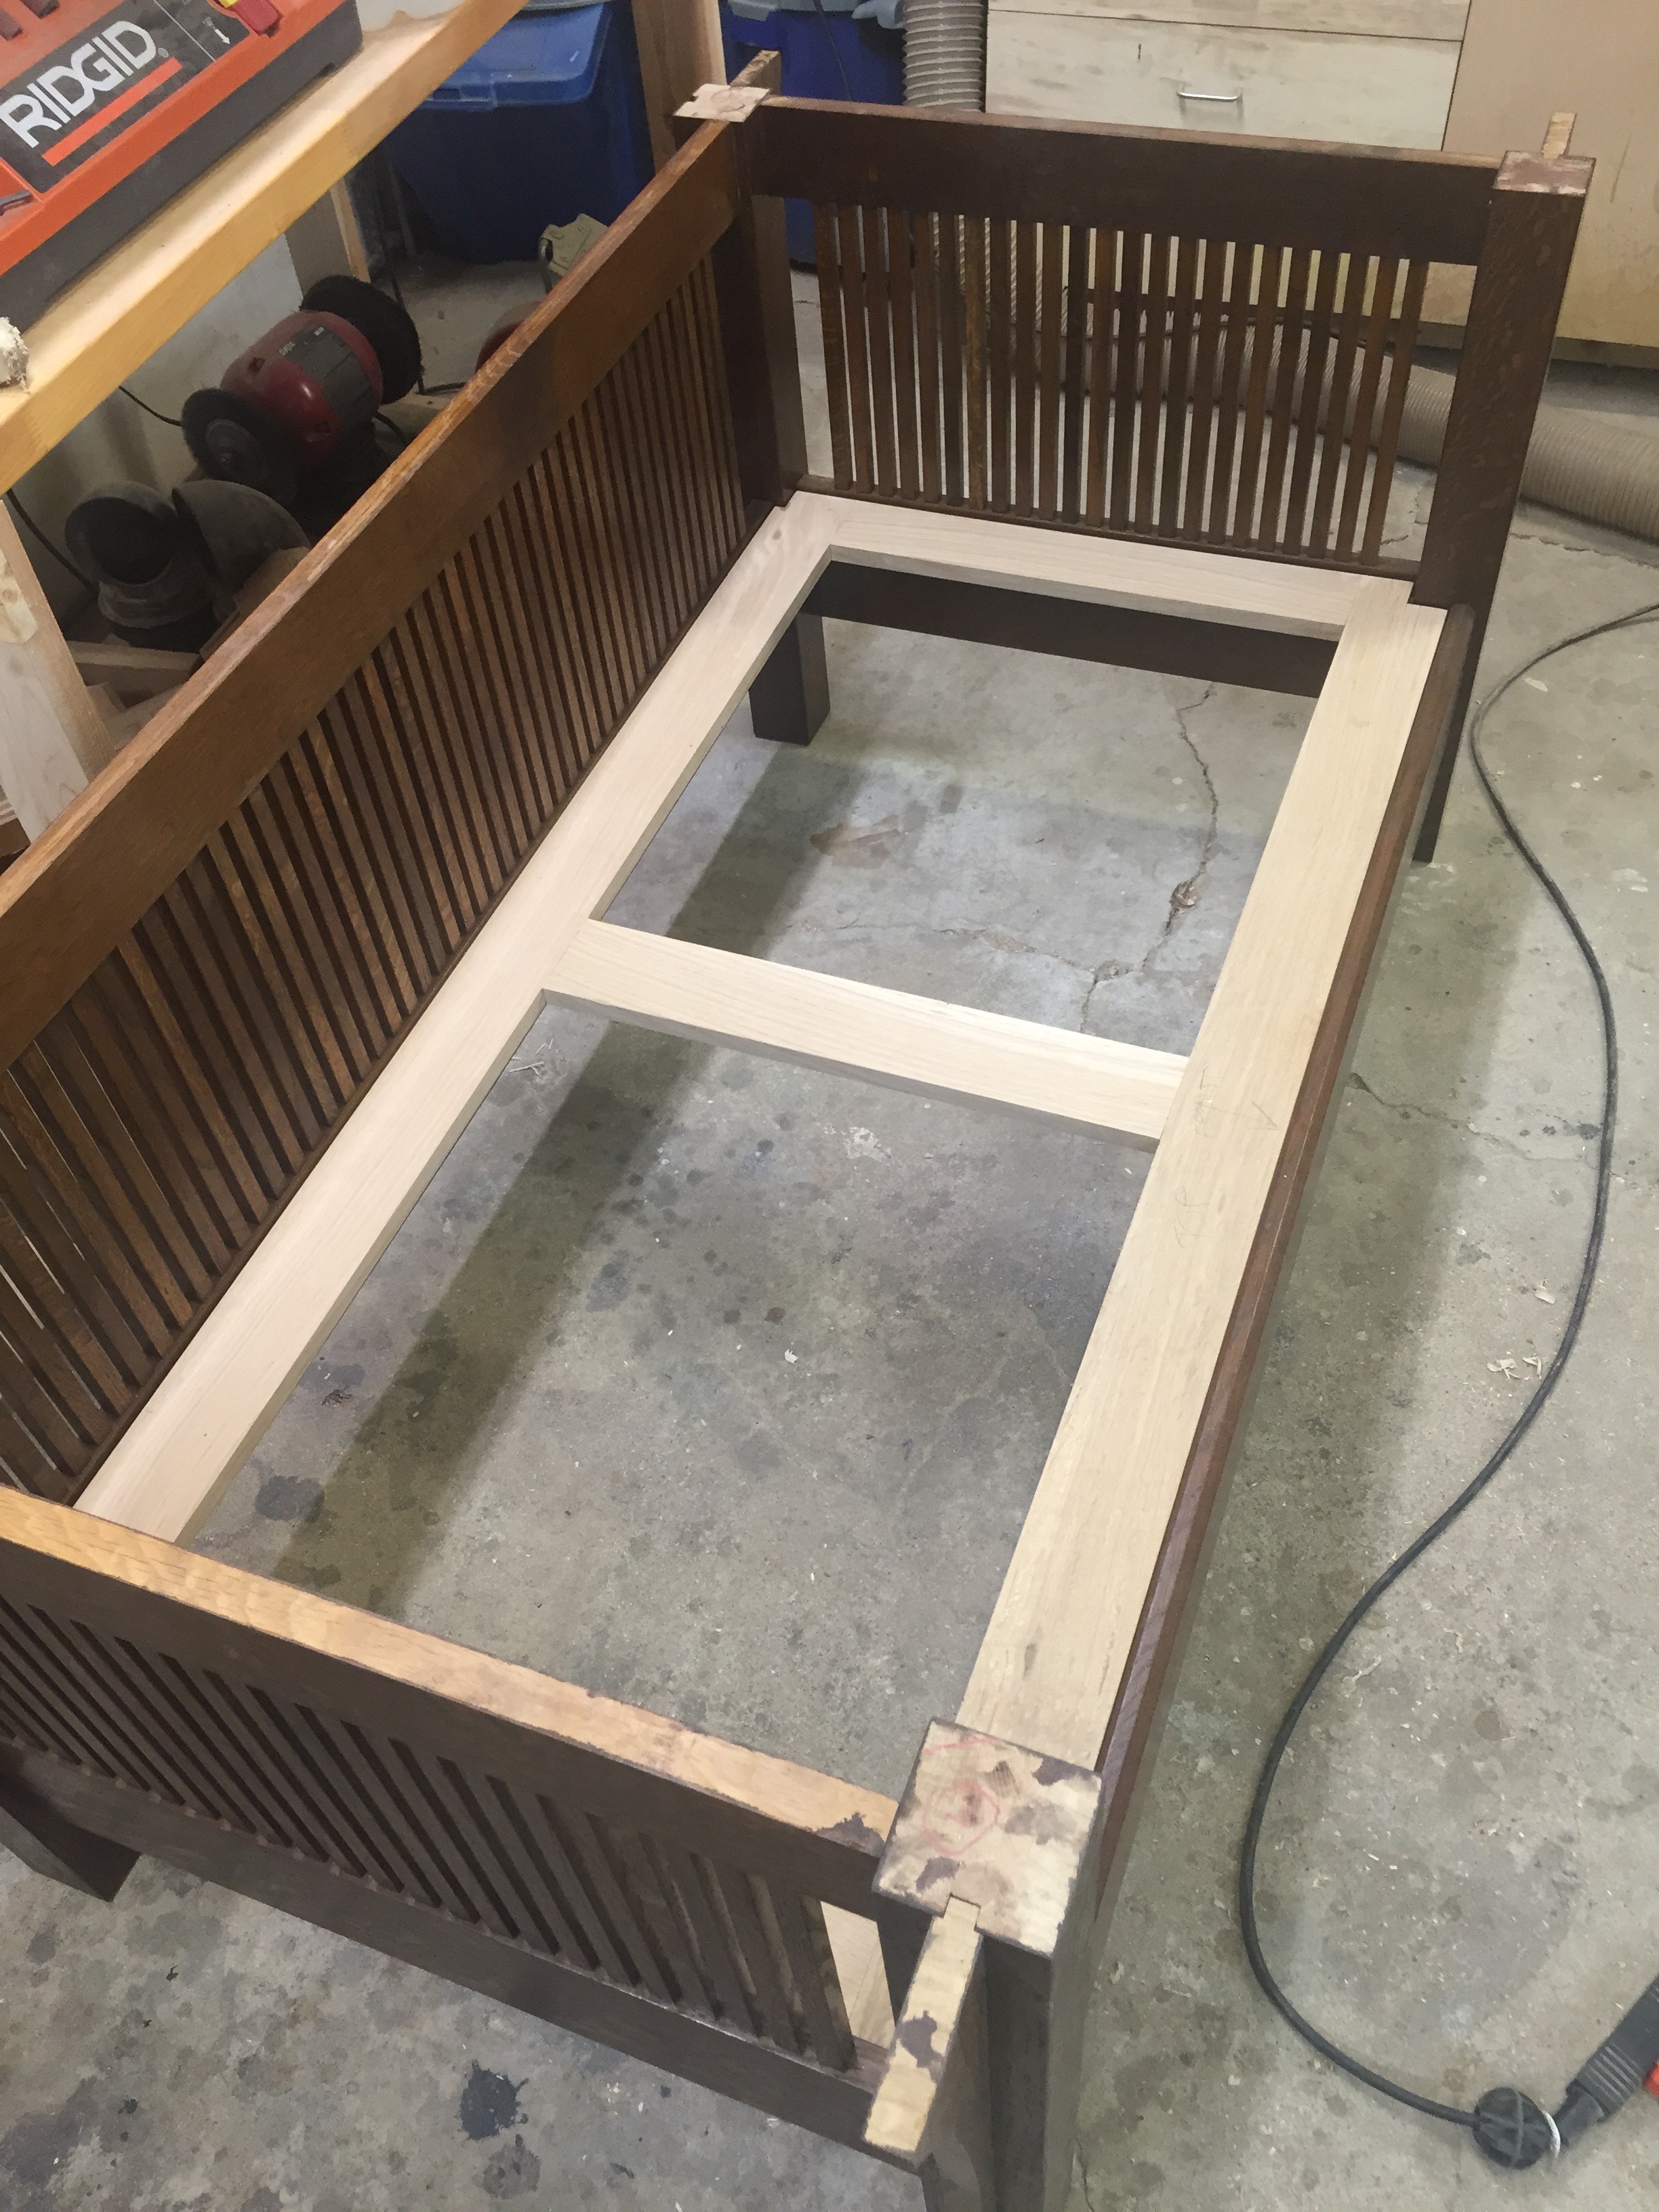
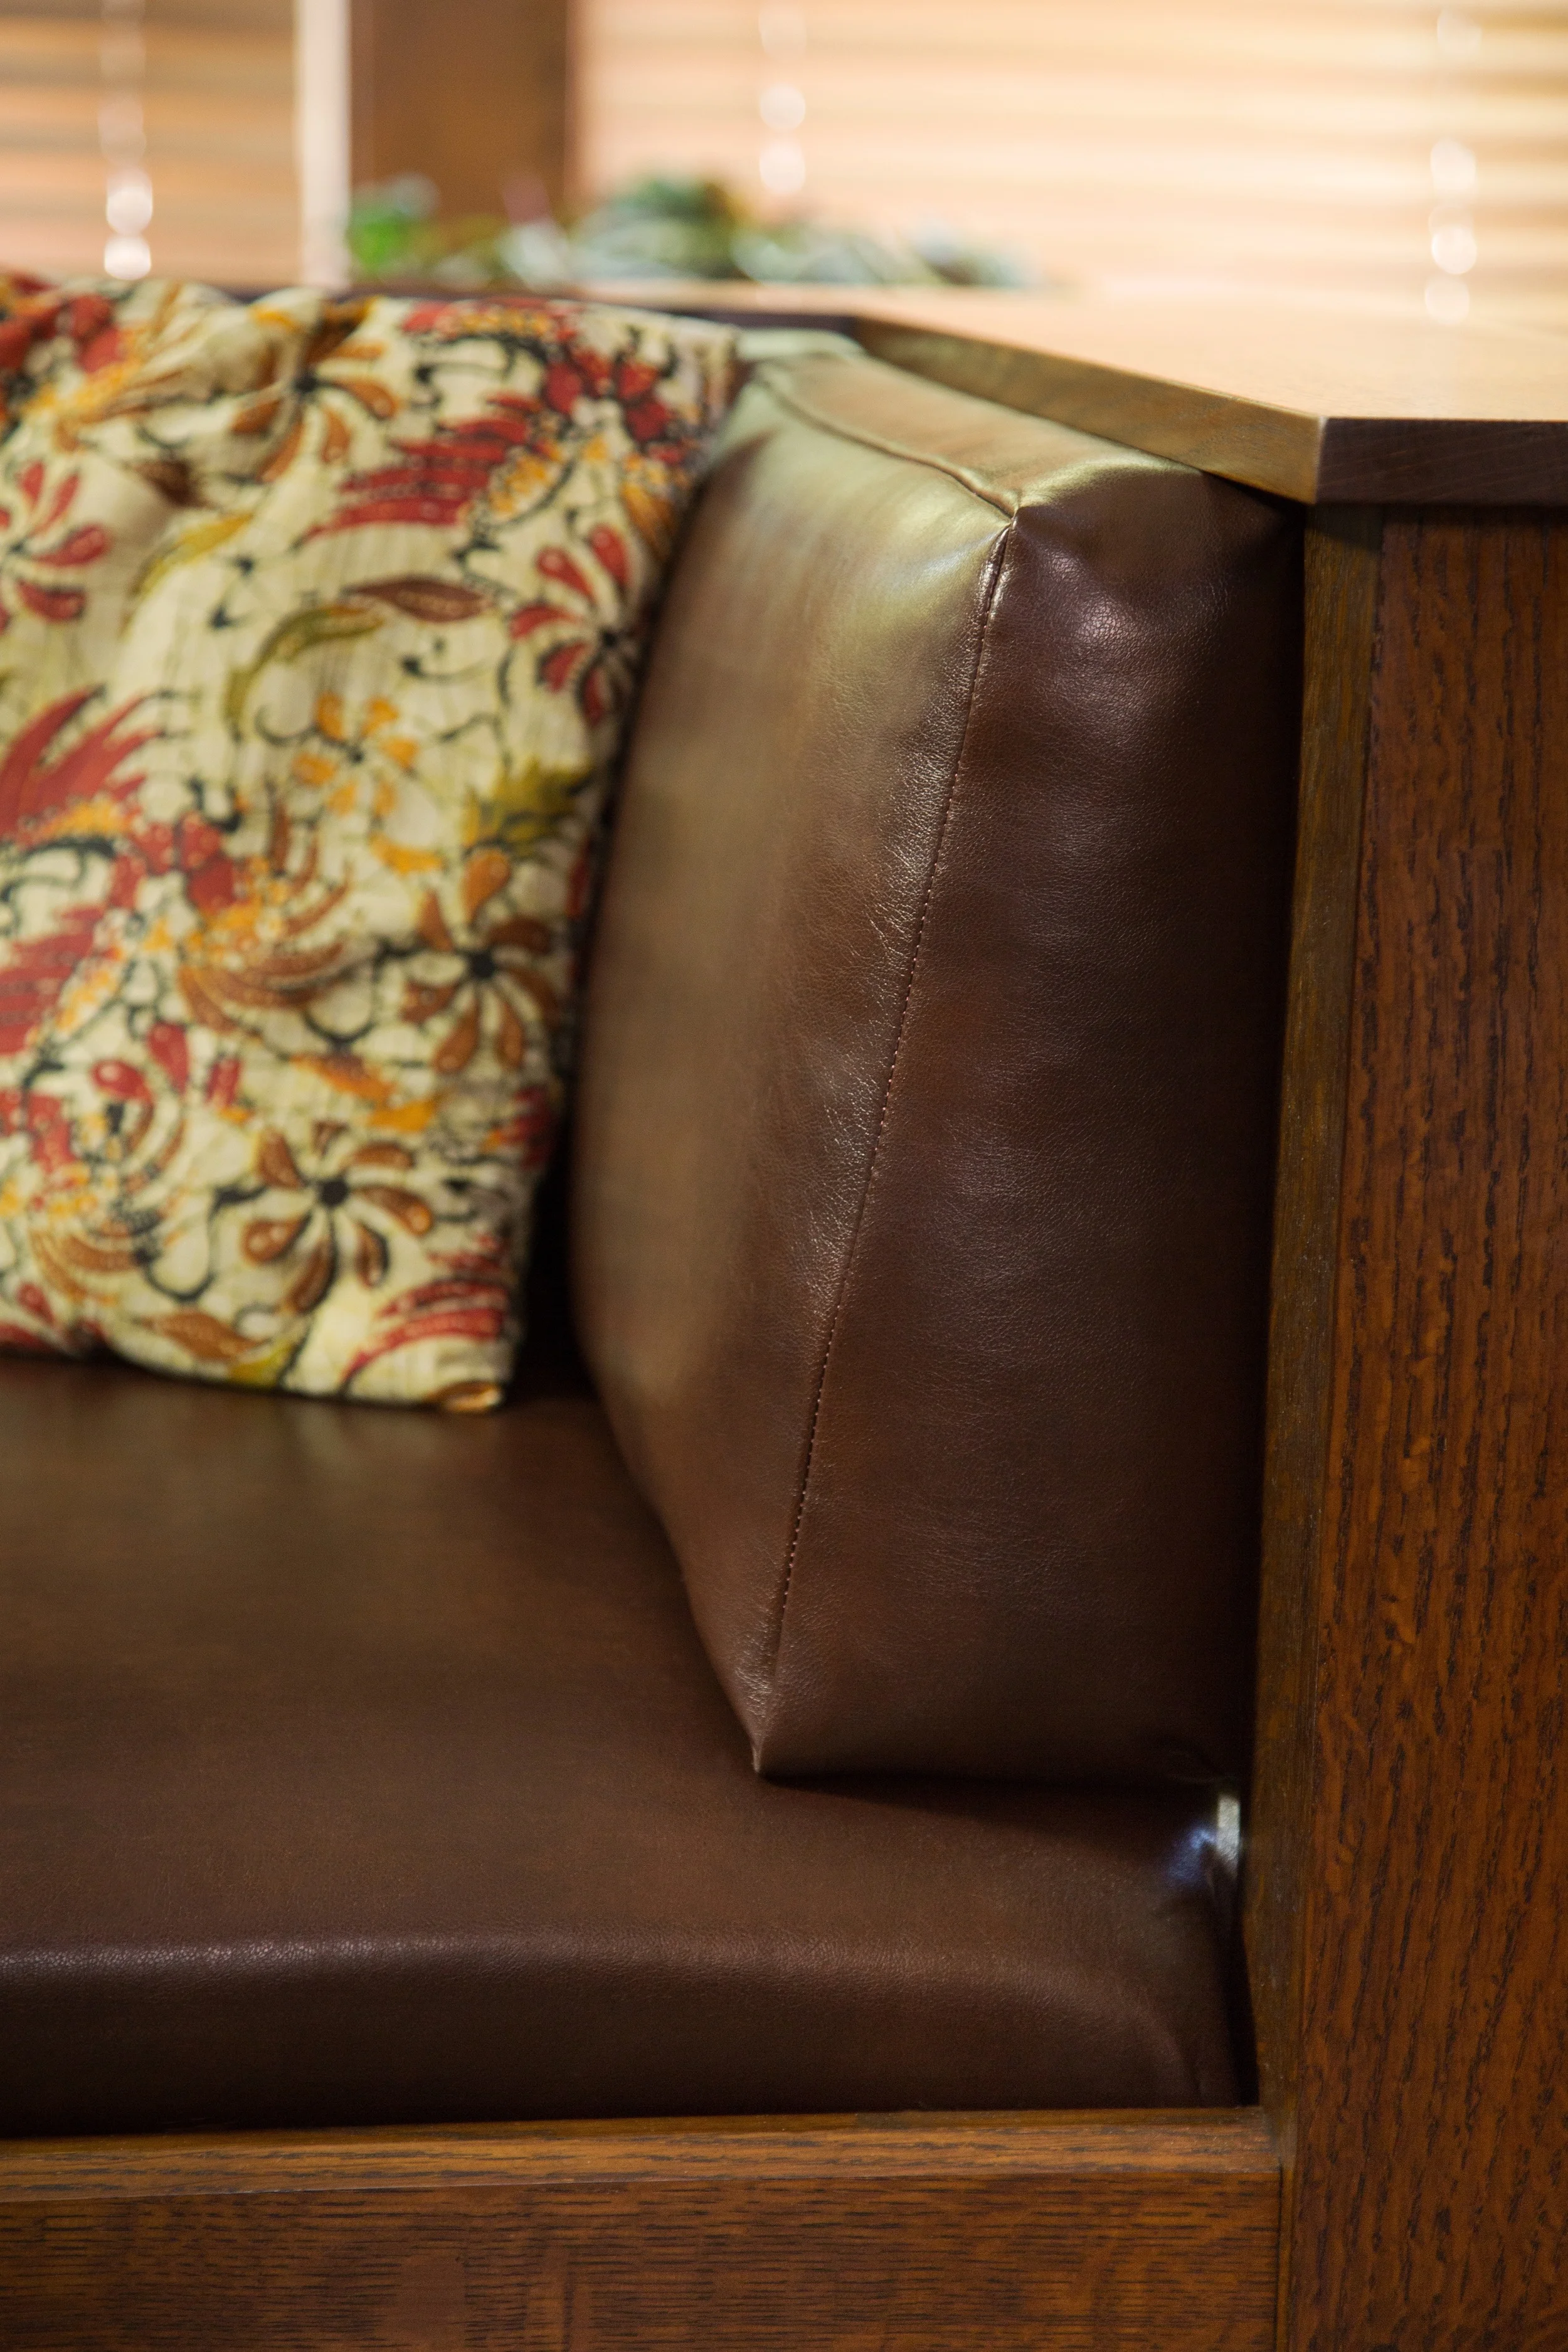
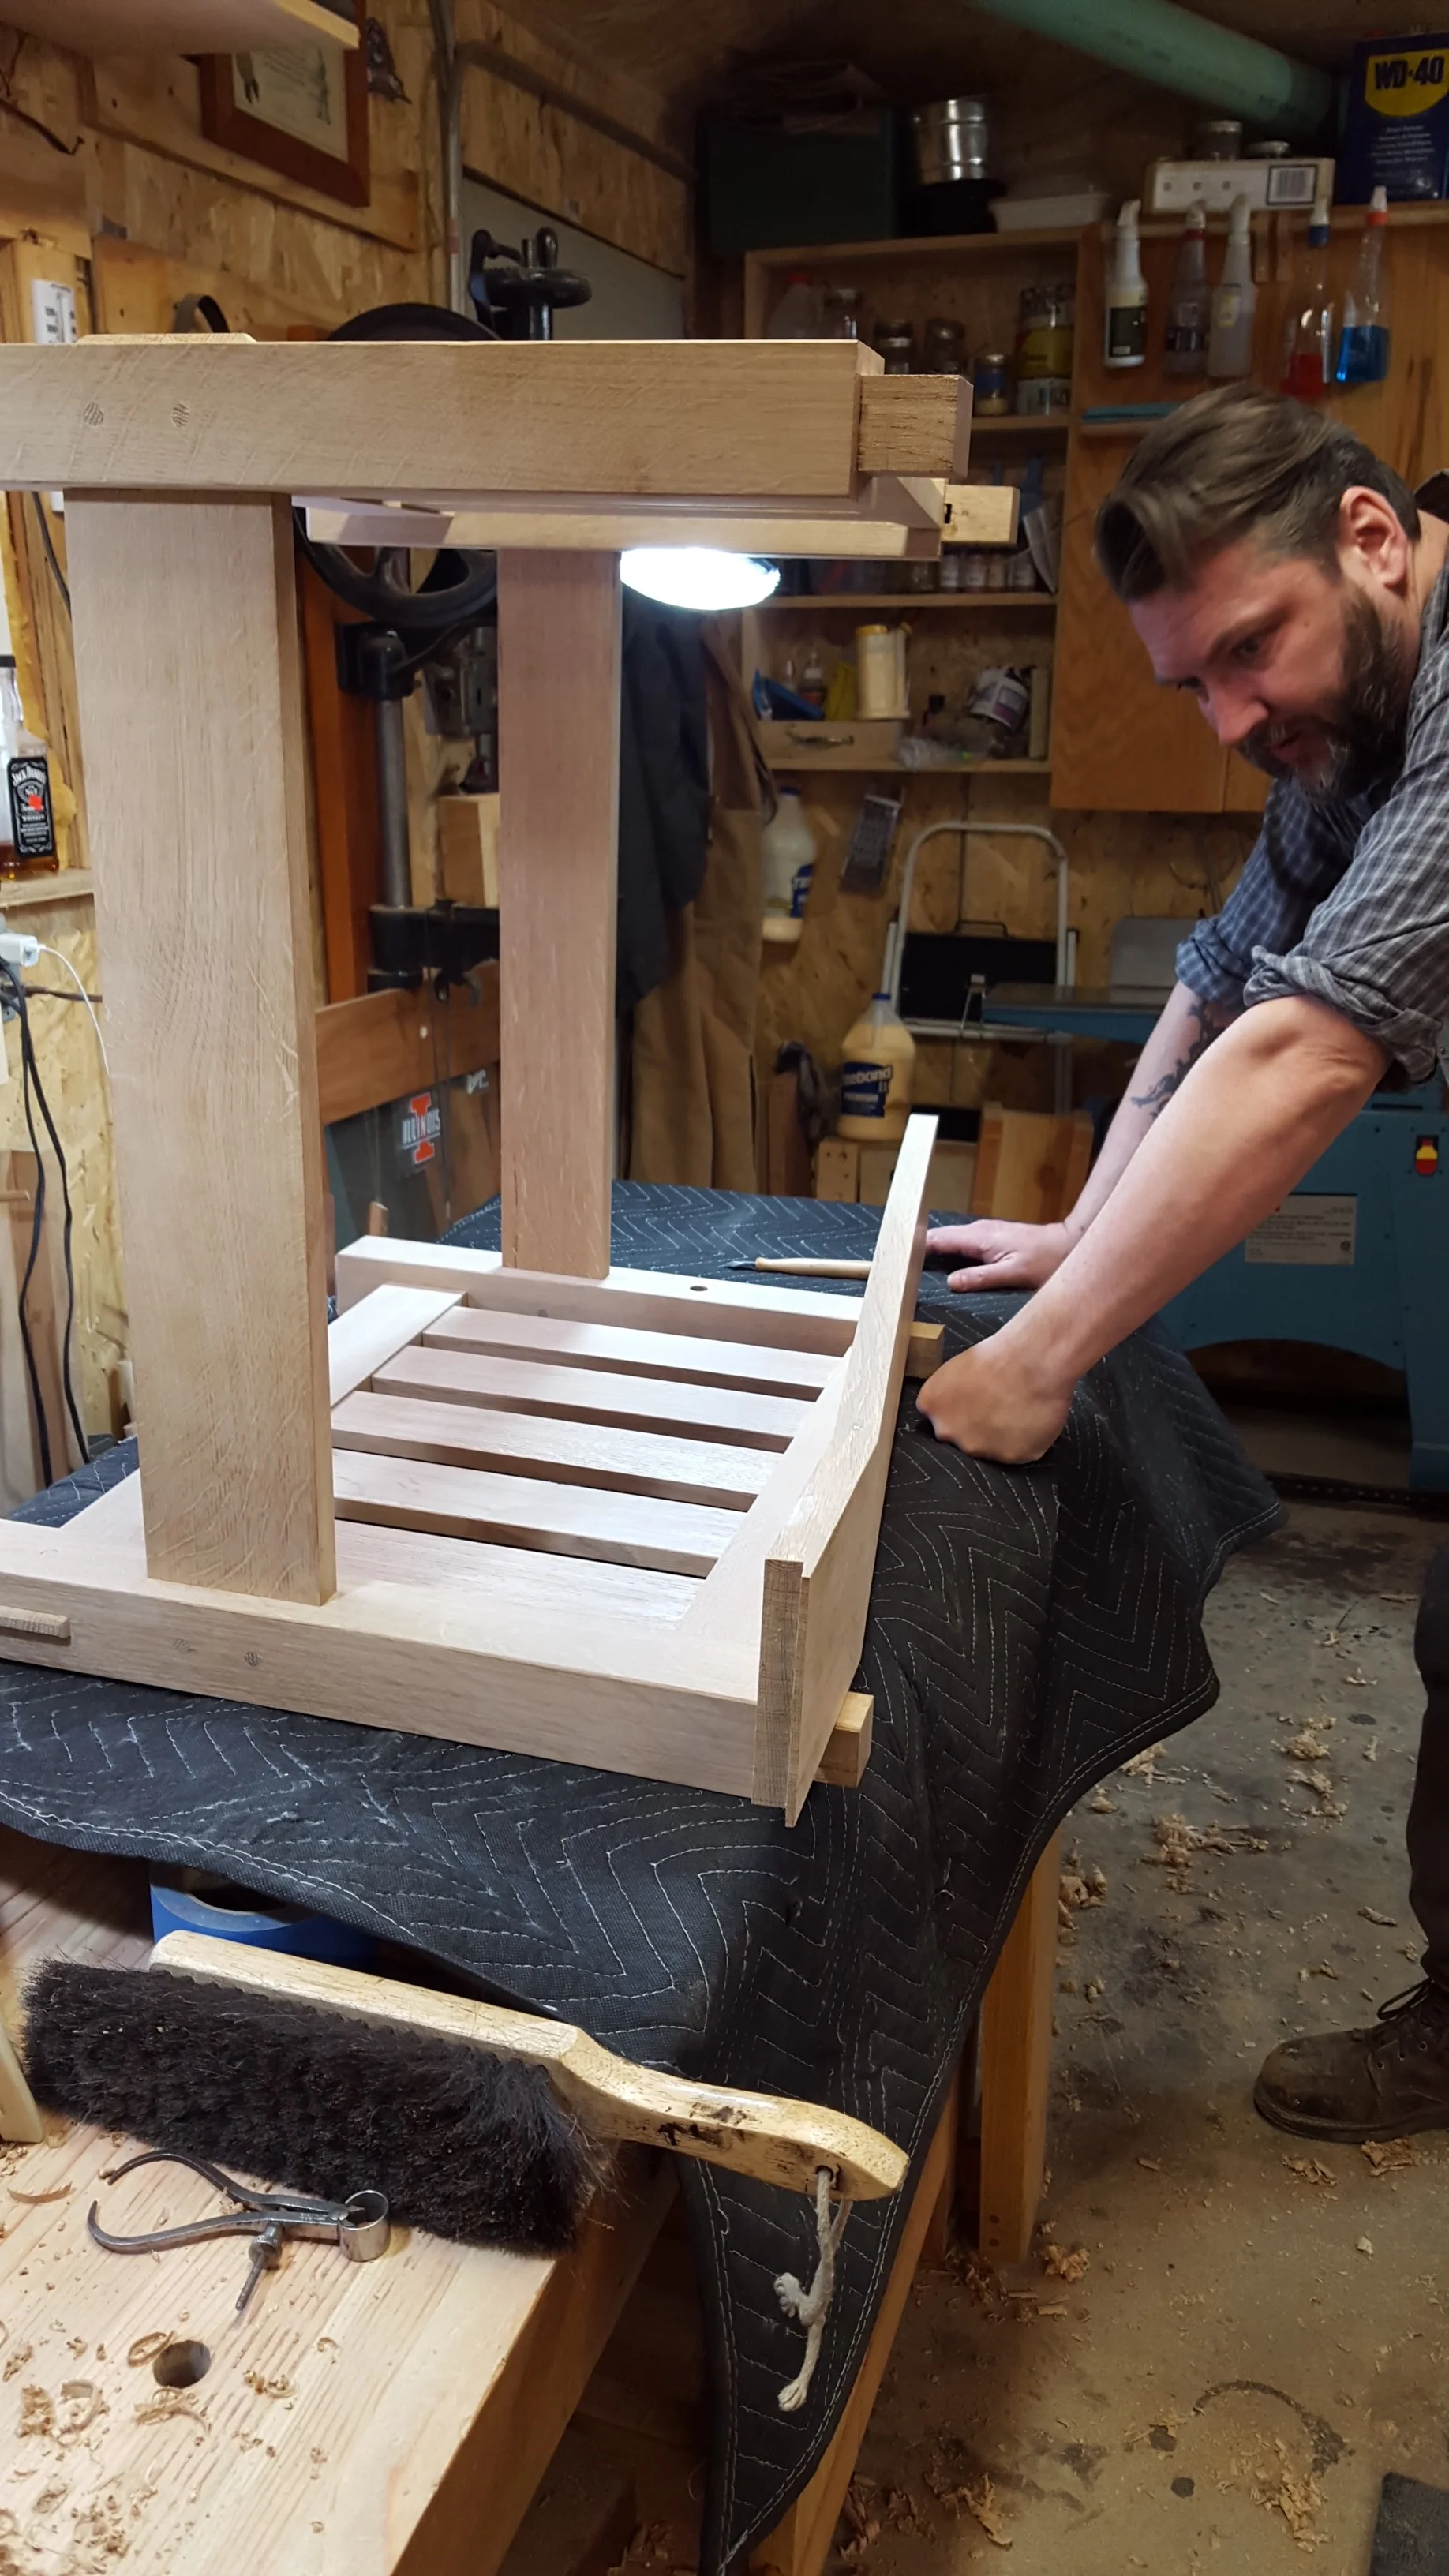
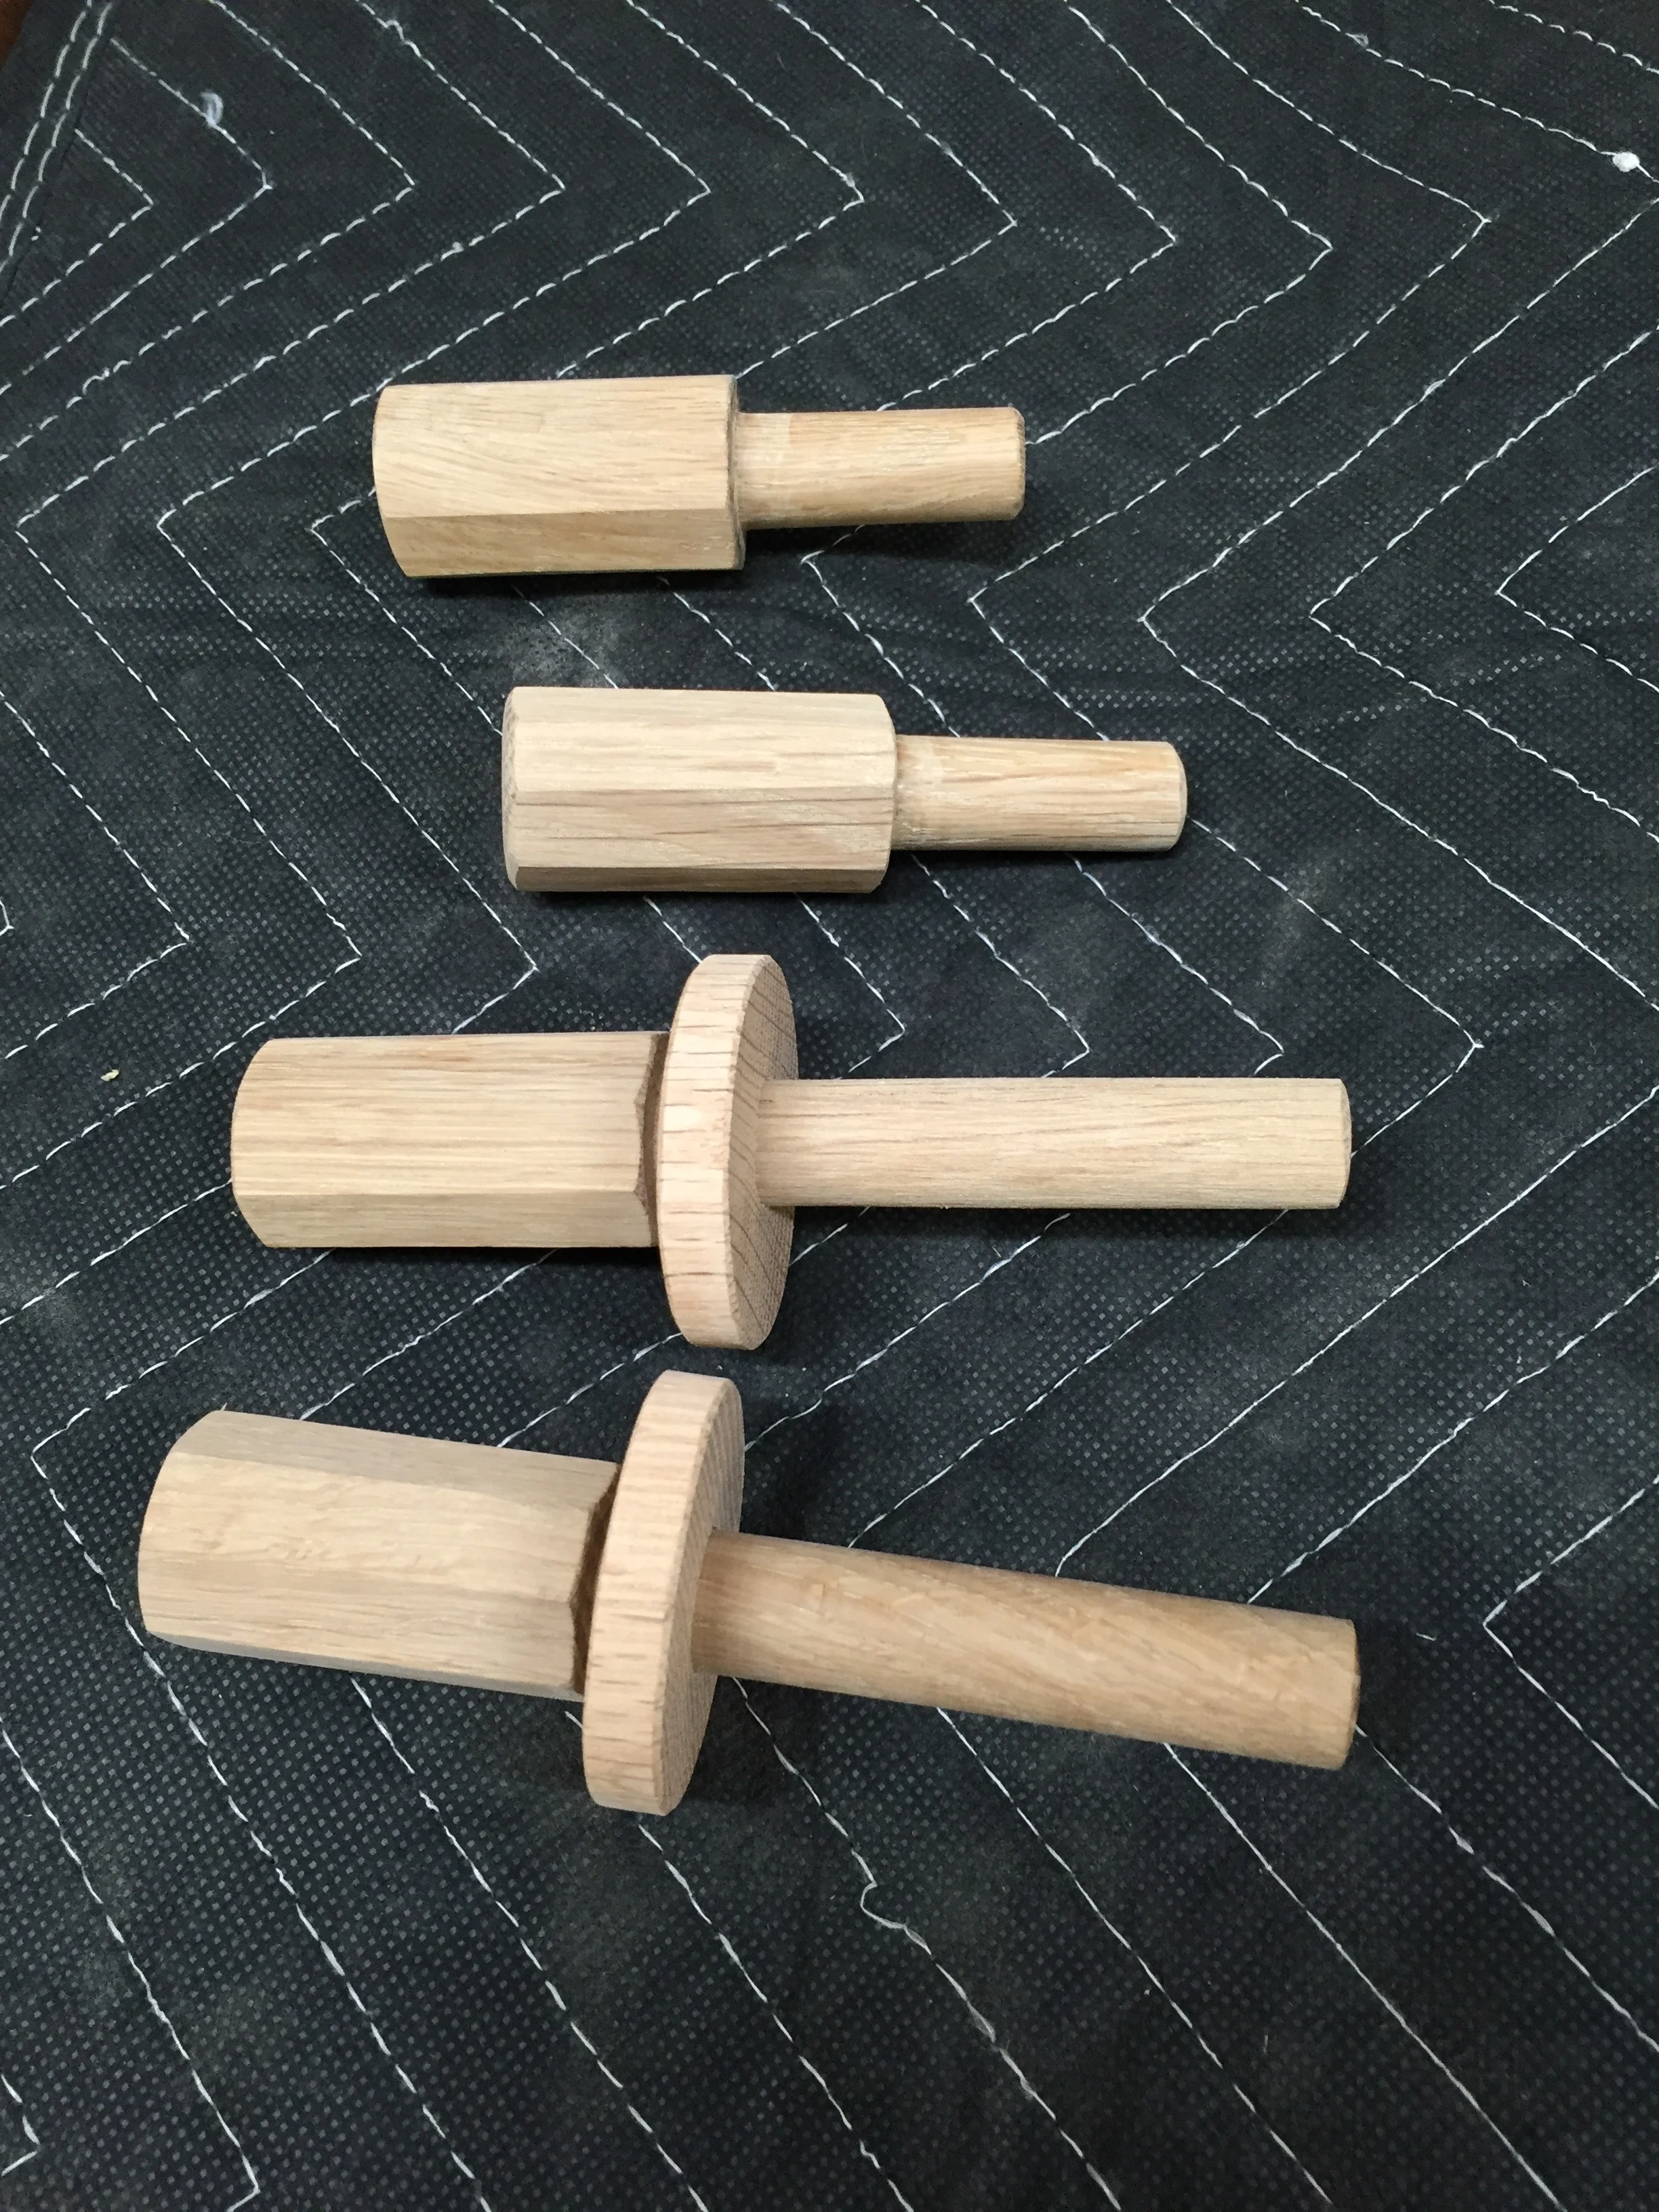
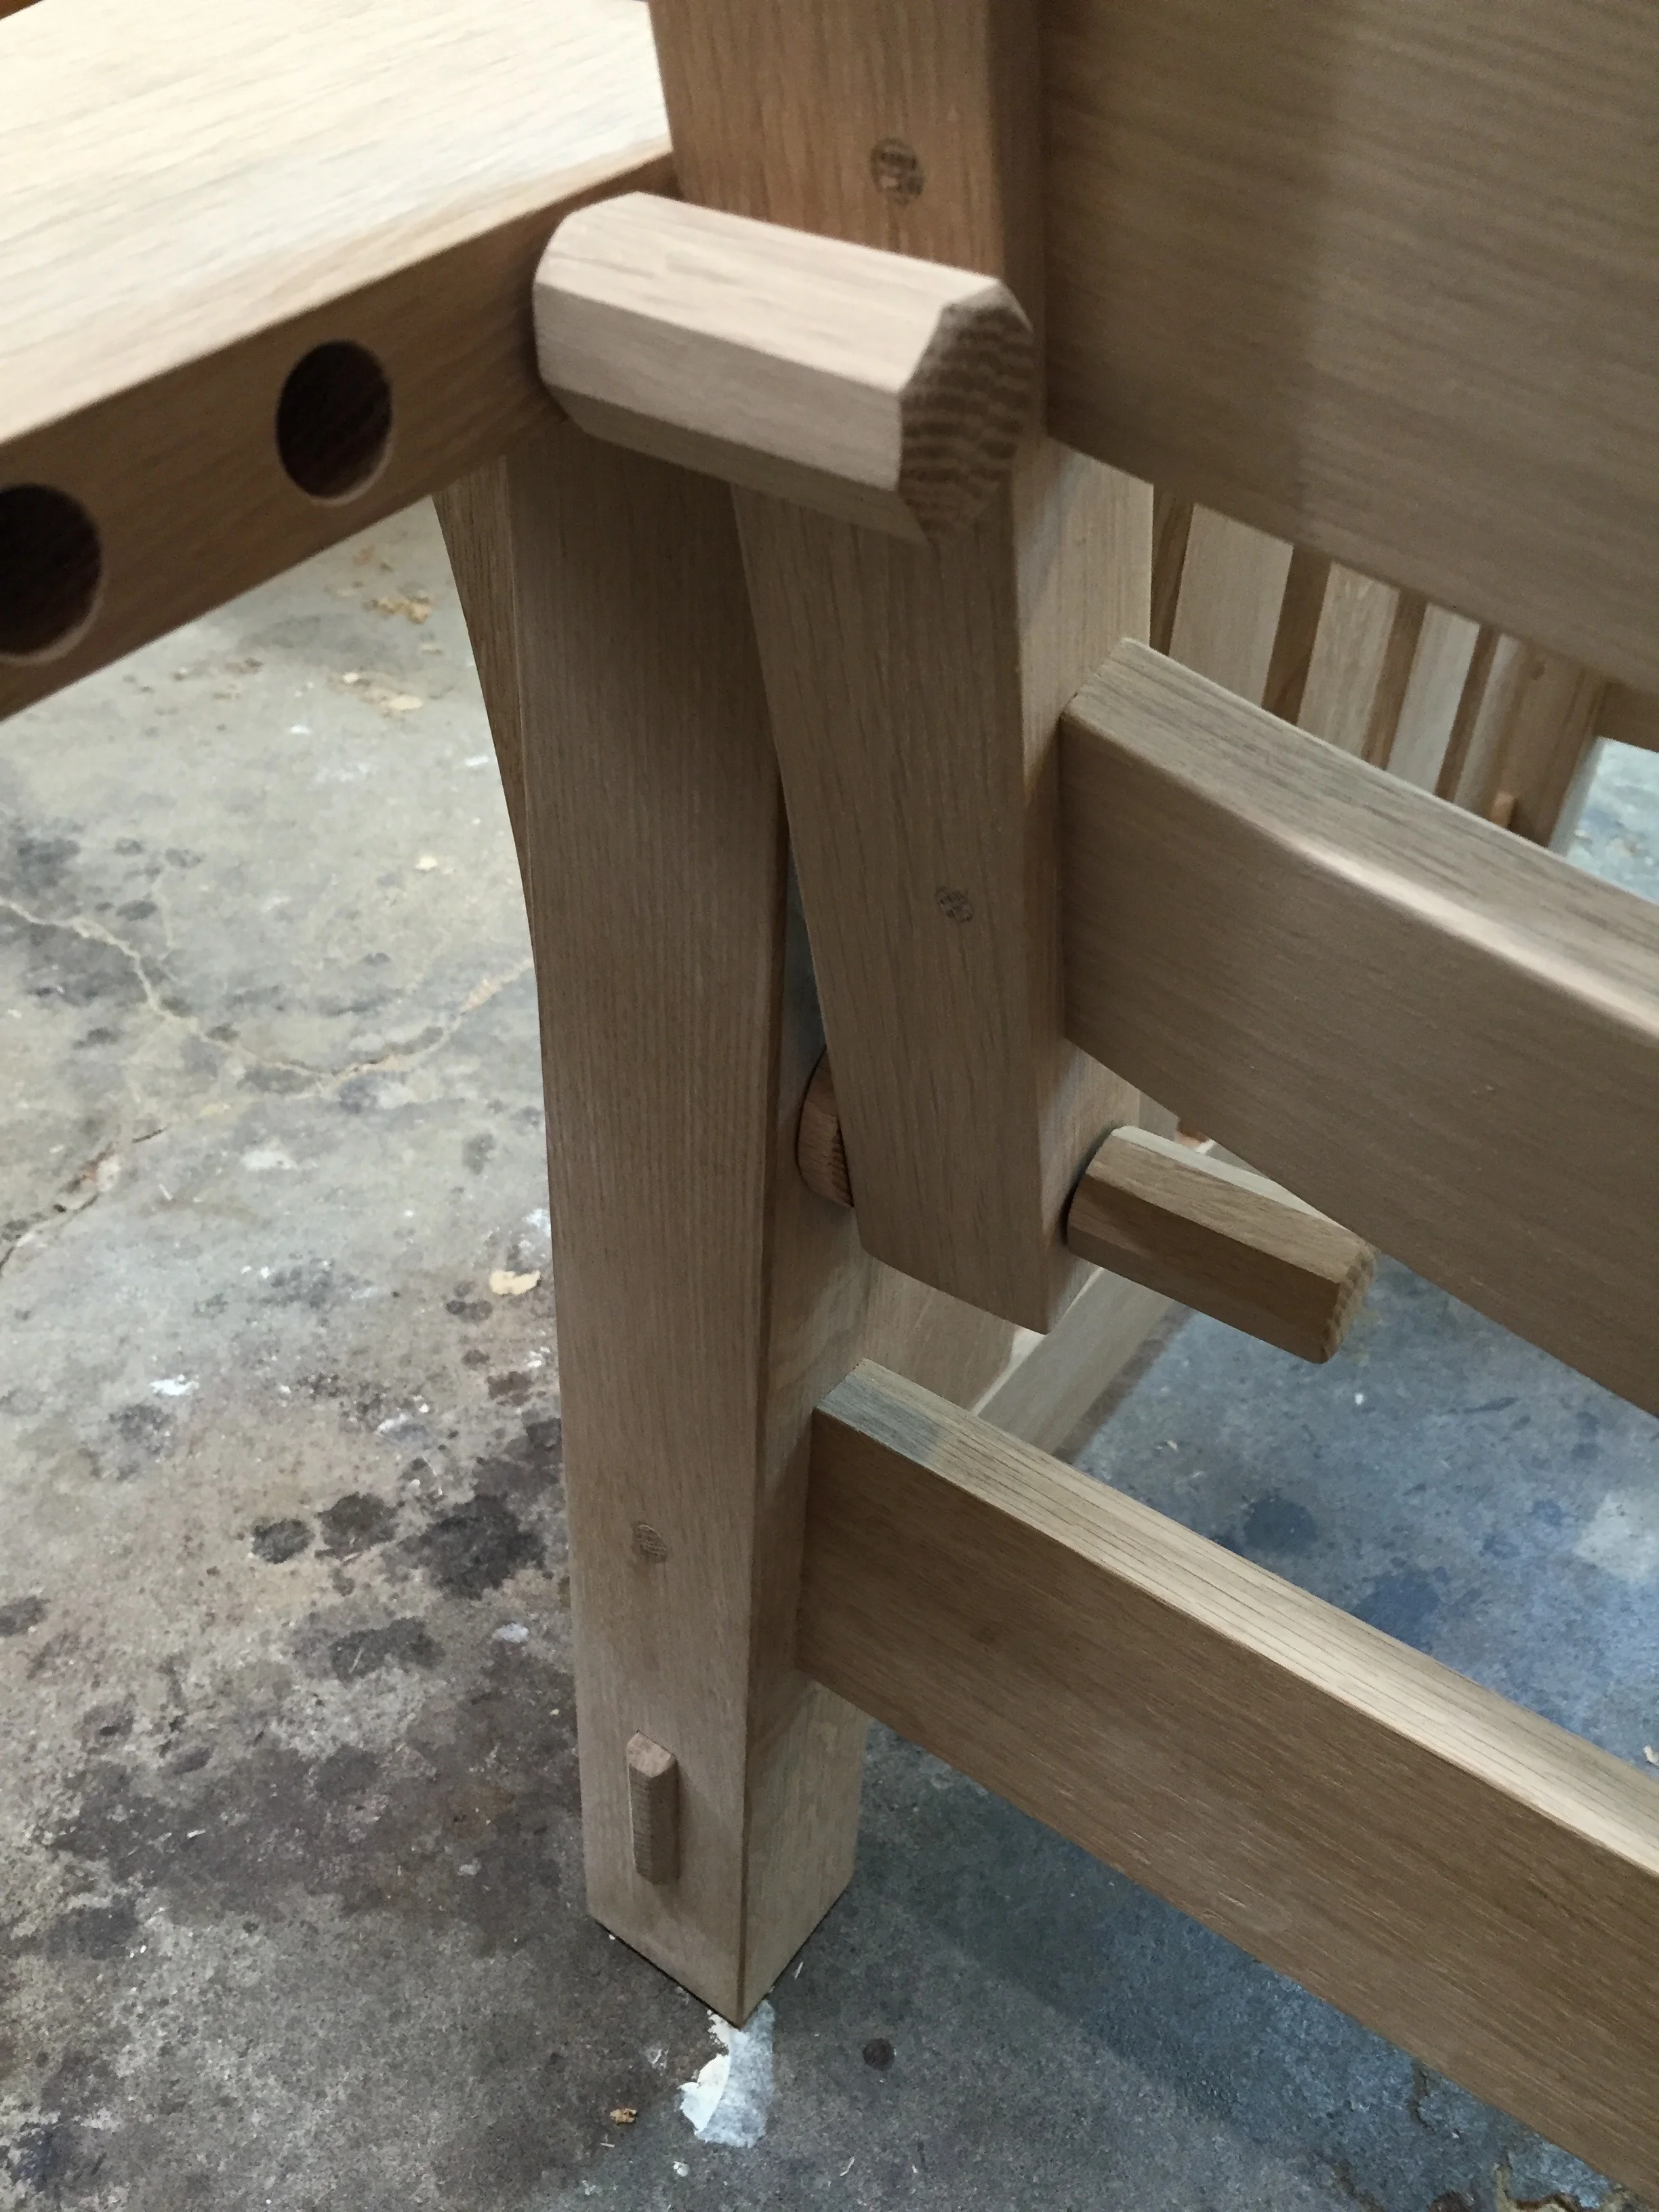
The back is attached to the chair with a few loose dowels and pegs, which allow the back to tilt, and the slant of the back to be adjusted. This was a fun detail to make, and allowed me to have a little time at the lathe. There's also a wooden washer or spacer for each of the pivot pegs. I opted for octagonal pegs, but these could be round or even square. Then a couple of cleats to support the seat frame were added, and I build a simple pine frame for the cushion.

Next up is finishing and upholstery.

Boiling Stones

I've been enjoying my new books. Lost Art Press recently released the two book set "The Woodworker: The Charles H. Hayward Years", a release that I've been eagerly awaiting ever since it was announced month (years?) ago. It's an absolutely fantastic curated collection of woodworker and author Hayward's articles from his years as editor of the English The Woodworker magazine from 1939 to 1967. If ever "Lost Art Press" lived up to its its name (by, you know, pressing lost art), its here. Hayward's career spanned the transition from hand work to the modern power tool age, a period when so much fundamental woodworking knowledge went from being common to almost forgotten. At 888 pages, it is a massive collection. But Lost Art Press has organized it by type and topic (and done an amazing job at re-setting the type and reproducing the illustrations) to where it is an engaging and very accessible read. As I go through it, every page seems to reveal a new gem, and authoritatively answers the kinds of questions that pop up on today's woodworking forums with regularity, ones that are often answered only hesitatingly and incompletely, by the well meaning, but ill-informed.

In a recent session going through the book, I came across a little article about cleaning oil stones. I hadn't thought to consider they even needed cleaning - I'd thought I would just keep them oiled up in use, and wipe the slurry off when done. But as my current set of Arkansas stones have been feeling "gummy" lately, and not cutting quite like they did when new, this piece caught my attention. Hayward says to either "... boil it in a strong solution of water and washing soda..." for a couple of hours, or, if you're in a hurry, cook it with a bare gas jet or blowlamp until the oil and grease (and embedded particles) are cooked out. The latter has the caveat that any uneven heating might cause the stones to crack. That seemed cool, but I wasn't ready to risk it.

So, I decided to boil mine, with a little dish soap and water. So far so good. Thanks Mr Hayward.

Follow up: Night and day. The stones are cutting fantastically. After I boiled them for about 2 hours (seeing a big oil slick form on the top of the water), I dried them, then applied some WD-40, went over them briskly with a wire brush, and put them back to work.

Prairie Sofa and Love Seat, Part 3

The end of my last post said "Part 3 coming soon", but that was back in April, and the sofa and love seat were completed back in May/June. Since then, I've been waiting to get some nice photography of the pieces before finishing the series. Because they were so large, and I'd already put them into my house, it was hard for me to do the photography well. Luckily, a friend of mine is a great photographer, and he came over with fancy lights, cameras, and other equipment, and he went at it for an an afternoon taking some excellent shots. Once he had the shots, it then took a while for him to edit and color correct them, etc. And pretty soon, it was September.

Sometimes, I just don't feel like posting and tweeting and promoting my woodworking - I just feel like woodworking. I also have a very linear mindset when it comes to working on projects. Although I've completed quite a few other (smaller) projects since the sofa and love seat, I didn't want to post about those until this big post series was finished. And thus the reason for the blogging delay.

Here's the result of all that waiting...

Photo by Marcus Mader.  Sofa and love seat by me!

Watching my friend Marcus (http://marcusmaderphotography.com) work was a great experience, and I learned a great deal. Developing (pardon the pun) my photography skills for the purpose of taking furniture pictures is one of my goals for the next year.


So how did the last part of the build go? In my previous post, I'd left off at pre-finishing the side assemblies. After doing all the work to get all those 206 spindles ready, the glue-up for the sides was relatively easy. Each side was glued in the mortise and tenon joints, and the spindles were just friction fit in place – no glue. I was a little concerned that any loose spindles might move, or seem loose, after assembly, but the dry fit put that fear to rest. In fact, the cumulative tension of all those spindles made pulling them apart difficult, which was a good sign.

A side assembly glue up

With the side assemblies glued up, it was time to put the backs and front rails together for each piece. The backs were just like the side assemblies, but longer. During the side assembly glue ups, I had learned a technique to ease in the little tenons of each spindle in the the mortises. After placing all the spindles in the bottom rail, I then put the top rail on, starting from left to right, with a clamp securing the end on the left side, and a looser clamp on the far right side. I then carefully seated each spindle, often with the help of a "spindle comb" jig I created, and sometimes with a little brass hammer. I would tap each one into place as I advanced to the next, slightly tightening the clamps as I went. That was great practice, and made doing the longer back pieces much easier.

Each back was put together with the top & bottom rails, and the spindles, in place, ready to go into the sides. But before I could assemble that, I had to prepare the front rails. The front rails had to be tied in to the side legs very securely, as there is only the single rail spanning the sides, not two rails, like the back. For that joint I added drawbore pegs to the joint. I've described it before, but it's an old technique to help pull a mortise & tenon joint together tightly using some offset holes for wooden pegs. 

With all that figured out, I was finally able to assemble the sides, front and backs. Hooray! They now almost sort of started looking like a sofa and love seat, and not just pile of lumber.

It was on to adding the corbels (the decorative vertical curved pieces on the sides of the legs). These fit into a shallow stopped dado, and were glued in place. You can see them attached to the love seat in the photo above, while the sofa is still waiting to have them added.

I was ready to add the arms, but before I could do so, I needed to get the upholstery process underway, so that could be prepared while I finished the arms. I had to attach cleats to the inside of each piece, and then build a frame that the fitted seat would attach to. The frames would then go to the upholsterer. Building the frames and cleats went quickly, as no finishing was required and none of the surfaces would be visible in the final piece. The cleats were just screwed to the rails, not glued (on the off chance that they might need to be adjusted later), and the frames were just simple mortise and tenon frames built to the upholsterer's specs.

Finally, I could get to building the broad, flat arms. The wood for these pieces needed to have the best grain pattern, as they would be the most visible part of the design. I'd saved some really nice cuts for these, and was happy to be working with them at last. The tricky part of these is that the arms are 7" or so wide, and need to meet in broad miter on the corners. This miter was going to be tricky, not only because it was so visible, and thus had to look perfect, but I was also concerned that it would be fragile and prone to cracking if the wood moved. But, that's how the original was designed, and is still made today. I took great pains to lay out the miter cuts precisely, and cut them with a hand saw, and trimmed the to fit with a plane. For a little reinforcement, and to help with alignment, I used biscuits on the joints to proved more glue surface. The glue up required a lot of clamping, and I had to make a series of clamping jigs and cauls to apply pressure on the right places. But slowly, all four joints came together.

The arms were now glued up, and it was back to doing pre-finishing on them before assembly. To attach the arms, they are simply glued to the base, so I had to mark and mask off the glue surfaces on the underside of the arms where they meet the base. This was tedious, but went well.

It was at this point I discovered I had made a mistake. On one each of the arms of both the love seat and sofa assemblies, I had incorrectly cut the miter angle. It resulted in the arms of the sofa being 1/2" too narrow, and the love seat being 3/8" too wide, when compared to the width of their respective backs. 

Drawing showing how the incorrect angle on one of the arms makes the whole assembly out of whack

Drawing showing how the incorrect angle on one of the arms makes the whole assembly out of whack

This was a bummer, and I had a choice to make. I could just leave it as is, slightly moving the arm assemblies over, and the discrepancy would have been hard for anyone to ever notice. Or, I could break the incorrect joints apart, and re do them. I knew it would bother me forever if I didn't do it right, and I could take it as an opportunity to learn how to fix a major error like this. So I did the latter, and broke the joint along the glue line. While I was relieved that the joint seemed pretty strong, it wasn't too hard to break it cleanly. I knew it would break along the glue line, as it was an end grain to end grain joint – the weakest type of glued joint. With the errant arms broken off, I then proceeded to cut the angle on the arms correctly, cleaned it up, and did a dry fit until it fit just right. Of course, re-glueing the joint meant that the masked off glue locations on the underside of that arms were now in the wrong place, so they had to be sanded down to bare wood, re-dyed, and re-finished. This mistake added many hours to the build. But in the end, I fixed it properly. I am now very glad I stopped, fixed it, and made it right. Learning to overcome those sorts of discouragements and press through them is as important a skill as any chiseling, planing, or finishing.

Re-gluing the corrected joint

With the arms now finished, I glued them to the bases, finally seeing the whole pieces more or less in their final form. One benefit to doing all that pre-finishing is that any glue squeeze out, and there was some, was very simple to remove. The glue doesn't stick the the shellac finish, and it just pops off with a little pressure from a wooden spudger or a fingernail. After the squeeze out was cleaned up, I applied a few coats of shellac to the assembled piece to blend all the pre-finished elements together. And finally, I applied a coat of dark brown paste wax with 0000 steel wool, and buffed it out with a cotton rag to a nice, matte glow. This last step was pretty time consuming, as the final assembled piece had a lot of surface area, and many nooks & crannies. But the wax makes it look great. When that was done, all that was left to do was to wait on the upholstery.

The upholstery was being done be an excellent local upholsterer, Kylie Egge of Recovered Interior. I went with a medium covered mottled leather with a slight texture. To get the upholstery right, we had to do things in two steps. First, they had to make the fitted bottom seat, and place that frame onto the rails in each piece. Seconds, with the seats in place, they could measure for the sizes of the side and back cushions. A few weeks later, the side and back cushions were delivered, and they fit like a glove. It was really amazing to see this all finally come together. It was also the first time I had worked with an upholsterer (and it won't be the last!), and just like with the photography, it was fun to share my project with a craftperson from another trade.

With the upholstery in place, it was time for the most important test - sitting in them. It's funny, because throughout the course of this whole build, I really had no idea if this furniture was going to be comfortable or not. I'd seen pictures of other prairie style sofas before, and it was a respected traditional design, but for all I knew, they could be terrible to sit in. But to our great relief, they are a delight to use. Since early June 2015, we've been using them every day, and couldn't be happier. 

Here's a gallery of the excellent photos by my friends Marcus and Pete, and few photos showing them at work ...

And that concludes the story of the prairie style sofa and love seat build. This was a major bucket-list project for me, and I'm proud of the result. We're thrilled every day at having these in our home.

The wife, and cat, approve!

Prairie Sofa and Love Seat, Part 2

It's been a couple of months since Part 1, and there's been a lot of progress. So much, that as of this writing, I'm almost done, but I'll save that for Part 3. I left off in Part 1 with readying the design and acquiring the rough lumber. But since then, both of those things changed.

Frame and panel style sides

The design is now different. In the plans, and my original intent, I was going with the frame and panel style sides. That design depended on getting one important type of material for the panels: 1/2" quarter sawn white oak plywood. I needed 1/2" plywood, not 1/4" (which was readily available) or 3/4" (also readily available), because I wanted to have a 1/4" reveal on the outside, and flush panels on the inside. With the stile and rail stock being 3/4" thick, the panel material had to be 1/2". Sure, I could have gone with solid wood, but after going through that dance with the recent wardrobe build, I wasn't in the mood to do that again so soon. The advantages of going with frame and panel, with plywood for the panels, were many...

  • I could build and assemble everything, then apply finish (i.e., no pre-finishing needed).
  • I could glue the plywood into the frames, adding strength to the piece.
  • it would be faster to build and finish.

So, I looked around for 1/2" quarter sawn white oak plywood, G2S (good on 2 sides), but simply couldn't find any in the Chicagoland area. My local hardwood dealer gave me a quote for making a sheet up from two sheets to 1/4", with some MDF in the middle to pad it out (two 1/4" piece squeeze down to 3/8" when pressed to gather in their plywood machine), but that would cost $250/sheet. And I needed two sheets. That was pushing the pricey end of the range for project, considering a sheet of 3/4" QSWO ply G2S costs $134. I found some other sources in adjacent states, but with shipping the cost came to $250 per sheet, so that was a no go.

I decided that instead of using solid wood panels, I would try something different. There is a variation on this style of sofa that uses square spindles to fill the area between the upper and lower rails. In these pieces, I like the spindle design and the frame and panel design equally. Going this route meant a few things...

  • I would need to do pre-finishing of the spindles
  • I could use material I had on had, no plywood needed
  • It was going to take longer to assemble
  • I could keep the rail material thicker than 3/4",  (which was desirable, as I wanted to add to the overall strength, to compensate for losing the strength of the glued-in plywood panels)

"Spindle" style sides

Test build of the "spindles" sides, with a decorative cutout slat in the middle, which I later ditched.

To see if the spindle design was feasible, I did a test build. The results were good, so I decided to go for it. The disadvantages of all the additional work and having to pre-finish were more than offset by not having to buy plywood. The design had begun to grow on me. I now had a good idea of how much extra work the spindles were (not as much as I'd feared), and I was able to settle on a good mortise and tenon size. In the test build, I toyed with adding a decorative center slat with a pierced design in it, but ended up ditching that idea, as I felt it was piling on too much decoration, and would take away from the other details of the pieces.

The next change involved the wood itself. As I discussed in Part 1, I was very pleased to be working with the urban forested lumber sourced from the University of Chicago. But much to my dismay, as I started milling up the lumber, it was evident that many pieces were lacking in the classic quarter sawn white oak figure. Some of them were fine, but too many were angled just far enough away from being true quarter sawn, veering into rift sawn territory, that they weren't showing the medullary rays, a.k.a. "ray flecks" I wanted to see. That meant I had to buy some more deeply figured material from the hardwood dealer. While far from a total loss, it was disappointing I wasn't able to get everything from this one source. But, that's just the nature of working with wood: sometimes it's hard to know just what you're working with until you start working with it. 

Almost quarter sawn white oak, with a "rift" appearance - not enough figure!

Quarter sawn white oak showing great figure with ray flecks, that's what I want!

With a new batch of lumber, I was ready to proceed with the build. The first steps were to laminate the legs. One hallmark of this sort of piece is that legs are usually put together in such a way that the quarter sawn face appears on all four sides of the leg. There are several ways to do it, one being four mitered sides with a square core, and another being a simple rectangular glue up with with 1/8" veneers on each side. I opted for the latter, as it is much easier to do. In addition, it allowed me to use some of the less visually optimal lumber for the center pieces.

Four mitered pieces attached around a core, left, and pieces with two 1/8" veneers, right

The glue-ups went well, and I was able to get some great looking faces for the legs. For each set of four legs, I was able to the glue-ups all together in one big glue-up sandwich, which was a ice time saver, and made efficient use of my clamps.

Below, showing some of the "ugly duckling" wood used for the centers of the legs, and veneered faces, and the four-at-once glue-up...

top view of a rear leg, showing the two tenons meeting on the inside.

With the leg blanks glued together, I next laid out the joinery for the mortises in each leg. In the original "panel style" version of these pieces, the side stiles were simply glued into dados in the side of each leg. With approximately 22" linear of long grain to long grain glue surface, that's a very strong joint. But by moving to the spindle design, that glue surface isn't present, as there are no side stiles. Instead there are just two rails going into the legs. That meant I had to lose the stub tenon/dado for the joint, and instead use full depth (or as deep as I could make them) mortise and tenon joints. In those parts of the legs where tenons were coming in from two directions, I had to work with the tenons running into each other. But luckily, there was enough depth to where the joints were going to be very strong with a lot of "meat" in them. With that problem solved, I proceeded to mill all the rails, cut the mortises and tenons, and fit the basic structure together. I took care at this stage to make sure all the joints were seated nicely, with no gaps at the shoulders, and that the fit was snug but not too tight. I didn't want to fuss with the fit later while seating the spindles. For the legs, I had picked the best faces for the showy parts, and the not-as-good faces for the areas that would be against the wall, and marked them with a triangle, also marking an (S) for sofa, and an (L) for love seat. It seems obvious, but clearly marking out parts as you go, especially when building two almost identical pieces at the same time, is a lifesaver. I ended up referring to these marks constantly throughout the whole build. I also made sure to mark each of the rails as they were fit, making sure there wouldn't be any mix ups later.

When the joinery was complete, I did a dry fit of each piece. This is always an exciting moment, when all the flat two dimensional pieces finally come together and form these three-dimentional sofa and love seat looking things! At this stage the legs still needed shallow 1/2" x 1/2" dados cut on the sides to accept the corbels, and this was the perfect time to mark the legs as there was no chance of confusion while they were standing in the dry fit. I also marked the rails for the 1/4" x 1/2" dados that will accept the spindle mortise strips. Again, doing it now while the pieces were in place greatly reduced the chance of marking them incorrectly while they were disassembled.

The next stage involved setting up for the spindles. From my test build at the beginning, I'd decided to go with 5/8" square spindles, set 1" apart on center, with 1/4" square x 1/4" deep mortises. Of the several combination's I'd tried, this seemed to look the best. At first, I thought I was going to need much larger tenons, and my first test had them at about 1/2" square. But that meant the dado to house the crenellated strip that would make the tenons would cause the remaining sides, or walls, of the rails to be less than 1/4" each, and that seemed too flimsy for my taste. 

The 1/4" square tenons were surprisingly strong, and more so when all lined up together in each side or back assembly. I had no worries this was going to be the right approach.

Now it was time to make all these things. Between the sofa and love seat, there were 206  12 1/2" long spindles, needing 412 mortise and tenon joints, with 824 faces. Each part needed to be jointed, planed, cut to length, have tenons cut, and each face hand planed. Later, they were sanded, had the grain raised, sanded again, had the dust removed, dyed, then shellacked. I spent a LOT of time processing those spindles.

I made the crenellated strips, cut the dados in the rails, and glued that together, taking care not to fill up the little mortises with glue. I only had to dig glue out of a few of the 206 mortises. I did a full dry fit of each of the two sides and the back, for each piece. This process made sure I discovered any malformed mortises or tenons, or any part that wasn't fitting, well before I would be doing final assembly. For the final assembly, the tenons would be going into the mortises dry, with no glue. Gluing them would have been tedious, and would have caused lots of squeeze out that would have required meticulous clean-up. The glue wasn't going to be adding anything in the way of strength on such tiny glue surfaces. The dry fit showed the spindles to be nicely snug in their mortises, and my fear that they would end up loose was assuaged.

This was as far as I could go without doing some pre-finishing. I made test boards to get the right balance of the dye and shellac, trying out a few different dye concentrations and types of shellac. I was going for a similar color/appearance to the mission pedestal table I did a couple of years ago. The final formula was full strength Transtint dark mission brown water based dye and several coats of dewaxed garnet shellac.

I started the pre-finishing process, working the two sides of each piece together, then later doing the backs. That split the work into four roughly equal sized labors (love seat sides, love seat back, sofa sides, sofa back). Managing the spindles individually was troublesome, so I constructed a couple of racks that would support each spindle by its tenons, letting the faces be free to air dry during the various finished steps. This also made moving them around the shop easier.

Spindle racks in action

At first, I used little dot stickers to make sure I didn't get any shellac into the tiny mortises, but after testing it out, I realized this step wasn't needed, and stopped doing it for the rest of the process. 

That's it for Part 2. Stay tuned for Part 3 coming soon.